Now let’s move to the 3 vertical “Bars” (Tools Panel, Image Window and Docked Panels) of the Photoshop interface.
View Other Articles in This Series
- How to set up Photoshop
- Photoshop Interface Explained (Part 1)
- Photoshop Interface Explained (Part 2)
- Introduction to the Photoshop Toolbar (Part 1)
- Introduction to the Photoshop Toolbar (Part 2)
- Introduction to the Photoshop Toolbar (Part 3)
- Photoshop Channels and Color
- Photoshop Selections (Part 1)
- Photoshop Selections (Part 2)
- Photoshop Layers
Vertical Bars
But the thing is that they are not really bars, I used this term so you better understand the overall picture. But what are they then? Well, imagine all the area below the 3 horizontal bars as a sticky area (a glued area that is) or a sticky box. You can stick the Image window, the Tools Panel and the Docked Panel to this area but you can also “unstick” them. Once they are “unstuck” they are floating above the sticky area and you can move them freely. After you stick them to the sticky area however they remain still and cannot be moved.
Take a look at the image below.

You can see that the Tools Panel, the Image window and the Docked Panels float above the sticky area and I can move them freely. To move these around click on the highlighted black box area area and drag. Also note that the Image Window can only be stuck to the upper sticky area and the Tools and Docked Panels can only be stuck to the either the left or right side of the sticky area.
Now let’s try something crazy and stick the Docked Panels to the left side of the sticky area. Simply click on the highlighted area than while holding on click drag it to right side until a blue vertical line appears. Release and voila, we stuck the Docked Panels to the left side.

Try to move the Image Window over the Docked Panels and you will see that it stays above the Docked Panels area but below the Tools Panels. That is because the Docked Panels are stuck to the sticky area while the Image Window is floating over the top. But why is the tools panel above the Image Window? Well that is because the image window has a lower priority than the tools panels (it is more important to have access all the time to the Tools Panel).

In the image below you can see that I stuck the Tools Panel to the right and the Image Window to the upper part of the sticky area.

Docked Panels

In the image above you can see a panel group. Layers panel, Channels panel and Paths panel are grouped together. If you want to ungroup let’s say Layers panel then simply click and drag the tab then release. You can see the results below.

Now let’s say I want to put the Layers Panel in the group with the Adjustments panel and Masks panel. Click the upper dark grey bar (but not the buttons on the far righ ) then drag until near the Adjustments panel. If you see a blue box line surrounding the group then release and the Layers panel will be now in the group with the Adjustments and Masks panel. If a horizontal blue bar appears then you have put the Layers panel in between the 2 groups. You can also change the order of the panels in a group by simply dragging their tabbed names to the left or right.

The best way to get the hang of it is to experiment. Go ahead, drag and drop panels and panels groups, stick them to each other or to the right part of the sticky are. Really, go crazy with them! You can always choose Window > Workspaces > Reset “Workspace Name” to make it nice and clean again.
Ok, a few more things about Docked Panels. The little 2 arrows button which points to the right is the Expand Panels button and the same button but with the arrows pointing left is the Collapse Panels button. A collapsed panel is an iconic representation of the panel and it is used to save some space. If you click on one of the icons representing a panel you will open that panel in “full mode”. If you click anywhere else on the image window or another panel the panel you opened previously remains opened. But if you want the iconic panel to go back to it’s initial state after you click somewhere else then right click somewhere in the panel’s upper gray bar and choose “Auto Collapse Iconic Panels”.


Tools Panel
The collapse button behaves differently to the tools Panel. If you click on it it will arrange all the tools in a 2 column panel. If you click it again it will return to it’s default 1 column state. Take note that in older versions of Photoshop the 2 column panel is the default and the expand/collapse button is missing. We will analyze the Tools Panel in detail in a future article.

Image Window

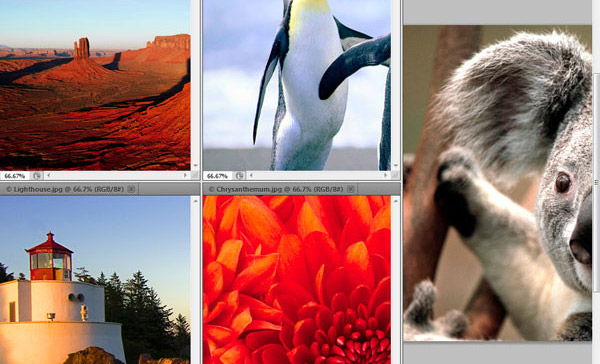
Next to image name (Koala.jpg) you can see some other info. “66.7%” is the actual zoom level. “(RGB” is the color mode and “/8#)” is the number of bits per channel or the image mode. Don’t worry too much about this info, you will get to know better what they mean in some later articles. And lastly “ * ” means that the image is not saved. If you save it that asterisk sign will disappear.
Lower, in the status bar (the red box) you can see the same zoom level as above (actually it’s 66.67% and above it is 66.7%. This is because Photoshop has rounded off the number 66.67 to 66.7).
Next to the zoom level you see some info about our image. In this case it is the image size. The number to the left of the slash sign (“/”) is the initial size” 2.25M” and the number to the right of the slash sign is the actual size “2.25M”. Because our image hasn’t been subject to any modifications the initial size and the current size are the same, but if we were to modify our image and add layers and stuff then the actual size would grow considerably. M means megabytes so 2.25 M is 2.25 Megabytes. If we click on the black arrow on the right of the info we will open an options window from where we can select what info is to be displayed. You can check out what the other options do in the manual. Because I use a lot of different images I tend to choose “Document Profiles “ as the default info but for now you can leave it in it’s default state.
Conclusion
Ok, let’s make a quick summary of what we have learned so far. The Photoshop interface is composed of 3 horizontal bars (Application bar, Menu bar, Options bar) and a “sticky area” where the Image window, the Docked panels and the Tools panels live.
The only thing we can change about the upper bars is to make the Application bar smaller so it fits on the same line with the Menu bar and we can select Workspace > Options to make the Options bar disappear. We can also make these bars disappear when in “Full Screen Mode”. That’s it. We cannot drag these bars to the left, right or bottom and we can’t change their size (at least, as far as I know ).
We can float the Image window so it is above the image area and we can move it around as we want. The only place we can stick it back is the upper area.
We can float the Docked panels and the Tools panel as we want, we can move them to the left or right and stick them to the left or right ( but not the upper part ). Also we can ungroup panels from the Docked panels and create our own groups which we can stick and move to the left or to the right.
Remember, if you screw your workspace and you want to go back, simply choose Window > Workspace > Reset “Workspace Name “.
That concludes this Photoshop interface tutorial. I hope you had fun and learned useful stuff. And don’t forget to experiment and make mistakes, as this is the quickest way to learn.