In this article (Part 1 of 3) I will give you a quick introduction to the Photoshop CS5 toolbar. The toolbar is a floating panel normally placed at the left of the screen.
View Other Articles in This Series
- How to set up Photoshop
- Photoshop Interface Explained (Part 1)
- Photoshop Interface Explained (Part 2)
- Introduction to the Photoshop Toolbar (Part 1)
- Introduction to the Photoshop Toolbar (Part 2)
- Photoshop Channels and Color
- Photoshop Selections (Part 1)
- Photoshop Selections (Part 2)
- Photoshop Layers
Resources
In case your workspace looks different choose Window > Workspace > Essentials. In case you moved the floating panels and palettes all around your document and you want them back the way they were simple reset the Workspace by choosing Window > Workspace > Reset “NAME OF THE CURRENT WORKSPACE”.
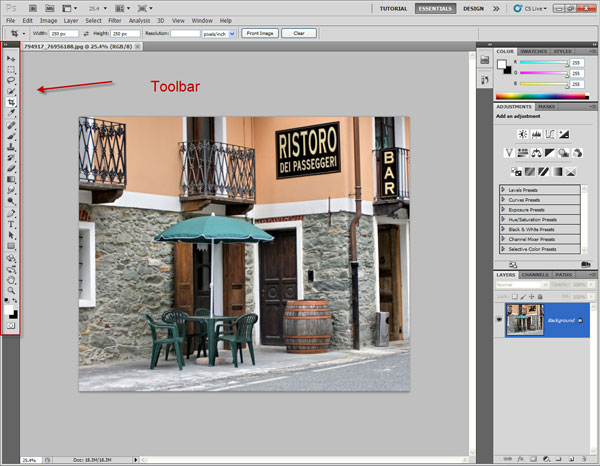
Similar tools on the toolbar panel are grouped but only one icon is shown. If you want to display all the tools in the group either hold the cursor over a specific tool icon for a longer time or right click the icon in the toolbar.
All tools groups have shortcuts assigned to them. The shortcut is the letter on the right of the tool name.
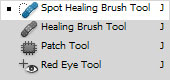
To access the last used tool in the tool group press the respective key. If you hold Shift while pressing the key you will cycle through all the tools in that group. For example below we have the Spot Healing Brush Tool selected. If I select another tool and then I press J the Spot Healing Brush Tool will be selected again. If I hold Shift and press J the next tool will be selected (the Healing Brush Tool).
Now let’s see what each tool does.
Move Tool
It is used for moving pixels on the screen. You can move text, layer masks, normal layers, selected areas. The shortcut for this tool is V but to temporarily access it while having another tool selected simply hold Ctrl and do the moving. Once you’re done moving release Ctrl and you will have the control of your previous tool (the tool you had before pressing Ctrl).
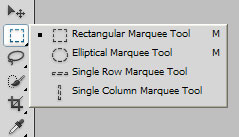
Rectangular Marquee, Elliptical Marquee, Single Row Marquee Tool and Single Column Marquee Tool
Shortcut – M.
The Rectangular Marquee Tool is used for making rectangular selections and the Elliptical Marquee tool is used for making elliptical selections. If you want to create perfect circles or squares hold Shift while dragging with the respective tool. If you want to move the selection while creating it, hold Space. To add to an existing selection press and hold Shift BEFORE using the tool – you’ll see a little + sign next to the tool cursor. If after you see the + sign next to the cursor you release and press Shift key you will create perfect circles or squares. Holding Alt before dragging will subtract from an existing selection and holding Alt and Shift will intersect with an existing selection. If you’re subtracting from a selection a little minus sign will appear at the right of the tool’s icon and a little X for intersecting.
These little shortcuts for adding, subtracting and intersecting with existing selections apply to almost all selection tools so I won’t be repeating them anymore.
I almost never use the Single Row Marquee tool or the Single Column Marquee Tool but maybe if you’re a web designer you’ll have a use for them. What do they do? If you select one of them and click once on the image you will have a 1px selection row or column.
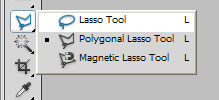
Lasso Tool, Polygonal Lasso Tool and Magnetic Lasso Tool
The Lasso Tool is used for making freehand selections. Not a very precise tool and I almost never use it but beginners may find it attractive.
The Polygonal Lasso tool is a bit more precise, allowing you to create a selections formed by straight lines. It has limited uses for selecting rectangular objects- like benches or fences. If you are using the Lasso Tool you can temporarily access the Polygonal Lasso Tool by holding Alt.
The Magnetic Lasso Tool has the most precision of all the tools in the group. It works by snapping to the edges of the objects. You simply click once on the edge of the object you want to select and release the mouse button. Then carefully drag around the object and notice how the Magnetic Lasso Tool “snaps” to the edges.
You can see below a selection I made with the Magnetic Lasso Tool. It’s the blue umbrella. Not a very bad selection considering the fact that I spent 20 seconds to create it. This is a recommended tool for beginners.

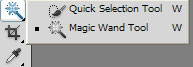
Quick Selection Tool and Magic Wand Tool
Shortcut-W.
I find myself using the Quick Selection tool quite often despite its imperfections. It has the advantage of being, as the name suggests, quick. Its icon looks like a brush and if you start painting with this brush inside of an object you will quickly select it. It helps a lot if the object has strong edges but even if it has soft edges (like a face against a reddish sky) it still behaves pretty well. Highly recommended for quick work or if you don’t know how to use other tools. Not recommended for precise selections.
The Magic Wand Tool is a nice little tool that has its uses from time to time. If you click somewhere in the image it will select all pixels in that area that have a luminosity level close to the luminosity level of the level you clicked. You can set this by entering a value in the Tolerance box (the Tolerance is situated in the tool option bar along the top of the screen).
In the image below I set the Tolerance setting to 2 and I clicked on the wall. Notice how ragged and ugly my selection is.

After I changed the Tolerance level to 20 and clicked on the same spot on the wall (after deselecting the previous selection) the selection is much better.

Also in the tool option bar is a checkbox that allows you to select noncontiguous areas (areas that are not connected) so if I click again on the same spot on the wall after removing the check from the Contiguous check box I would select both the wall on the left and right and generally every pixel with a close luminosity to the clicked area.

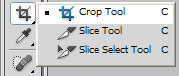
Crop Tool, Slice Tool and Slice Select Tool
The Crop Tool allows you to crop your images to the desired size. Click, drag, press Enter and you just cropped your image. The cropping is best done at the end of the editing process.
The Slice Tool and Slice Select Tool are mainly for Web Designers and have very few uses for regular uses. How it works? Well, you drag with the Slice Tool and create rectangles (usually web pages layouts). After you’re done you select Save for Web & Devices from the File menu and select a folder. This process will save each sliced portion as a separate image thus allowing you to quickly use these images for website creation.
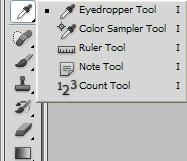
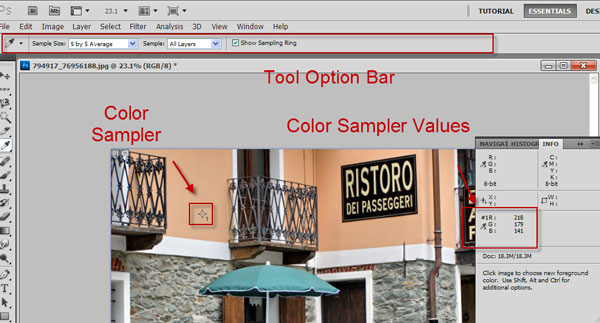
Eyedropper Tool, Color Sampler Tool, Ruler Tool, Note Tool, 123 Count Tool
Shortcut – I.
If you’re doing color correction in an image then the Eyedropper Tool is your best friend. To use it properly first set the Sample Size in the option bar (the option bar I keep talking about is situated just below the Menus) to 3×3 or even better 5×5.
Hover the Eyedropper tool over the image and notice how the R G B values change. If you click with this tool anywhere on the image you will set the Foreground color to the color below the Eyedropper Cursor. A quick way to access the Eyedropper tool while having the Brush Tool selected it is to press the Alt key.
Hold Shift and left click while using the Eyedropper tool to access the Color Sampler Tool and create a new color sampler (you can have a maximum of 4 color samplers). You can see in the image below where my color sampler is and what are the R G B values in the area I have sampled from. This information is very useful when you do color correction or you want to know what are the values of a specific area. Even better, you can change the Mode to Lab, CMYK, HSB or other wacky modes. I remember that I used this tool a lot when I was first learning about Photoshop to see how various adjustments and blend modes affect the pixels values.
The Ruler Tool is for measuring the actual dimensions on the screen. Not a lot of uses for this tool (maybe if you’re a web designer) but it has one nice feature. In the options bar there’s a button called Straighten. Here’s how to use it. Notice that in the picture below, the level of the ground is not horizontal. It looks like the house is falling to the left side.
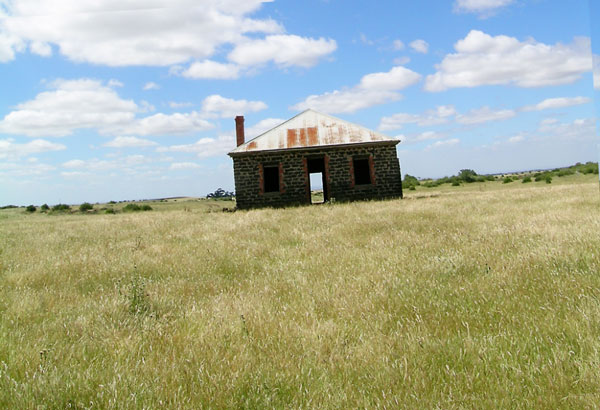
To correct this, select the Ruler Tool then click and drag where the horizon line is in the picture
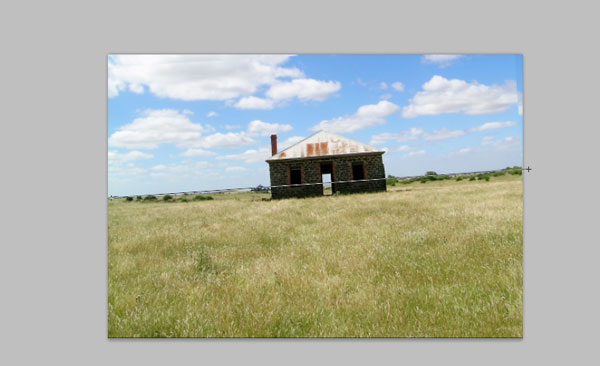
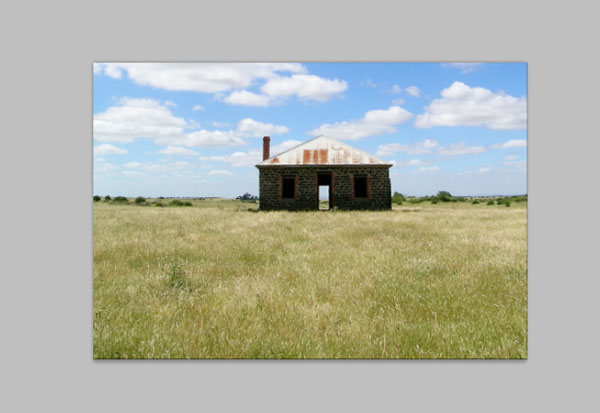
Press Straighten and voila, we’ve straighten the horizon line. A bit of cropping occurs at the edges but that’s a good trade off for a straight image.
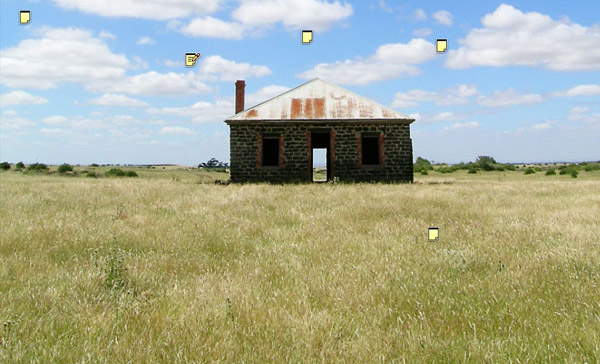
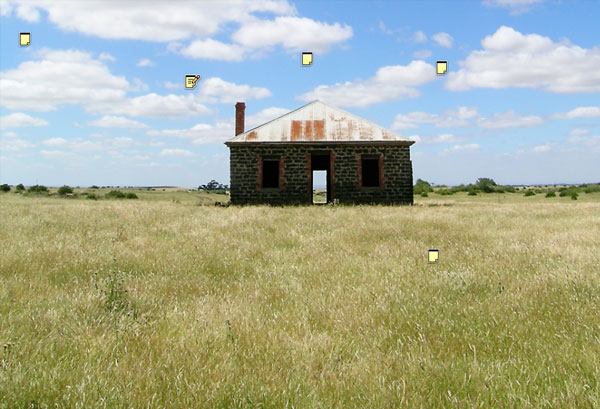
I never use the Note Tool but you may find it helpful if you’re passing documents to other people and you want to indicate something. In the image below I added several notes and each could indicate a specific problem you want someone to address or maybe if you’re extremely forgetful write notes to yourself, like “Don’t forget to reduce the saturation here” or “Remove this ugly spot here”.
Finally, the 123 Count tool is for counting objects. It probably has its uses for certain people but I haven’t ever felt the need to count objects in an image with a tool.
NOTE: The original house picture was straight to start with, but for the purposes of the tutorial I rotated the picture slightly to the left and then used the Ruler Tool on it.
Part 2
That’s it for the Part 1 of Photoshop Toolbar Introduction. Click here to read Part 2.