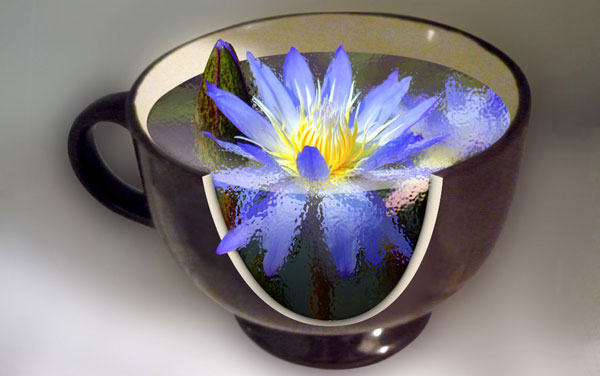
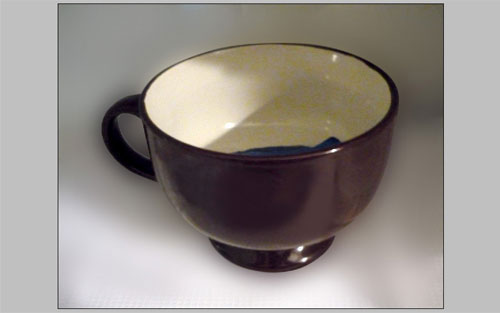
In this Photoshop tutorial we will create a water lily in a cup effect.
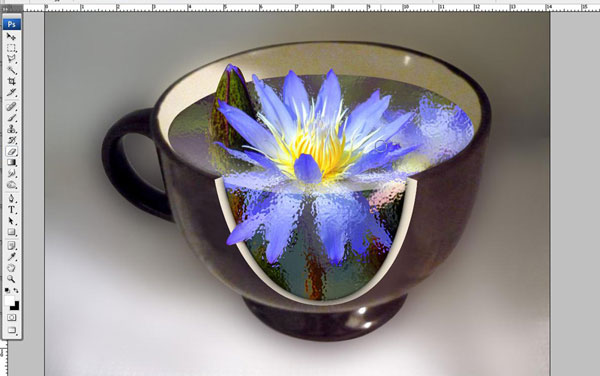
Final Image
Resources
Step 1
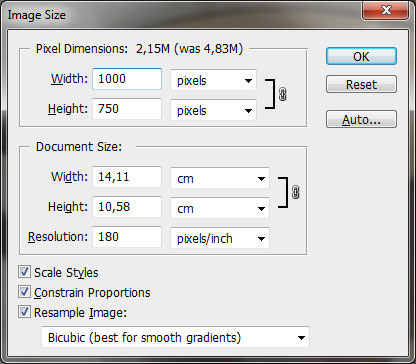
In this tutorial, we will be working with two photos to show you how to create a section of a cup with liquid. Start by opening the Cup photo. Resize the image to 1000 px width by going to Image > Image Size.
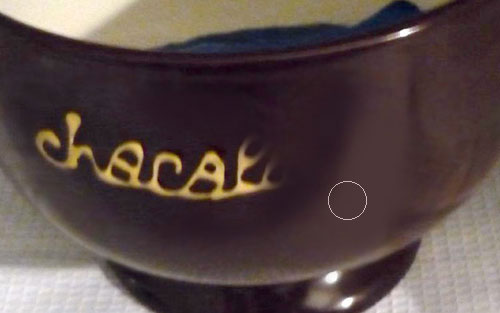
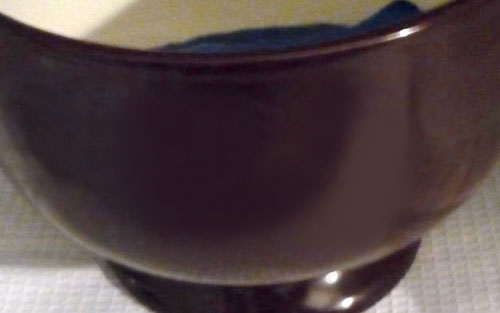
We now need to remove the inscription from the cup and edit the background. Select the Clone Stamp Tool and a soft round brush about 50 pixels. Hold down the Alt key and the cursor will change it’s format to a target. Click the point you wish to use as a sampling point. This will be the reference point for cloning. Click and draw where you want the cloned image to appear. As you draw, a cross will appear on the original image while a corresponding circle appears where you are drawing.
Step 2
Let’s work on the background. Select the Polygonal Lasso Tool to make a selection of the background.
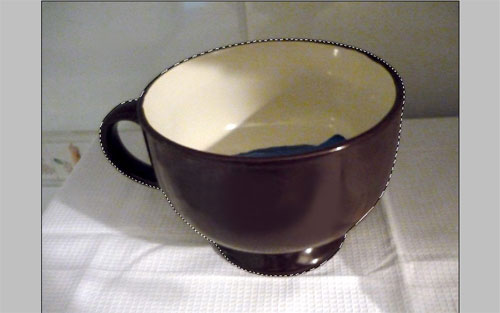
Hold the Alt button to remove the small background area between the cup handle and the cup body from the selected area.
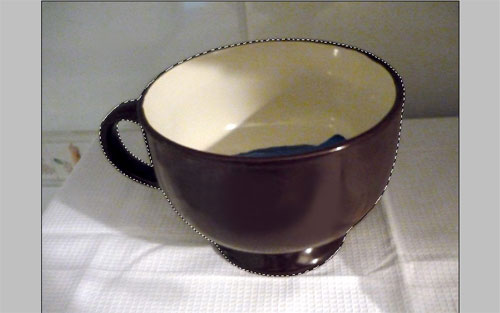
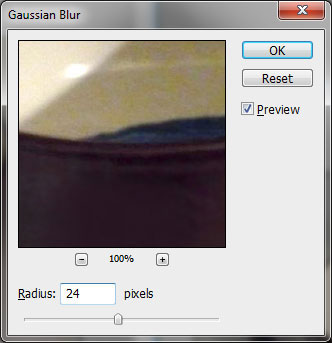
Press Ctrl+Shift+I to inverse the selection and apply Filter > Blur > Gaussian Blur using the following settings:
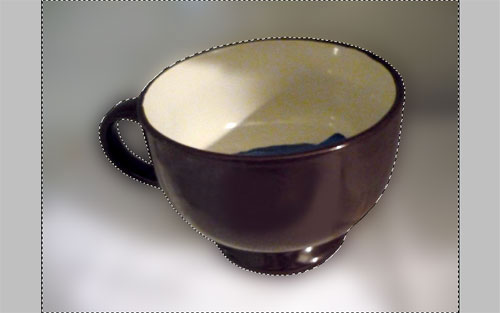
Remove the selection by pressing Ctrl+D. Click twice on the background layer to convert it to a normal layer. Go to Edit > Transform > Rotate and rotate the photo a little bit.
Use the Clone Stamp Tool to process empty areas on the canvas.
Step 3
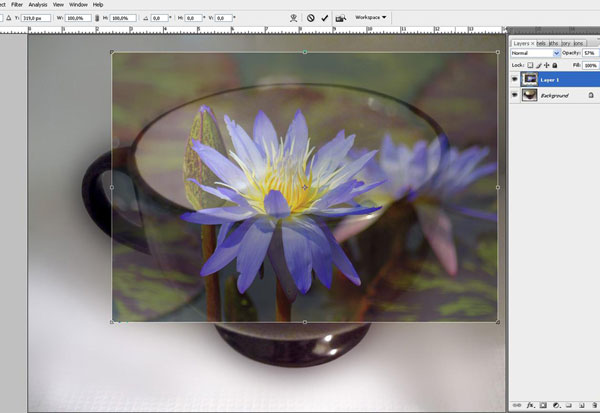
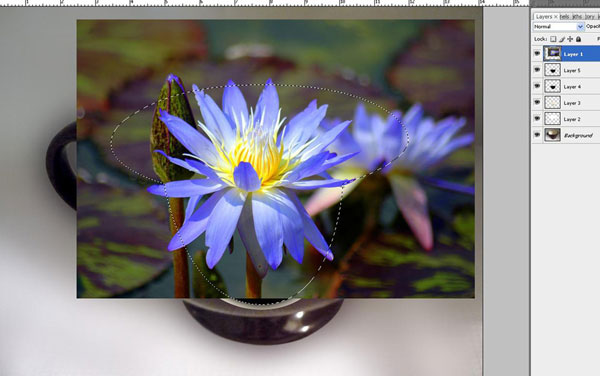
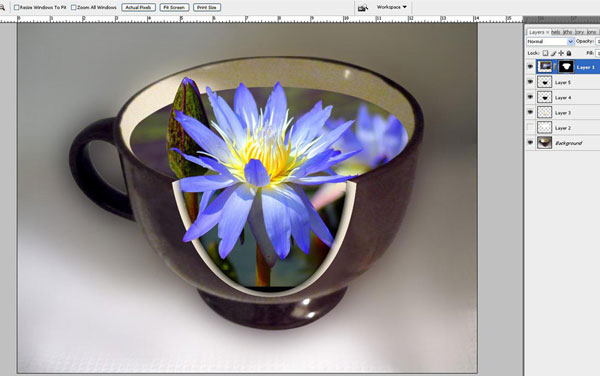
Open the flower photo and copy it to the canvas with the cup. The flower image is bigger than the cup photo so we need to resize it. Set flower photo opacity to 50% (it will be easier to choose the right size). Apply Edit > Free Transform to reduce the image size holding the Shift button to reduce it proportionately.
Step 4
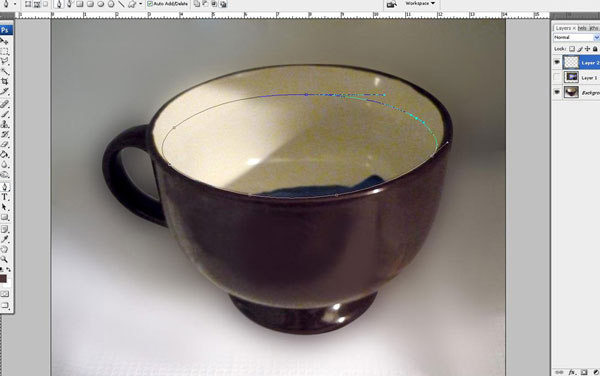
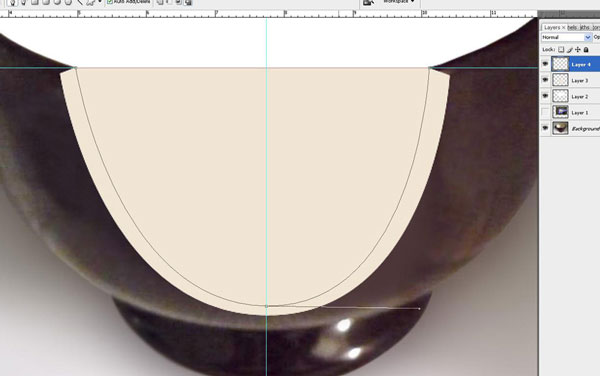
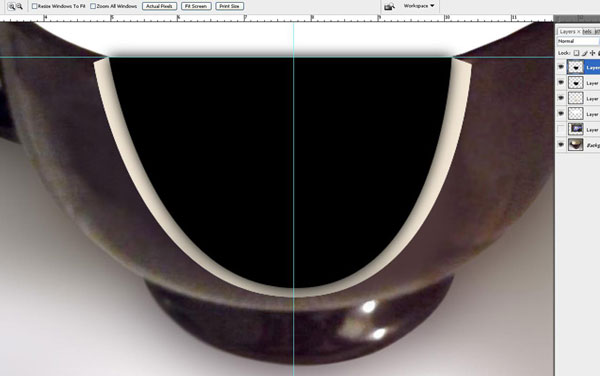
Change the opacity of the flower photo back to 100%. Hide the lotus layer temporarily (click on the eye in the layers palette). Select cup layer and use the Pen Tool to create a form similar to the liquid surface, fill with white.
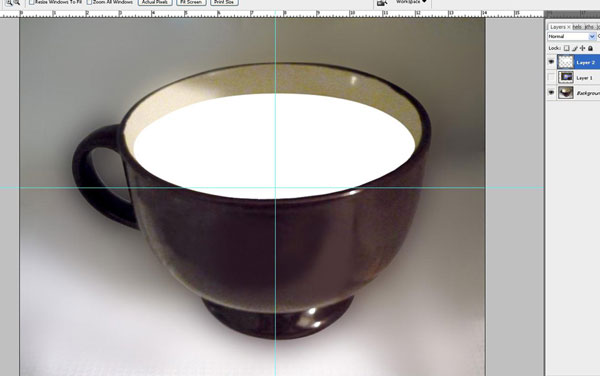
Add rulers to our canvas with View > Rulers and then create two guidelines as shown below.
Select the Pen Tool (make sure you are working with Paths) and draw your line.
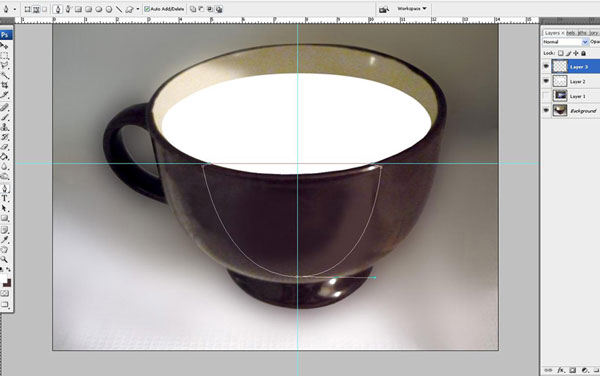
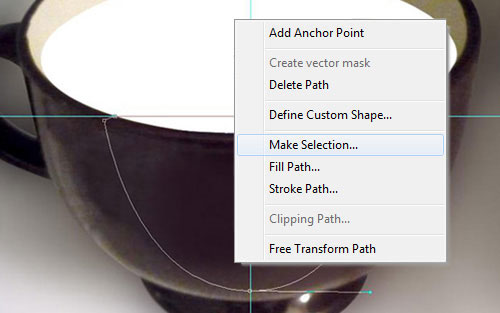
Right-click and select Make Selection.
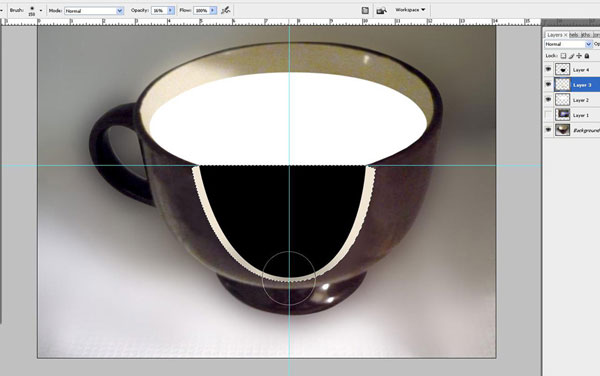
Create a new layer and fill the selected area with #f0e5d3. Remove the selection with Ctrl+D and move the horizontal guideline a little bit higher similar to the screenshot below.
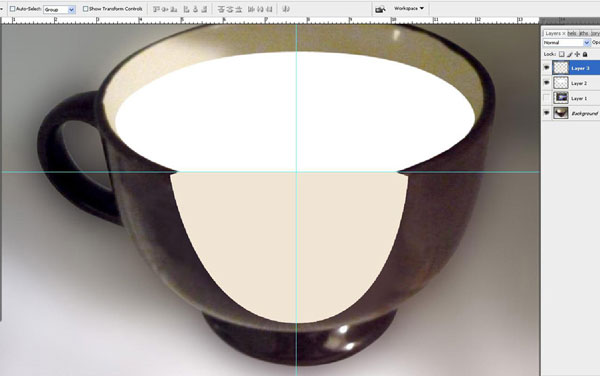
Use the Pen Tool again to create a new shape.
Right-click and select Make Selection. Fill the selected area with black on a new layer. Deselect the chosen area with Select > Deselect. Now we need to add some shadow to the section. Go to the layer below and load selection with Select > Load Selection. Select the Brush Tool (Opacity: 16% and soft round brush) to create a shadow at the bottom.
Remove the selection with Ctrl+D and go to the layer above.
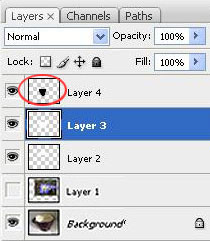
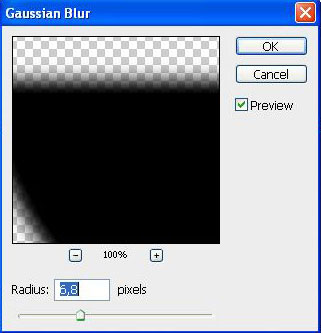
Duplicate the layer with Ctrl+J and apply to the duplicated layer Filter > Blur > Gaussian Blur.
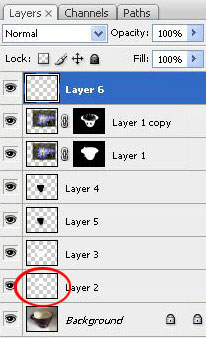
Remove the guidelines and merge the unblurred black layer and the layer with liquid surface into one layer.
Load the selection of this layer with Selection > Load Selection.
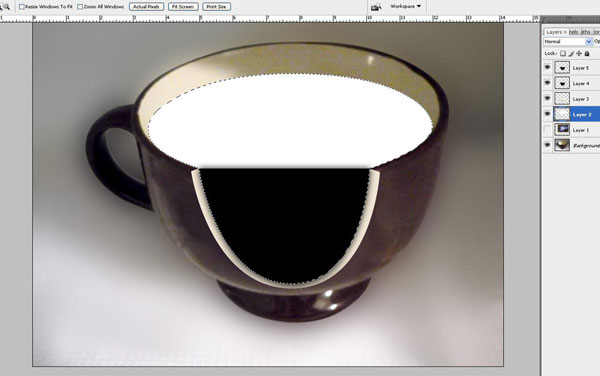
Step 5
Select the flower layer and make it visible again.
Select the Polygonal Lasso Tool and hold the Shift button to see a plus sign near the cursor. Then add flower petals to your selection which should be inside the cup.
User Layer > Layer Mask > Reveal Selection to add a vector mask to this layer.
The lower part of the flower is missing so select the Smudge Tool to complete it.
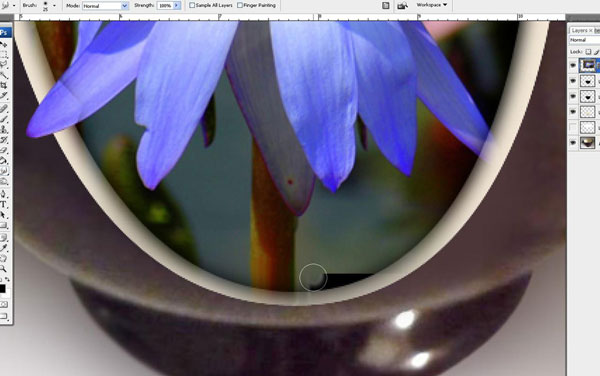
Step 6
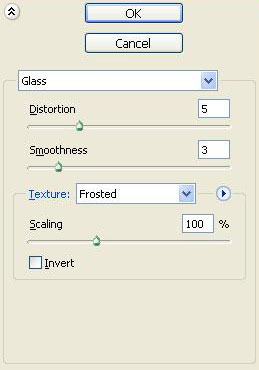
Press Ctrl+J to duplicate the flower layer and apply Filter > Distort > Glass on the duplicated layer.
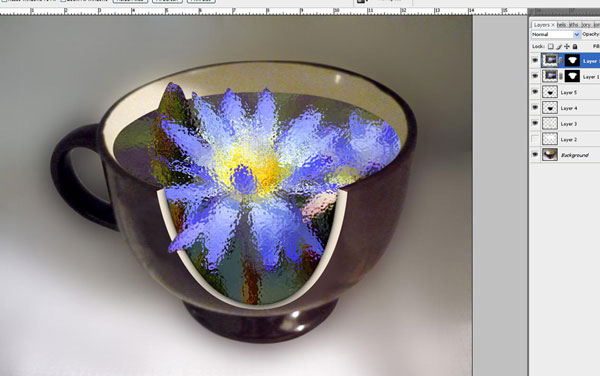
Select the Eraser Tool and with a hard round brush with black color erase the petals that should be outside the water.
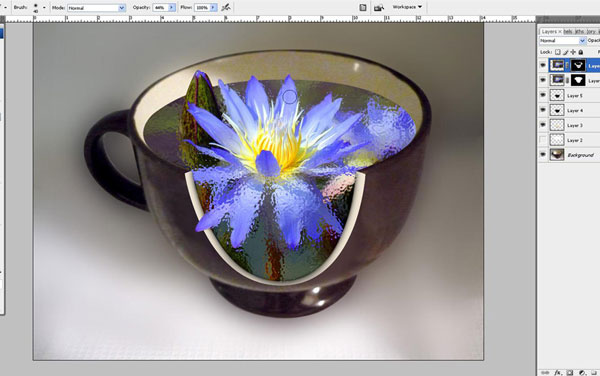
Step 7
Select the Elliptical Marquee Tool and create around selection similar to the liquid surface size. Finally, create a new layer.
Fill this selection with a white to transparent gradient on a new layer.
Remove the selection with Ctrl+D and set the opacity to 37% for this layer. Use the Eraser Tool and a soft round brush to clean the petals that should be outside the water.
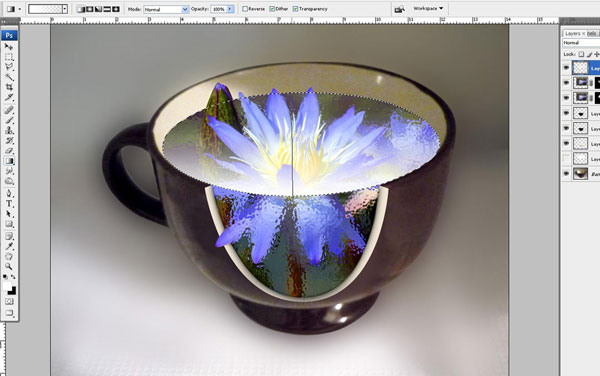
The liquid that is on a deeper level is darker so we need to add a dark gradient to the bottom. Load the selection of the layer with the flower by using Selection > Load Selection and fill the selected area with a black to transparent gradient on a new layer.

Remove the selection with Ctrl+D and work with layer mode and opacity/fill to achieve the final result. In my case, I used Soft Light with an opacity of 37%.
And We’re Done!
Here is how your final result should look.