The Libraries panel has been available since the introduction of Photoshop CC 2014 but what exactly is it and why is it useful?
In this article, I’ll give you a run-through of the tool so you’ll be able to use it to speed up your workflow and keep your assets organized.
Tutorial Details
- Program : Adobe Photoshop CC 2015
- Estimated Completion Time : N/A
- Difficulty : Easy
The Libraries panel has been available since the introduction of Photoshop CC 2014 (Window > Library), but what exactly is it and why is it useful? In this article, I’ll give you a run-through of the tool so you’ll be able to use it to speed up your workflow and keep your assets organized.
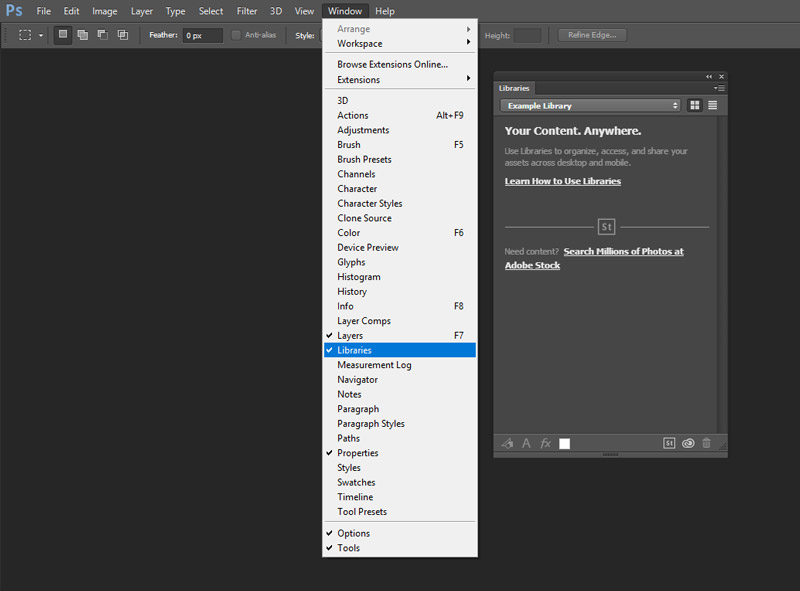
What are Libraries?
The idea of the panel is to store the different elements you might want to use more than once, potentially across more than one document, or even across other software like Illustrator, After Effects and Premiere Pro, as long as they’re Creative Cloud versions.
As an example, if you’re a photographer or a designer and you use a logo quite often, it would be much more useful to be able to grab it from the Libraries panel then to have to find it from your hard drive and drag it into your document each time.
If your logo is in the Layers panel as part of a project, you can click the Add Graphic button in Libraries and it’ll add it to your library.
![]()
The great thing about this is that because it’s the Creative Cloud, you’ll be able to now use it wherever you log in. So if you have two different computers, and Photoshop installed on both, you’ll be able to access them from either one. To use the logo again, just reverse your process and drag it from the Libraries panel to your document.
If you’re not working online or don’t want to use Cloud, you can still use Libraries to organise your elements locally.
Creating Libraries
You can add just about anything to Libraries. It’s not only for images, you can store colour swatches, layer styles, font types… just about everything. If you don’t want your Library to be too cluttered, you can create additional Libraries for different projects, or different elements.
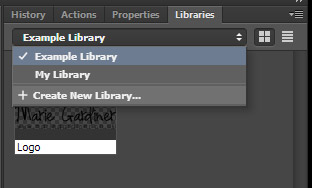
Just go to the drop-down box in the panel and click +Create New Library.
You can also create a new Library from a document, which will automatically add Character Styles, Colours, Layer Styles and Smart Objects.
A Closer Look at Libraries
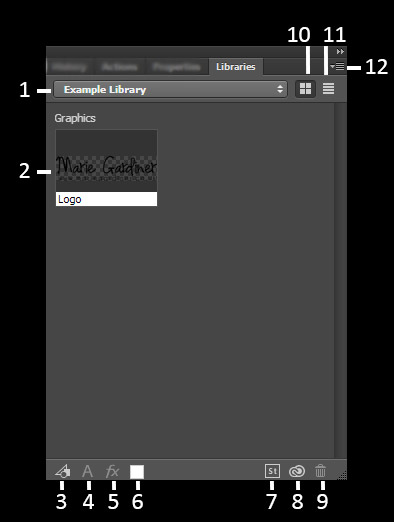
- This is your libraries list, where all the libraries you create will be, and where you create new ones
- These are the elements you add to your library
- This is ‘Add Graphic’ where, as described earlier, you can add something new to your Library
- Add a Character Style. When you click on a font and then this button, it’ll add that font to your Library including any formatting like size and style.
- Add Layer Style is for Photoshop only as it directly impacts your PS layers.
- Add Foreground colour does exactly what you’d expect and lets you add a foreground color to your Library. Depending on the layer you click, Add Fill Colour might also appear as an option.
- This is a handy way to check Adobe Stock images and add any favorites to your Libraries to use again in future.
- Synch your Libraries across your various platforms.
- Delete!
- Shows your items as icons so you can see a preview of what they are.
- Shows your assets as a list, grouped by type.
- This is your options or settings, so there are options to view online or rename Libraries, for example.
Updating Assets
If you add something to a library and then make a change to that original asset (say you update a logo), that could become problematic. Thankfully, Adobe thought of this, and you can choose to link (and unlink) your assets. If you link something, it stays associated with the original document, so when you make changes, those are reflected in each instance of the asset. If you consider how Smart Objects work when you place them in a document, it’s a similar thing.
If your logo, for example, wasn’t linked, and you changed the original, the old version would still be in the library. If it was linked, it would update. If your element is linked, you’ll see a little cloud next to it.
Conclusion
Libraries are most useful for people who work across more than one Adobe CC software, or across multiple networks (home and an office, for example) but that’s not to say they’re no use to the rest of us.
Linking your assets means that changes are more or less in real time and you won’t have to hunt out the latest version of a particular graphic. Libraries mean better organization and more efficiency across projects because of that. If you’ve not given the Libraries Panel a try yet, I highly recommend giving it a go.