In this tutorial you will learn how to create a nice colorfull suspended text effect using Adobe Photoshop.
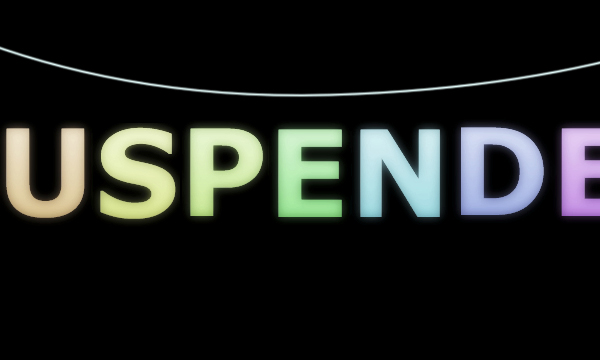
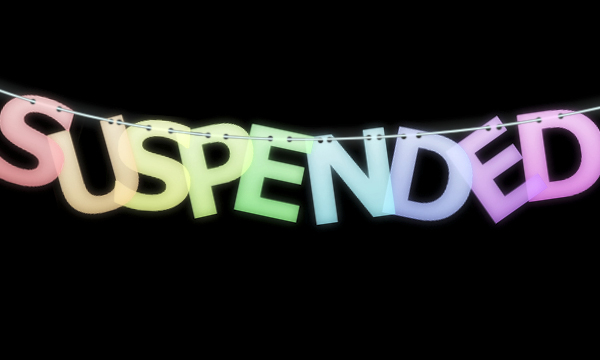
Final Image Preview

Step 1
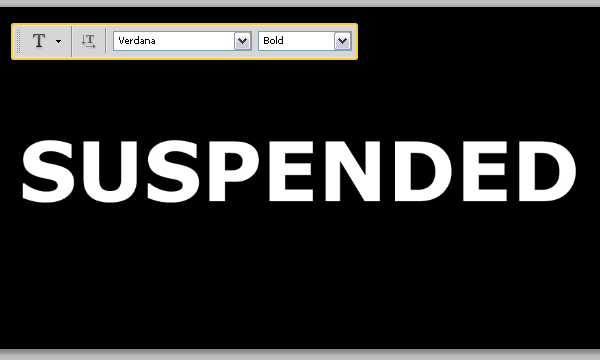
First create a new document, 1000×500 pixels, with a black background. Then, create your text in white. The font used is Verdana, and the size is 120pt. Choose Bold from the Font Style selection box next to the Font Family box in the Options bar.
Step 2
Create a new layer on top of the Background layer and call it “Gradient”. Select the Gradient Tool, and set the Foreground color to White. Create a Foreground to Transparent gradient from top to bottom.
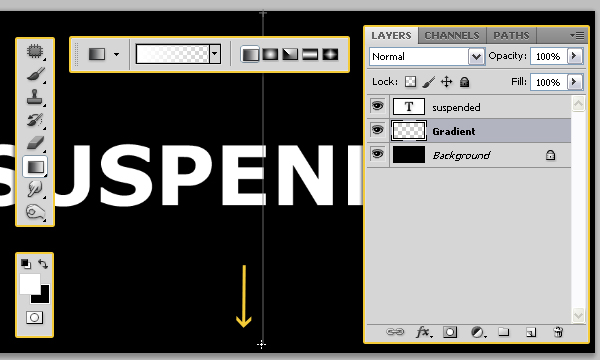
Press the Ctrl key, and click on the text layer thumbnail (icon) to create a selection.
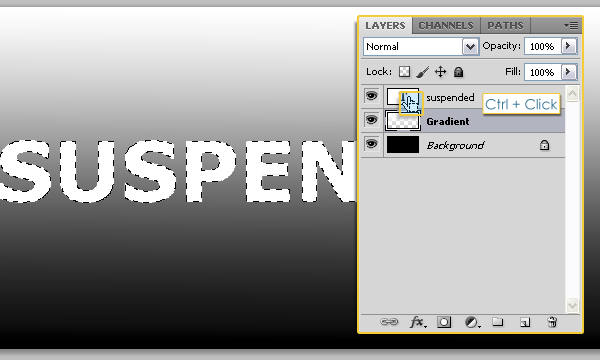
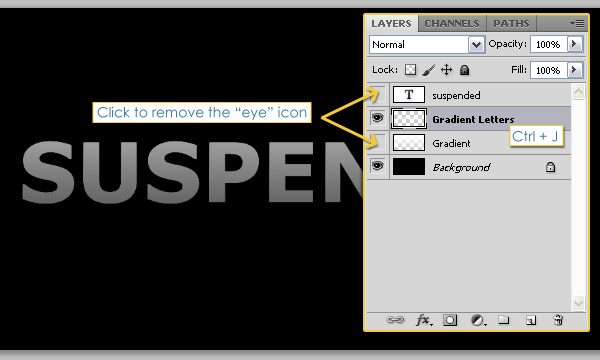
Select the “Gradient” layer so that it is the active layer, and press Ctrl + J to copy the selection and paste it in a new layer, call the new layer “Gradient Letters”. Then, click on the eye icons next to the text and “Gradient” layers to make them invisible.
Step 3
Pick the Rectangular Marquee Tool, and click the Intersect with Selection icon in the Options bar. Reselect the text (Ctrl + Click on the text layer thumbnail), then draw a rectangle around the first letter.
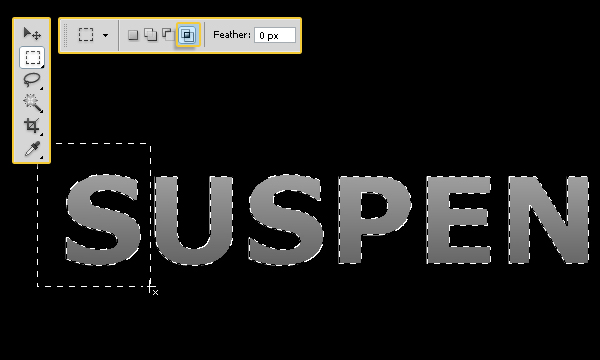
This will make the letter S the only selected letter.

Create a new layer on top of the “Gradient Letters” layer and call it “Colored Letters”, then change its Blend Mode to Screen. Fill the selection you created with the color #ff0000, then press Ctrl + D to get rid of the selection.
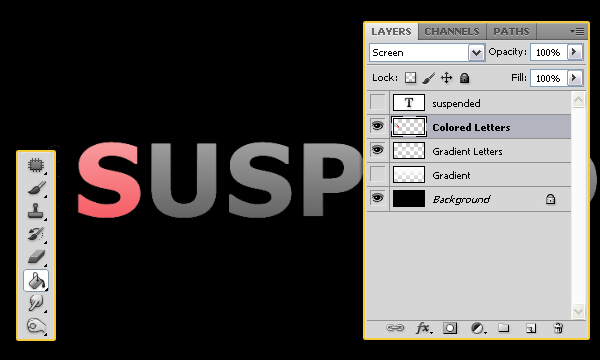
Repeat the same process to each letter. (Ctrl + Click on the text layer thumbnail to create a selection, draw a rectangle around the letter you want to color, fill in the selection, and press Ctrl + D to get rid of the selection at the end.) The colors used here are as follows:
S – #ff0000
U – #ff7e00
S – #fffc00
P – #a2ff00
E – #06ec00
N – #00d8ff
D – #004eff
E – #7200ff
D – #f000ff
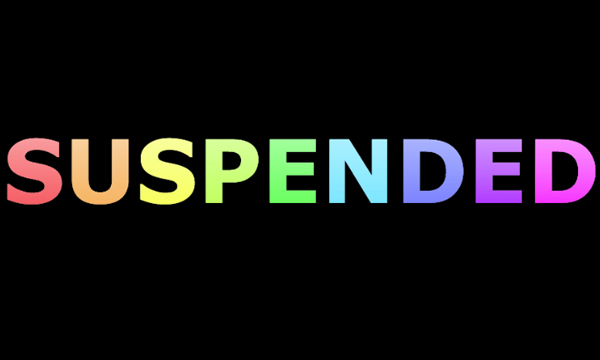
This is what you should get:
Step 4
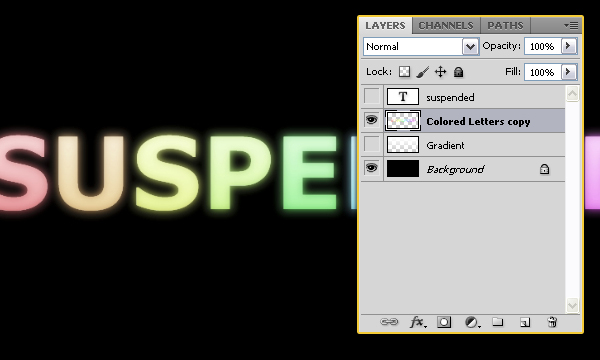
Set the Fill value for both the “Gradient Letters” and “Colored Letters” layers to 60%, and duplicate each one of them.
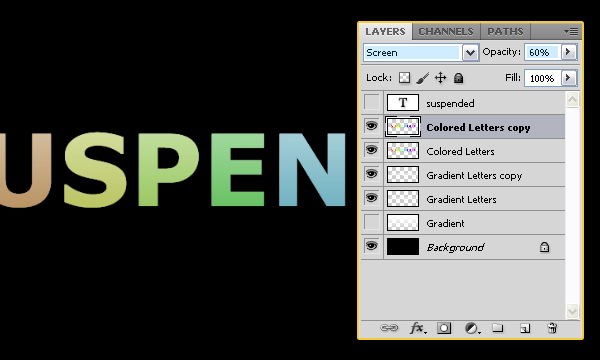
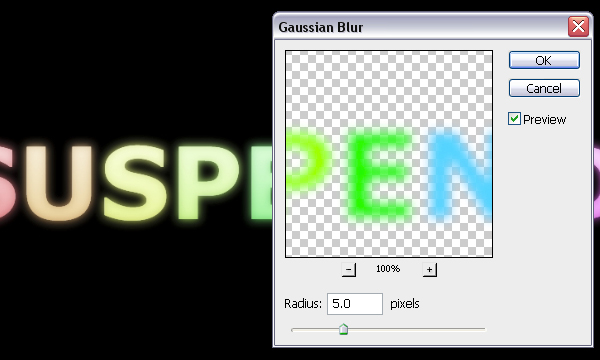
Select the original “Colored Letters” layer, then go to Filter > Blur > Gaussian Blur, and set the Raduis to 5. Do the same thing for the original “Gradient Letters” layer.
Merge all 4 layers together (select them all, then go to Layer > Merge Layers).
Step 5
Now, create a selection from the original text layer again (Ctrl + Click on the original text layer’s thumbnail), use the Rectangular Marquee Tool, and click the Intersect with Selection icon in the Options bar, then draw a rectangle around the first layer.
Once the letter is selected, press Ctrl + J to copy it and paste it in a new layer.
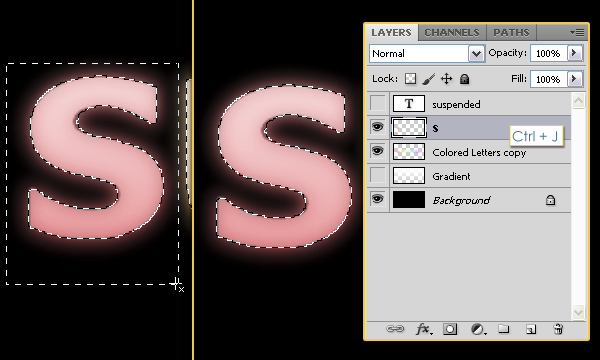
Repeat the same process for each letter. Don’t forget to select the “Colored Letters copy” layer after you press Ctrl + J each time.
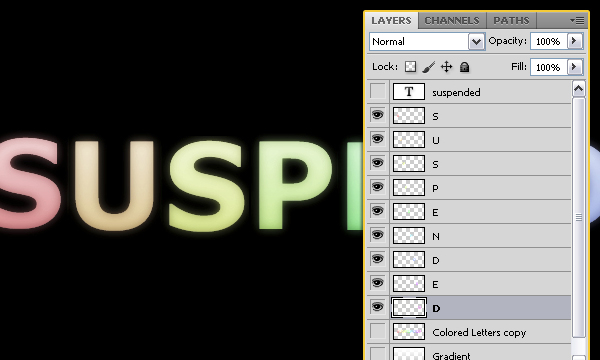
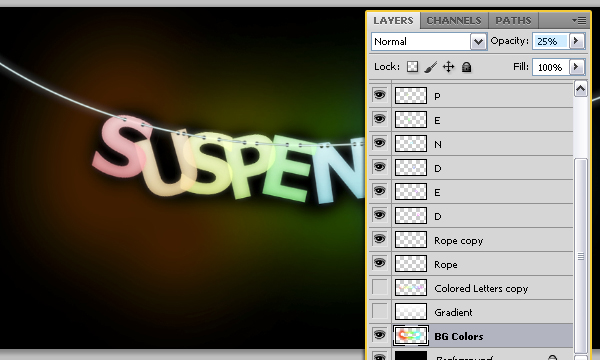
Once you’re done, you should have each letter in a separate layer. Remove the eye icon next to the “Colored Letters copy” layer to make it invisible.
Step 6
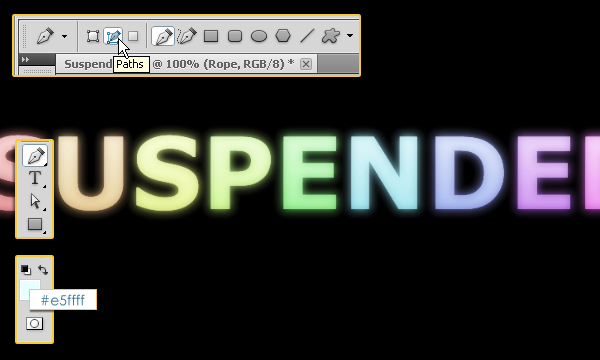
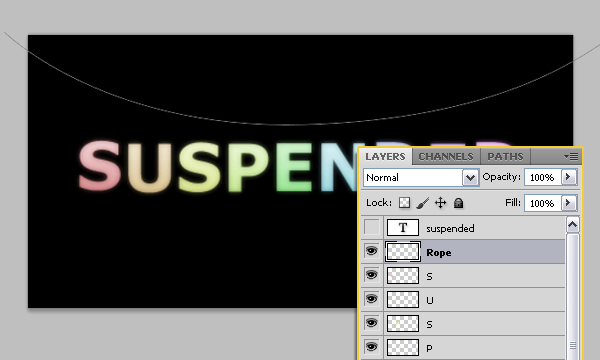
Set the Foreground color to #e5ffff, and pick the Pen Tool. Make sure to clik the Paths icon in the Options bar as well.
Create a new layer on top of all layers and call it Rope. Draw a path as shown below:
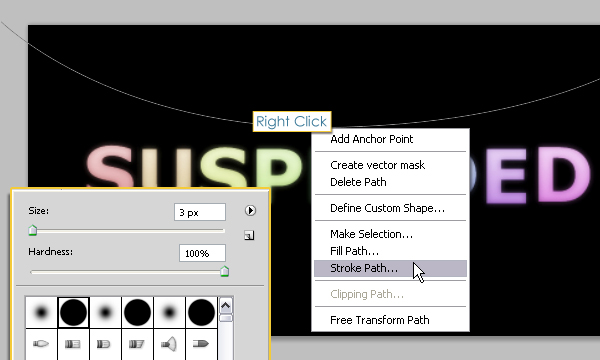
Choose a hard round brush and set its Size to 3 px. Then, pick the Pen Tool once again, right click on the path you’ve created, and choose Stroke Path.
Use the settings below:
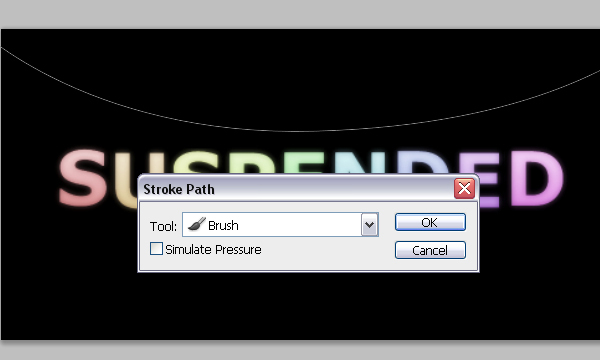
This should stroke the path with the brush you modified. Hit Enter to get rid of the path.
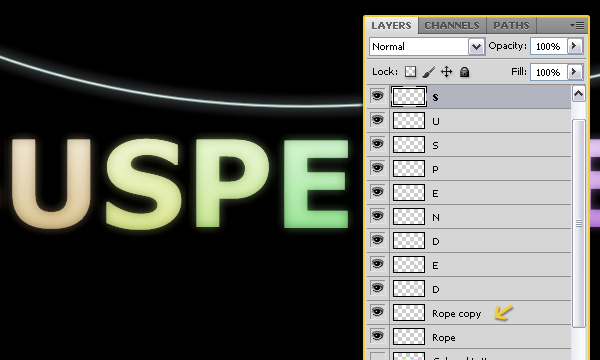
Duplicate the “Rope” layer, then select the original one, and apply the Gaussian Blur Filter once again (You can press Ctrl + F to do so).
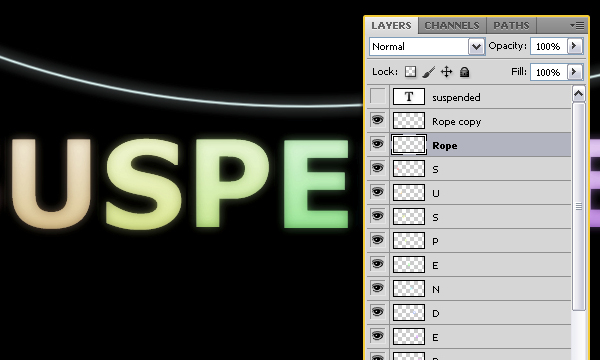
Drag the two “Rope” layer so that they are under all the letters’ layers.
Step 7
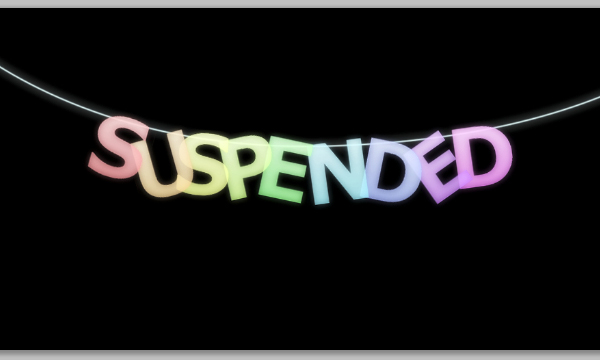
Rotate and move the letters to place them on the Rope.
Ctrl + Click the “Rope” layer’s thumbnail to create a selection.
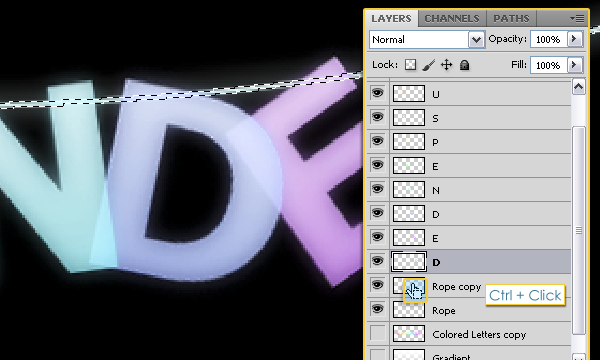
Pick the Eraser Tool, and select the Letters layers, one by one, to erase the outer edges so that the letter looks like its really hung on the Rope.
This is how the text should look like:
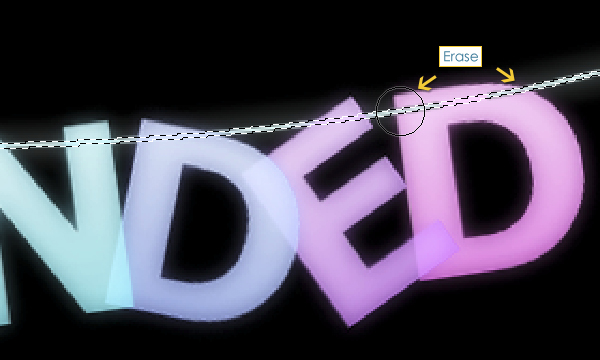
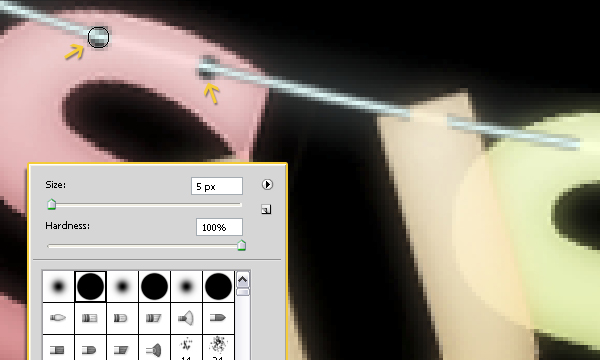
Now choose a hard round brush for the Eraser Tool, set its size to 5 px, and again, select the Letters layers one by one, to erase the parts where the Rope and the Letter meet.
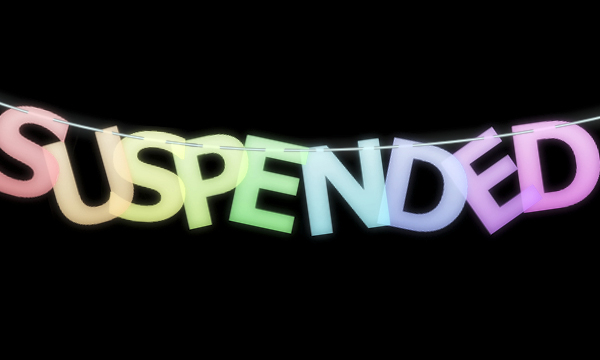
You should end up with a result similar to this.
Step 8
We’re going to make the background more colorful. So create a new layer on top of the Background layer and call it “BG Colors”. Then, select a soft round brush, and scatter some different sized spots on your canvas using different bright colors, for example #fe5a00, #ffe100, #7cff00 and #00fff5.

Use the Eraser Tool with a soft round brush to erase a bit of the colors at the center (around the text).
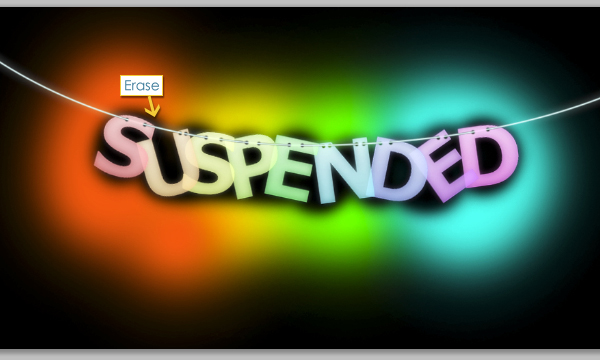
Set the “BG Colors” layer’s Opacity to 25%. And we’re done!.
Final Image