In this tutorial we will create a depth of field effect using only some standard Photoshop filters.
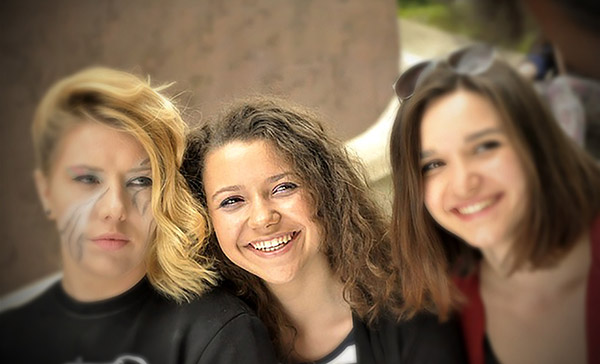
Final Image
As always, this is the final image that we’ll be creating:
Tutorial Details
- Program: Adobe Photoshop CS3
- Estimated Completion Time: 40 minutes
- Difficulty: Beginner-Intermediate
Resources
Step 1
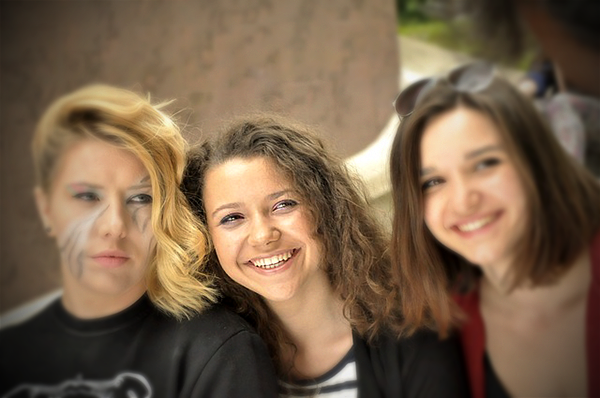
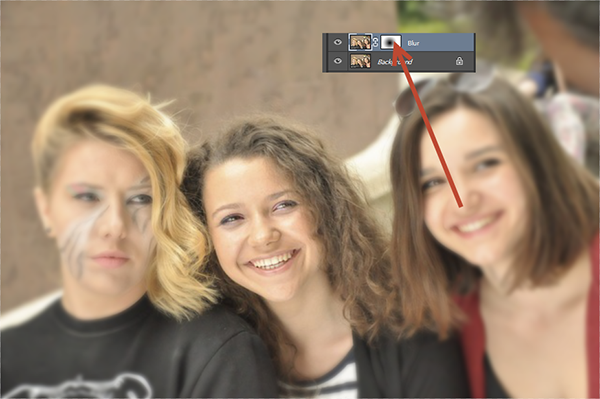
Open the file “Girls” and duplicate the “Background” layer. Select the background layer in the layers palette by clicking on it and press Ctrl + J to duplicate it. Name this new layer “Blur”.
Step 2
The depth of field effect is achieved by selectively blurring parts of the image so that only a certain portion of the photo will have focus. In our case we want to put focus on the girl in the middle and blur the other two girls on the sides.
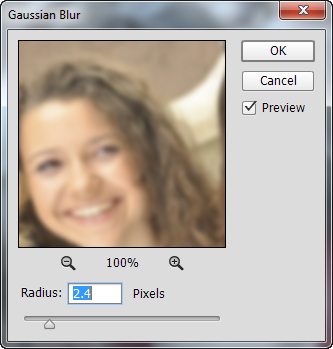
Let’s start by applying a lens blur. Go to Filter > Blur > Gaussian Blur and apply a 2.4 pixel Gaussian Blur.
Step 3
We have applied a blur to the whole image but now let’s try to somehow keep the girl in the middle from being blurred (selective blur, remember?). We could do that by simply selecting the Eraser Tool and erasing the blurred layer where we want the blur effect to disappear but this would be a poor way of doing it. Why? Because there is this thing called “non-destructive editing” and it basically means that if we make a change to our photo we can always go back and revert it or modify it.
If we use the eraser tool however we won’t be able to do that because the information in the “Blur” layer will be lost forever. So a better way to do it is by using a layer mask. Let’s do that now.
Click on the “Blur” layer in the layer palette and go to Layer > Layer Mask > Reveal All. You will see that a white thumbnail appears next to the layer thumbnail in the layers palette.

Step 4
A layer mask allows us to completely or partially hide a layer. If we paint with black at 100% opacity in a layer mask we will hide that portion of the layer completely. If we paint with black at 50% opacity we will partially hide that portion of the layer. And painting with white at 100% doesn’t hide the layer at all.
So we want to hide the blurred effect over the face of the girl in the middle. Do you know how we’ll do that? We’ll paint with black in the layer mask of the blurred layer in order to hide that portion of the layer and thus keep the girl in the middle un-blurred.
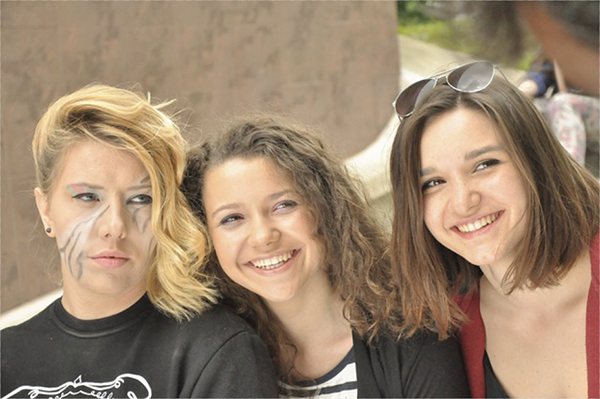
Choose a round soft brush and paint with black in the layer mask over the middle girl’s face.
Step 5
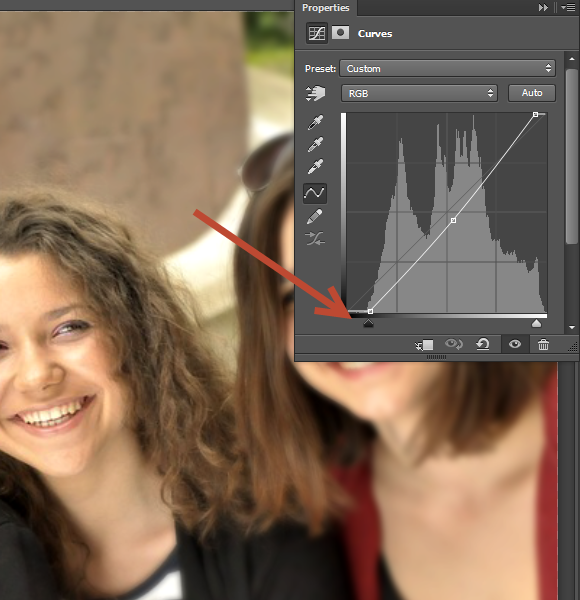
Before going to perform the rest of the steps that will give us a nice depth of field effect let’s take a look at the colors in our photo. We can see that it looks a bit washed out (there is too much white). Let’s correct this.
Start by creating a Curves Adjustment Layer ( Layer > New Adjustment Layer > Curves) and drag the left black triangle to the right as shown below. By doing this we have both decreased the amount of white in the photo and slightly increased the contrast (which is a good thing).
Step 6
Another important step that makes for a successful depth of field effect is a vignette. Basically a vignette is just a subtle semi-opaque soft black frame around our photo (it works well with almost any photo). It is easier to make one than explain it so let’s do it.
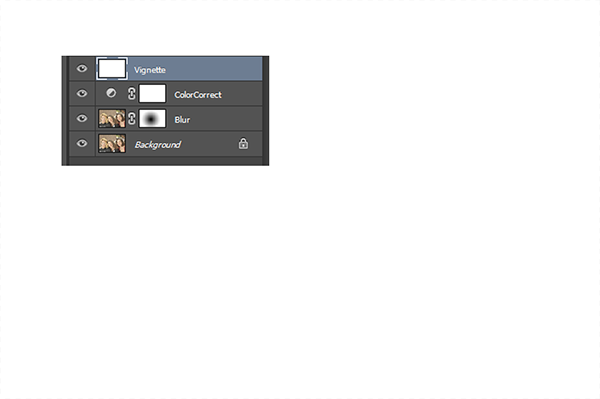
First create a new layer (Ctrl + Shift + Alt +N) and fill it with white (Shift + F5). Name this layer Vignette.
Step 7
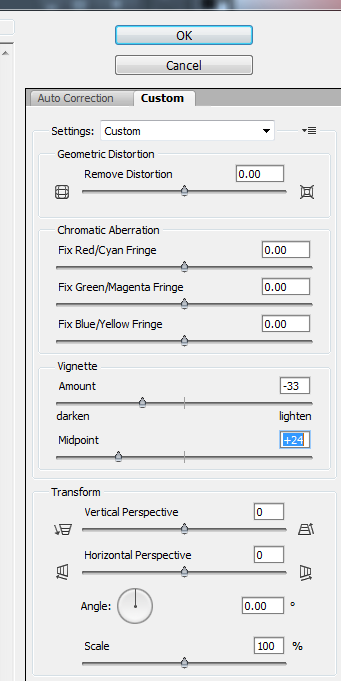
Now go to Filter > Lens Correction and click on the Custom Tab. There you’ll see a Vignette section and an Amount slider. Drag the Amount slider to the left (-33). You’ll also see a Midpoint slider. Drag the Midpoint Slider to the left (+24). Once you’re done with these adjustments click ok.
Step 8
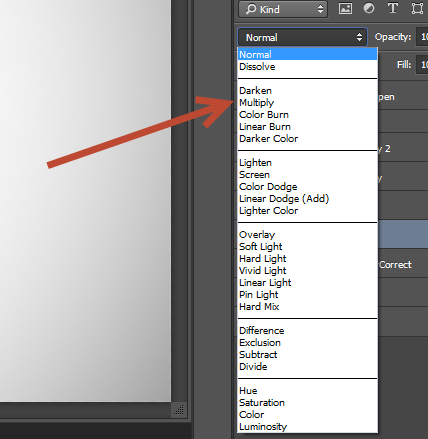
So now we have a white layer with a soft black frame around it. How do we transform this into a Vignette? Well, we’ll do that with the help of the famed blending modes. You’ll notice that there is a drop down menu in the layer palette next to Opacity. If you click on it you will see a multitude of blending options to choose from. In order for our vignette to work we will choose the Multiply blending mode – by doing this we will get rid of all the white colors while keeping the black soft frame around the photo.
Step 9
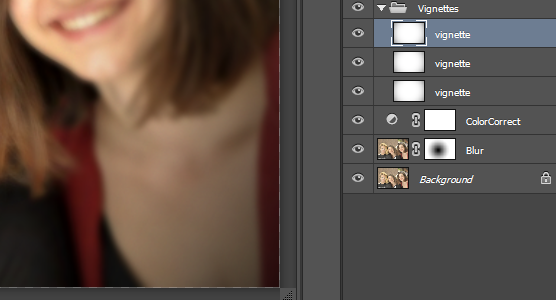
The vignette looks good but it is a little too subtle for my taste – I can barely see the black frame around the photo. In order to make it look stronger let’s duplicate the vignette layer a couple of times. Click on the vignette layer in the layers palette and press Ctrl + J a couple of times. You will notice that the vignette effect increases with each duplication.
Once you’re finished duplicating the layer hold the Shift key and click on each vignette layer. Press Ctrl + G to group all these layers and name the group “Vignettes”. The grouping of the layers doesn’t affect in any way the look of the image but it will keep our layers palette clean and organized.
Step 10
We have a decent depth of field effect but I think we can improve it a little bit more. Since we can’t blur the margins of the photo (it will look too fake) we can sharpen the middle portion.
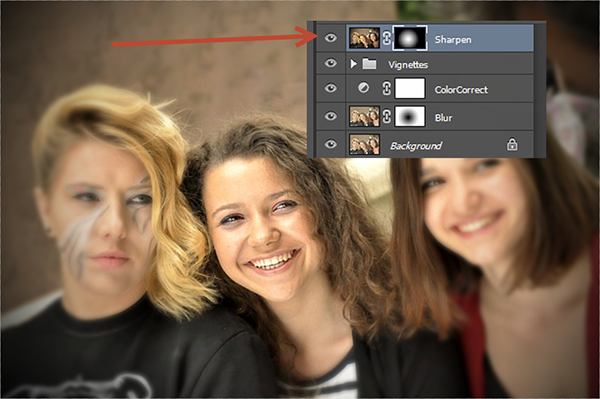
First let’s create a new layer from all the visible layers (press Ctrl + Shift + Alt + E). Nothing changes but we have a new layer on top of our layers with which we can play. Name this layer “Sharpen”.

Step 11
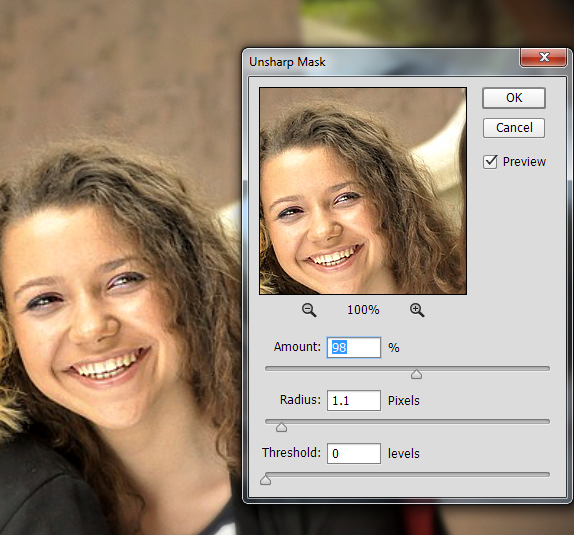
Let’s apply a sharpen effect to this layer. We can achieve this effect in multiple ways with Photoshop but for the purpose of this tutorial let’s use the simplest method – an Unsharp Mask. Go to Filter > Sharpen > Unsharp Mask and use the settings shown below. Click ok and you should see that our photo looks more sharp than before.
The problem is that we applied the sharpen effect to the whole picture, including the blurred areas which we would like to keep blurred.
Step 12
In order to keep the blurred areas unsharpened we will use a Layer Mask (like we used in Step 4).
Go to Layer > Layer Mask > Hide All and you will see a black thumbnail appear next to the layer thumbnail and the sharpen effect vanished. That is because the black in a layer mask hides.
In order to reveal the sharpen effect on the middle portion of our photo (and avoid the blurred areas) simply choose a round soft brush and paint with white over the girl in the middle. This will show the sharpen effect over her and keep the margins nicely blurred.
And We’re Done!