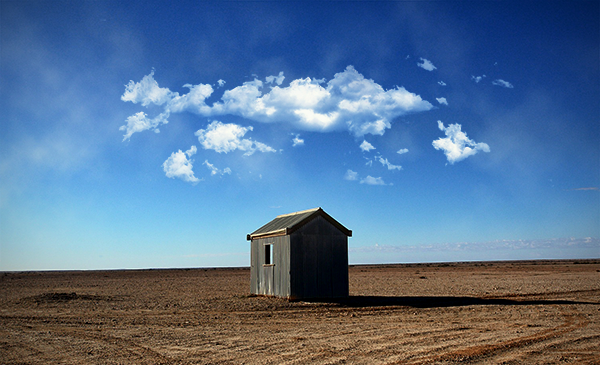
In this Photoshop tutorial we will learn how to add real and fake clouds to an empty sky using nothing but the power of blending modes and some easy selection techniques.
Final Image
As always, this is the final image that we’ll be creating:

Tutorial Details
- Program: Adobe Photoshop CS3
- Estimated Completion Time: 30 minutes
- Difficulty: Beginner-Intermediate
Resources
Step 1
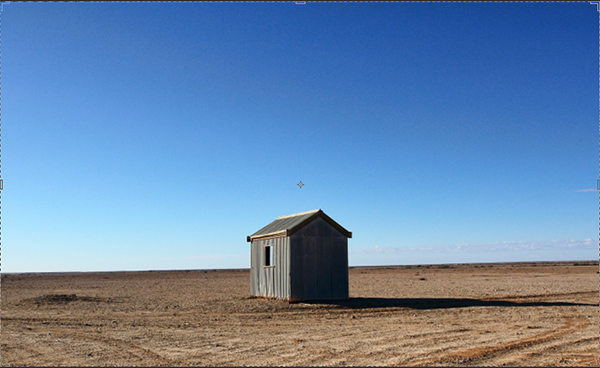
Open the file “Cabin”. As you can see the beautiful blue sky is empty right now but we will add some clouds soon enough. Let’s crop this image a little bit to put more focus on the sky area. Select the Crop Tool (C) and crop the photo as shown below.
Step 2
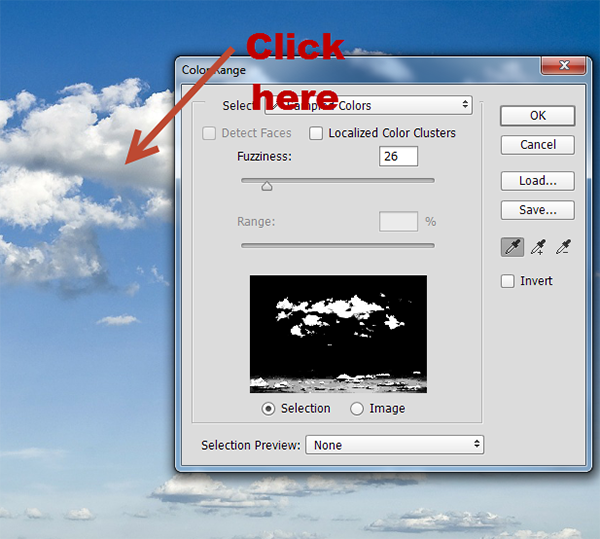
Open the file “Clouds”. We will use the Select Color tool to select the clouds because the clouds are mostly white and the sky blue and this difference in color will make selecting the clouds with the Select Color tool easier.
Go to Select > Select Color and click once with the sampler on the clouds and press Ok.
Step 3
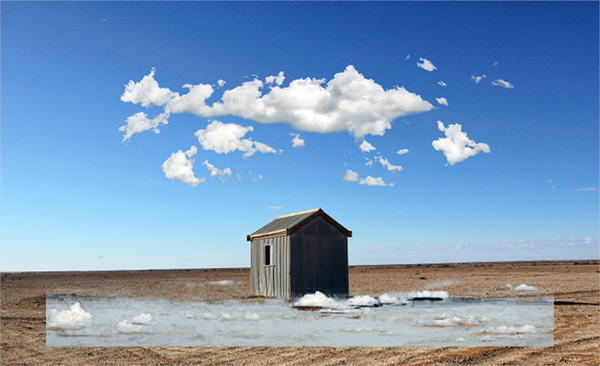
With the clouds selected press Ctrl + C to copy the clouds selection.
Go back to our document and press Ctrl + V to paste the clouds.
Resize the clouds and place them as shown below (in order to resize any layer press Ctrl + T to enter Free Transform and Shift-drag the corners to resize proportionally).
Step 4
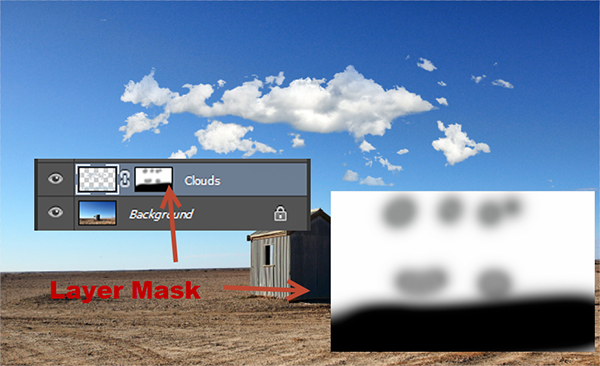
Add a layer mask to the clouds layer (Layer > New Layer Mask > Reveal All). Paint with black in the layer mask to hide the lower portion of the clouds and some of the upper areas. Before painting with black make sure that the layer mask is selected – click on the layer mask thumbnail to select it. As you can see in a layer mask black hides and white reveals while gray partially reveals/hides.
Step 5
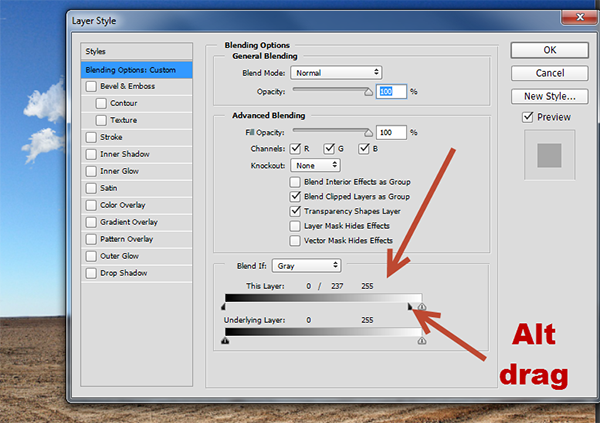
Double click the clouds layer to open the blending options window. Hold the Alt key and drag the black slider as indicated below. By doing this we will partially hide the gray portions of the clouds and achieve a better blending effect with the sky.
Step 6
The clouds look good enough but they are a bit too white for my taste. Usually clouds pick up some color from the sky they are on (reddish clouds on sunset skies, gray on stormy skies, etc) so let’s achieve this effect.
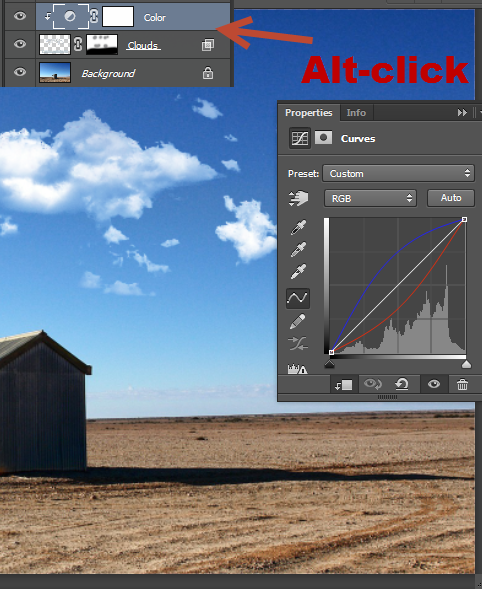
Create a Curves Adjustment Layer (Layer > New Adjustment Layer > Curves) and use the settings shown below to boost the blue color.
Now simply hold the Alt key and click between the curves layer and the clouds layer to clip the curves layer to the clouds layer. This action will limit the effects of the curve adjustment layer solely to the clouds.
Step 7
These clouds look good enough but I feel that we should also have some misty clouds (barely visible smoky smudges of white) just to add some randomness.
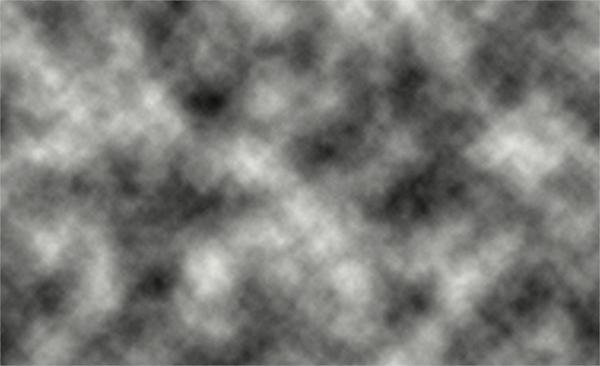
Press D to set the foreground and background colors to black and white and create a new layer (Ctrl + Shift + Alt + N).
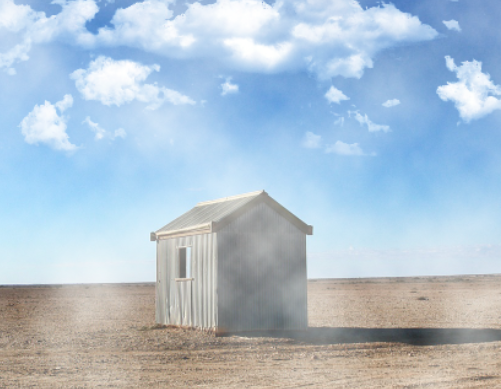
Go to Filter > Render > Clouds – you can see the result below.
Step 8
Change the blending mode of the rendered clouds to Screen and lower the opacity to 77%.
The Screen blending mode will hide all the black colors in the layer and reveal only the white. In this case this behavior is ideal because it will hide all the black clouds and reveal only the white. Blending modes are very useful and I highly recommend that you learn more about them.
Step 9
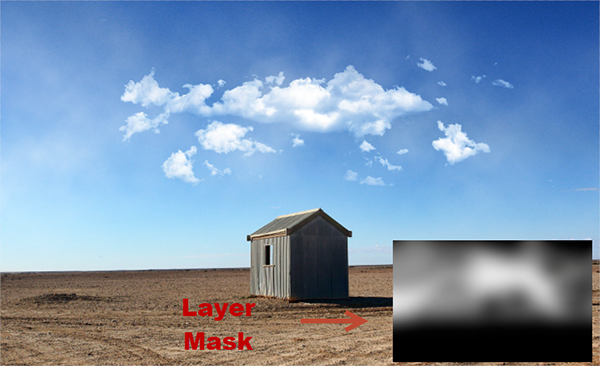
Add a layer mask to the rendered clouds (Layer > Layer Mask > Reveal All) and paint with black to hide the lower portion of the clouds (where it overlaps the ground) and some of the upper areas.
Step 10
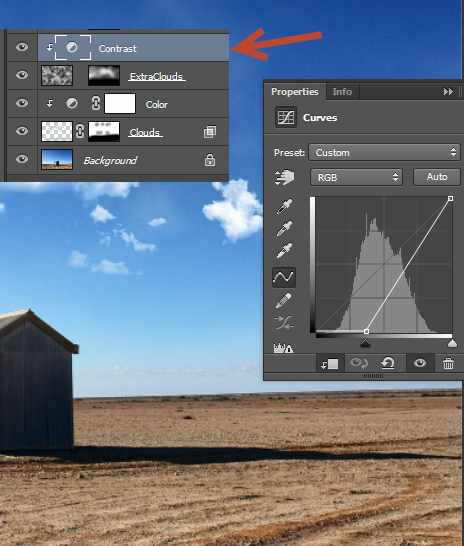
Create a Curves Adjustment Layer and drag the sliders as shown below to increase the contrast.
Clip this layer to the rendered clouds layer. By doing this we will further increase the contrast of your misty clouds and make them look better.
Step 11
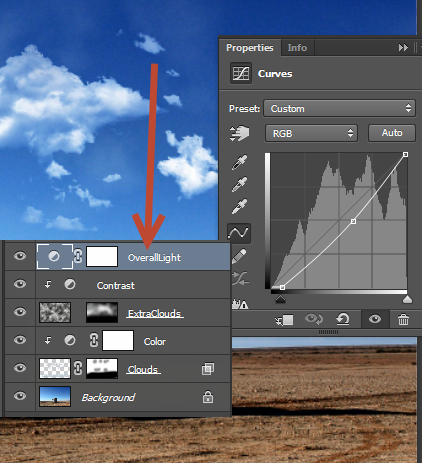
Let’s improve the overall look of our image. Create a new Curves Adjustment Layer (Layer > New Adjustment Layer > Curves) and use the settings shown below to both increase the contrast and darken the image a bit.
Adjustment layers are a very useful addition to Photoshop tools. They allow us to change the properties of an image without committing to any definitive changes. If you don’t like a the effect of an adjustment layer you can simply delete it or you can tweak the opacity and even change the blending mode.
Step 12
One final effect I like adding to most of the photos I tweak in Photoshop is the vignette (a subtle black border around the image that puts more focus on the center).
Create a new layer (Ctrl + Shift + Alt + N) and fill it with white (press D to set default colors and Ctrl + Backspace to fill the layer with white).
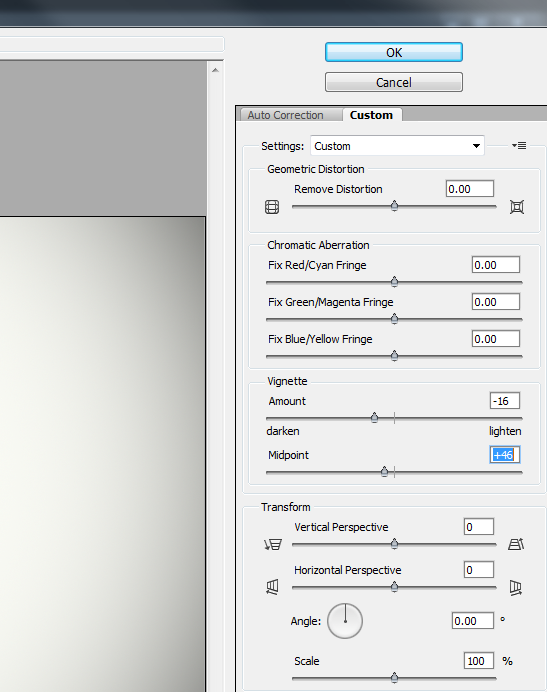
Go to Filter > Lens Correction and go to the Custom tab. Use the settings shown below and press Ok.
Now simply change the blending mode to Multiply (this blending mode is the opposite of the Screen blending mode – it hides all the white colors and shows the black ones).
And We’re Done!
