We will create a parting sea photo manipulation using both simple and advanced techniques in this Photoshop tutorial.
Final Image
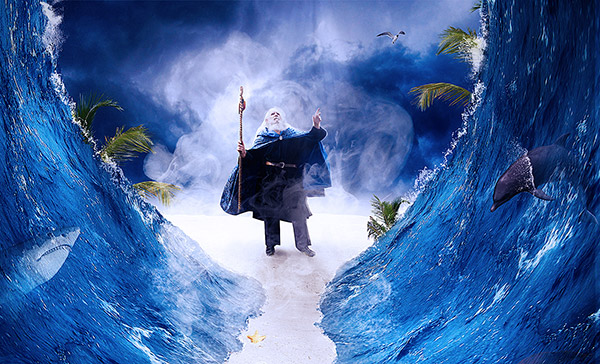
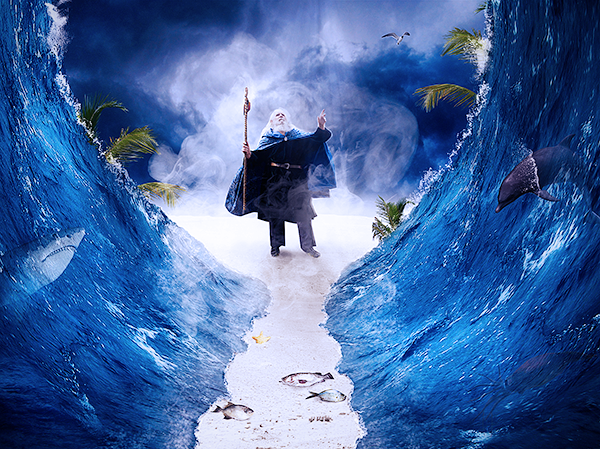
As always, this is the final image that we’ll be creating:
Tutorial Details
- Program: Adobe Photoshop CS3
- Estimated Completion Time: 40 minutes
- Difficulty: Beginner-Intermediate
Resources
- Sea
- Pyramids
- Palm
- Sea
- Splash Brush
- Smoke Brush
- Wizard
- Seagull
- Fish1
- Fish2
- Fish3
- Shell
- Shark
- Octopus
- Dolphin
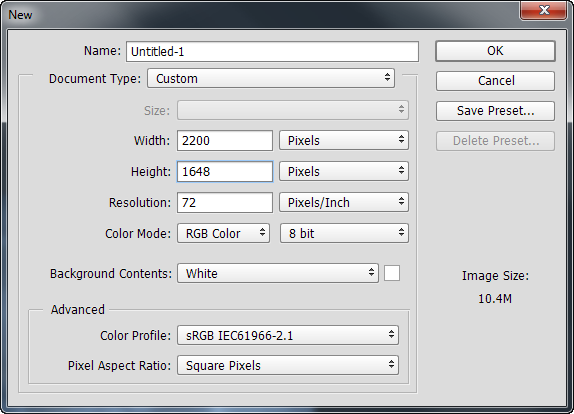
Step 1
Create a new document 2200×1648 pixels.
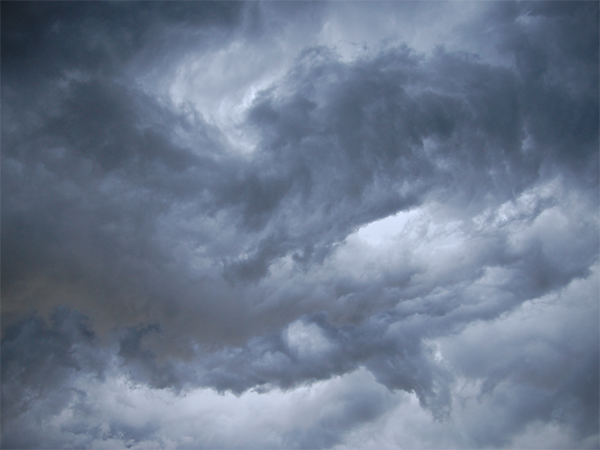
Step 2
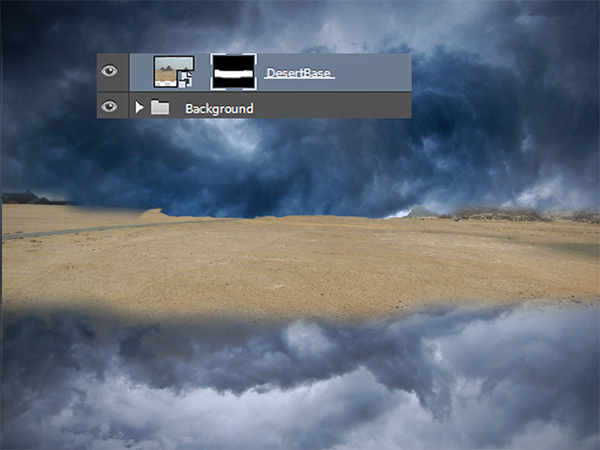
Open the file “Sky”. Select all (Ctrl + A) and copy (Ctrl +C). Go back to our newly created document and paste (Ctrl + V). Use the Free Transform Tool (Ctrl + T) to position the sky as shown below.
Step 3
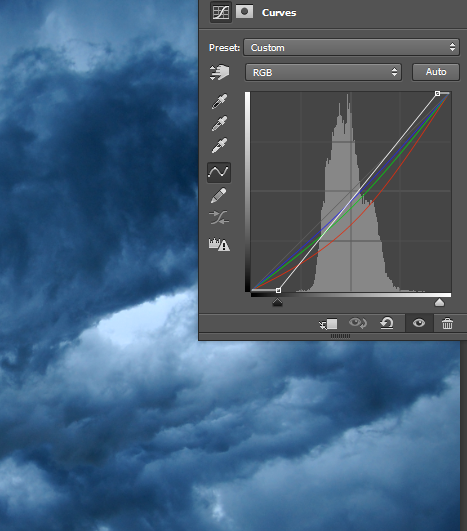
Let’s add some color to our sky. Create a new Curves Adjustment Layer (Layer > New Adjustment layer > Curves) and use the settings shown below.
Step 4
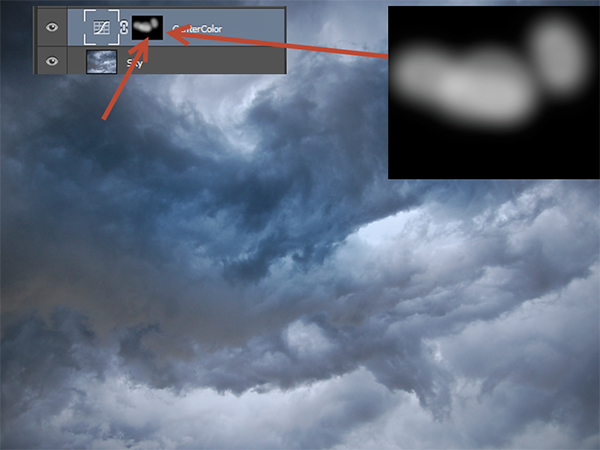
You’ll notice that the curves adjustment layer has a layer mask by default (the layer mask is the white thumbnail next to the layer thumbnail in the layer palette). Black in a layer mask hides the layer completely and white reveals it. Gray partially reveals the layer. We want to reveal the Curves adjustment layer only in the middle of the sky.
First set the colors to default (press D). Now click on the layer mask to make it active and press Ctrl + Backspace to fill it with black.
Choose the standard soft brush and paint with white in the middle of sky (make sure the layer mask is active – just click on it). You will notice that the effects of the Curves Adjustment Layer will only be visible where we paint with white.
Step 5
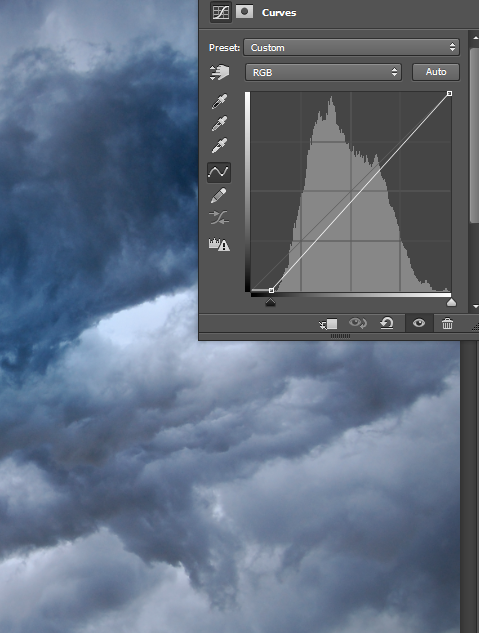
The sky looks a bit light so let’s darken it up. Create a new Curves Adjustment Layer and drag the black slider to the right as shown below.
Step 6
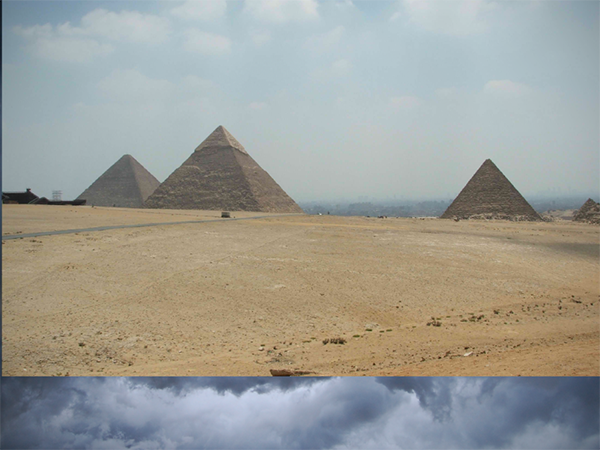
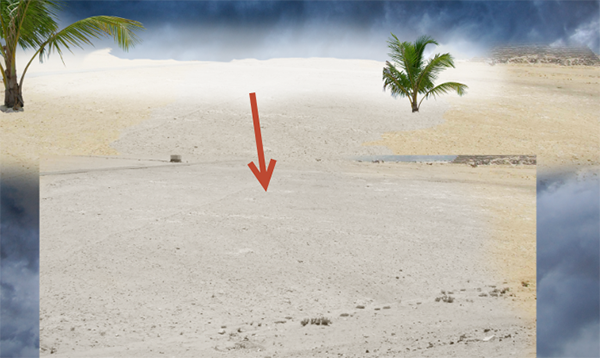
Now let’s create the ground for our waves to stand on. Open the file “Pyramids” and select everything (Ctrl +A). Copy by pressing Ctrl + C and paste in our document by pressing Ctrl + V. Use Free Transform to position the layer as shown below.
Step 7
Add a layer mask to the pyramid layer (Layer > Layer Mask > Reveal All) and with the standard round soft brush paint in the layer mask to hide the top and bottom parts leaving only the sand.
Step 8
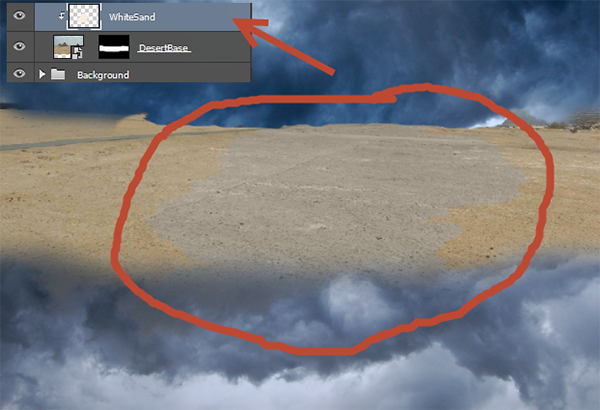
Let’s lighten up the sand in the middle. Create a new layer and change the blending mode to Color.
Choose a light neutral color (#b0a99d) and paint over the area shown below. Clip this layer to the pyramid/sand layer (in order to clip a layer to another Alt-click between the two layers in the layer palette. This will show the upper layer only through the pixels of the bottom layer).
Step 9
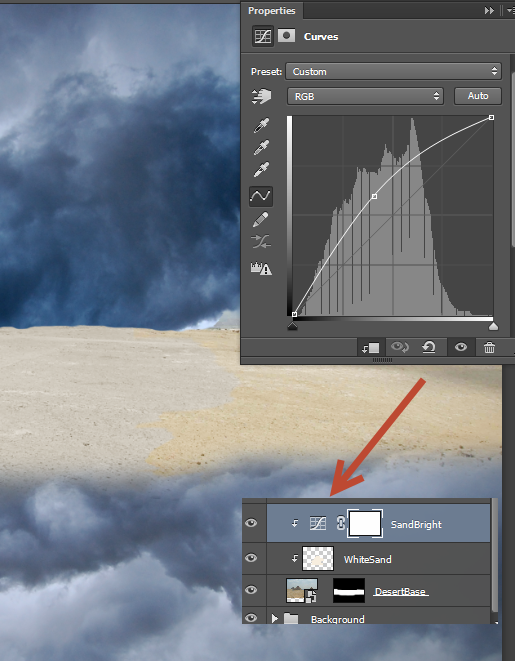
The sand is a bit too yellow. Let’s correct this. Create a new Curves Adjustment Layer and drag the curve up to lighten. Clip it to the sand layer (Alt-click between the curves layer and the “White Sand “ layer.)
Step 10
We know beforehand that we are going to place our wizard in the middle of the scene. Let’s create some background mist. Create a new layer and paint with a round soft brush at 20% Opacity as shown below.

Step 11
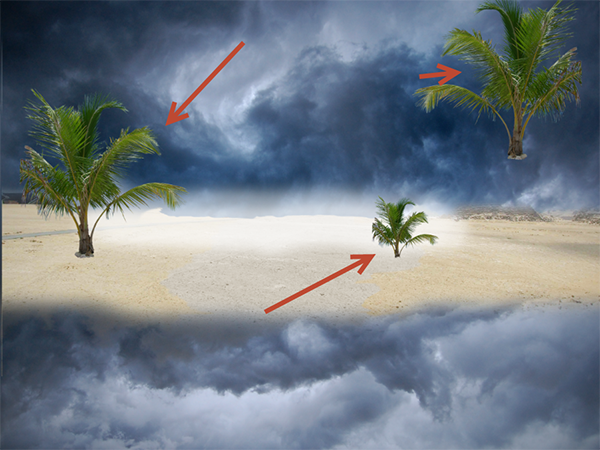
Open the file Palm. Copy all (Ctrl + A) and copy/paste (Ctrl + C, Ctrl + V) the palm in our scene. Place it as shown below.
Once you’re done create a duplicate palm layer (Ctrl + J) a couple of times and place the duplicates as shown below. We’re doing this to add some vegetation to our scene.
Step 12
Create a new layer (Ctrl + Shift + Alt +N) and select the Clone Tool (S). Clone from the white sand in order to create some more sand in the bottom part of our scene.
Step 13
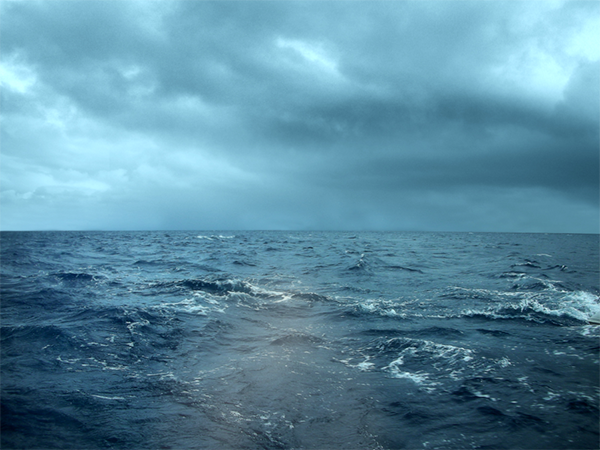
It’s time to create the parted waves. Open the file “Sea”. Select all and copy/paste in our opened document. Place the sea layer as indicated below (use Ctrl + T to open Free Transform and resize/position the layer).
Step 14
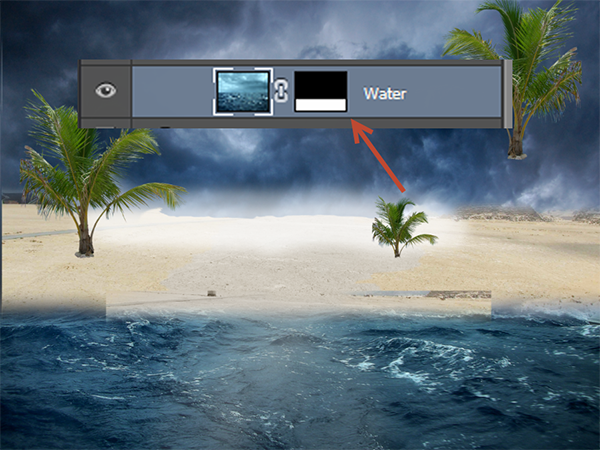
Add a layer mask to the sea layer (Layer > Layer Mask > Reveal All) and hide the upper section of the sea (paint with black in the layer mask over the areas you want hidden). Name this layer “Water”.
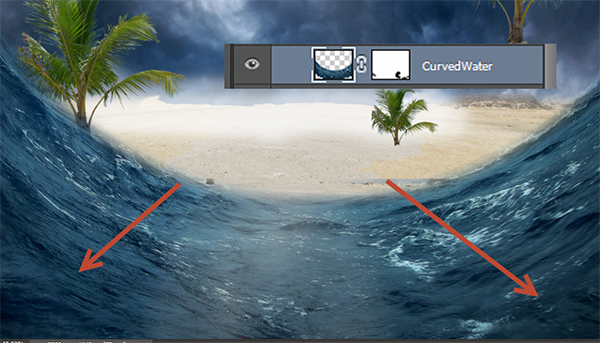
Step 15
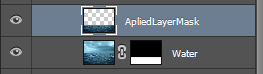
Duplicate the “Water” layer (Ctrl + J) and right click on the layer mask. From the drop down menu choose Apply Layer Mask. This will apply the layer mask to the layer pixels. Name this layer “CurvedWater”.
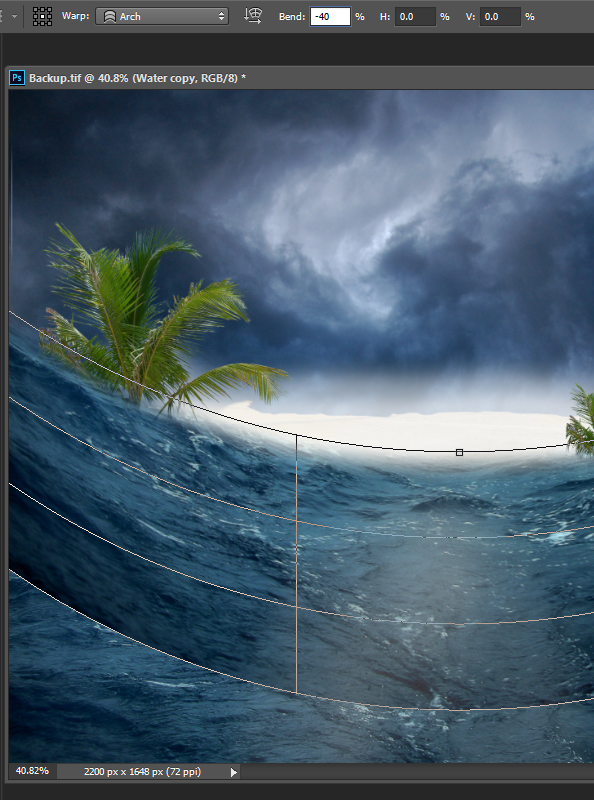
Step 16
With the Curved Water layer selected press Ctrl + T to enter Free Transform. Right click on the layer (in the document window) and from the drop down menu choose Warp.
In the tools options toolbar (just below the menu items) choose Arch and change the Blend field to -40. Press Enter to apply the warp transformation.
Step 17
Add a layer mask to the Curved Water layer and hide the straight edges (as indicated in the image below).
Step 18
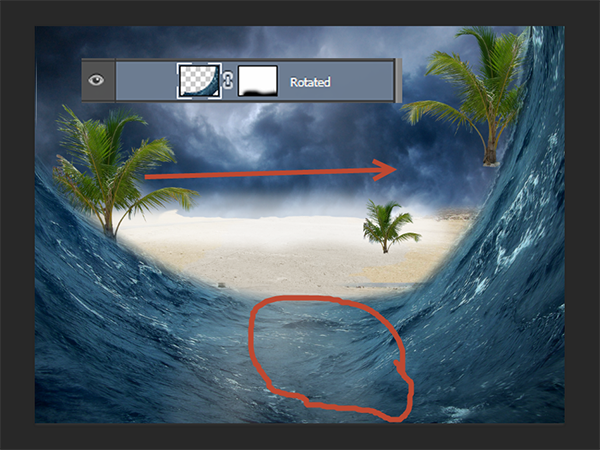
Duplicate the Curved Water layer by pressing Ctrl + J and use Free Transform to rotate it to the right as shown below.
Add a layer mask to hide the artefacts and hard edges that will show in the middle of the scene.
Step 19
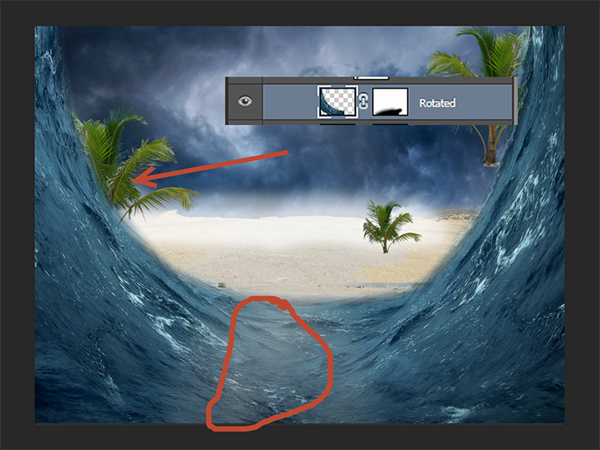
Repeat step 18 but this time rotate the duplicated layer to the left.
Step 20
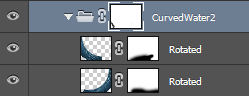
Group the two rotated layers together (hold the Shift key and click on each of the layers in the layer palette to select them. Press Ctrl + G to group them) and name the group “CurvedWater2”.
If there are still some hard edges left or other things that you want removed simply add a layer mask to the group (Layer > Layer Mask > Reveal All) and use a black soft brush to hide them.
Step 21
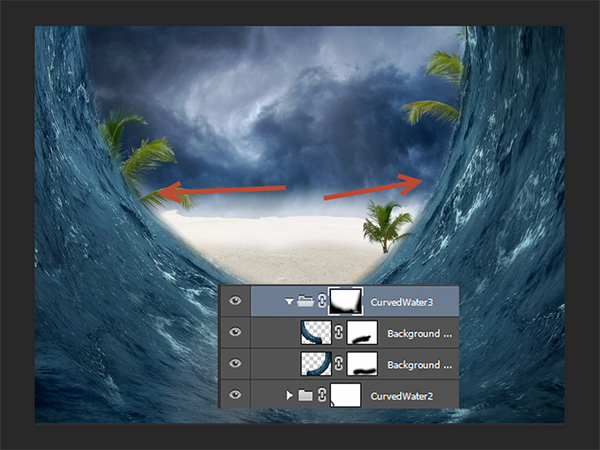
Duplicate the “Curved Water2” group (Ctrl + J). Make it a bit smaller and move it up a little (use Ctrl + T). Use the layer mask of the group to hide any unwanted details. Name the group Curved Water3.
Step 22
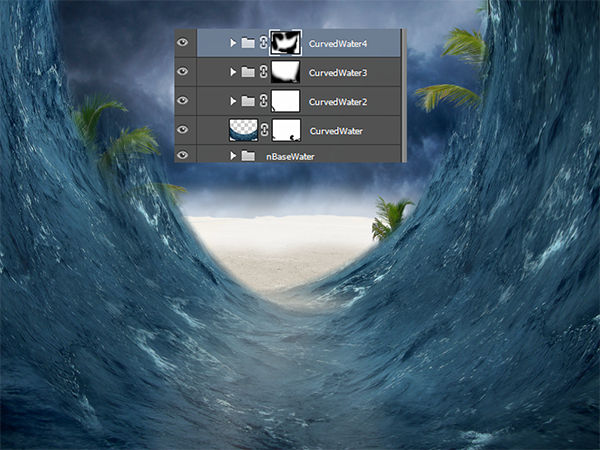
Repeat step 21 (duplicate, move up and make the group smaller). Name this group Curved Water 4.
Step 23
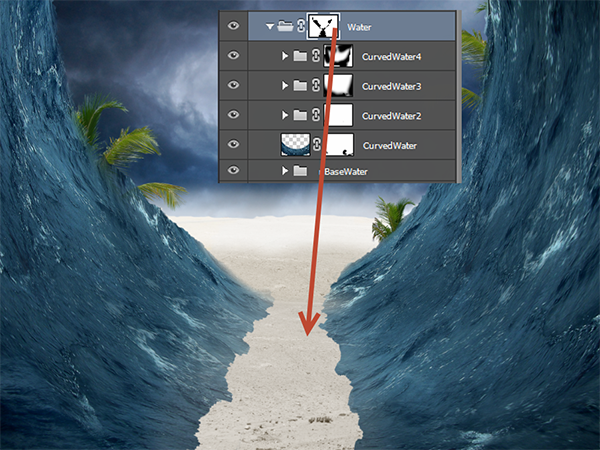
Group all the water related layers and groups together and name the group “Water”. Add a layer mask to this big group and use the standard chalk brush to hide the waves in the middle where the sand should be.
Step 24
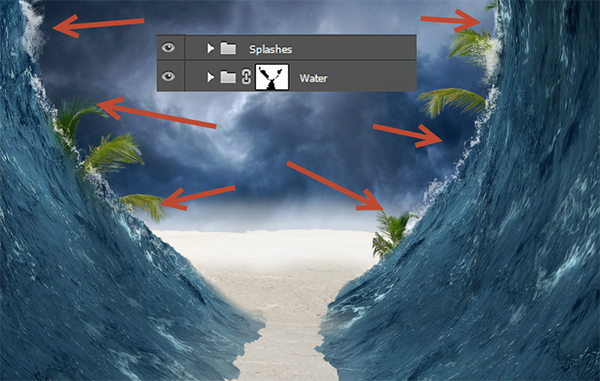
Now let’s add some splashes to our parting waves.
Import the brush “Splashes” (double click on the .abr file) and create a new layer (Ctrl + Shift + Alt +N). Use various splash brushes to create some white splashes as shown below.
For organization’s sake I grouped all my splash layers under a group called Splashes (Ctrl +G).
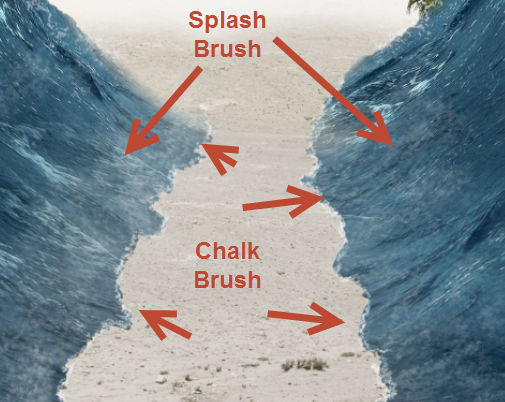
Step 25
Let’s create some nice splashes and subtle waves where the parting waves meet the sand. Use the same splash brushes from Step 24 but with lower opacity to create some white foam and splashes as shown below.
I also used the standard Chalk brush at 2px size and 44% Opacity to create the parting waves outlines.
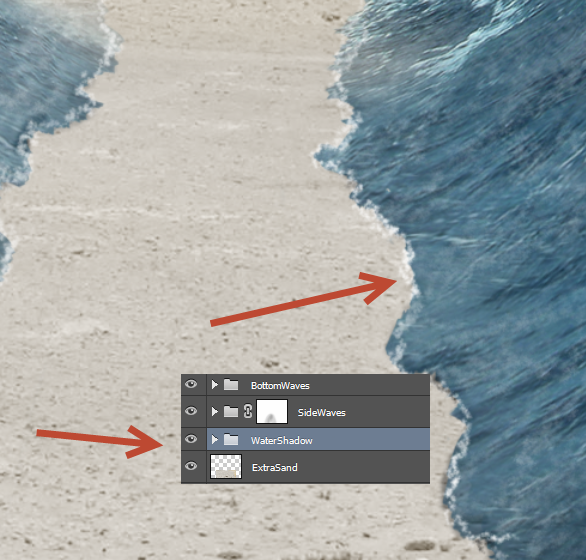
Step 26
Create a new layer and place it below the water related layers (just above the Extra Sand layer we created in step 12).
Use the standard round soft brush at 5% opacity to paint some light shadows underneath the waves.
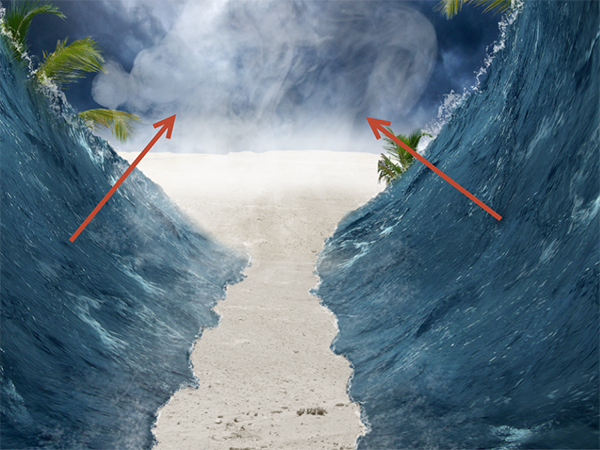
Step 27
Let’s create some background smoke for our wizard. Import the Smoke brushes (double click on the .abr file) and make a new layer (Ctrl + Shift + Alt +N). Using a smoke brush of your choosing create some white smoke as shown below.
Step 28
Now let’s add the wizard. Open the file “Wizard” and use the Pen Tool to make a selection of the wizard.
Press Ctrl + Enter to convert the path into a selection and press Ctrl + C to copy.
Go back to our document and press Ctrl + V to paste. Use Free Transform (Ctrl + T) to place the wizard as shown below.
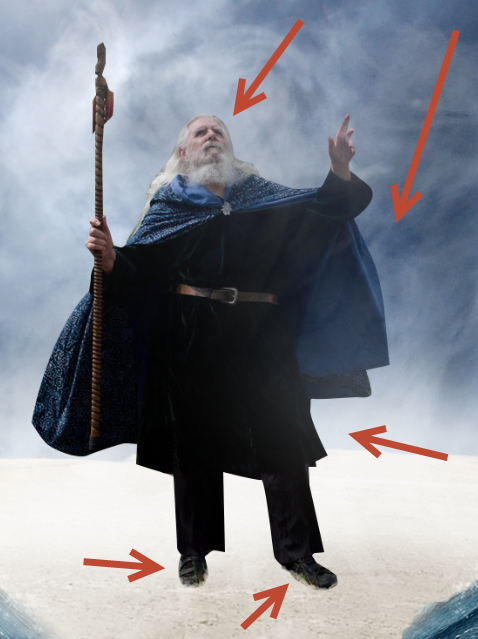
Step 29
Add a layer mask to the wizard layer (Layer > Layer Mask > Reveal All) and use the chalk brush inside the layer mask to hide a bit of his shoes (so that it looks like he is standing in the sand). Remember that in a layer mask black hides and white reveals so for this step paint with black in the layer mask.
You can also choose the standard round soft brush and paint with a lower opacity (10%) over his face and the blue cape to blend them nicely with our surroundings.
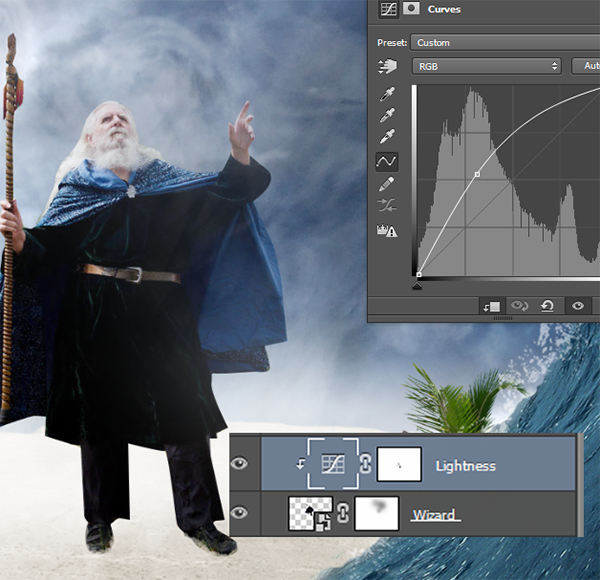
Step 30
Our wizard is placed okay in the scene but he looks a bit too dark. Let’s correct this. Create a new Curves Adjustment Layer and drag the curve up to lighten. Clip the curves adjustment layer to the wizard layer (Alt-click between the two layers in the layer palette) so that the lighten effect will be applied only to the wizard.
If the lighten effect is too strong use the layer mask that comes with the Curves Adjustment Layer by default to hide the unwanted areas.
Step 31
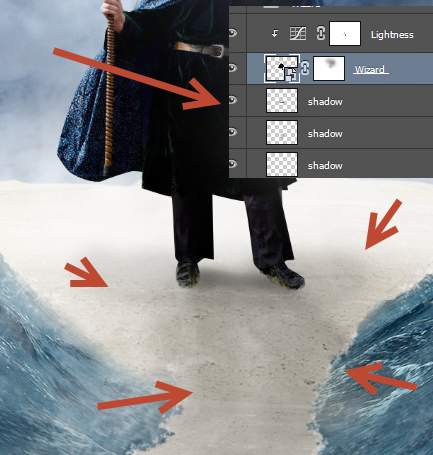
Without shadows our wizard lacks any 3d depth and reality.
Create some new layers below the wizard layer and change their blending modes to Multiply. Paint some shadows with the round soft brush at 20% Opacity.
Step 32
Let’s add some more elements to our scene.
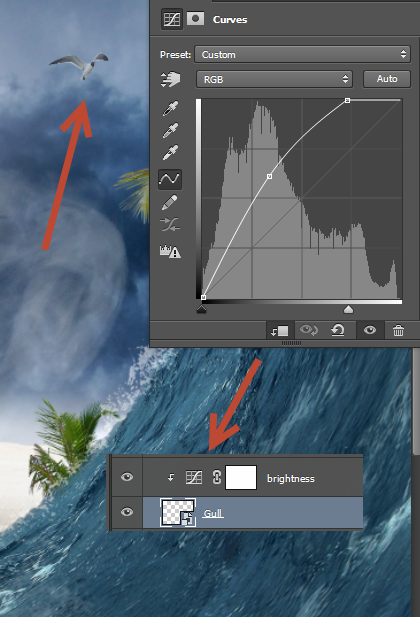
Open the file “Sea Gull”. Make a selection of the sea gull and copy/paste it into our scene. Place the gull above the wizard as shown below (use the Free Transform Tool – Ctrl + T).
Step 33
As you can see the gull is a bit too dark for our scene. Create a new Curves Adjustment layer and drag the curve up to lighten.
Clip the curve layer to the gull layer (alt-click between the two layers in the layer palette).
Step 34
There is some smoke behind the wizard but I think some smoke in front of him would look good. Create a new layer and using one (or more) of the smoke brushes create some white smoke in front of the wizard.

Step 35
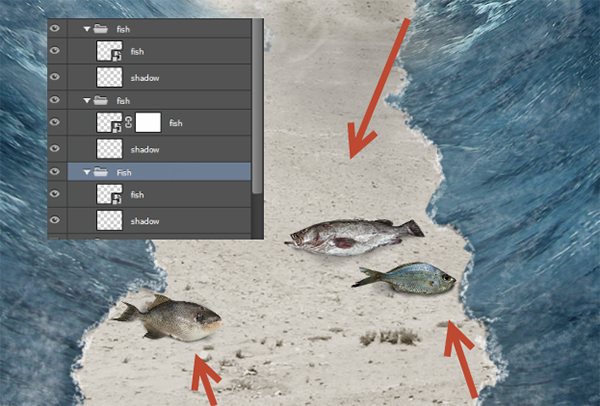
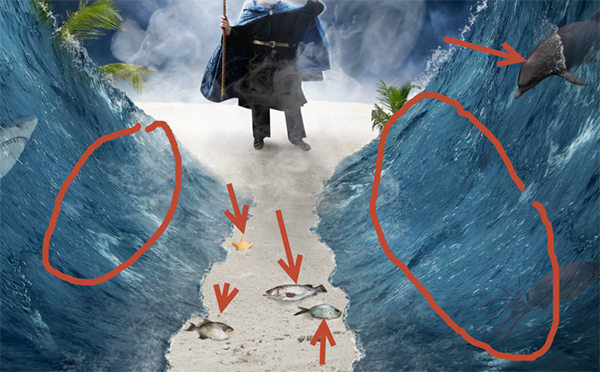
Because the sea is retreating there should be some marine life left behind on the sand. Let’s start by adding some fish. As you can see in the resources list there are three fish photos. Open each photo and create selections of the fish. Copy and paste the fish as shown below and for greater realism paint some shadows beneath the fish (each fish should have a shadow placed below the fish layer in the layers palette).
Step 36
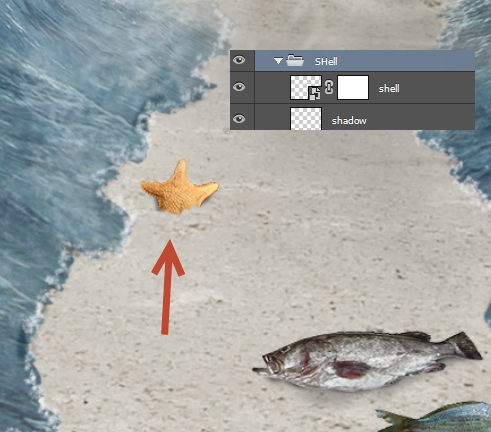
Open the file “Shell” and copy/paste the shell into our document. Place the shell as shown below and use a layer mask to hide the bottom part of the shell (it will look as she is buried in the sand). You can also paint some shadow on a different layer.
Step 37
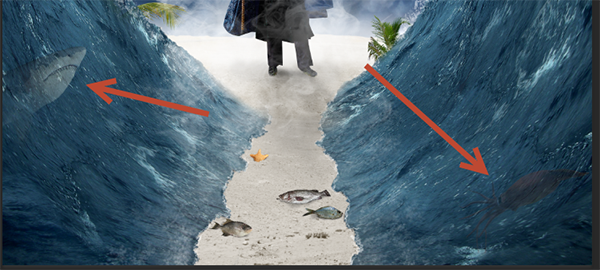
Let’s add some creatures in the water. Open both the files Octopus and Shark and copy/paste them in our document. Place the shark in the left wave and the octopus in the right. Lower the opacity of each of these creatures to 10-15%.
Step 38
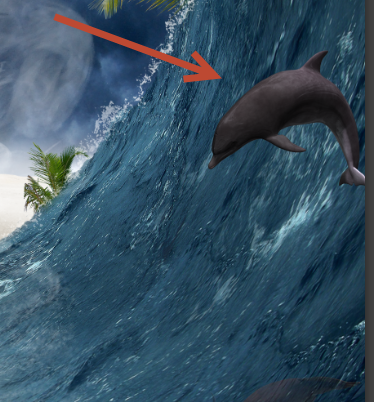
Let’s add a jumping dolphin in our scene.
Open the file “Dolphin” and make a selection of the dolphin. Copy/paste the selection in our scene and place it as shown below (use Free Transform).
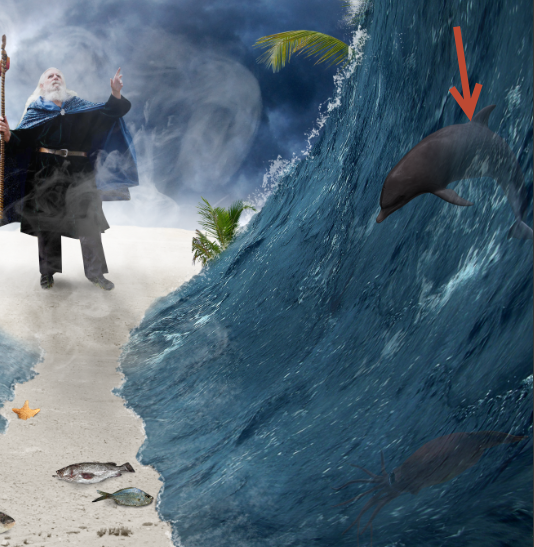
Step 39
Add a layer mask to the dolphin layer and partially hide (by using a black brush at 50% Opacity) half of the dolphin (the back side). By doing this it will look like the dolphin is half in the water and half outside.
Step 40
Create a new layer and using the splash brush we imported in previous steps create some splashes around the dolphin as shown below.

Step 41
Let’s add some improvements and special effects to our scene.
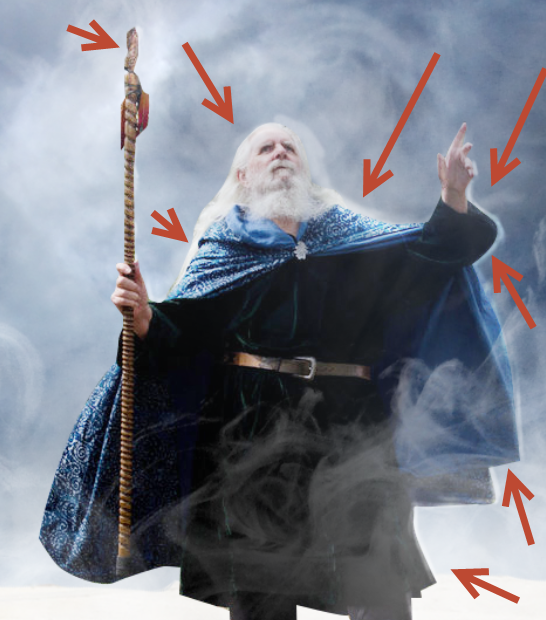
Create a new layer and change its blending mode to Overlay. With the standard round soft brush at 14% opacity paint some white outlines around the wizard.
Step 42
Create another new layer and change the blending mode to Overlay. Choose the same brush but increase the size to 100px or more. Paint some patches of white on the waves and some smaller areas of white on the fish.
Step 43
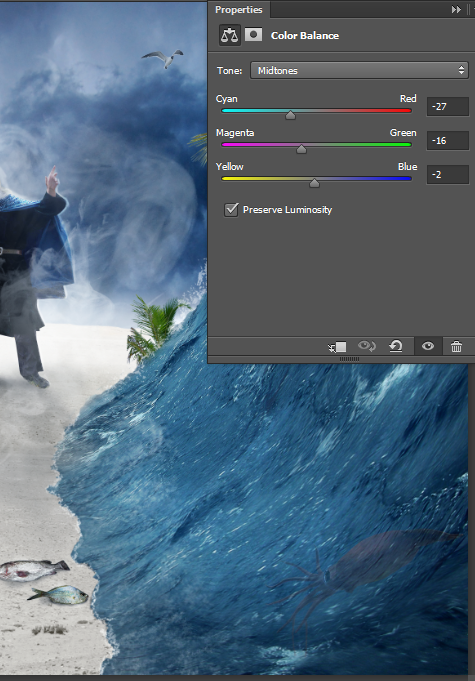
Let’s alter the overall colors in our scene. Create a new Color Balance Adjustment Layer (Layer > New Adjustment Layer > Color Balance) and tweak the settings as shown below.
Step 44
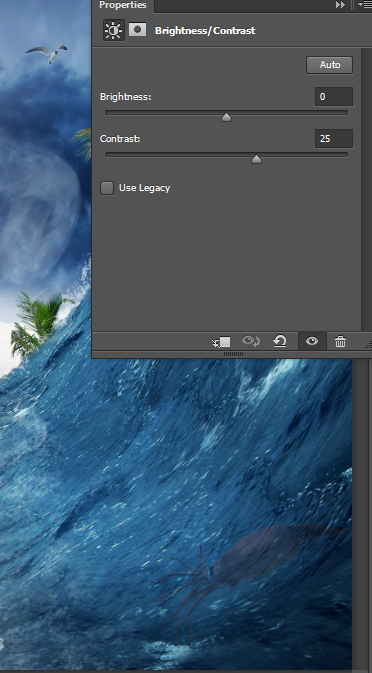
I find the contrast to be a bit low. Let’s correct that.
Create a new Brightness/Contrast Adjustment Layer (Layer > New Layer > Brightness/Contrast) and increase the Contrast slider to 25.
Step 45
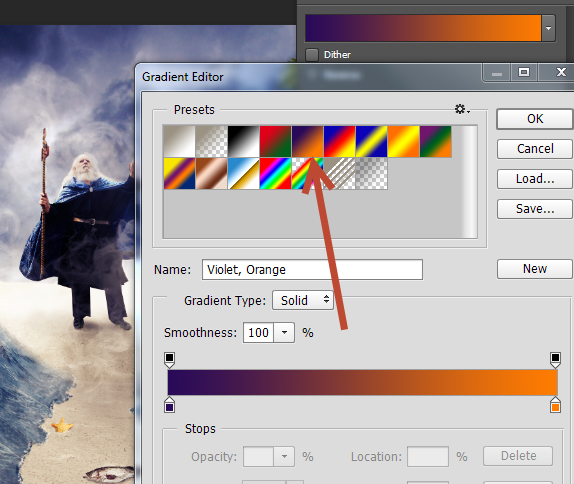
Let’s add some color variety to our scene.
Create a new Gradient Map Adjustment Layer ( Layer > New Adjustment Layer > Gradient Map) and use the settings shown below.
Change the blending mode of the gradient map layer to Soft Light and lower the opacity to 67% to tone down the effect.
Step 46
Let’s create a subtle dreamy/soft effect. Create a new layer from all the visible layers (Ctrl + Shift + Alt
+ E) and apply a 5px Gaussian Blur (Filter > Blur > Gaussian Blur).
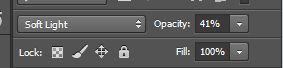
Change the opacity of the layer to 41% and the blend mode to Soft Light.
Step 47
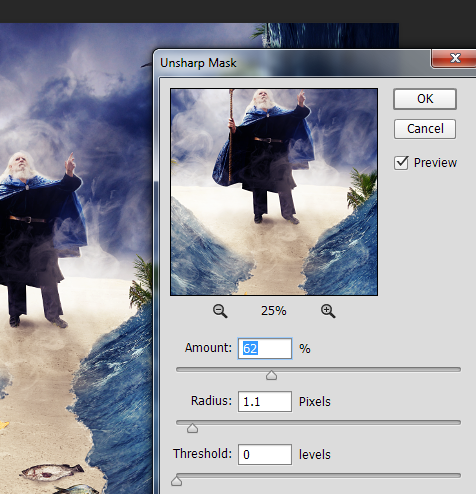
Let’s sharpen the image a bit. Create a new layer from all the visible layers (Ctrl + Shift + Alt +E) and apply the Unsharp Mask filter (Filter > Sharpen >Unsharp Mask). Use the settings shown below for best results.
Step 48
Import the Light Ray brushes and create a new layer. Choose a light brush and create some very subtle light coming from above the wizard (10% Opacity for the brush).

Step 49
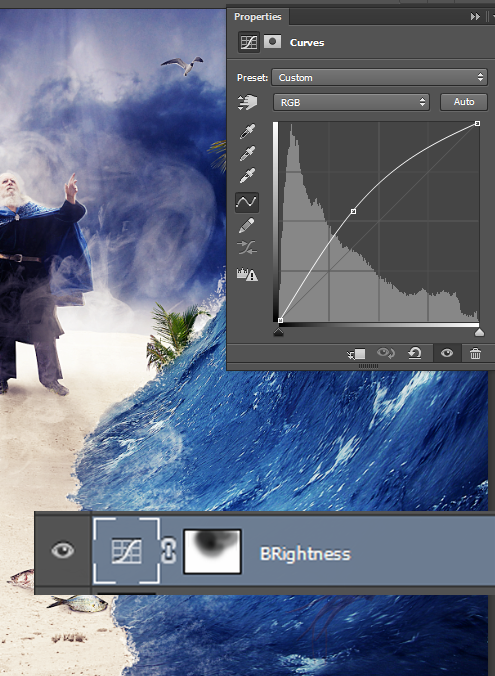
I do feel that the waves are a bit dark for my taste. Create a Curves Adjustment Layer and drag the curve up to lighten.
In the layer mask of the curves layer paint with a round soft brush at 90% opacity over the wizard to hide the effect in that area.
Step 50
There is nothing better than a photo filter to unify the colors and improve the overall look of the scene.
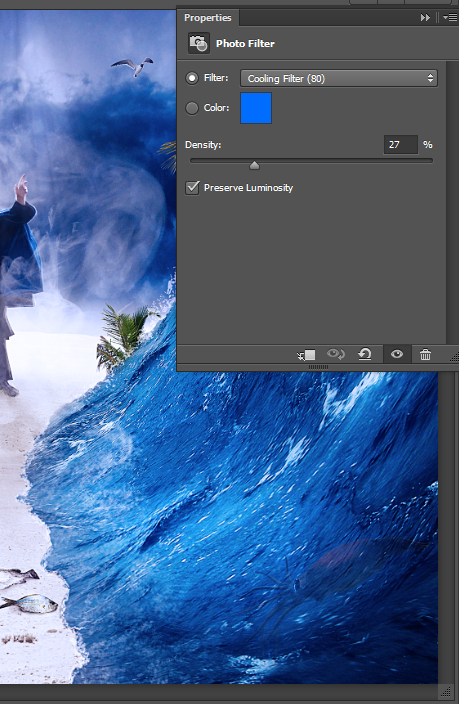
Create a Photo Filter Adjustment Layer (Layer > New Adjustment Layer > Photo Filter). Choose a nice blue filter and lower the density to 27%.
Step 51
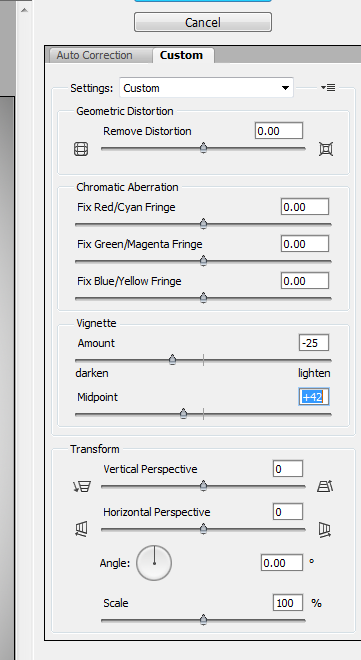
As a final step let’s create a subtle vignette. Create a new layer and fill it with white (Shift + F5).
Change the blending mode of the layer to Multiply and go to Filter > Lens Correction. Use the settings shown below to apply a vignette in our scene.
And We’re Done!