In this tutorial you will learn how to create a dynamic liquid text effect in Adobe Photoshop.
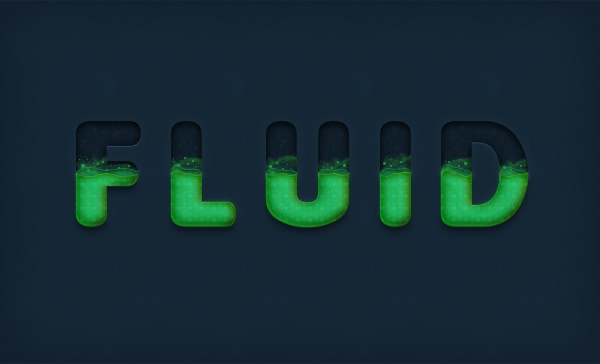
Final Image
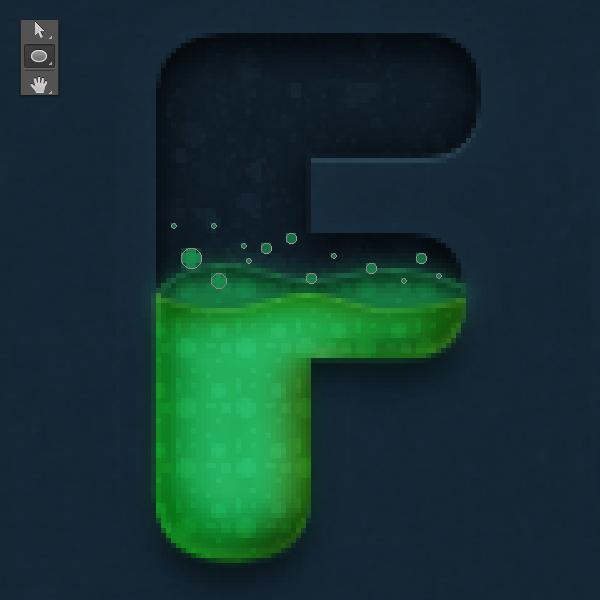
As always, this is the final image that we’ll be creating:
Tutorial Details
- Program: Adobe Photoshop CC
- Estimated Completion Time: 35 minutes
- Difficulty: Beginner-Intermediate
Resources
Step 1
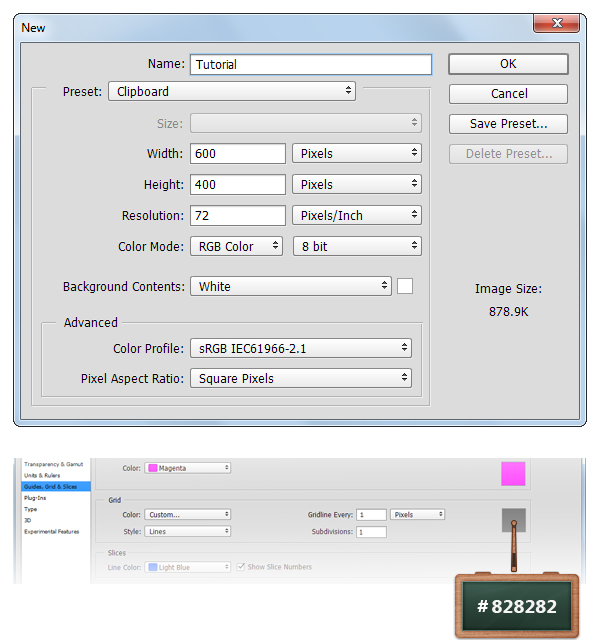
Create a 600 x 400px document, go to View > Show > Grid to enable the Grid and then go to View > Snap To > Grid to enable the Snap to Grid. Hit Control + K to open the Preferences window, go to Guides, Grid & Slices and enter the settings mentioned in the next image. Along the tutorial I turned off the grid ( Control + ‘ ) for you to have a better vision. The grid will make it easier for you to create/edit the shapes.
Step 2
Focus on the Layers panel, select the Background layer and click on the padlock icon to unlock the layer.
Concentrate on your Toolbar, set the foreground color to #172733, grab the Paint Bucket Tool and fill the canvas with the new color.
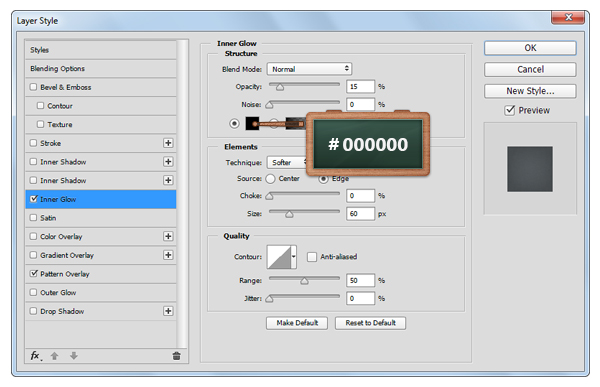
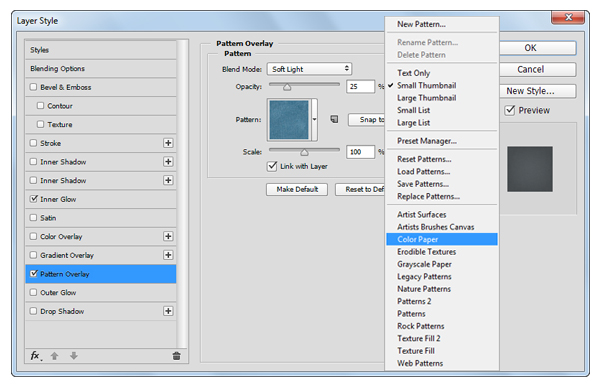
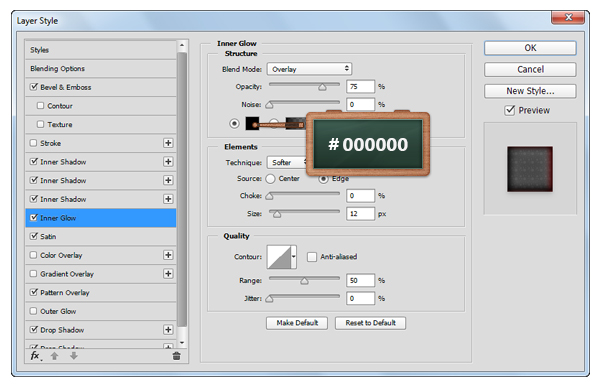
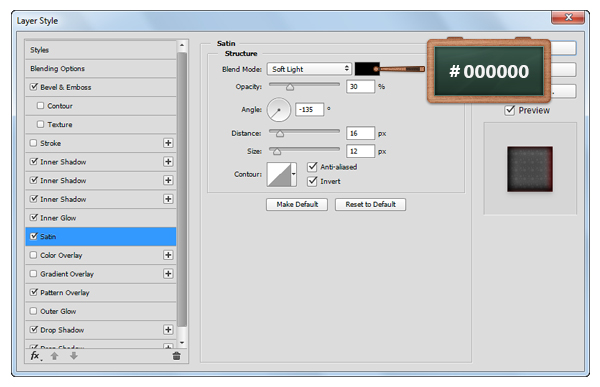
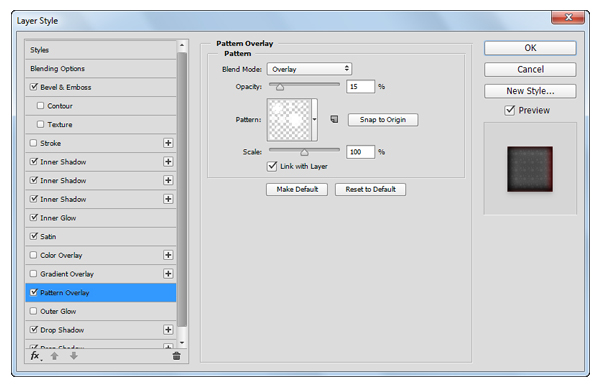
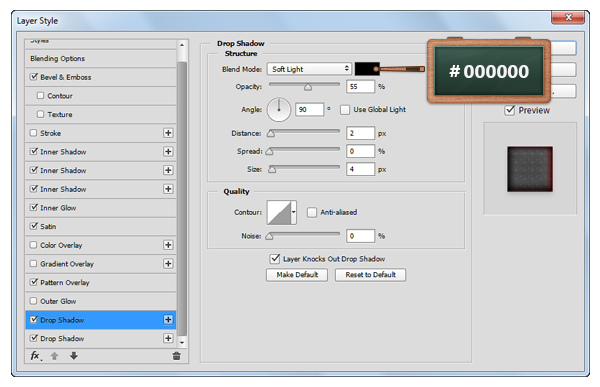
Open the Layers Style window for the existing layer and enter the settings shown in the next images.

Step 3
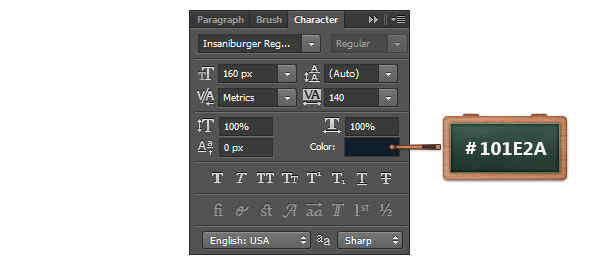
Pick the Horizontal Type Tool and use the Insaniburger font.
Move to your canvas, add the “FLUID” text with the size set to 160px and the color to #101E2A.

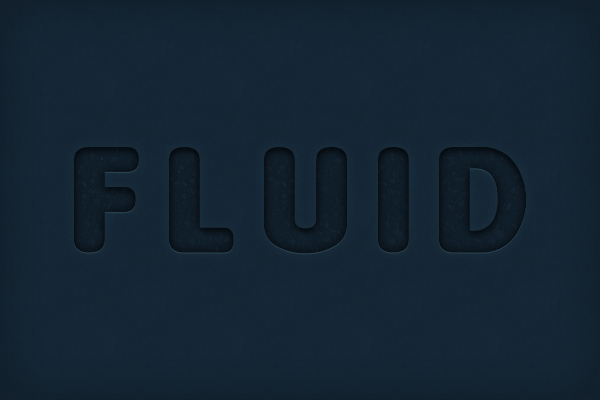
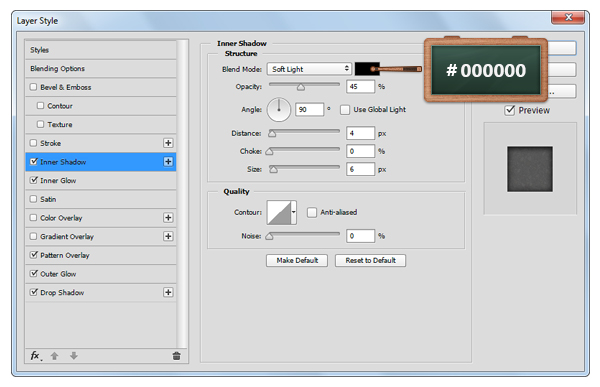
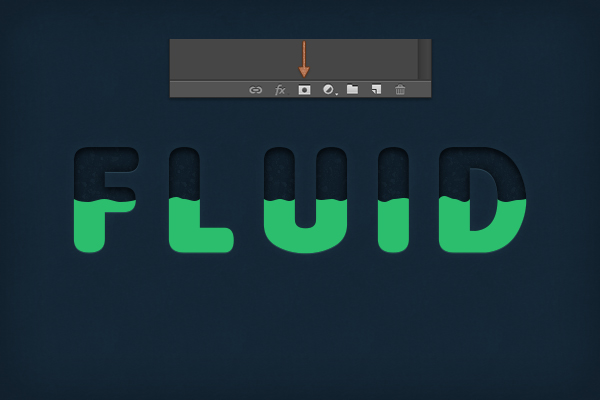
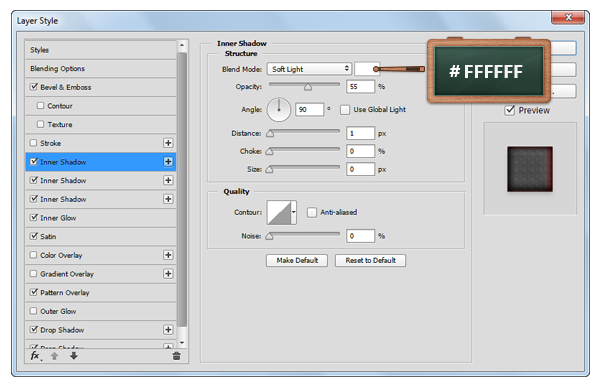
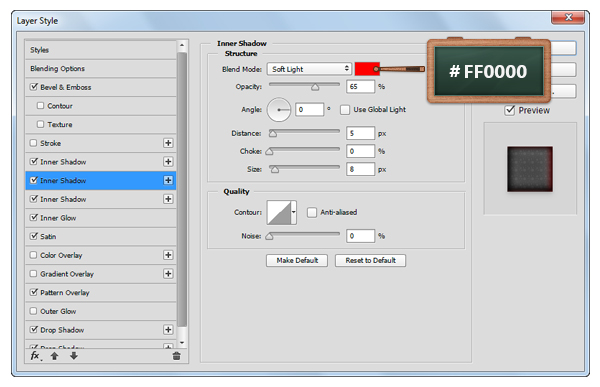
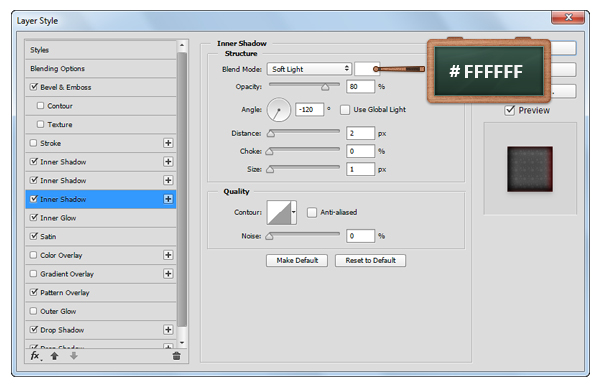
Step 4
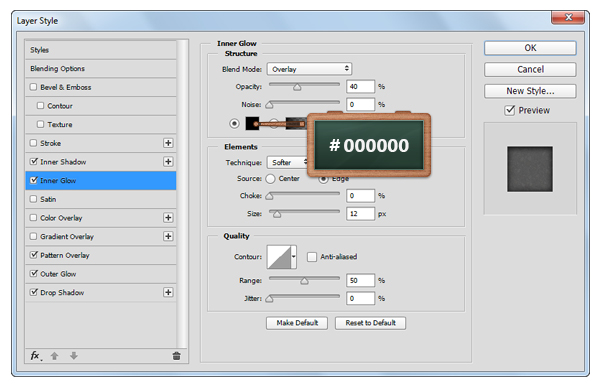
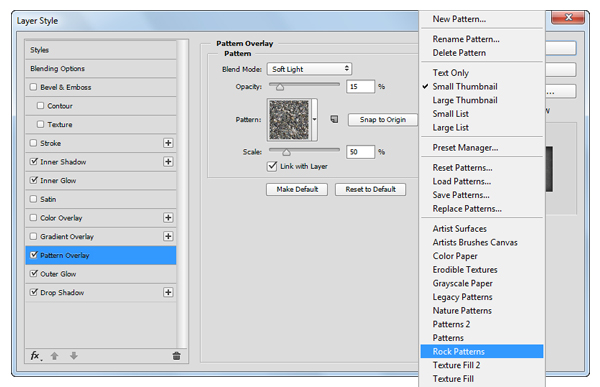
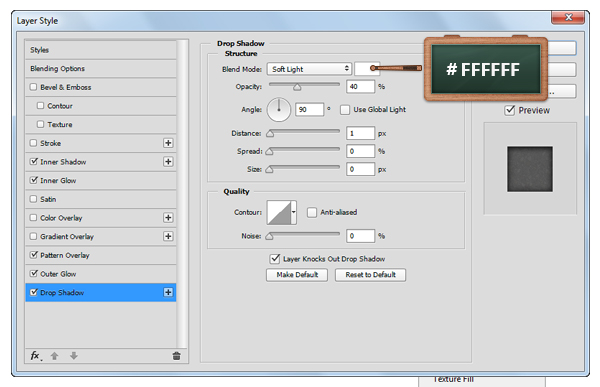
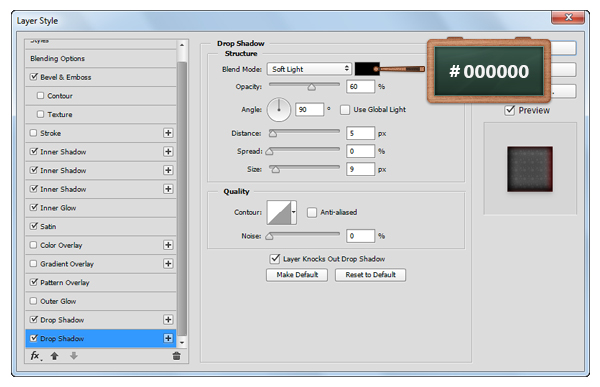
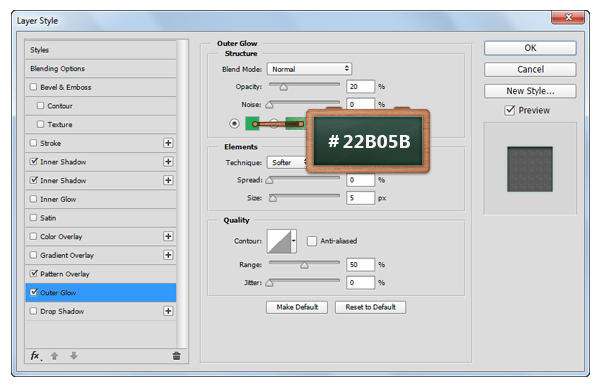
Open the Layer Style window for the text and enter the settings shown in the next images.

Step 5
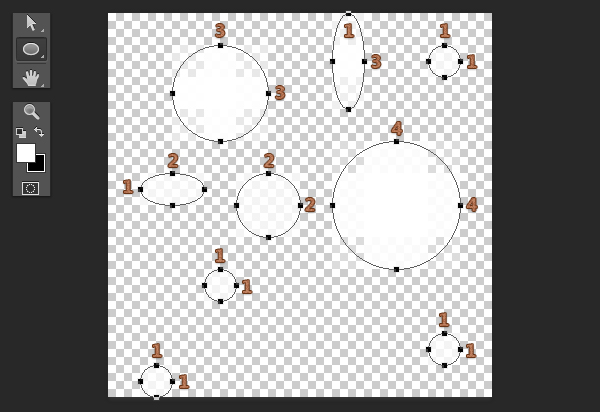
In this step we will create the pattern for the green liquid.
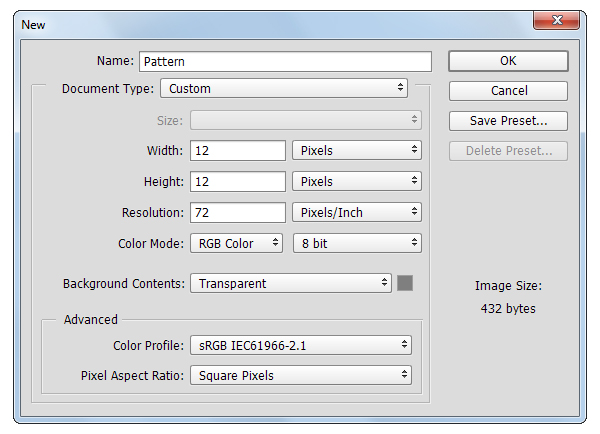
Hit Control + N, create a 12 x12px document and make sure that the Background Contents is set to Transparent.
Move to your Toolbar, set the foreground color to white ( #FFFFFF ), pick the Ellipse Tool and create the following vector shapes.
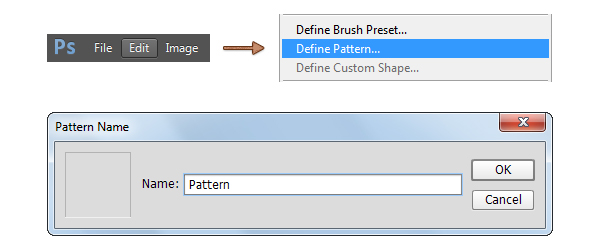
Once you’re done, save your pattern simply by going to Edit > Define Pattern. Pick a name for your pattern and click OK.
Step 6
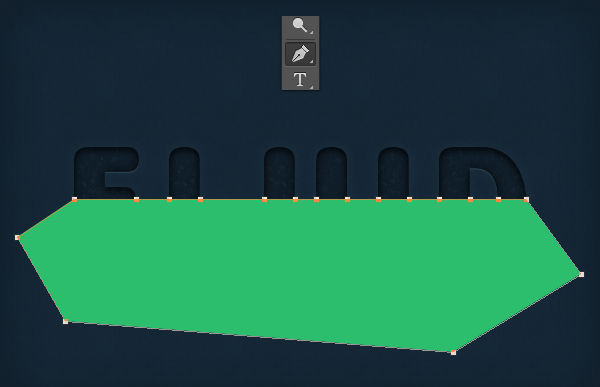
Return to your main document and focus on the Toolbar.
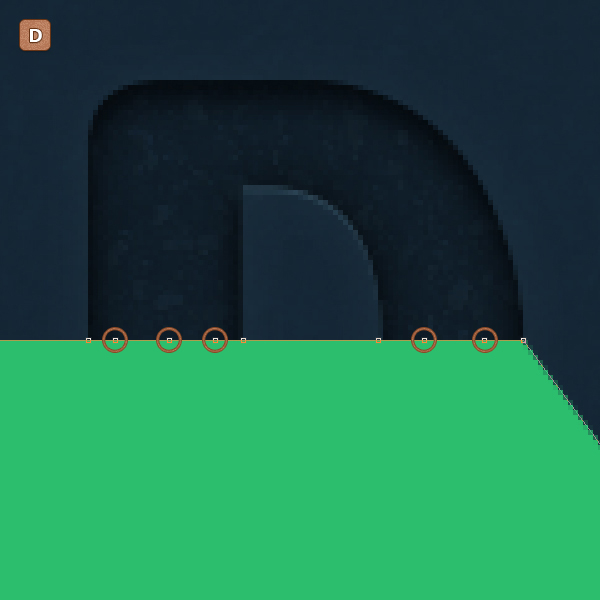
Change the foreground color to #2CBE6D, pick the Pen Tool and create the following vector shape.
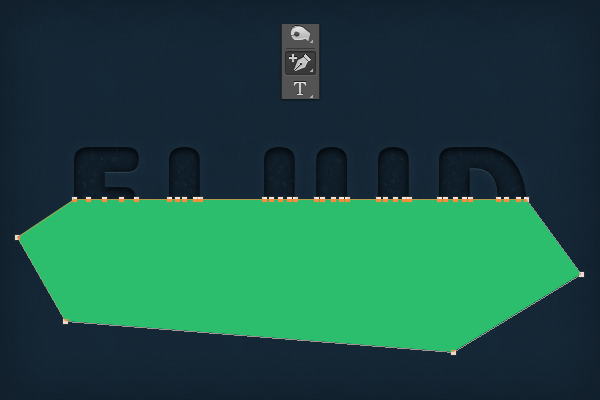
Step 7
Make sure that the vector shape made in the previous step is still selected, pick the Add Anchor Point Tool and add few anchor points as you can see in the following images.
Step 8
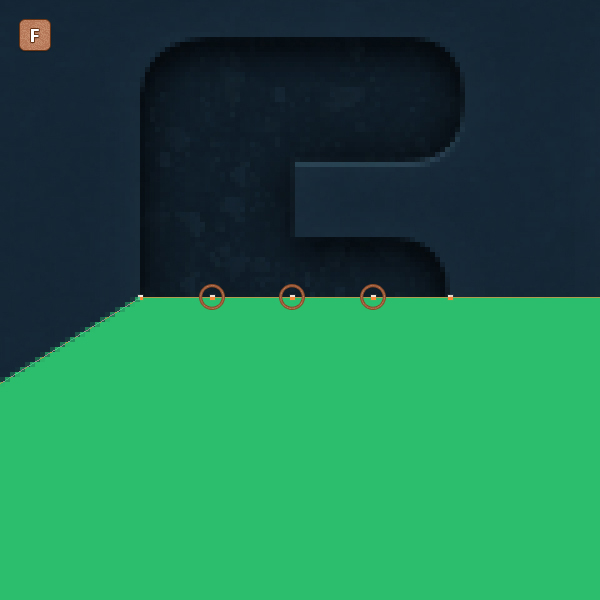
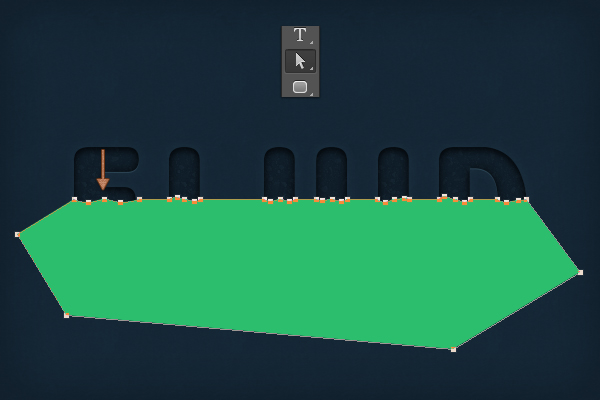
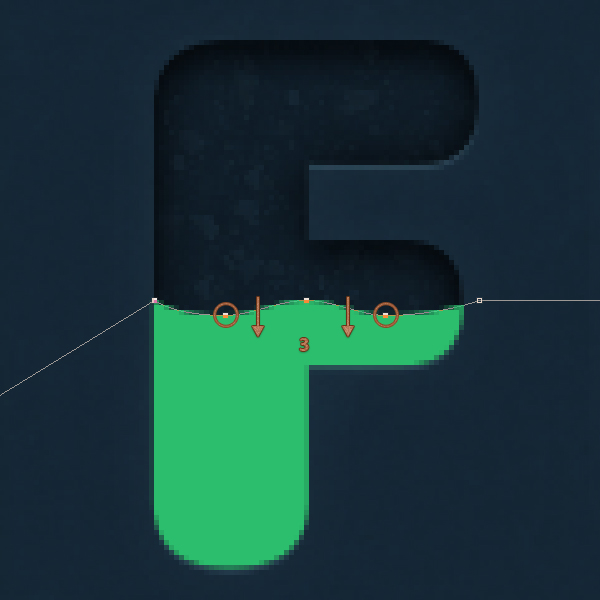
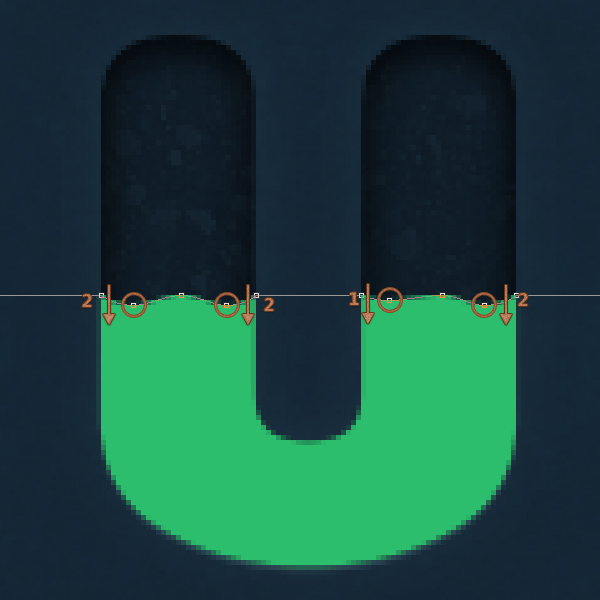
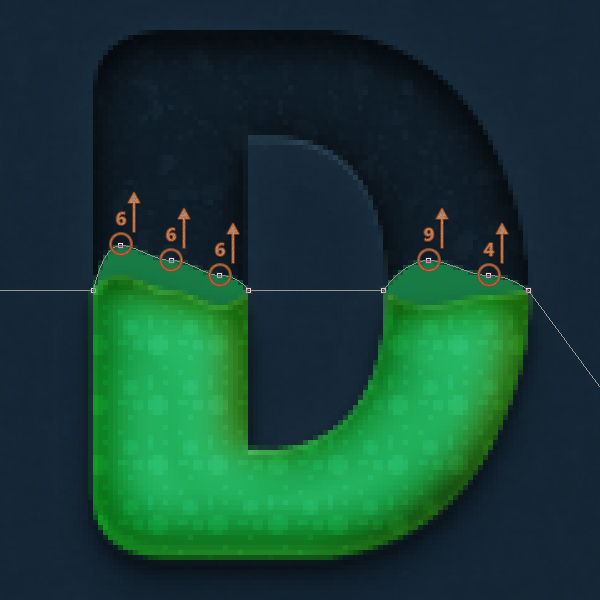
Pick the Direct Selection Tool and focus on the “F” letter. Select the highlighted anchor points and hit the down arrow button from your keyboard three times to move the anchors points 3px down.
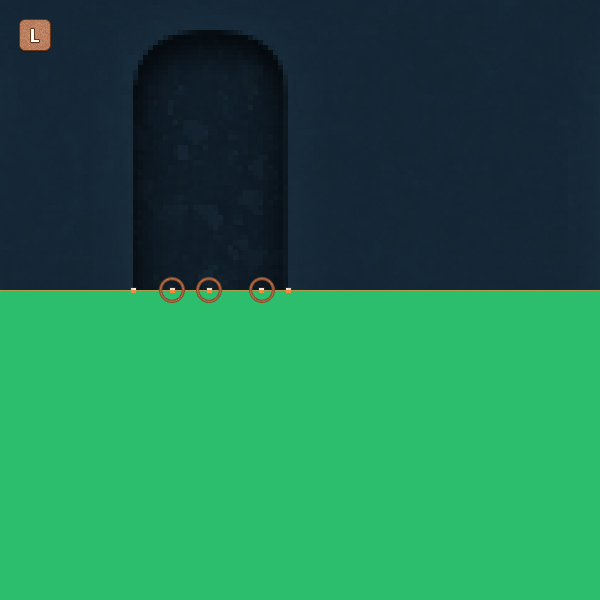
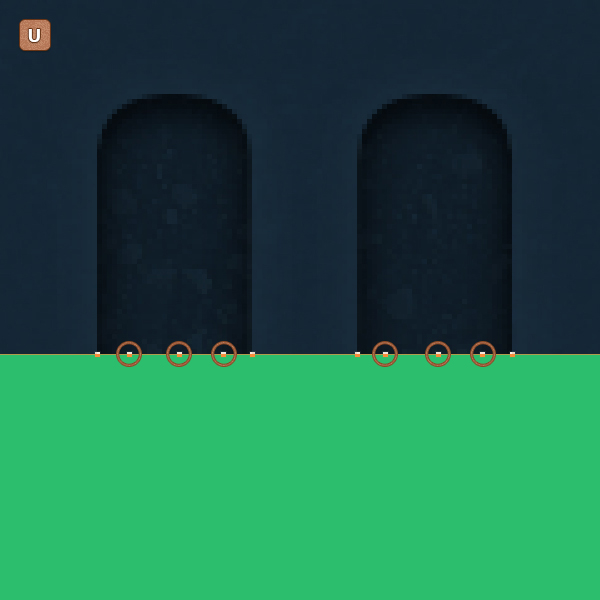
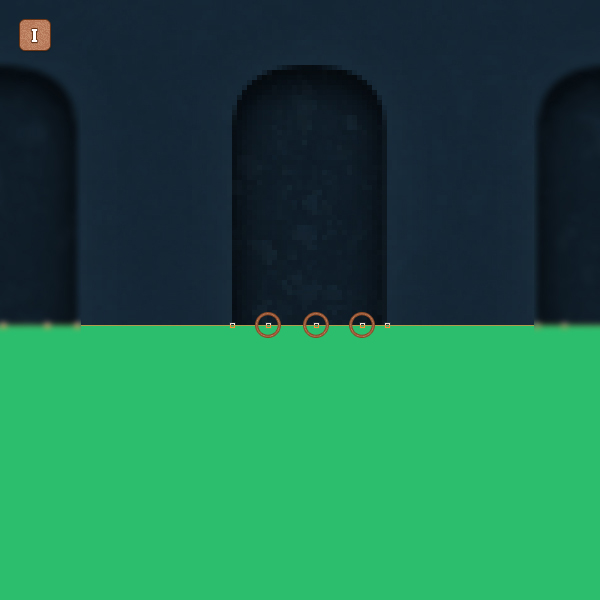
Once you’re done, focus on the rest of the text and move the anchor points as you can see in the next images.
Step 9
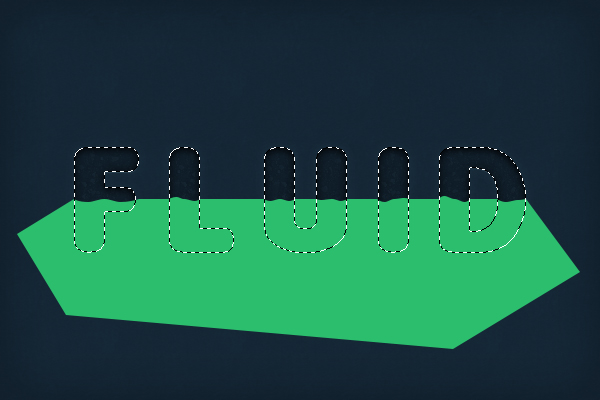
Focus on the Layers panel, hold the Control button from your keyboard and then click on the thumbnail icon that stands for the text to load a simple selection around it.
Now, make sure that the green vector shape is still selected and click on the Add Layer Mask button. Once you are done, hit Control + D to get rid of that selection.
Step 10
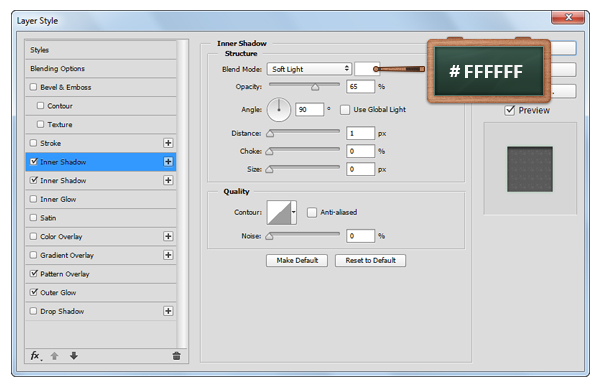
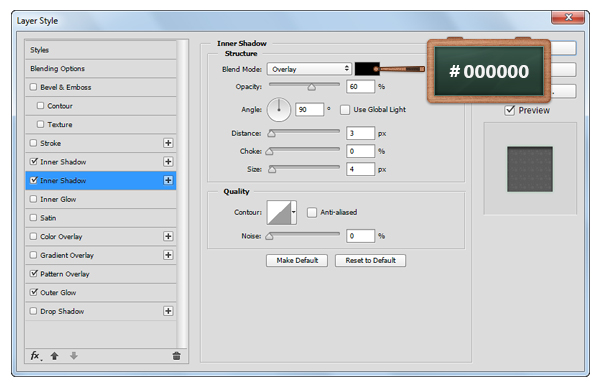
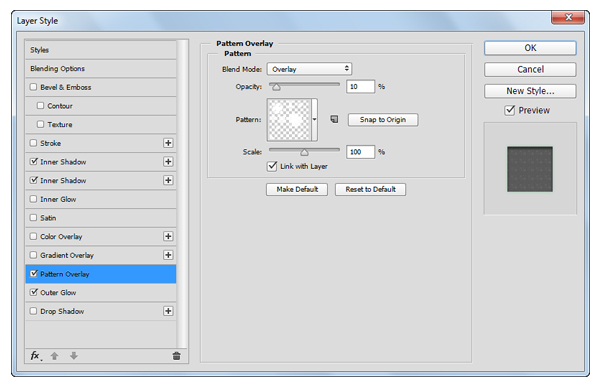
Open the Layer Style window for the green vector shape and enter the settings mentioned below. For the Pattern Overlay section use the pattern created in this tutorial.


Step 11
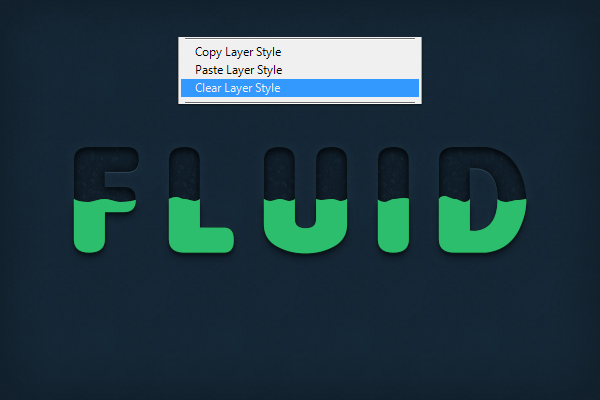
Focus on the Layers panel, make sure that the green vector shape is selected and hit Control + J to duplicate it.
Select the fresh copy, right click on it and go to Clear Layer Style.
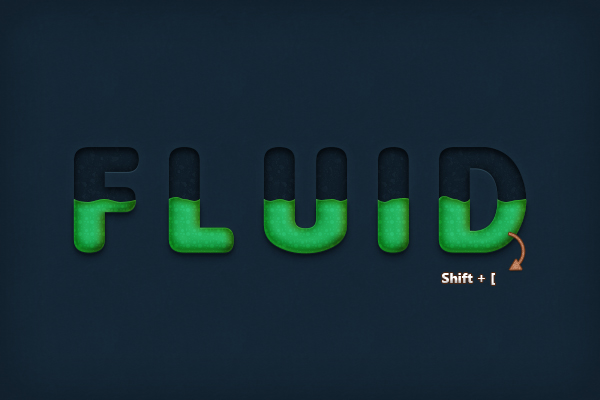
Now, change its color to a darker green ( #177B44 ) by clicking on the Layer Thumbnail Icon for this copy and then send it under the green vector shape using the Shift + [ keyboard shortcut.

Step 12
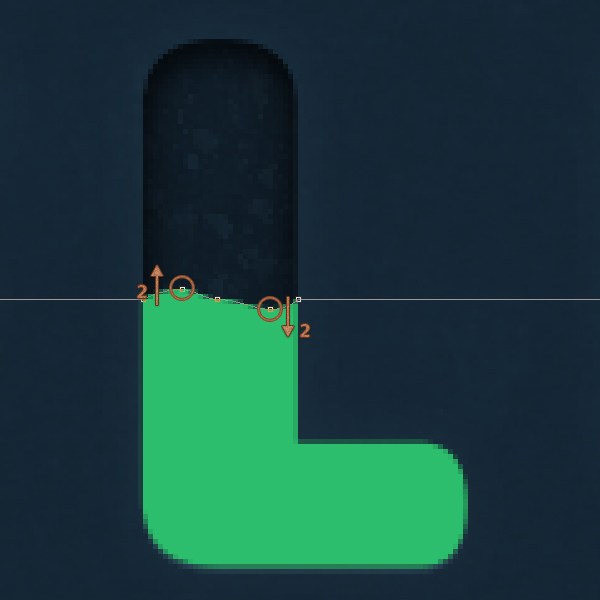
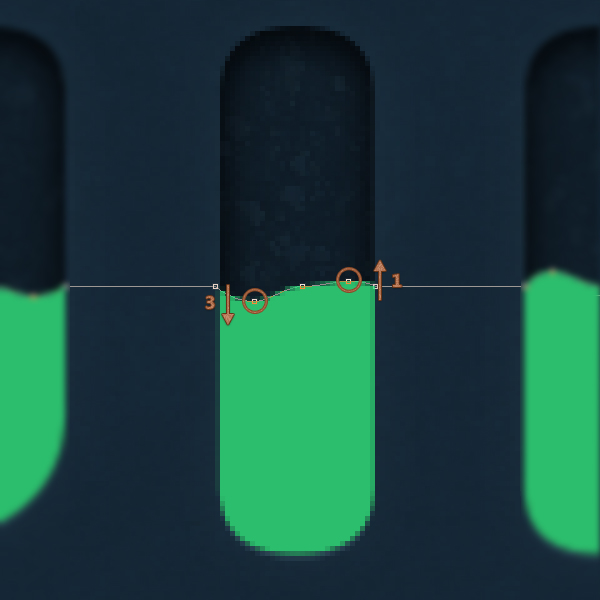
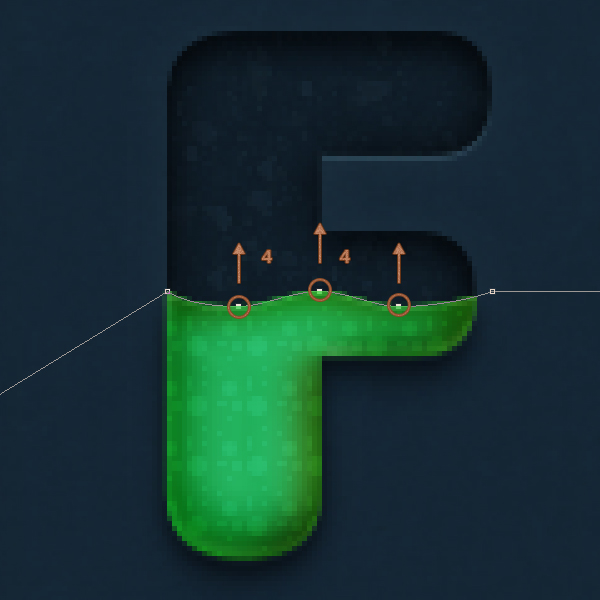
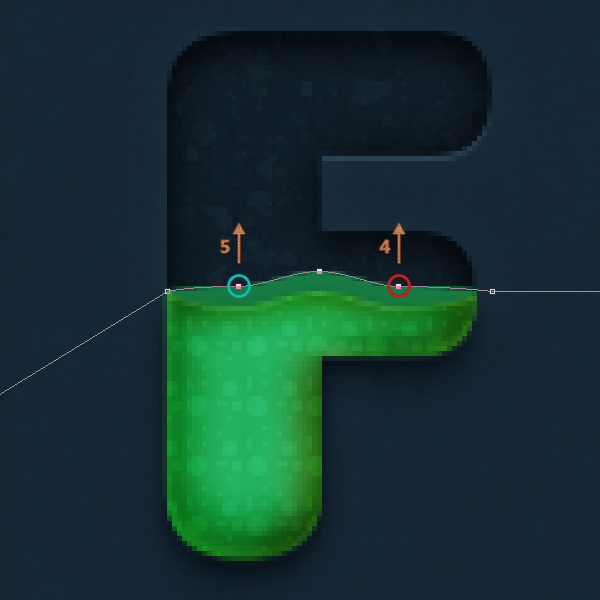
Make sure that the copy made in the previous step is selected and pick the Direct Selection Tool. Focus on the “F” text, select the anchor points from the inside of it and move them 4px up.
Now, select the anchor point highlighted with blue and move it 5px up and then select the anchor point highlighted with red and move it 4px up.

Step 13
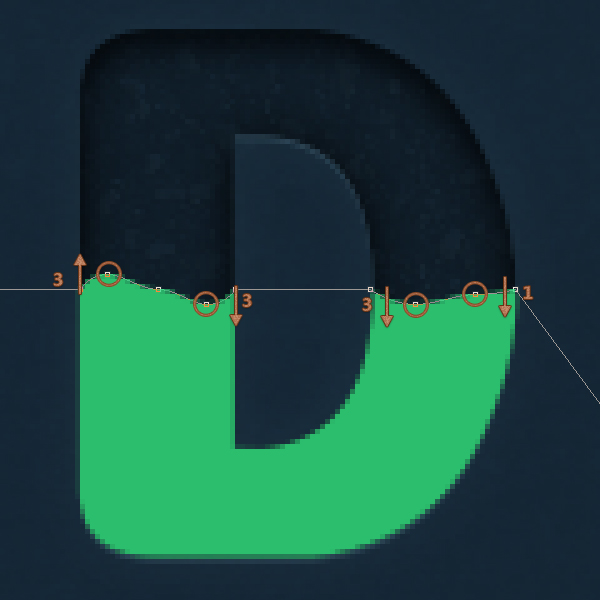
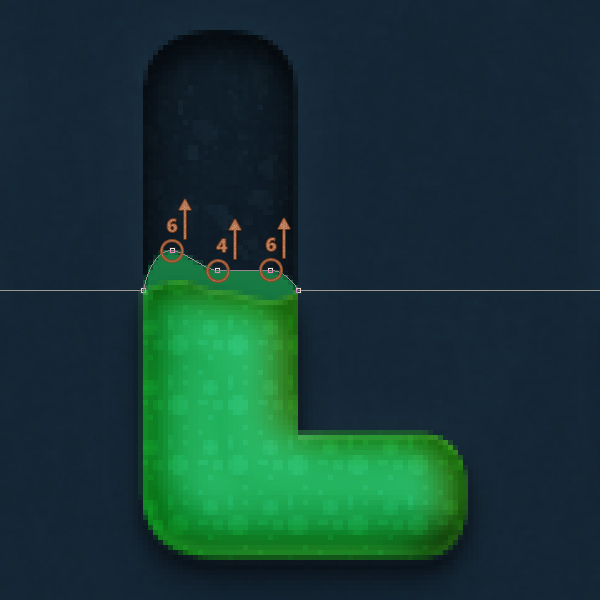
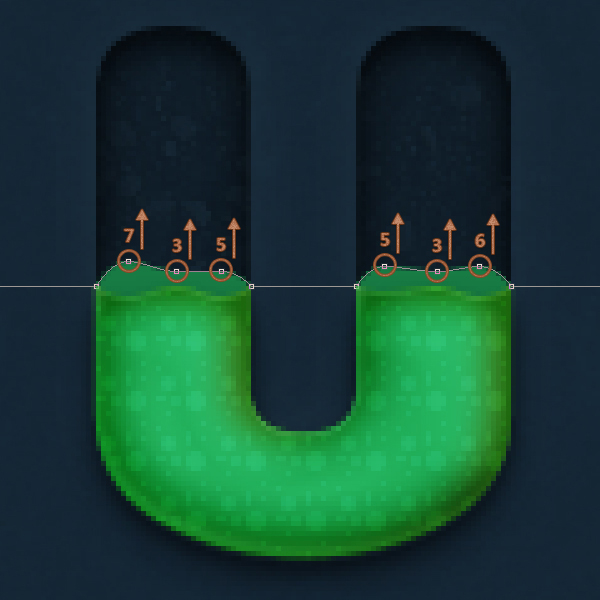
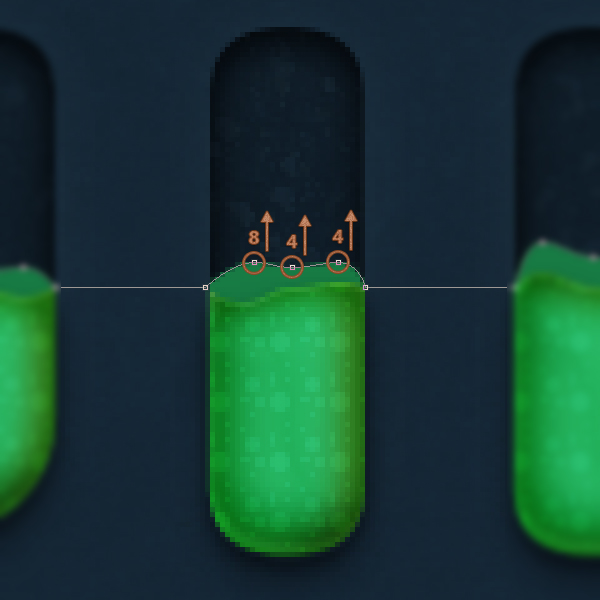
Focus on the rest of the text and using the same tool, select the anchor points one by one and move them as you can see below.

Step 14
Open the Layer Style window for the vector shape edited in the previous step and enter the settings shown below.

Step 15
Change the foreground color to #1A894C and pick the Ellipse Tool. Focus on that zone where the green vector shape is ending, create a few circles and spread them as you can see in the next images.


Step 16
Focus on the Layers panel, select all the vector shapes made in the previous step, right click on one of them and go to Merge Shapes.
Open the Layer Style window for this vector shape and enter the settings shown below.


Step 17
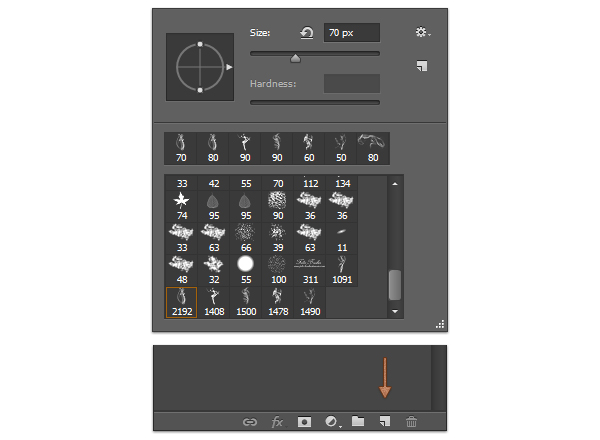
Change the foreground color to #FFFFFF, pick the Brush Tool, use the 2192 brush from this pack and then set the size to 70px.
Focus on the Layers panel, go to Create a new layer, return to your canvas and click once to create the brush.
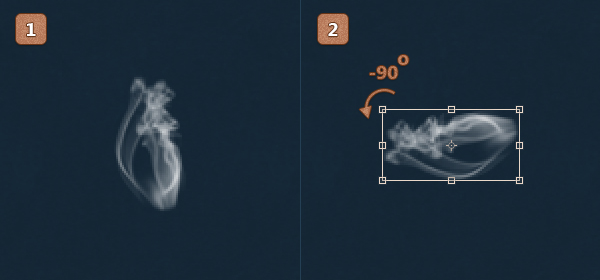
Hit Control + T, hold the Shift button, rotate your brush to -90 degrees and then place it over the “F” text as you can see below.

Step 18
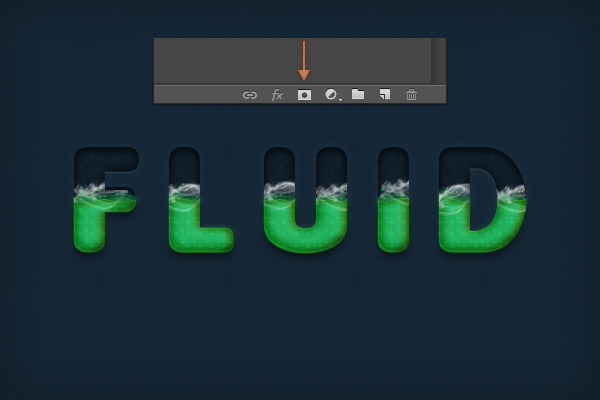
To create the “gas” effect for every letter you have to repeat the procedure from the previous step. Every brush needs a new layer.
Now, select all the layers with the brushes, right click on one of them and go to Merge Layers.
Select this fresh layer, make a selection around the text and click on the Add Layer Mask button


Step 19
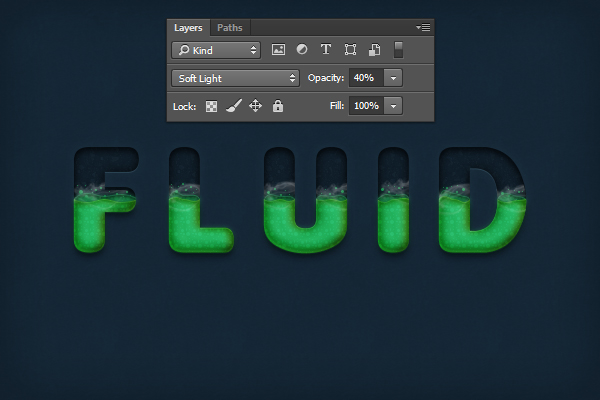
Make sure that the layer with your brushes is still selected, move to the Layers panel, set the Blend Mode to Soft Light and lower the Opacity to 40%.
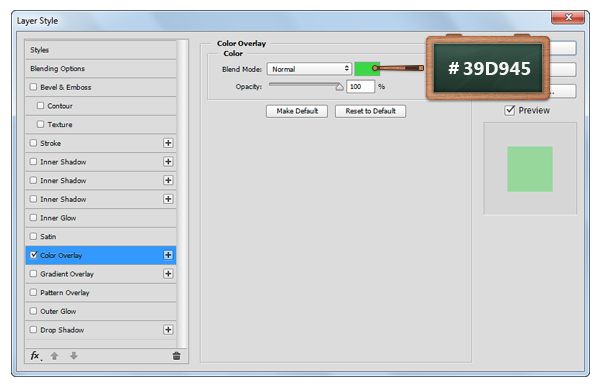
Once you’re done, open the Layer Style window for this layer, go to the Color Overlay section and change the color to #39D945.

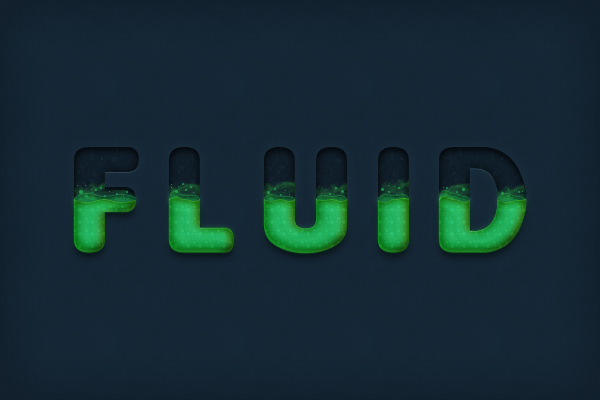
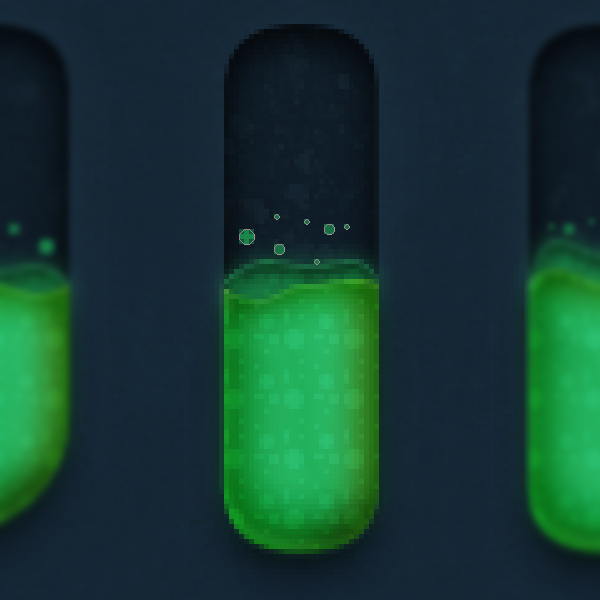
And We’re Done!
Here is how your final result should look.