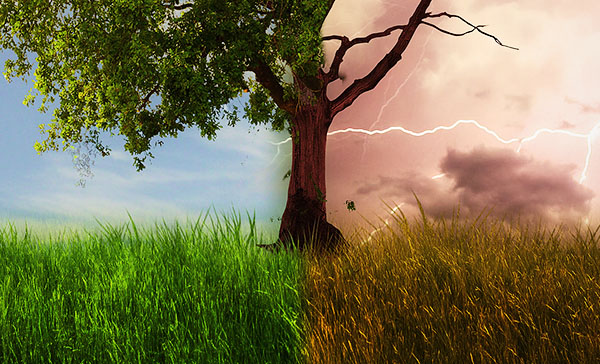
In this Photoshop tutorial we will create a dramatic tree photo manipulation.
We’ll be relying heavily on layer masks and selections but even if you’re a beginner you will be able to complete this tutorial. Let’s begin!
Final Image
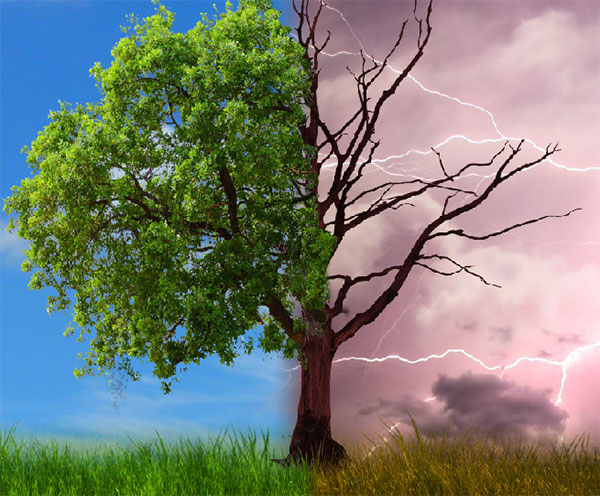
As always, this is the final image that we’ll be creating:

Tutorial Details
- Program: Adobe Photoshop CS3
- Estimated Completion Time: 30 minutes
- Difficulty: Beginner-Intermediate
Resources
Step 1
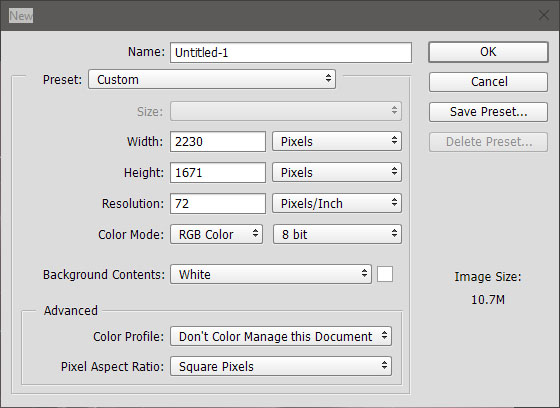
Open Photoshop and create a new document (Ctrl + N) 2230×1671 pixels.
Step 2
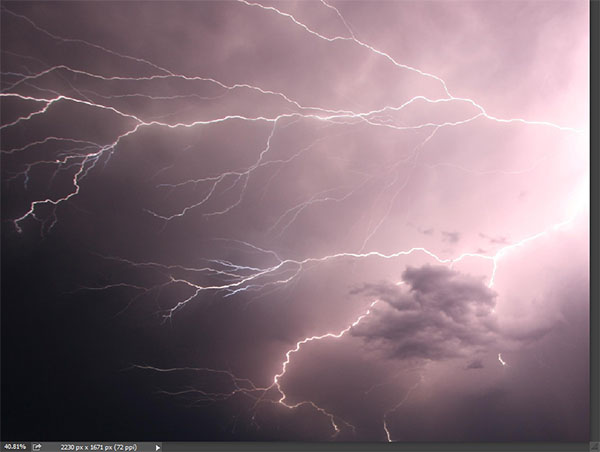
Open the file “Storm Clouds” and copy all by pressing Ctrl + A and copy with Ctrl + C.
Go back to our document and paste with Ctrl + V. Use Free Transform (Ctrl + T) to position the clouds as shown below.
Step 3
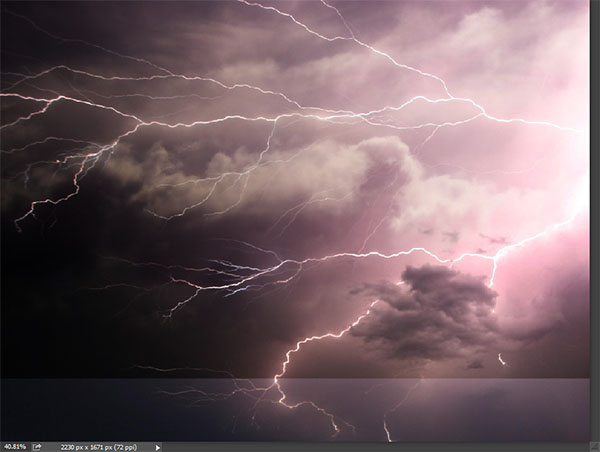
Open the file “Clouds2” and select all. Copy and paste the clouds in our document and resize them as shown below.
Change the blending mode to Soft Light to hide almost everything except for the clouds.
Use Free Transform to position and resize the clouds (hold Shift while resizing to maintain the picture ratio).
Step 4
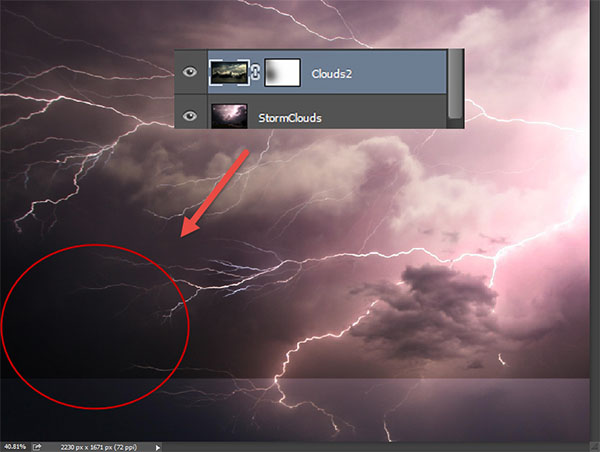
Add a layer mask to the “Clouds2” layer by going to Layer > Layer Mask > Reveal All. With the brush tool selected (B) and the standard round soft brush from presets paint with black in the layer mask (click on it to make it active) over the area shown below.
Because in a layer mask black hides by painting over the indicated area we will hide that section from view.
Step 5
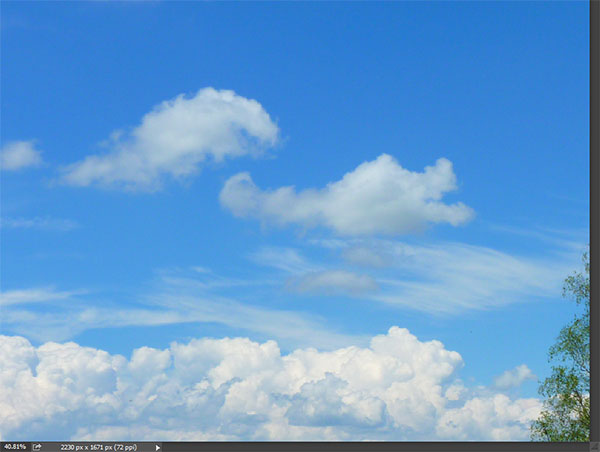
Open the file “Sunny Clouds”. Select all and copy paste the clouds into our scene. Position them as shown below.
Step 6
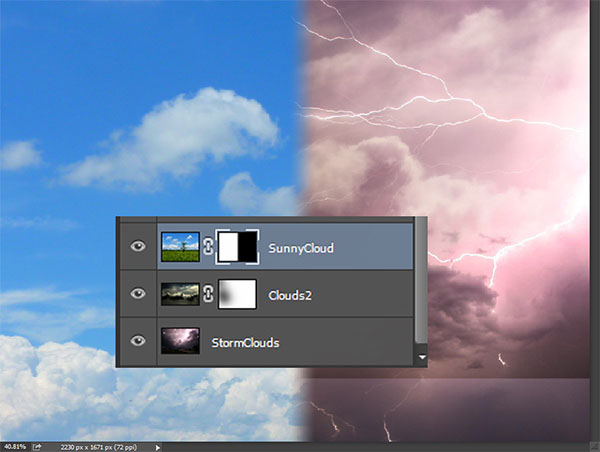
Add a layer mask to the “Sunny Clouds” layer and select the Gradient tool (G) with the standard settings (foreground to background). Press D to set the colors to black and white and drag from left to right while holding Shift in the layer mask until half of the clouds are hidden from view.
Step 7
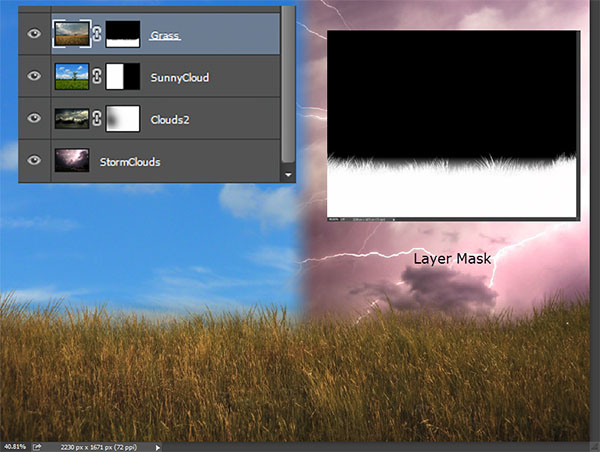
Open the file “Grass”. Select all and copy/paste the grass into our scene as shown below.
Add a layer mask to the grass layer and with the gradient tool you used in the previous step, drag from the top downwards in order to hide everything but the grass.
Import the “Grass Brush” by double clicking on the .abr file. Select the Brush tool and choose a grass brush.
Paint with white on the layer mask where the black area meets the white area in order to create the illusion that the grass is sticking out (before you had only a flat line between the grass and the sky).
Step 8
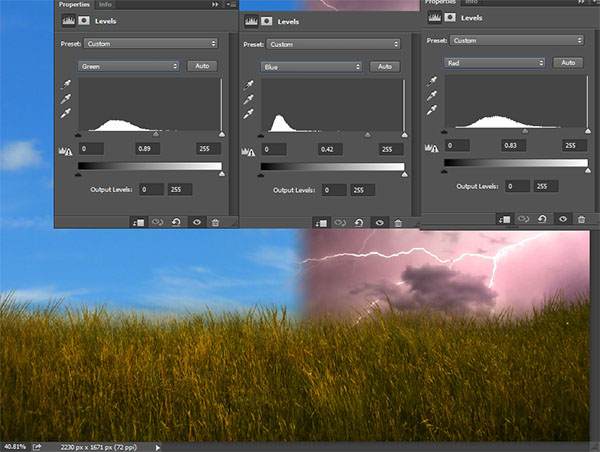
Create a Levels Adjustment Layer (Layer > New Adjustment Layer > Levels) and clip it to the grass layer by Alt-clicking between the two layers (this will restrict the effect of the levels layer only to the grass layer).
Use the settings shown below to boost both the contrast and the colors in the grass layer.
Step 9
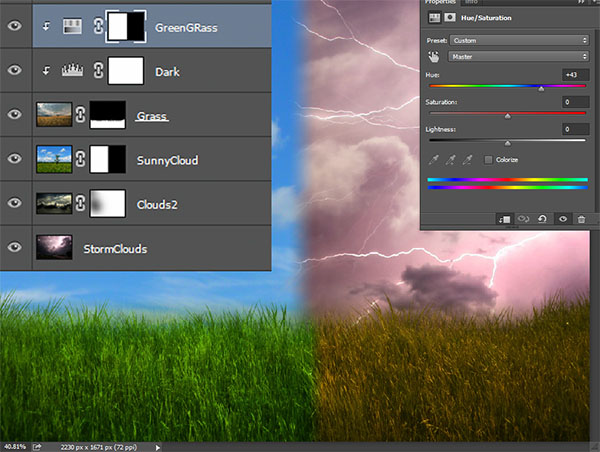
Create a Hue/Saturation Adjustment Layer (Layer > New Adjustment Layer > Hue/Saturation) and clip it to the uppermost layer (the curves layer) in order to restrict the effects only to the bottom most clipped layer (the grass layer).
Increase the Hue slider to 43 and use the gradient tool in the layer mask to restrict the effect only to the left part of the grass (click on the layer mask to make it active and with the Gradient Tool drag from right to left while holding Shift).
Step 10
Open the file “Old Tree”. Select all and copy/paste the tree into our document. Place this dried tree in the middle of the scene – right where the green grass meets the yellow grass.
Add a layer mask to the tree and with a grass brush paint with black over the tree roots so that it will blend nicely with the existing grass.

Step 11
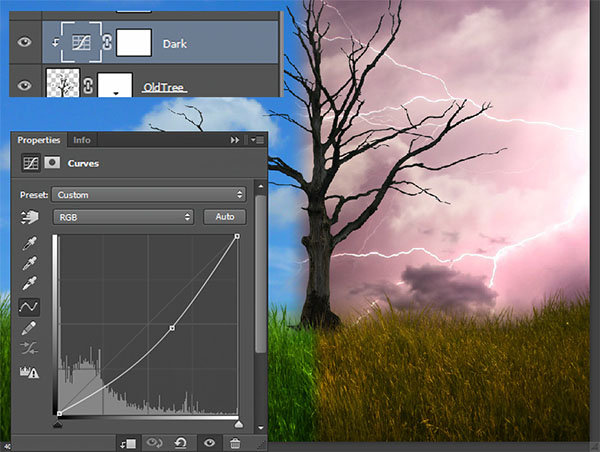
Create a new Curves Adjustment Layer (Layer > New Adjustment Layer > Curves) and clip it to the tree layer (Alt-click between the two layers in the layers palette). Drag the curve down to darken the tree.
Step 12
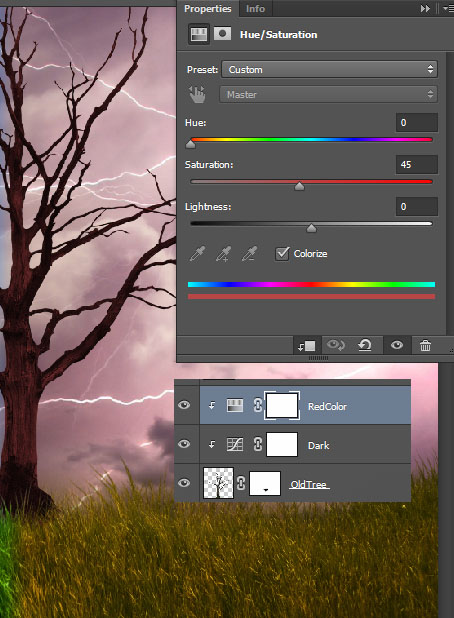
Create a new Hue/Saturation Adjustment Layer and drag the Hue slider to 0 and the Saturation slider to 45.
Clip this layer to the curves layer in order to restrict the effects only to the tree.
Step 13
Open the file “Green Tree”. Select all and copy paste the tree into our document. Put this tree in the middle of the scene over the dried tree.
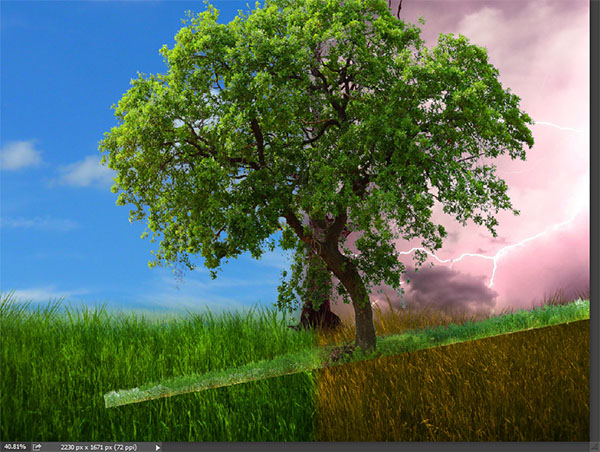
Step 14
Add a layer mask to the “Green Tree” layer and with the standard chalk brush paint with black in the layer mask to hide the whole right side and all of the trunk/roots.
Step 15
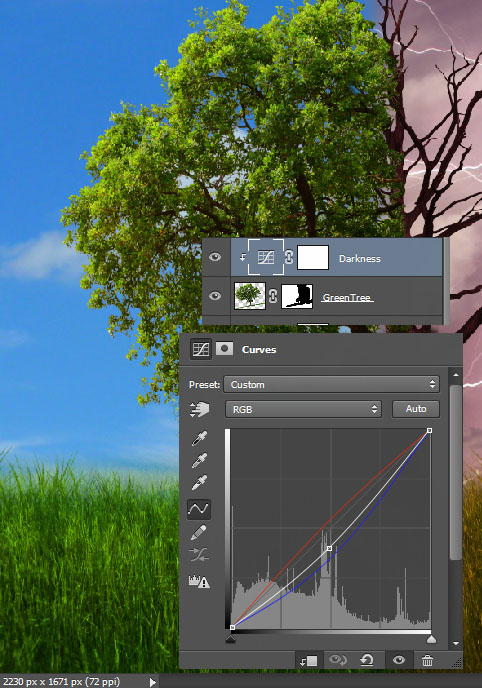
The tree is a bit too light for our scene. Let’s darken it a bit. Create a new Curves Adjustment Layer and clip it to the tree layer.
Use the settings shown below to both darken the tree and adjust the colors.
Step 16
All the elements in our scene are placed so it’s time for some final adjustments.
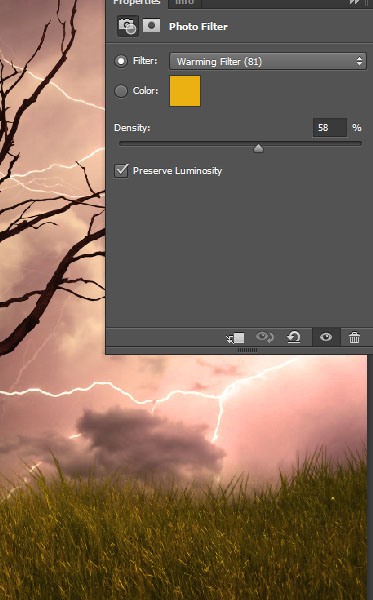
Let’s start by unifying the overall colors. Create a new Photo Filter Adjustment Layer (Layer > New Adjustment Layer > Photo Filter) and use the settings shown below.
Step 17
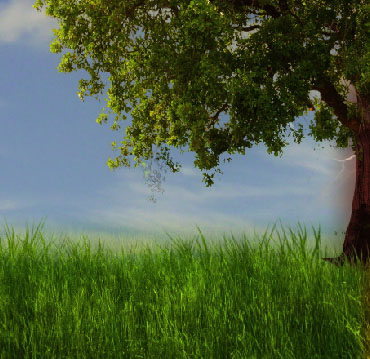
Create a new layer from all the visible layers by pressing Ctrl + Shift + Alt + E.
Apply a 50px Gaussian Blur (Filter > Blur > Gaussian Blur) and change the blending mode to Soft Light.
The effect will be too strong so you can lower the opacity (mine is 35%).
Step 18
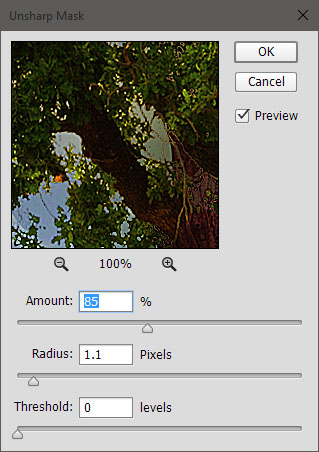
Create a new layer from all the visible layers again but this time apply a sharpen effect by going to Filter > Sharpen > Unsharp Mask and using the settings shown below.
Step 19
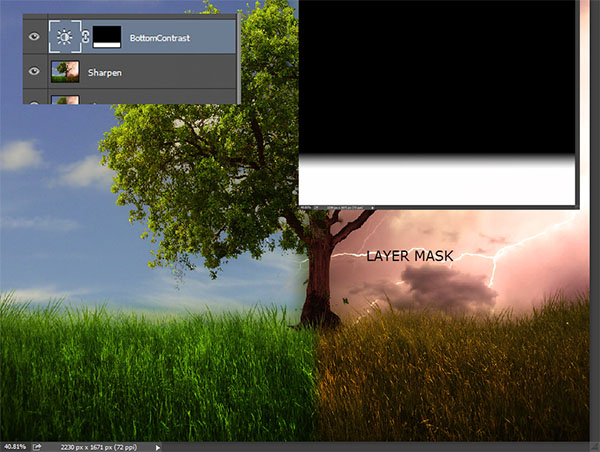
The bottom of our scene (mainly the grass) looks washed out and out of contrast.
Let’s fix it. Create a new Brightness/Contrast Adjustment Layer (Layer > New Adjustment Layer > Brightness/Contrast) and increase the Contrast slider to 52.
Use the gradient tool in the layer mask to apply this effect only to the grass (hold the shift key and drag with the gradient tool from up towards down).
Step 20
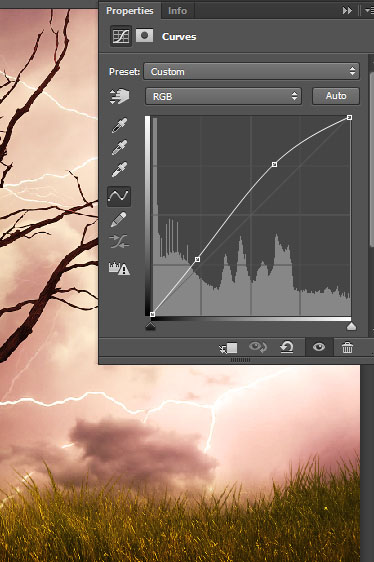
Let’s play a bit with the light in our scene. Create a new Curves Adjustment Layer and use the settings shown below to increase the overall light and boost contrast.
Step 21
And finally let’s add a vignette to add focus to our scene.
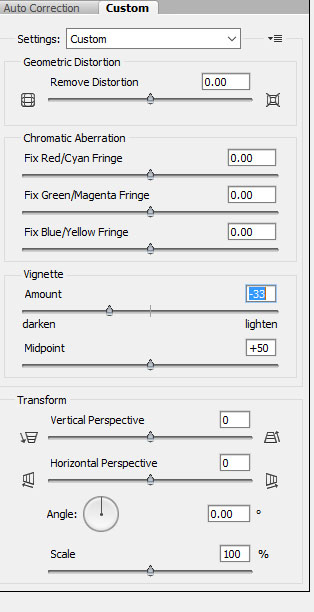
Create a new layer and fill it with white (Shift + F5). Change the blending mode to Multiply and go to Filter > Lens Correction.
Use the settings shown below and press ok. You can lower the opacity of this layer if the vignette effect is too strong (my opacity is 38%).
And we’re done.
And We’re Done!


