This tutorial explains how to use a couple of images, a blur filter, and a simple brush to create a realistic text-on-wet-window effect.
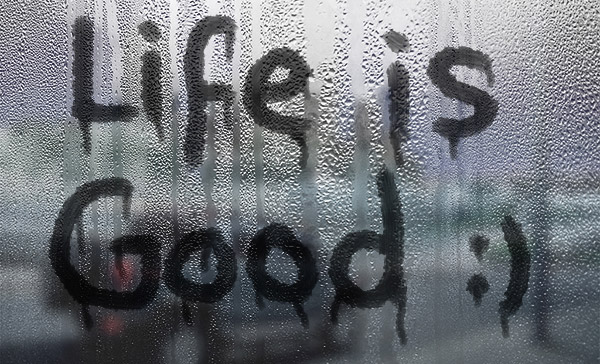
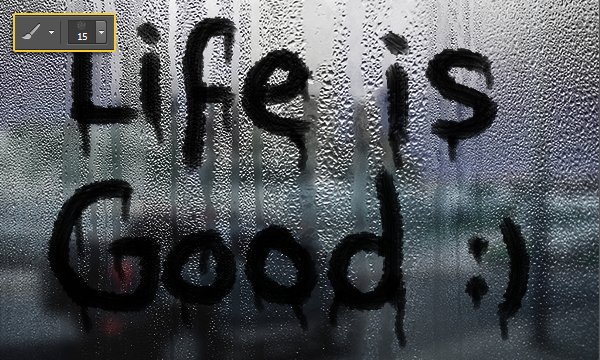
Final Image
Resources
- Rain Widescreen HD Wallpapers from hdwallpapersarena.com.
- Hummer H2 Night City Car Wallpaper by SeKoJa.
Step 1
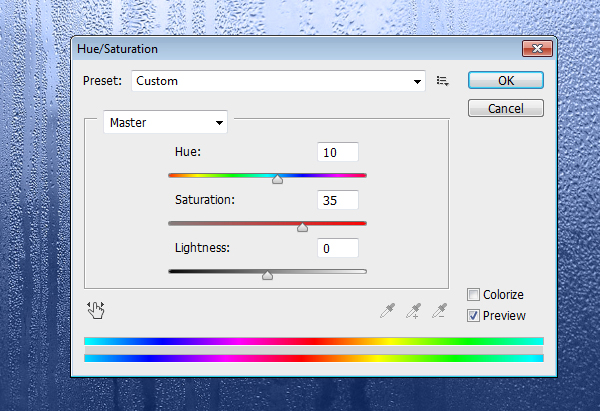
Open the “Rain Widescreen HD Wallpaper” image in Photoshop, then go to Image -> Adjustments -> Hue/Saturation. Change the Hue to 10 and the Saturation to 35.
Go to Image -> Adjustments -> Desaturate.
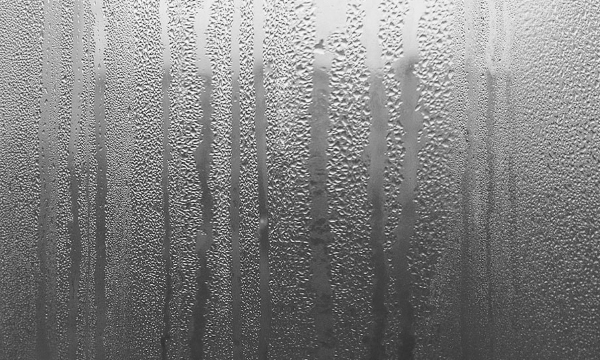
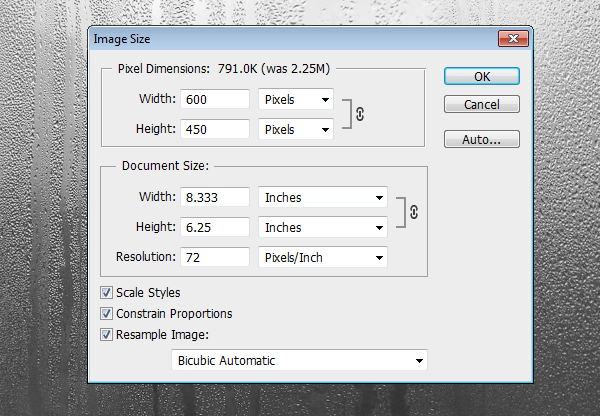
Then go to Image -> Image Size, make sure that the “Constrain Proportions” box at the bottom is checked, and type 600 in the Width field at the top. You can type in any other value you like depending on the size you want and the text you’re going to create. Click OK.
Step 2
Place the “Hummer H2 Night City Car Wallpaper” image on top of the “Rain Widescreen HD Wallpaper” image. Then go to Edit -> Free Transform to resize the image. Press and hold the Shift key to constrain proportions, then click and drag the corners inward.
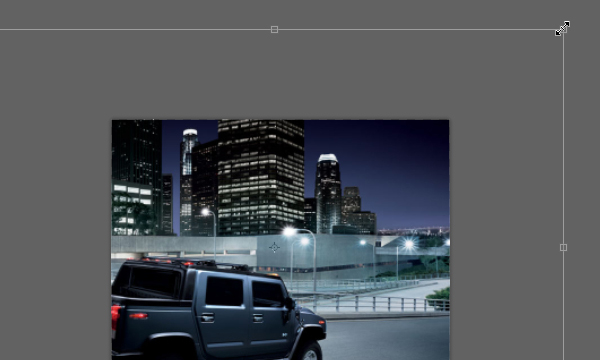
When you’re happy with the size, hit the Enter/Return key to accept the changes.
Step 3
Change the “Hummer H2 Night City Car Wallpaper” image layer’s Blend Mode to Overlay, and its Opacity to 80%.
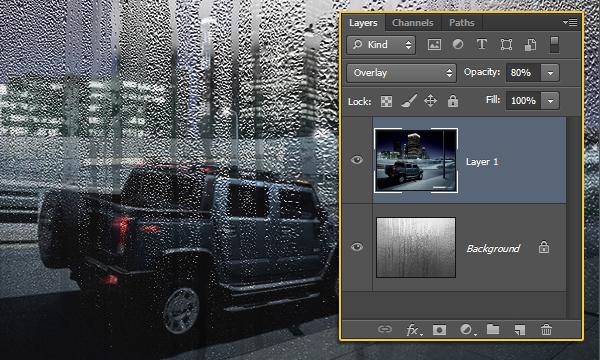
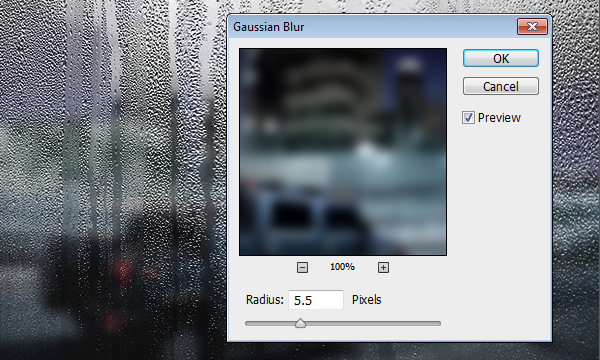
Go to Filter -> Blur -> Gaussian Blur, and set the Radius to 5.5.
Step 4
Create a new layer on top of both layers and call it “Text”. Set the Foreground color to Black, pick the Brush Tool, and choose the “Rough Round Bristle” Photoshop default brush tip. Change the brush’s size to a value of your choice depending on how thick or thin you want your text to be. Here, it is set to 30 px.
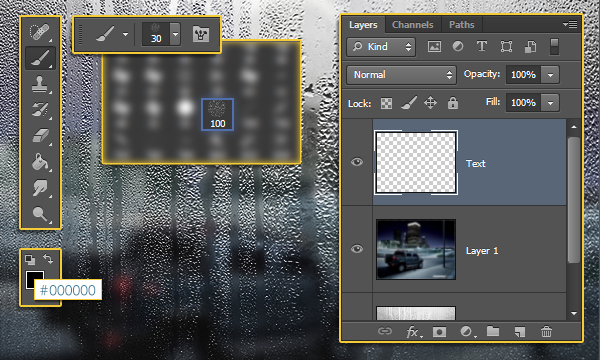
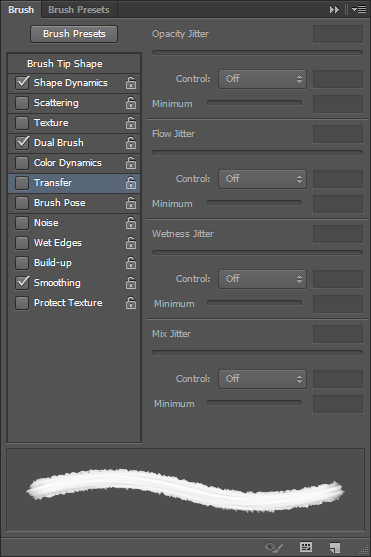
Open the Brush panel (Window -> Brush), and un-check the Transfer box.
Step 5
Create the text you like using the brush you picked. Take your time with this step, and remember that you can Undo and re-create the text as many times as needed.
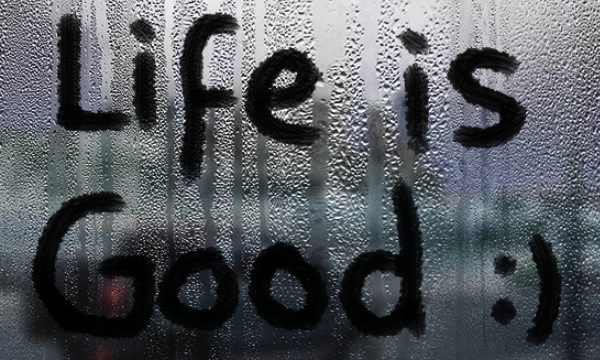
Once you’re done, decrease the brush size to a small value (around 8 px), then add some little dripping lines below the letters. You might want to thicken the lines’ tops a little bit for a more realistic effect.
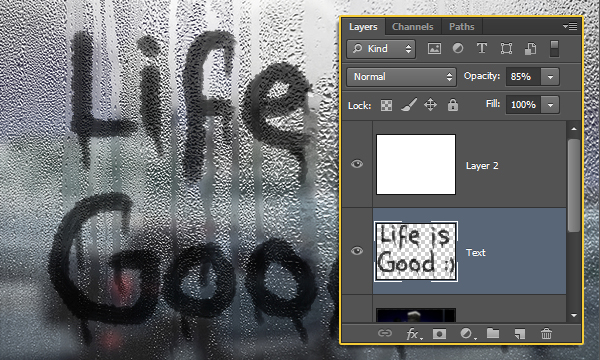
Step 6
To emphasize the text a bit more, create a new layer on top of all layers, fill it with White, then change its Blend Mode to Soft Light and lower its Opacity to a value of your choice (something around 55%).
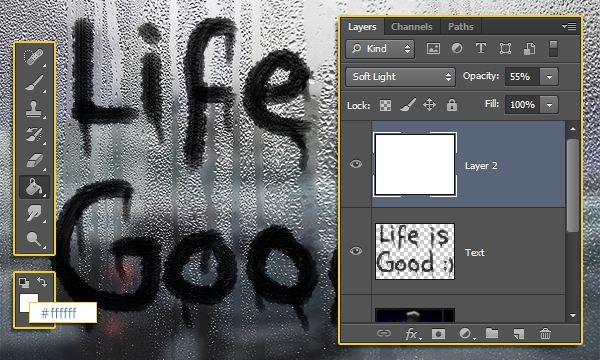
Finally, select the “Text” layer and lower its Opacity accordingly. Here, it is changed to 85%.
And that’s it!
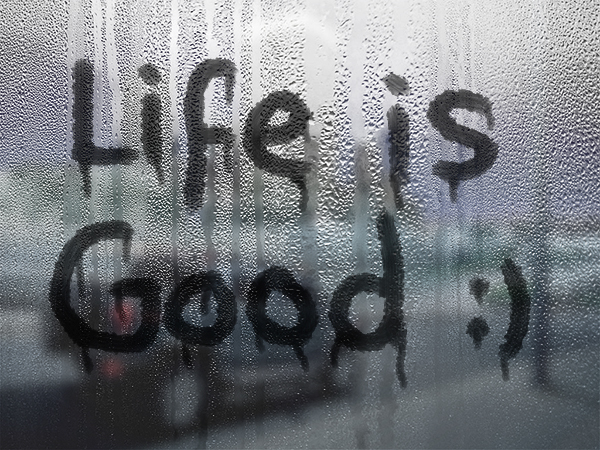
Final Image
Hope you enjoyed the tutorial and found it helpful.