Wanna be a super star? First of all, create your own cool logo! You don’t know how to do this? This Photoshop tutorial created special to help you.
Start by making a new document in Photoshop, something like 500×300 pixels and fill it with gradient (use colors of #c0cfcc and #e2e5de).

After that you should stylize your background. I think, the better way will be to add a couple of white lines to the background. To do this use the Pen Tool (select the Paths instead of Shape Layers) and draw such curve line as mine:
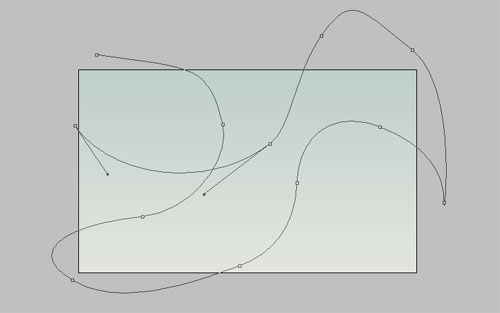
After hat get out the Brush Tool and a hard round brush about 1 pixel with white color. Then activate the Direct Selection Tool and right-click on the curve line, select Stroke Path as on picture below:
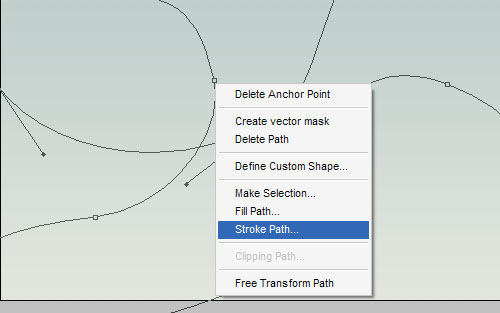
A little dialog box will appear as in the screenshot. Choose Brush and press OK.

See the result on my picture below.

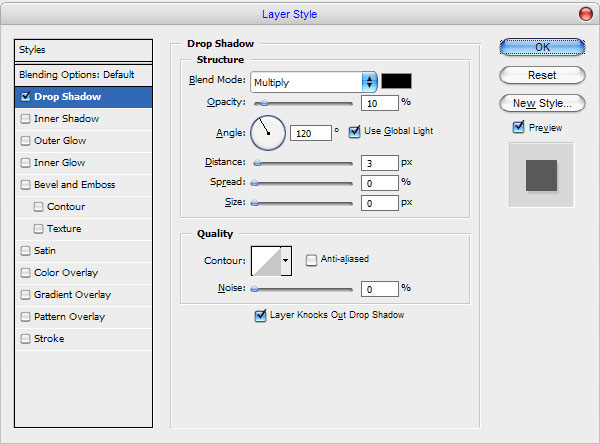
Ok, now apply the Drop Shadow layer style for current layer.
Looks better than before.

Ok, move to the next step. Start with creating the logo. Use the Horizontal Type Tool to write down something like ‘SUPER STAR’ with white color. Actually, it does not matter what font color you will use.

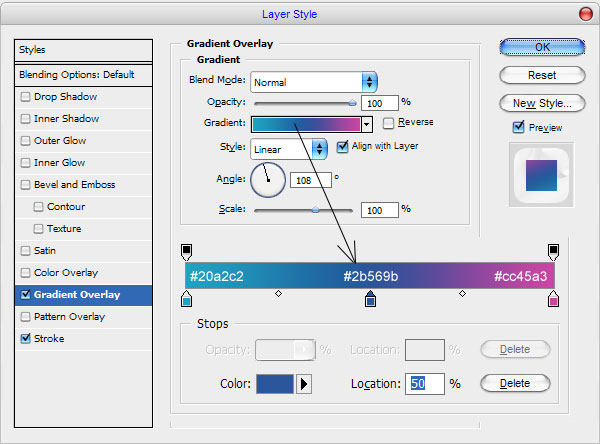
In the above image I’ve used a font called AG ForeignerULB (65 pt, Crisp), which is sadly a commercial font. Feel free to try a different font such as Arial Black. Ok, before we start the next step we need to find some suitable texture which we will use later. I think, this one will be good for our tutorial. First of all we need to add the pattern to Photoshop patterns palette to use it for creating text effect later. Open the picture or find another one using Google Images and use Edit > Define Pattern to save this picture as pattern. Go back to our main document and apply the Gradient Overlay and Stroke layer styles for text layer.
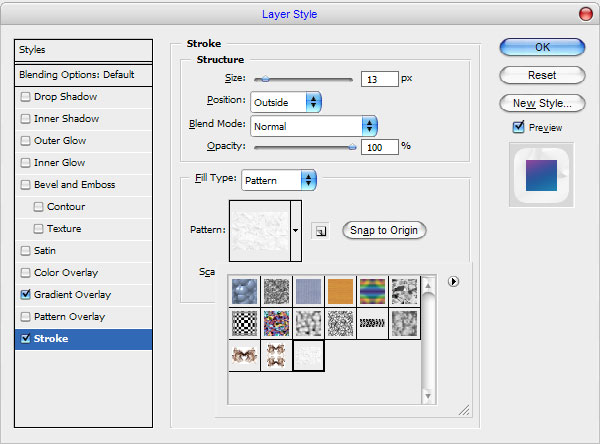
Now, your image should now look like the image shown below:

Ok, I think it is very good logo. But it is unfinished yet. Something is missing? What exactly? Of course the stars! Select the Custom Shape Tool and select the standard Photoshop shape with next presets:
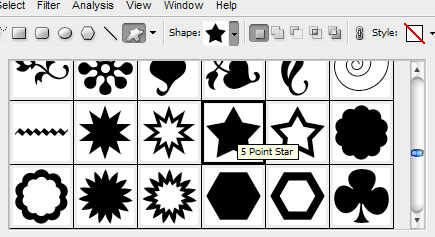
Print a couple of white stars on the words.

Ok, then merge all layers with stars and the text in one layer and apply the Drop Shadow layer style to new received layer:

Now, we have something like my picture below:

After that use Layer > layer Style > Create Layer to separate layer style to the new layer and transform it a little bit with Edit > Transform > Distort. The final picture should be the next:

I like it so much and what about you? Hope you like it to! Now, time to add the slogan to our logo. Select the Horizontal Type Tool again and draw out the text line in the bottom. I prefer to use the Bickham Script Pro font, but if you don’t have it fell free to use another one. For this text line I used the color of #4f5e70:

To finish off the tutorial, I think, we should add a couple of stars to the background. Select the Custom Shape Tool again and the draw the stars.

Merge all layers with stars shapes in one, then go to the layer under and draw a little bit more black stars shapes.

Merge all layers with black stars shapes in one layer and change opacity to 10% for this layer.

Ok we are done! Our logo looks as real superstar logo! Hope you enjoyed this Photoshop tutorial!

