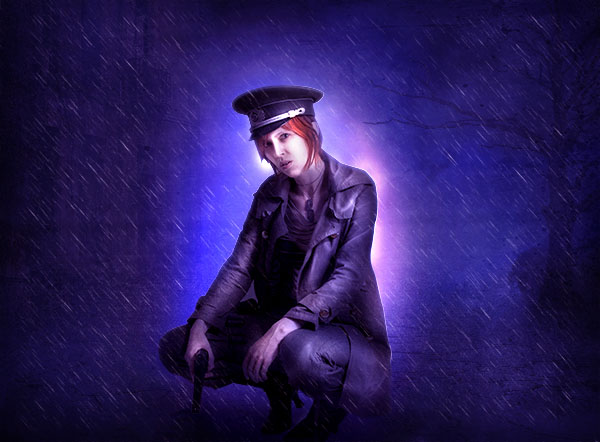
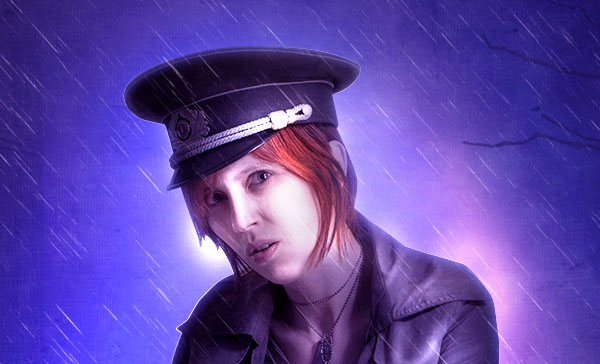
In this Photoshop tutorial we will create a complex photo manipulation depicting a soldier girl standing in the rain.
We are going to heavily use layer masks, blending modes and selections but with patience even beginners will be able to complete it. Let’s begin!
Final Image
As always, this is the final image that we’ll be creating:

Tutorial Details
- Program: Adobe Photoshop CS3
- Estimated Completion Time: 30 minutes
- Difficulty: Beginner-Intermediate
Resources
Step 1
Create a new Document 3300×2432 px (Ctrl + N).
Step 2
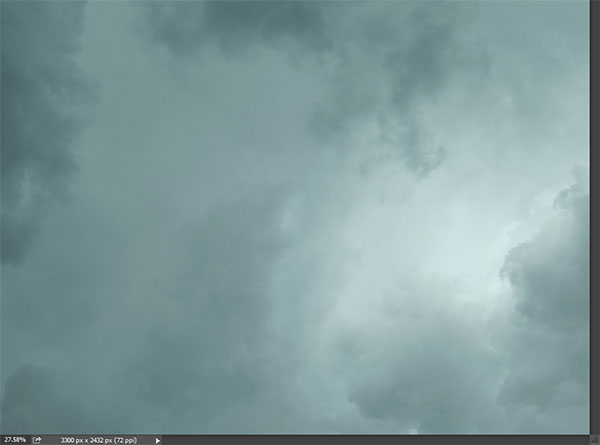
Open the file “Clouds”. Select all (Ctrl + A) and copy (Ctrl + C). Go back to our scene and paste with Ctrl + V.
Use the Free Transform (Ctrl + T) to resize and position the clouds as shown below.
Step 3
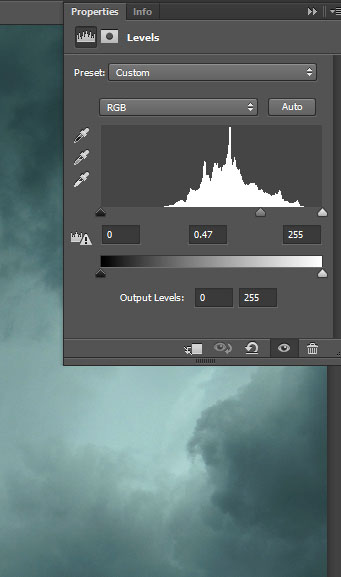
Create a new Levels Adjustment Layer (Layer > New Adjustment Layer > Levels) and use the settings shown below to darken the clouds.
Step 4
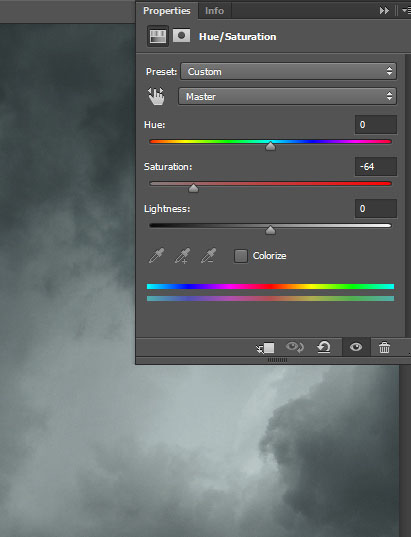
Create a new Hue/Saturation Adjustment Layer (Layer > Adjustment Layers > Hue/Saturation) and use the settings below to desaturate the clouds.
Step 5
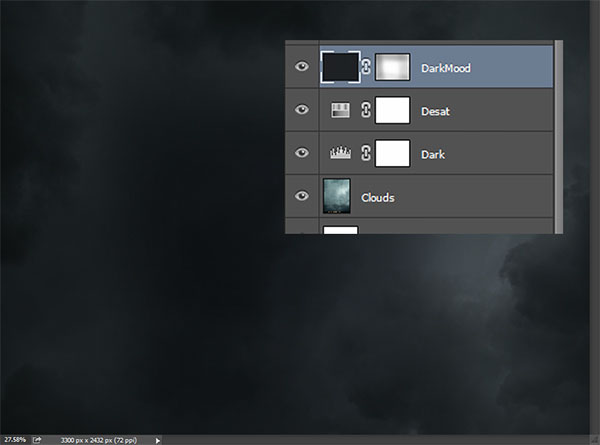
Create a new layer (Ctrl + N) and fill it with a dark blue color (#1e2024) by pressing Shift + F5.
Change the blending mode to Hard Light and add a layer mask (Layer > New Layer Mask > Reveal All).
With the standard round soft brush at 10% opacity paint with black on the layer mask at the edges of the scene to soften the darkening effect.
Step 6
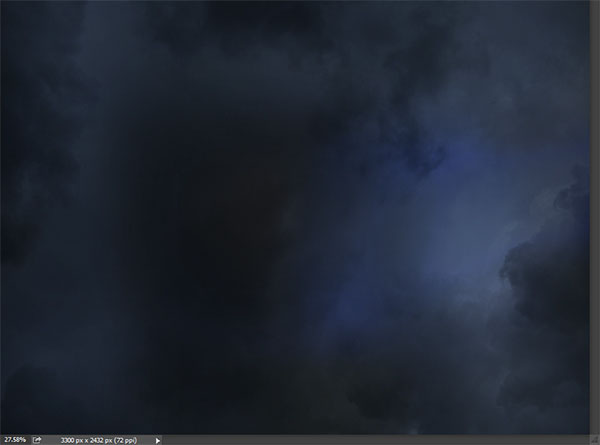
Create a new layer and set the blending mode to Color Dodge.
With the standard soft round brush at 40% opacity paint with an intense blue color (#1d3c9c) as shown below.
Step 7
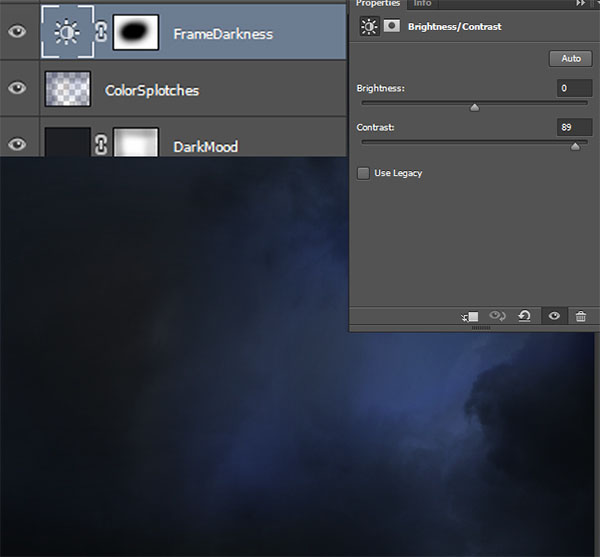
Create a Brightness/Contrast Adjustment Layer (Layer > New Adjustment Layer > Brightness/Contrast) and use the settings below.
On the layer mask paint with black at 100% opacity in the middle of the scene.
Step 8
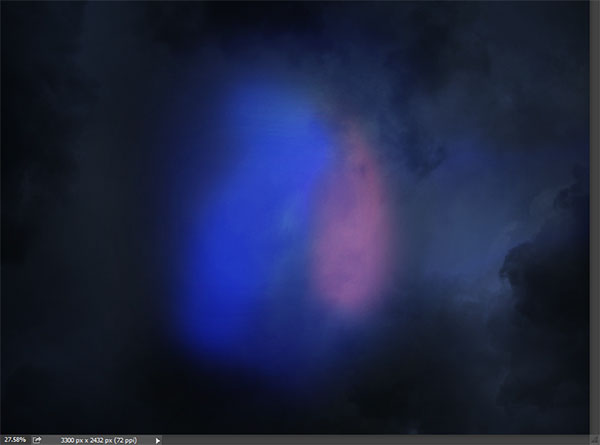
On a couple of new layers set to Color Dodge paint with a deep blue (#2c42c3) and a soft purple (#7334a8) in the center of the scene.
Step 9
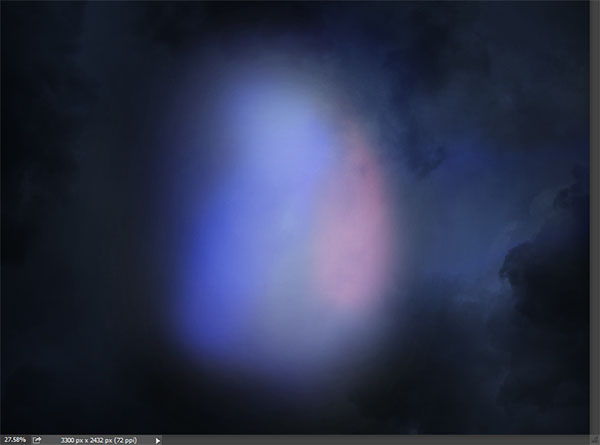
On a new layer paint with a bright blue (#b0c2f2) in the center of the scene to create the back glow behind our main character.
Step 10
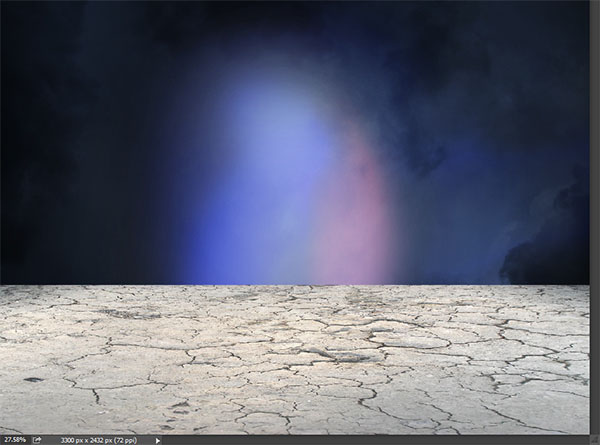
Open the file “Ground”. Copy and paste the ground into our scene.
Use the Free Transform tool to give it perspective (hold the alt and the shift key while dragging on one of the bottom points).
Step 11
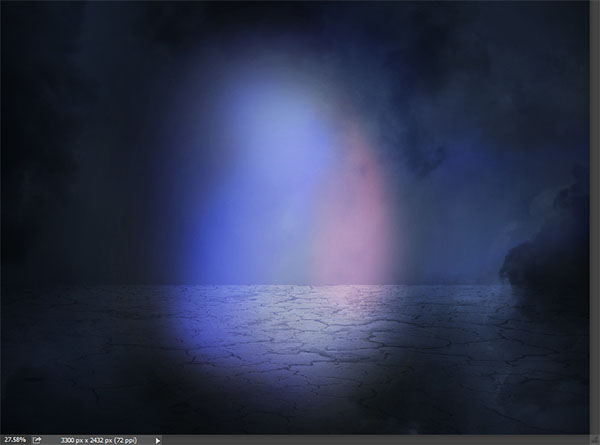
Change the blending mode of the ground layer to Overlay and lower the opacity to 42%.
Step 12
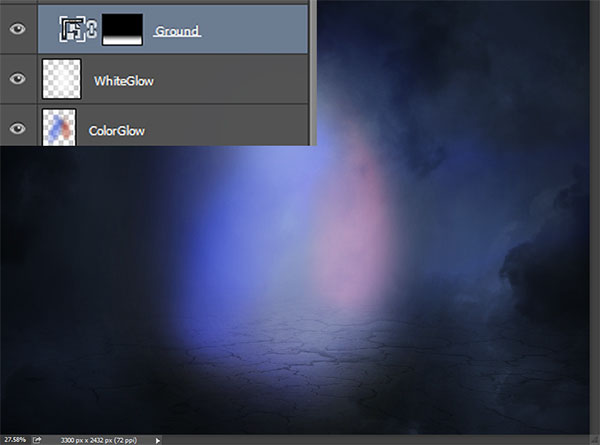
Add a layer mask on the ground layer and choose the Gradient Tool (G).
Set the colors to default (D) and in the layer mask drag from top to bottom in order to gradually hide the upper section of the ground.
Step 13
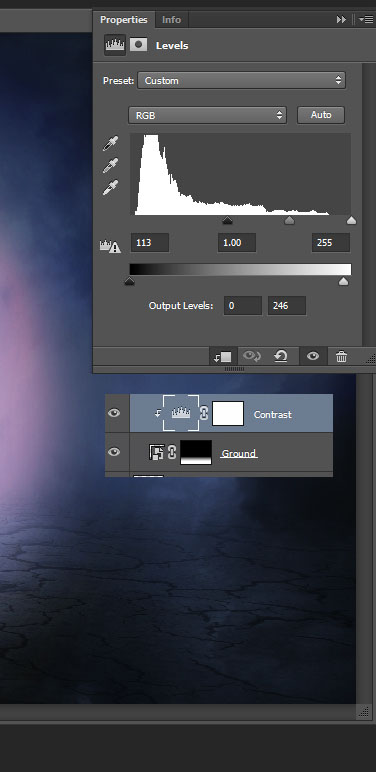
Let’s add some contrast to the ground. Create a Levels Adjustment Layer (by the way, you can find all the adjustment layers used in this tutorial under Layer > New Adjustment Layer) with the settings shown below. Clip this layer to the ground layer by Alt-clicking between the two layers in the layers palette. This will keep the contrast effect restricted to the ground layer.
Step 14
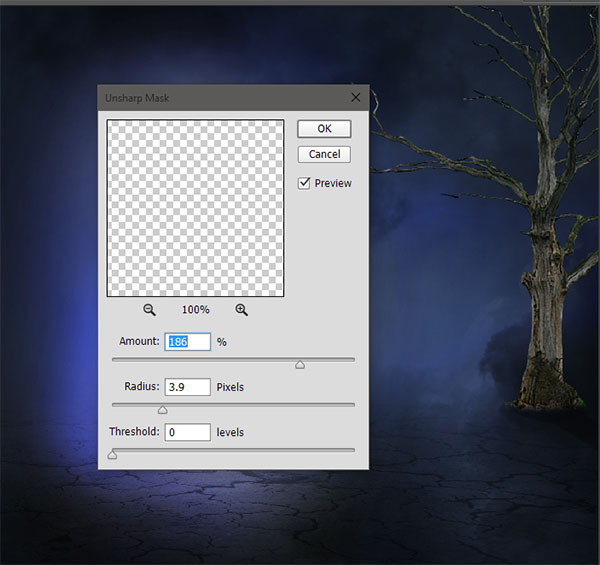
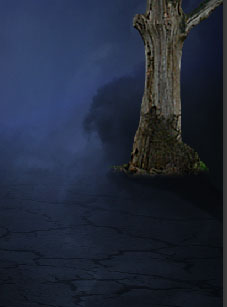
Open the file “Dead Tree”. Copy/paste the tree and position it with Free Transform as shown below.
Right click on the dead tree layer and from the drop down menu choose Convert To Smart Object.
Apply an Unsharp Mask effect (Layer > Sharpen > Unsharp Mask) to the dead tree to match our scene’s sharpness.
Step 15
Create a new layer and with the chalk brush paint a shadow going towards the right side of the scene (from our view). Place this layer below the dead tree layer in the layers palette.
Step 16
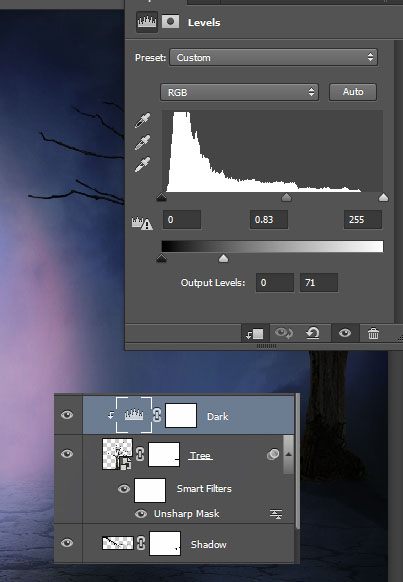
The tree is way too light for our scene. Create a Level Adjustment Layer and clip it to the tree layer. Use the settings below to darken the tree.
Step 17
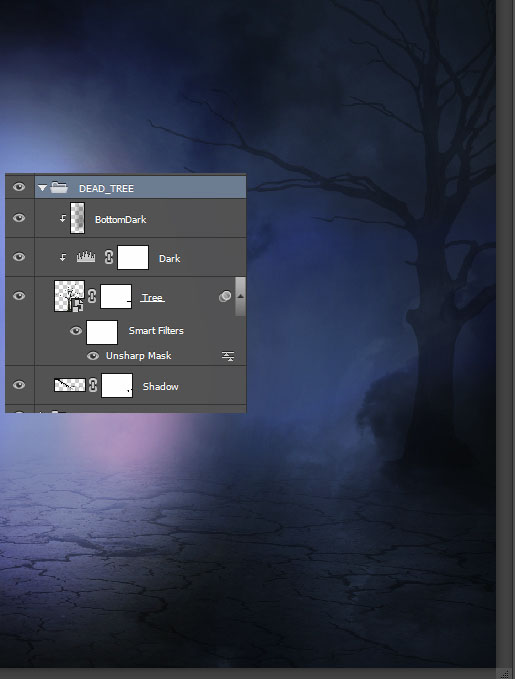
Create a new layer and clip it to the tree layer. With black paint with the standard round soft brush at 50% Opacity on the bottom of the tree.
Once you’re done group all the tree related layers (Ctrl + Click on each layer to select and press Ctrl + G to group).
Lower the group’s opacity to 33% to blend it seamlessly with the scene.
Step 18
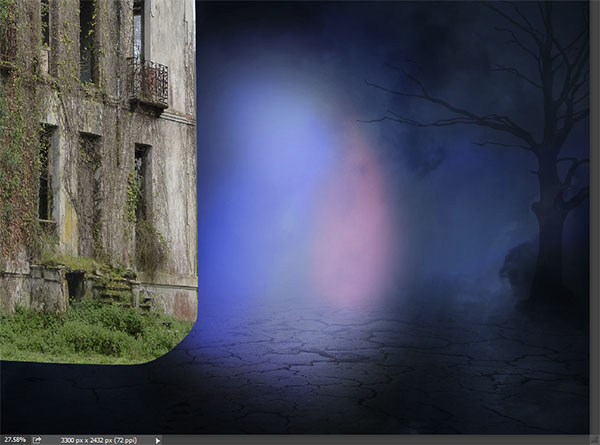
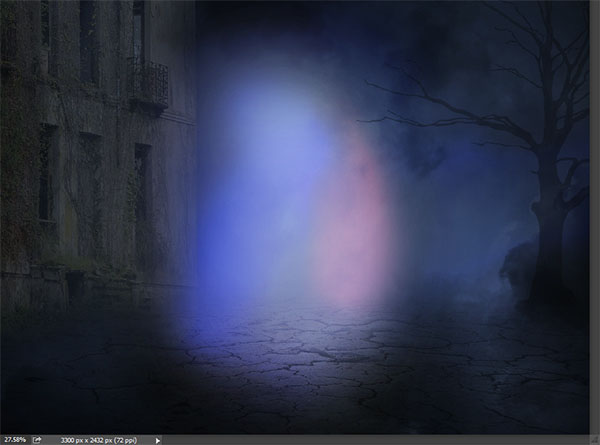
Open the file “Building”. Make a selection of the building with the Pen Tool or the Lasso Tool. Copy and paste the building into our scene as shown below.
Step 19
Lower the building opacity to 23%. Add a layer mask and use a black round soft brush in the layer mask to hide hard edges.
Step 20
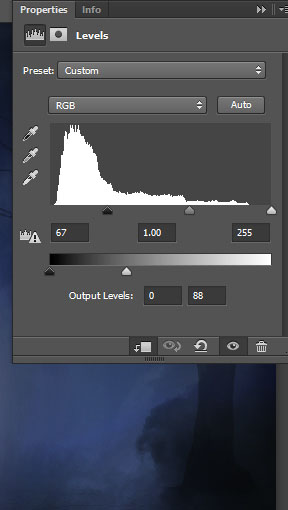
Create a Levels Adjustment Layer and clip it to the building layer (alt-click between the two) and use the settings shown below to darken it.
Step 21
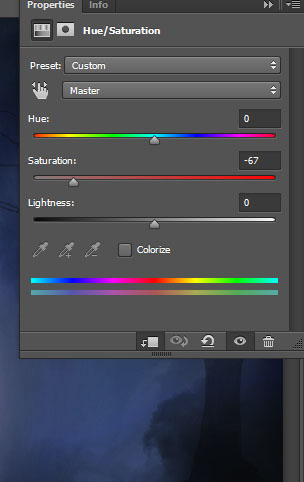
Create a Hue/Saturation Adjustment Layer and clip it to the building layer. Use the settings below to desaturate it a bit.
Step 22
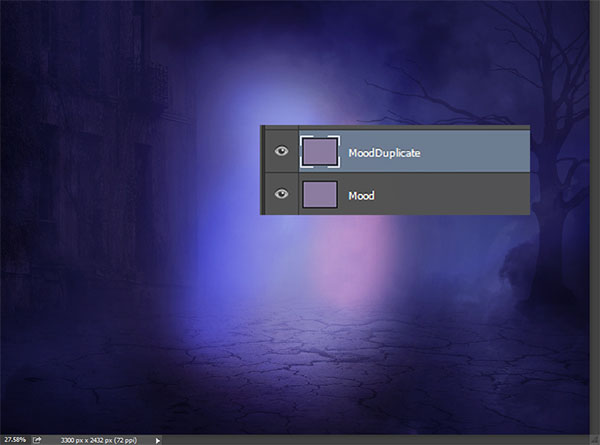
Let’s dramatically change the mood and unify our scene’s colors.
Create a new layer and fill it (Shift + F5) with a neutral purple (#8b7c9f).
Change the blending mode to Soft Light and duplicate it by pressing Ctrl + J.
Step 23
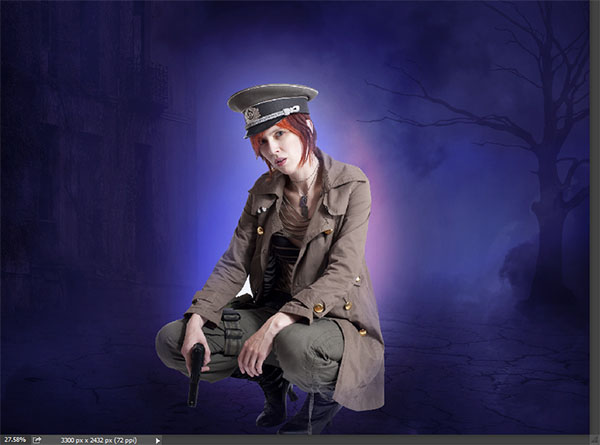
Let’s place our warrior girl in the scene. Open the file “Warrior Girl” and use the Pen Tool to create a selection of the girl.
Press Ctrl + Enter to convert the path into a selection and copy/paste the girl in the scene.
Step 24
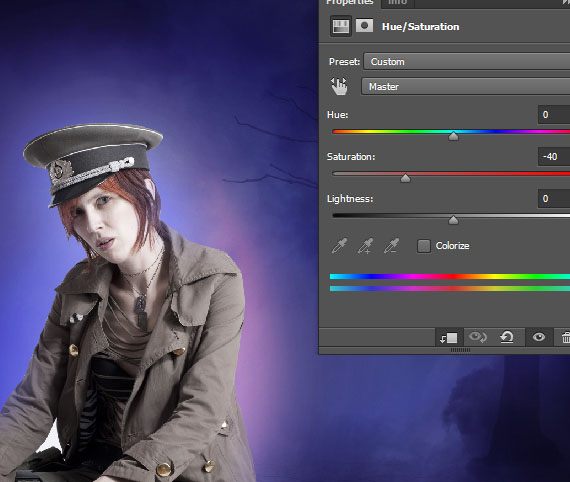
Create a Hue/Saturation Adjustment Layer and clip it to the girl layer. Use the settings shown below.
Step 25
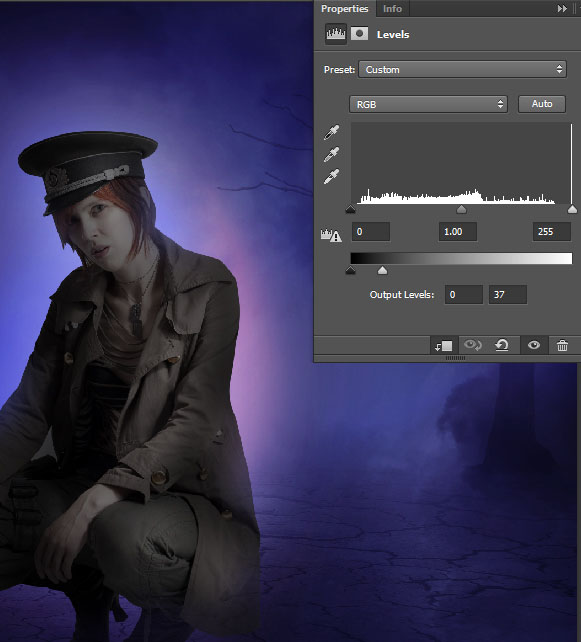
Let’s dramatically darken the girl layer. Create a new Levels Adjustment Layer with the settings shown below and clip it to the girl layer.
In the layer mask paint with a round soft brush at 20% opacity with black over the face and the major body highlights.
Step 26
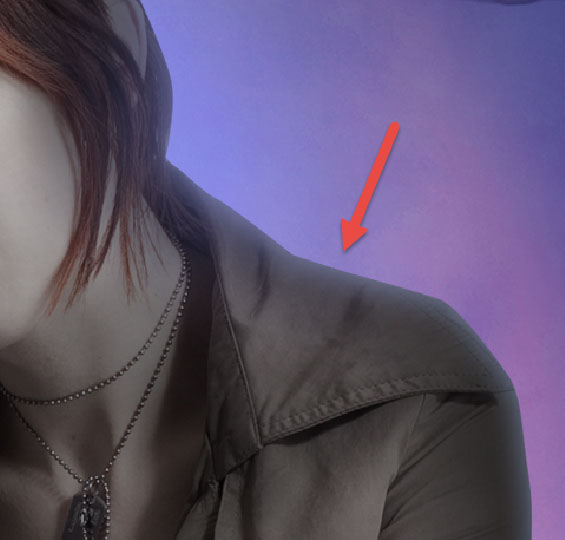
Create a couple of new layers and set the blending mode to Overlay for the first and Screen for the second.
With a 3px round soft brush paint with white or white blue over the edges of the girl’s silhouette.
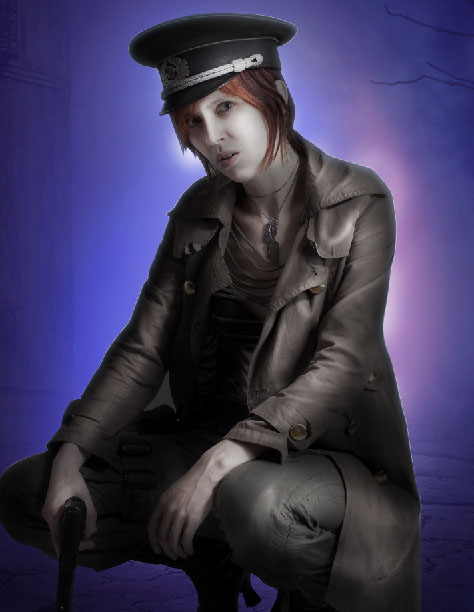
Step 27
Create a new layer and set the blending mode to Soft Light.
With the round soft brush at 20% Opacity paint with white over the highlights and with black over the shadows until you achieve a result like in the photo below. I used multiple layers just in case I made a mistake and I advise you to do the same.
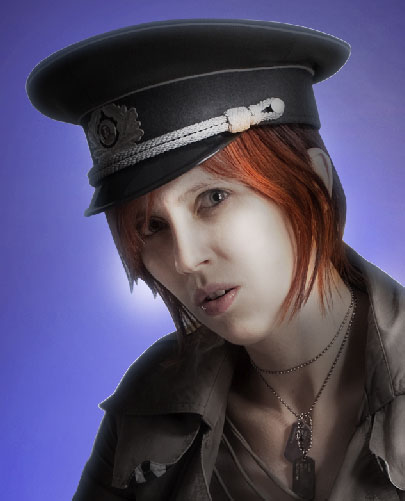
Step 28
On a new layer set to Overlay paint with a red soft brush (30% Opacity) over the girl’s red hair to further increase the intensity.
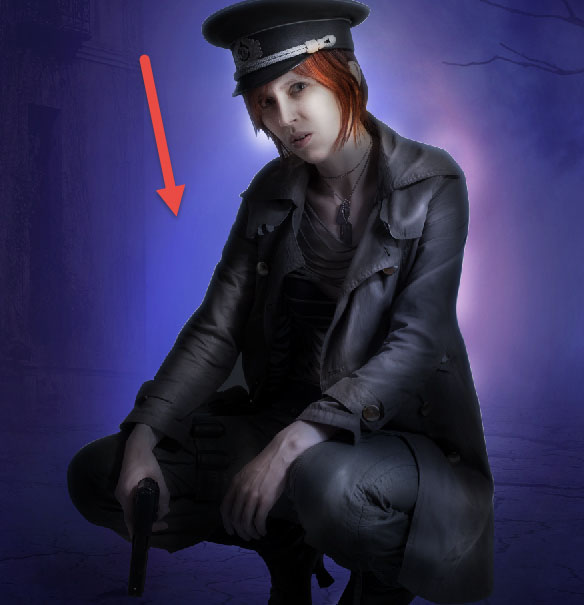
Step 29
Create a new layer and set the blending mode to Soft Light. Sample a blue color from the scene (with the brush tool selected hold the alt key until the sampler appears and then click) and with a round soft brush at 10% Opacity paint over the girl to better blend her in with the environment.
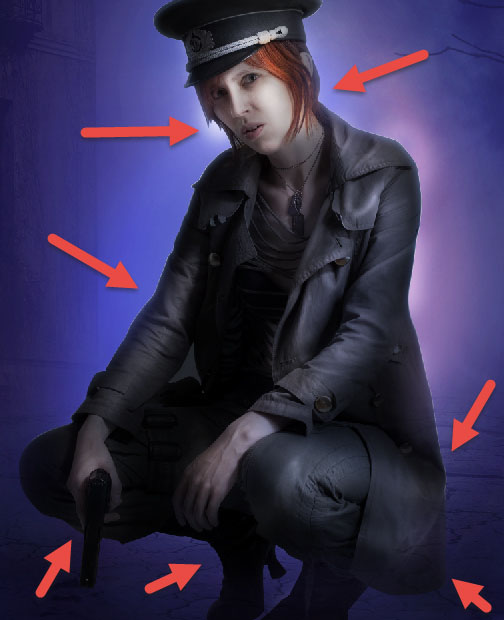
Step 30
Group all the girl related layers and add a layer mask to the group. With a soft black brush at 20% opacity paint over the indicated areas to remove the hard edges of the selection and blend her with the overall scene.
Step 31
Duplicate the layer created in step 22 and place it above the girl group in the layer palette. Alt-click between the two to clip the upper colored layer to the girl layer.
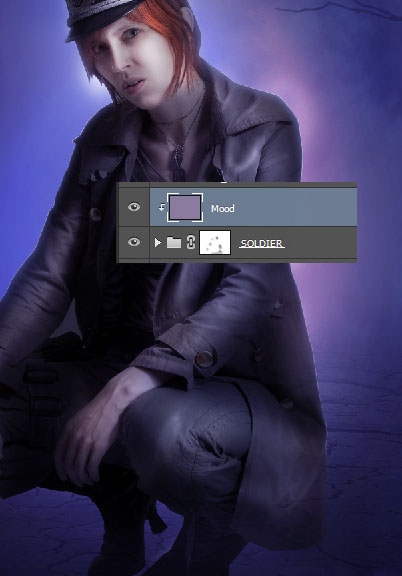
Step 32
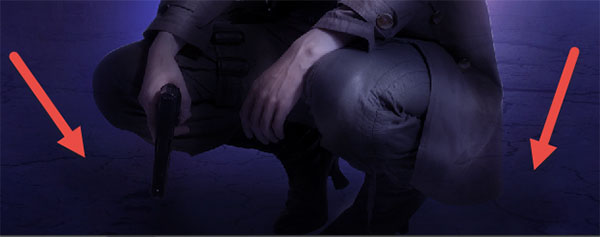
Our soldier girl looks a bit fake because she projects no shadows. Create one or more layers and place them below the girl group in the layers palette.
With the round soft brush at 60% Opacity paint some shadow under her feet.
Step 33
It’s time for the final effects because we are done with the main elements of the scene.
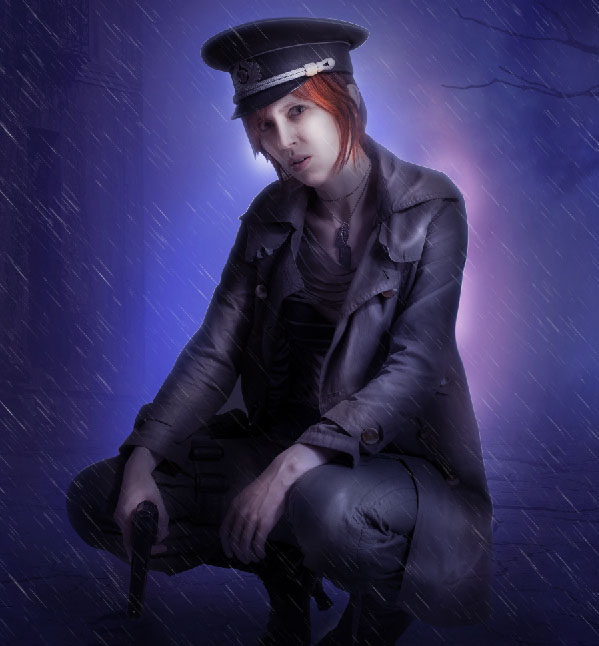
Open the file “Rain Texture” and copy/paste it in our scene. Change the blending mode to Screen and add a layer mask.
On the layer mask paint with 50% opacity black over the girl to partially hide the rain in that area.
Step 34
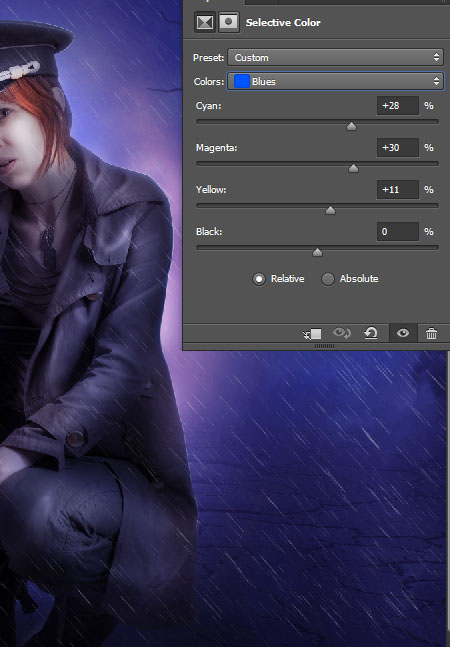
Create a Selective Color Adjustment Layer and use the settings shown below to improve the blue colors.
Step 35
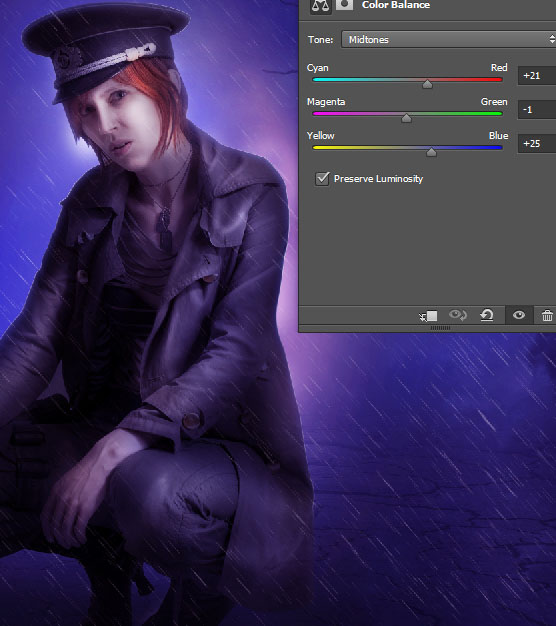
Create a Color Balance Adjustment Layer and increase the Red and Blue sliders as indicated below.
Step 36
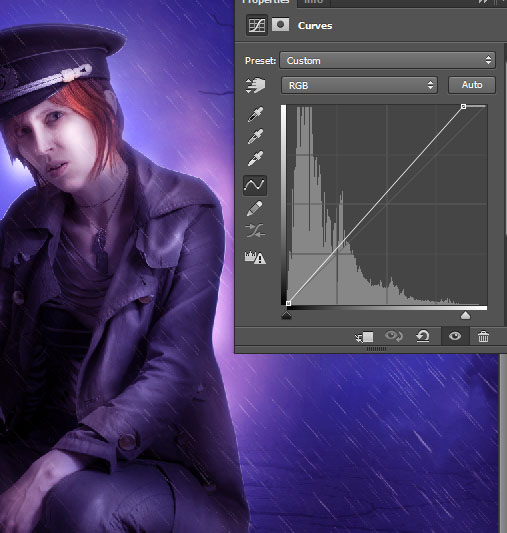
Create a Curves Adjustment Layer and drag the rightmost arrow a bit to the left in order to lighten up the scene.
Step 37
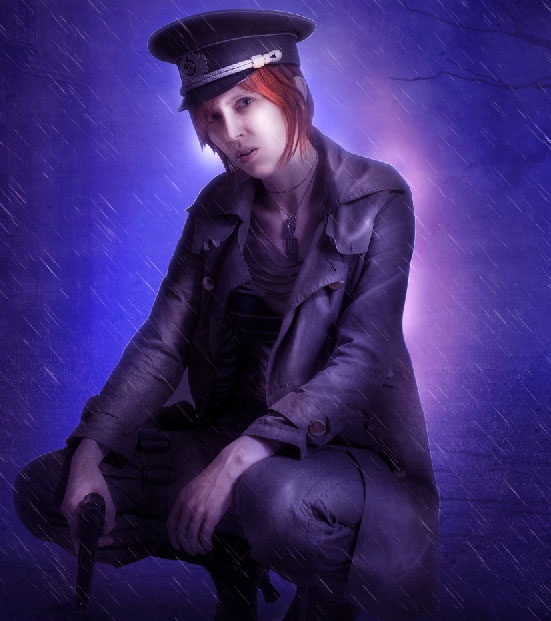
Open the file “Dirt Texture”. Select all and copy/paste the texture into our scene.
Desaturate the texture layer by going to Image > Adjustments > Desaturate.
Change the blending mode to Soft Light and add a layer mask.
On the layer mask paint with a 40% opacity black soft brush over the girl to partially hide the texture in that area.
Step 38
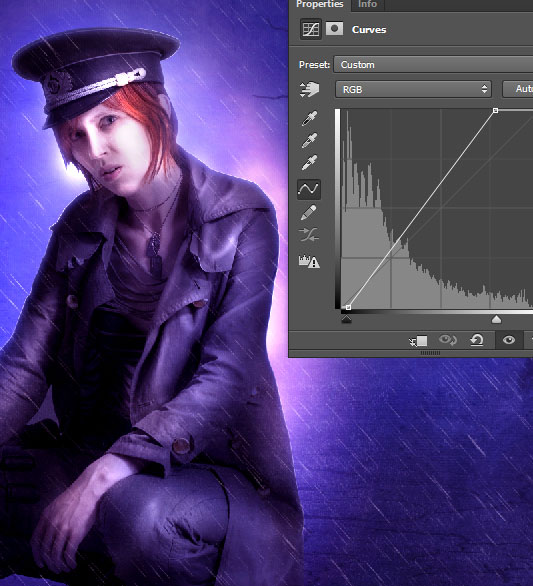
Create another Curves Adjustment Layer and move the rightmost arrow a good way to the left.
Fill the layer mask of the adjustment layer with black (Shift + F5) and with a round soft brush at 80% Opacity paint in the layer mask over the girl to reveal the luminosity effect just there.
And we’re done.
And We’re Done!
