
In this tutorial you will learn how to add a reflection to your photos in Photoshop.
We will use some filters and some standard Photoshop tools so even beginners will have no problem in following this tutorial.
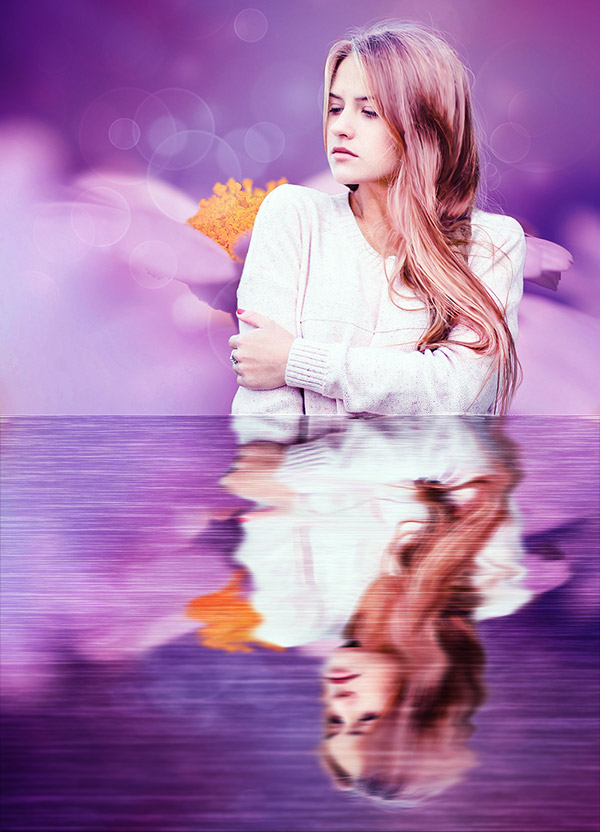
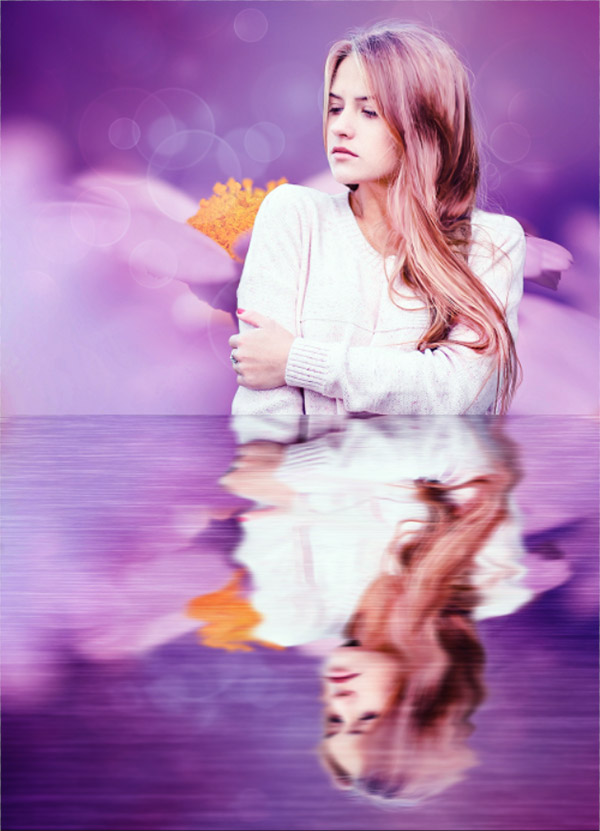
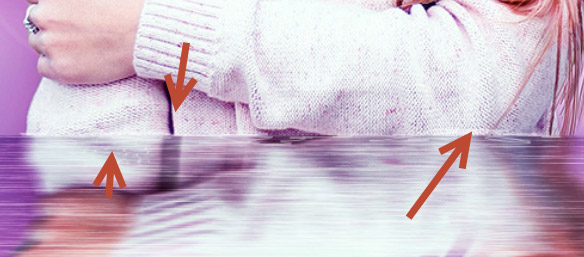
Final Image
As always, this is the final image that we’ll be creating:
Tutorial Details
- Program: Adobe Photoshop CS3
- Estimated Completion Time: 40 minutes
- Difficulty: Beginner-Intermediate
Resources
Step 1
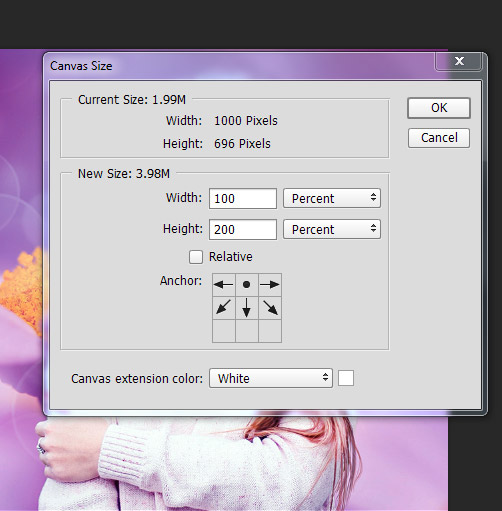
Open the image “Girl”. In order to create a proper reflection we have to increase the size of the canvas so that we will have space to put the reflection. Press Ctrl + Alt + C to open the Canvas Resize window and use the settings shown below and press Ok.
Step 2
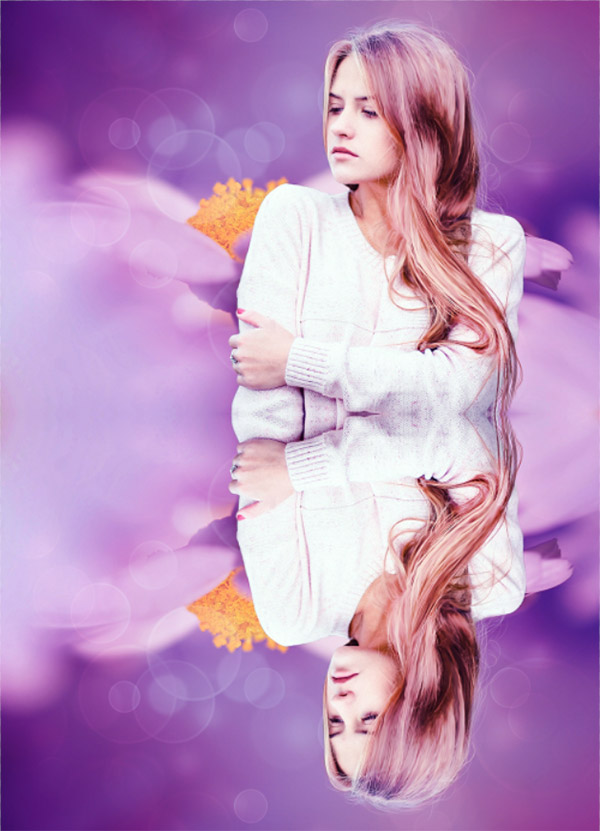
Press Ctrl + J to make a duplicate of the background layer and press Ctrl + T to enter Free Transform. Right click on the layer and from the drop down menu choose Flip Vertically.
Once the image is flipped hold the Ctrl key and drag it down. This will create our basic reflection upon which we will build further. Name this new layer “Reflection”.
Step 3
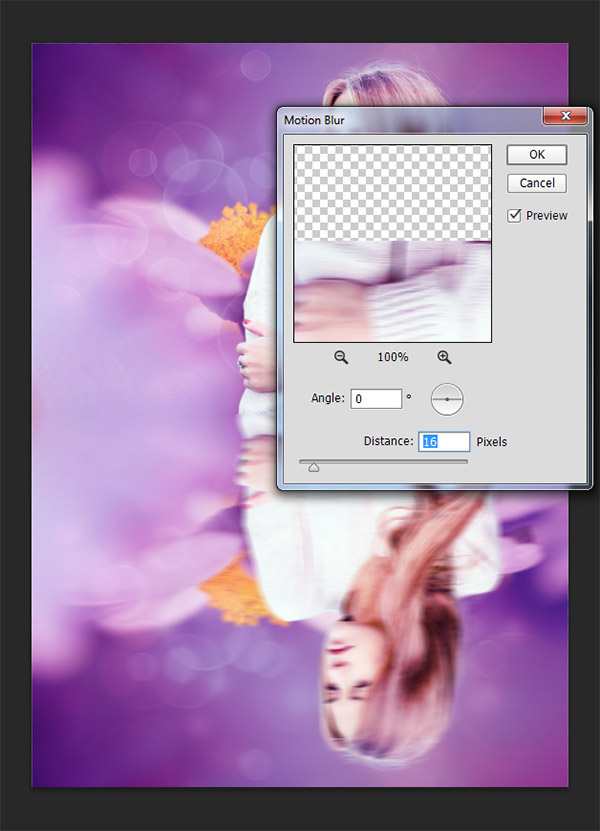
Reflections are not as clear as ours so let’s change that. Add a 16px Motion Blur effect with 0 percent angle (Filter > Blur > Motion Blur) to our reflection layer. As you can see this changes the realism of the reflection greatly and we could stop here if we don’t want to trouble ourselves or if we were in a great hurry. But since we want a more realistic reflection effect we will have to work a bit more. Alright, let’s move to the next step.
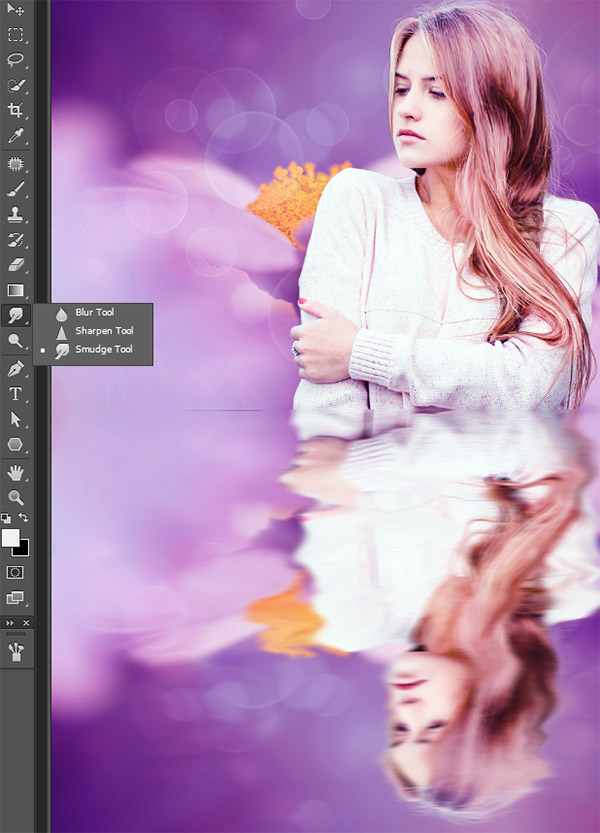
Step 4
Let’s add a bit of randomness and movement to the reflection. Select the Smudge Tool and start dragging here and there around the face, the hair and the body. Don’t overdo it but apply small changes all over the reflection layer. I’ve often seen photo manipulations that are not realistic because they look either too symmetrical or too clean. Whenever you’re working on your scenes always add random stuff here and there and try to break the symmetry. And the same goes for dirt – don’t be afraid to paint some dirt over clean objects, especially if the setting of the photo manipulation is somewhere in nature.
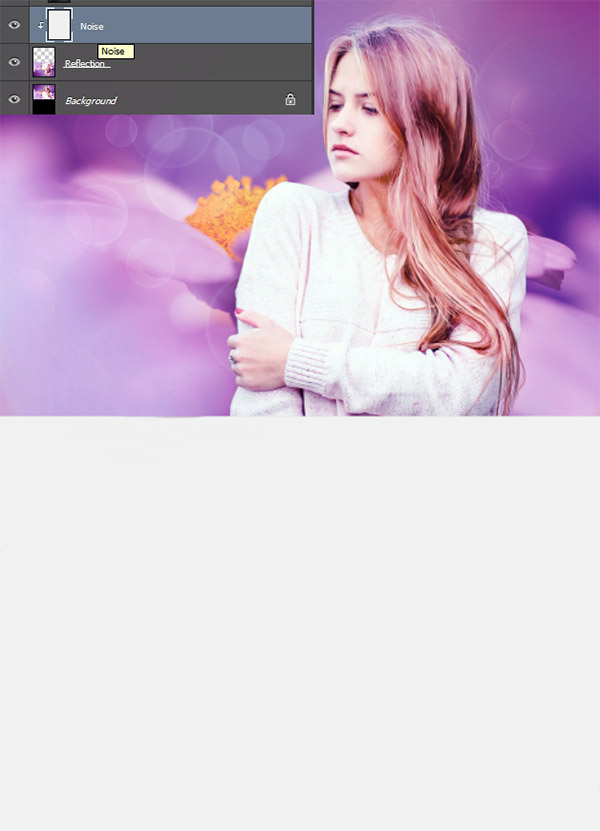
Step 5
Let’s start adding some waves. Create a new layer (Ctrl + Shift + Alt+ N) and fill it with white (press D to set the default colors and Ctrl + Backspace to fill the layer with the background color. Name this layer Noise and clip it to the reflection layer (in order to clip a layer to another simply Alt-click between the two layers in the layer palette – this will show the upper layer only through the lower layer).
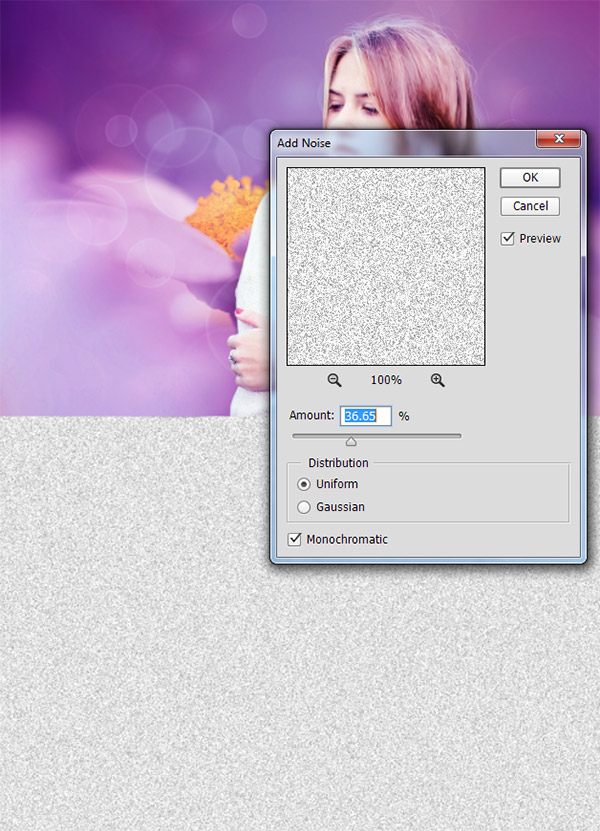
Step 6
Let’s add some noise to this layer in order to make the base for our waves. Select Layer > Noise > Add Noise and use the settings shown below.
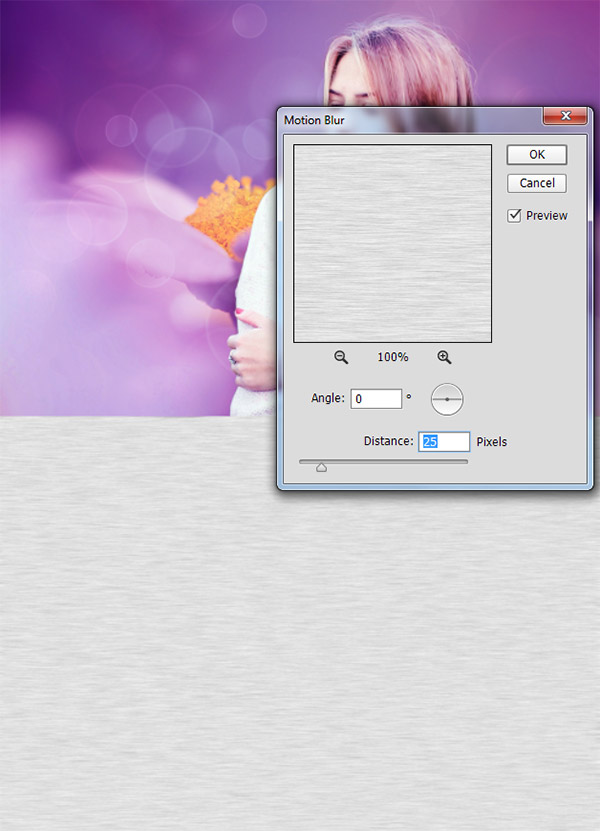
Step 7
Apply some Motion Blur to the noise layer (Filter > Blur > Motion Blur) and use the settings shown below. As you can see it starts to look a little like waves.
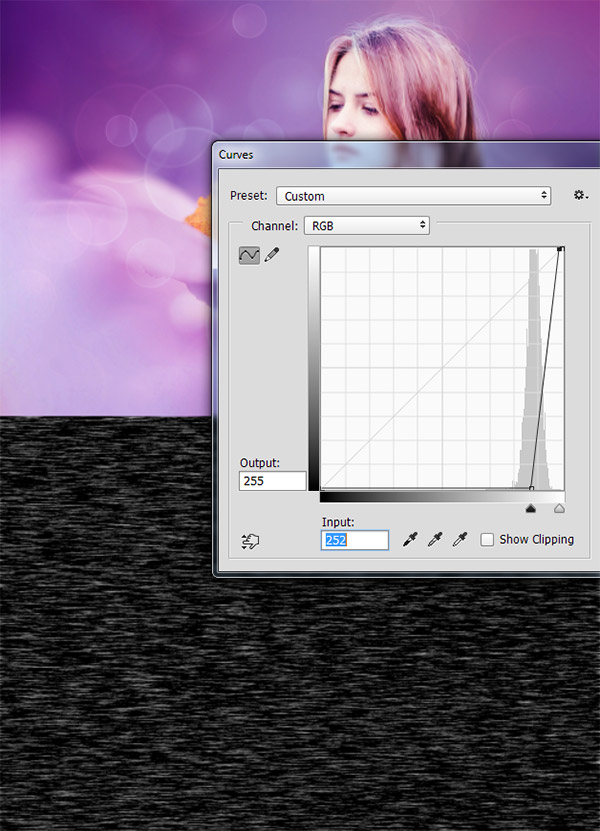
Step 8
The noise layer is way to add light for representing waves successfully. Let’s darken it a bit. With the noise layer selected open the Curves Adjustment window (Image > Adjustments > Curves) and use the settings shown below to both darken the noise layer and increase the contrast at the same time.
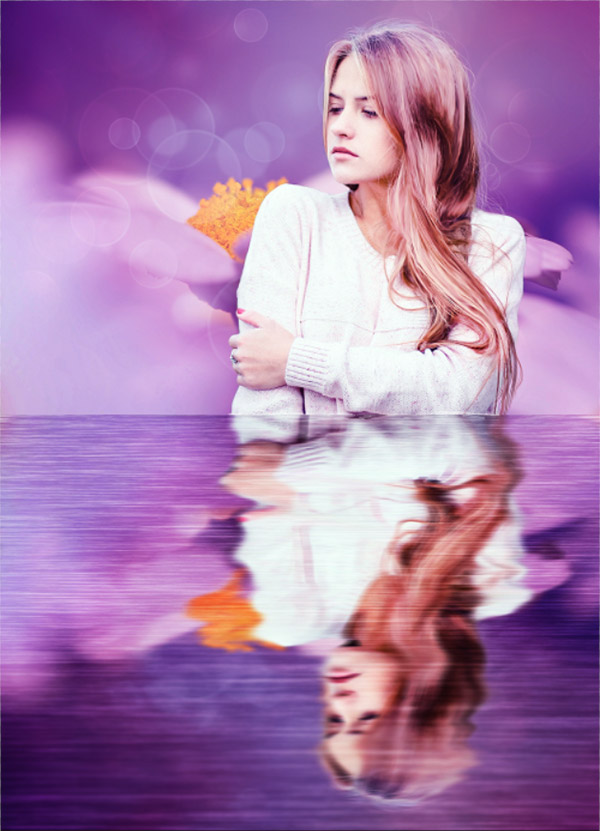
Step 9
Change the blending mode of the noise layer to Soft Light and lower the Opacity to 70%. And voila – the magic of blending modes. As you can see we have some pretty decent waves but there is one little problem – the waves have the same clarity both near the middle of the document and on the bottom. If these were real waves they would probably be a little blurry near the bottom of the document. We will address that issue in the next step.
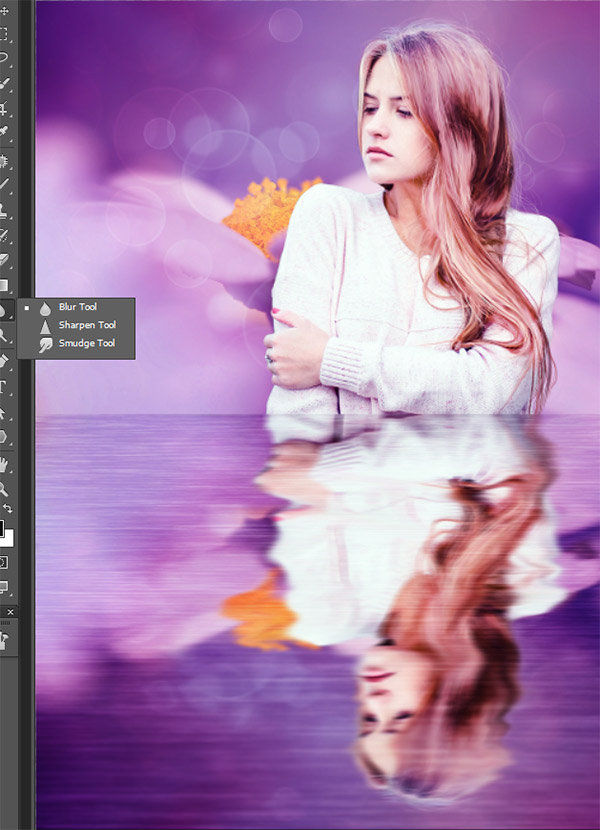
Step 10
Select the Blur Tool and lower the strength (in the upper toolbar, just below the menu) to 30%. Now paint gently on the bottom of our document and make sure to leave the upper part unchanged.
Step 11
Duplicate the noise layer by pressing Ctrl+ J and clip it to the lower noise layer (just Alt – click between the two layers).
Change the blending mode to Overlay and lower the Opacity to 23%. By doing this we will increase the contrast of the waves and darken them a little. I find myself using the blending modes on almost every scene I do in Photoshop. I use very often Overlay and Soft Light – these blending modes will boost the contrast and increase the luminosity usually. The Screen blending mode is good only for lightening a scene and the Multiply is great for darkening.
Step 12
Create a new layer (Ctrl + Shift + Alt + N) and select the standard chalk brush. Lower the size to 3px and the Opacity to 50%. Supposedly the girl is sitting in the water so let’s create some tiny waves hitting her (the white little lines that appear around objects submerged in water). And that’s it!!
And We’re Done!