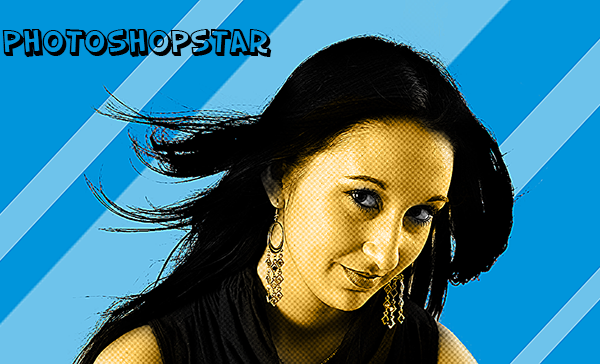
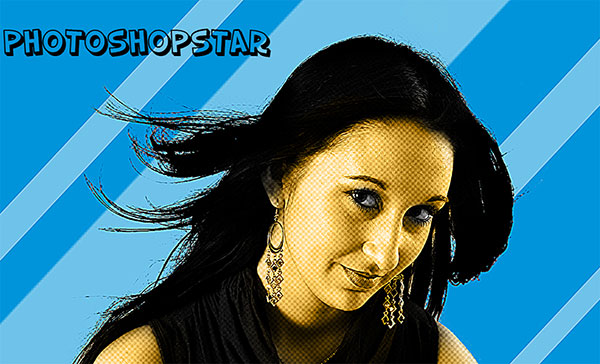
In this Photoshop tutorial we will create a pop art scene using some easy techniques that even beginners can follow.
Final Image
As always, this is the final image that we’ll be creating:

Tutorial Details
- Program: Adobe Photoshop CS3
- Estimated Completion Time: 30 minutes
- Difficulty: Beginner-Intermediate
Resources
Step 1
Open Photoshop and create a new file 1085×649 pixels. Fill the layer with a bright blue color (#0095db) by pressing Shift + F5. This will be the background for our pop art scene.

Step 2
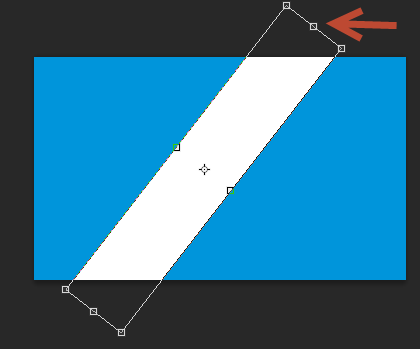
Let’s create some nice diagonal stripes. Select the Rectangular Marquee Tool (M) and create a rectangle as shown below. Choose white as the foreground color and fill the selection with white by pressing Alt + Backspace.

Step 3
Press Ctrl + T to enter Free Transform and rotate the white rectangle at an angle of 45 percent (hold shift while rotating) and elongate it (by dragging the top middle handles while holding the Alt key) as shown below.
Step 4
Name the layer you rotated in step 3 “Stripe” and lower the opacity to 43%.

Step 5
Duplicate the stripe layer a couple more times and use the Free Transform tool (Ctrl + T) to resize and position the new stripes at various positions in the scene as shown below. You can also play around with each stripe opacity to increase the randomness in the scene.

Step 6
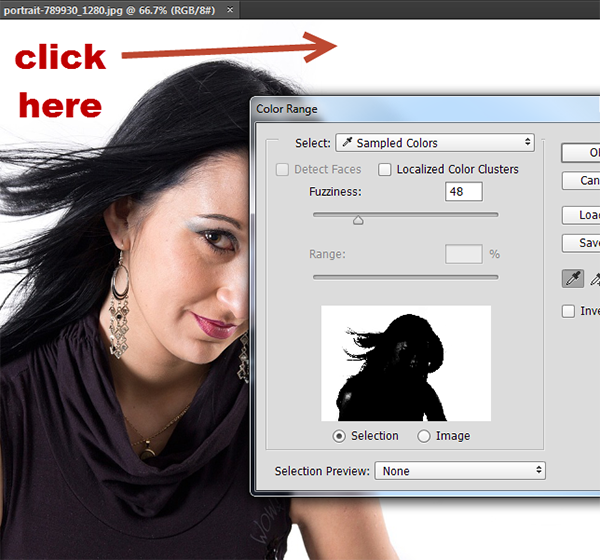
With the background done it’s time to add the main element of our pop art scene : the girl! Open the file “Girl” in Photoshop and open the Color Range tool (Select > Color Range). Click once with the color picker on the white background – your color range window should look like this:
Step 7
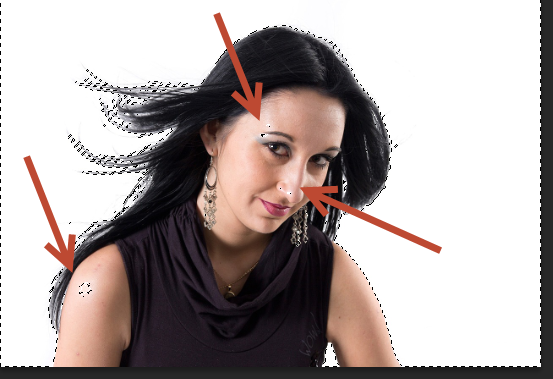
Press Ok to create a selection and close the Color Range window. Press Ctrl + Shift + I to invert the selection (we selected the white background with the color range tool because it was an easy selection – by inverting it we select the girl). You will notice that there are still some areas of the girl that are not completely selected.
Step 8
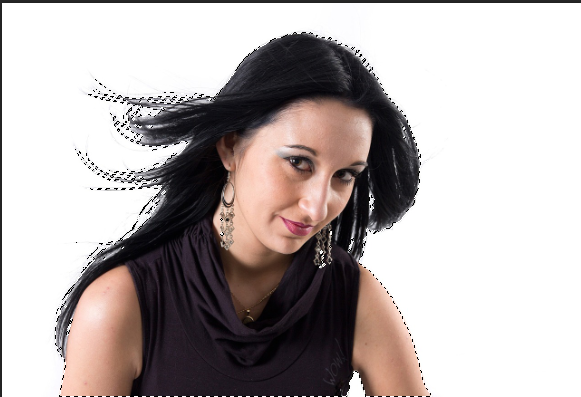
In order to select those spots first choose the Rectangular Marquee Tool (M). Hold shift and drag with the rectangular marquee tool over those spots indicated in step 7 to add them to our selection. You should now have a complete selection of the girl.
Step 9
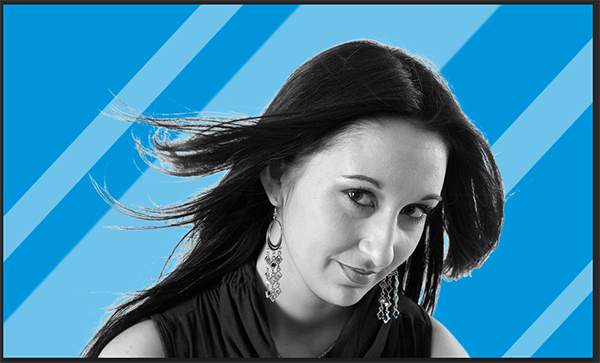
Press Ctrl + C to copy the selection and go back to our document. Press Ctrl + V to paste the girl and use the Free Transform tool (Ctrl + T) to position her as shown below.
Once you’re done, desaturate the girl layer by going to Image > Adjustments > Desaturate.
Step 10
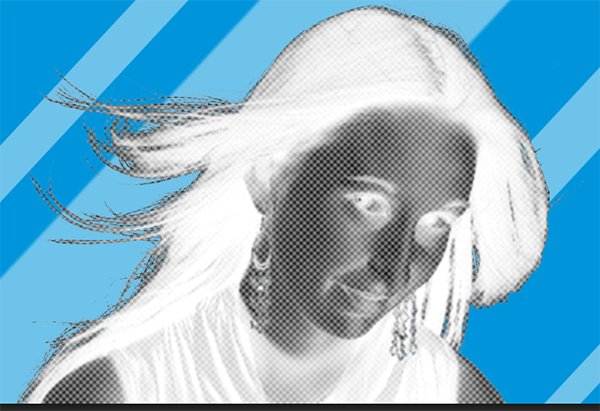
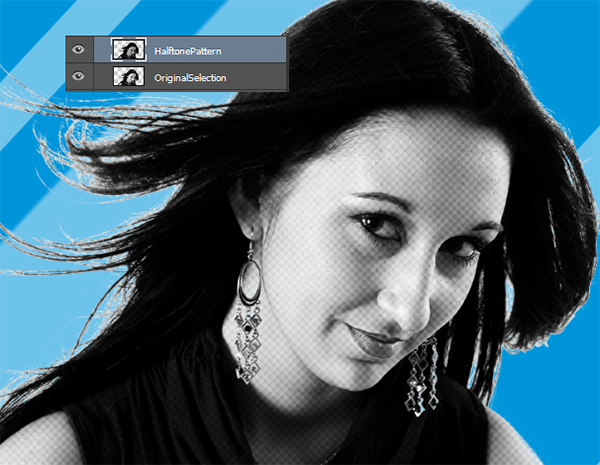
Duplicate the girl layer (Ctrl + J) and go to Filter > Filter Gallery to open the filter gallery. Once you’re there select the Halftone pattern.
You will see that we achieved some sort of ghost effect –don’t worry, we’ll correct it in the next step.
Step 11
Change the duplicated ghost layer blending mode to Soft Light and press Ctrl + I to invert the colors. Suddenly all falls into place – doesn’t’ it? We give our girl that nice halftone pattern found in old magazine photos and at the same time we increased the contrast of black and white colors.
Step 12
One thing I don’t like about our selection is the white margins on the girl’s hair – they just don’t look good. Let’s correct that with an adjustment layer.
Group these two layers (the desaturated girl layer and the halftone layer) together by Shift-clicking them and pressing Ctrl + G.
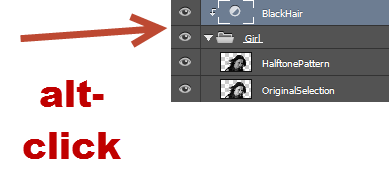
Now create a Curves Adjustment Layer by going to Filter > New Adjustment Layer > Curves and clip it to the group we just created by Alt-clicking in between the two in the layers palette (clipping means that the curves effect will only be applied to the group layer).
Step 13
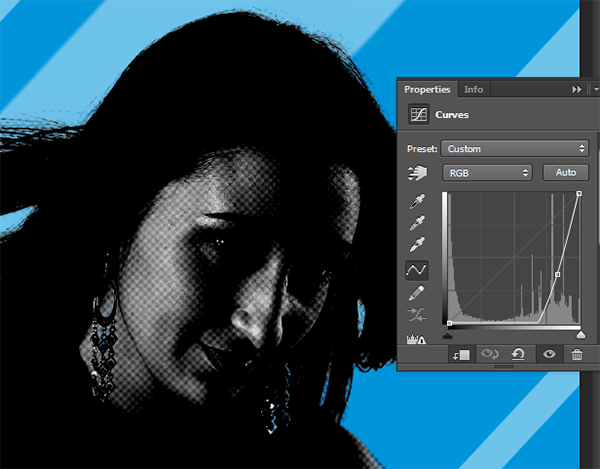
Use the settings shown below on the curves Adjustment layer to produce a strong darkening effect. We want to use this effect only on the portions of the white hair and not on all the surface of the girl – we will correct this in the next step.
Step 14
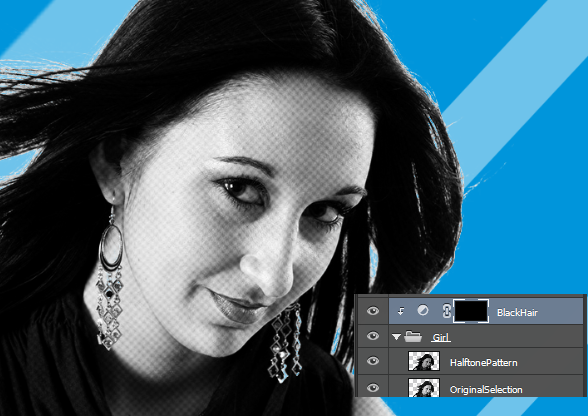
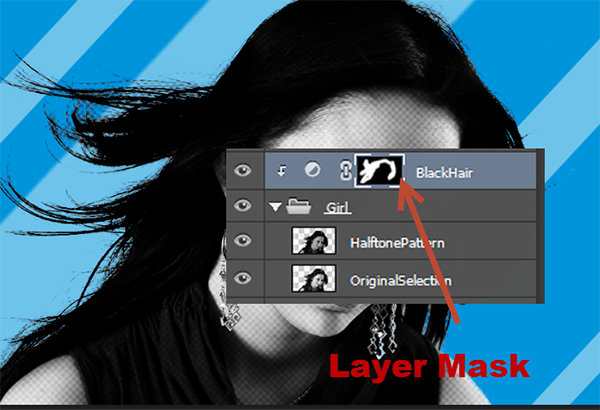
As you can see the Curves Adjustment Layer came with a layer mask (the white thumbnail next to the layer thumbnail in the layers palette). In a layer mask black hides the layer and white reveals. Press D to set the colors to default and click on the layer mask in the layers palette to make it active.
Now press Ctrl + Backspace to fill it with black (and thus completely hide the effect).
Step 15
Choose the standard round soft brush (open the brush presets window by going to Window > Brush Presets) and in the layer mask paint with white over the edges of the girl layer that are white to reveal the darkening effect only there.
Step 16
We’ve done a pretty good job so far but we can further improve this scene. Let’s add a second color to our scene.
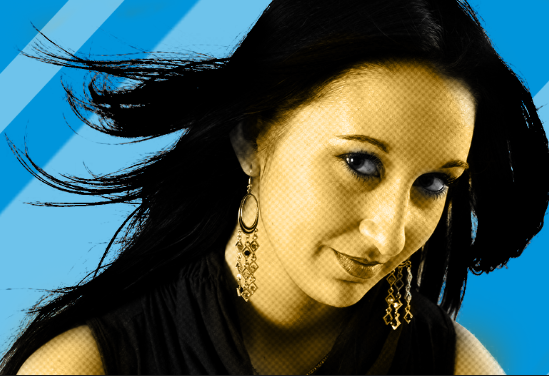
Create a new layer (Ctrl + Shift + Alt +N) and change the blending mode to Color. Choose a nice yellow color (#ffd67e) and with the round soft brush paint over the girl’s skin (face, shoulders and neck) but avoid the eyes.
Step 17
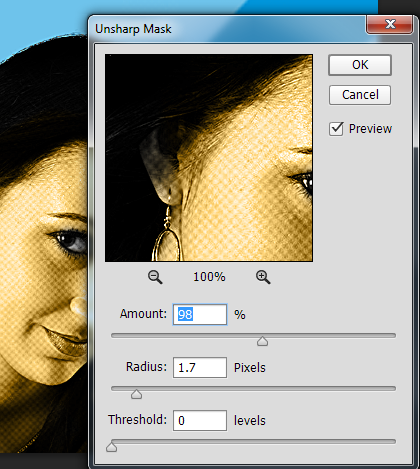
Create a new layer from all the visible layers by pressing Ctrl + Shift + Alt + E. Apply a sharpening effect by going to Filter > Sharpen Unsharp Mask and using the settings shown below.
Step 18
Import the Slapstick Comic font (if you have Windows 7 double click the font file and press install, otherwise Google “how to install fonts” for your specific operating system) and choose the type tool (T). Type something in there (like the name of the person) – I chose to type the name of the awesome website you’re getting you’re tutorials from – and place the text as shown below.
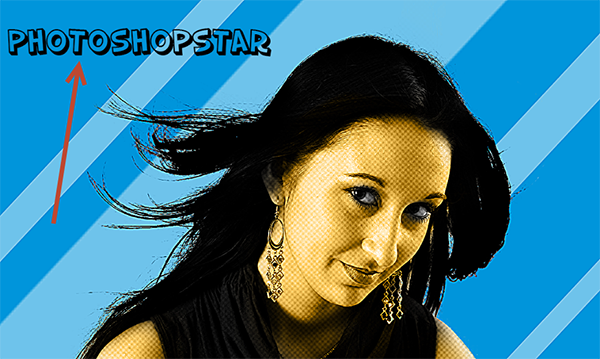
And We’re Done!
