Many of you may not be familiar with LAB color mode so I will share with you some quick but advanced techniques to color correct and improve your photos FAST. We could try to achieve the same results in RGB but it will take longer and may not yield the same great results as in LAB.
Below it is a short introduction to LAB color mode but you can skip it and jump to the practical techniques of using LAB although a basic understanding of the theory behind it helps.
A quick introduction to LAB color mode
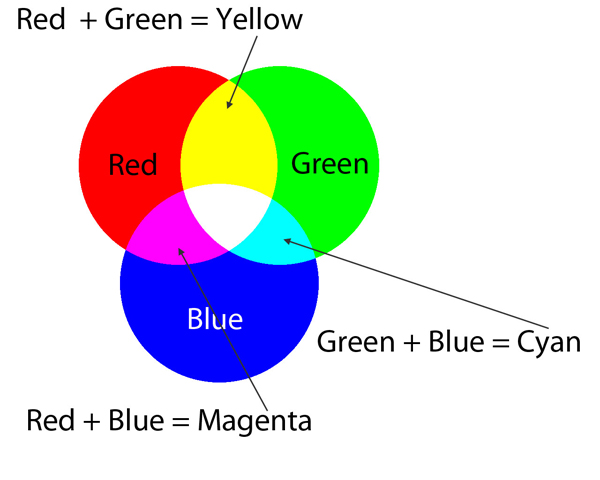
So what’s the difference between LAB and RGB? Some of you may know that in RGB color mode we have three color channels: red, green and blue. These channels combine to produce all the colors on the RGB color wheel. Red and green combine to produce yellow, green and blue form cyan, blue and red form magenta.
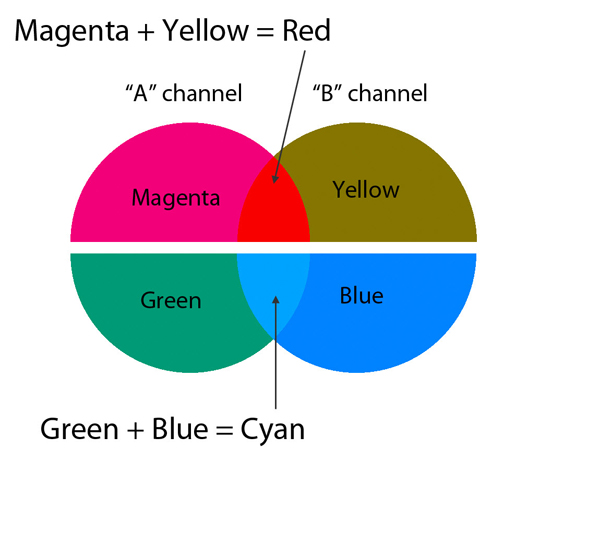
What about LAB? Well, L is the luminosity channel, A is the green-magenta channel and B is the blue-yellow channel. “L” channel contains all the luminosity information and is basically the black and white version of a photo with no color whatsoever. “A” channel has all the greens and the magentas while “B” has all the blues and yellows. You may wonder where is the red cyan channel. There is no red cyan channel because these colors are formed by combining the “A” and “B” channels. Red is formed when equal amounts of magenta and yellow exist in the “A” and “B” channels while cyan is formed when equal amounts of green and magenta exist in the “A” and “B” channels.
You may notice that the colors are somehow wrong. Yellow has a brownish look, green has a “cyanish” look, while blue is very close to cyan. That is because LAB color mode it is designed to reproduce colors the way humans see them while RGB is the way the machines sees color. It has something to do with simultaneous contrast and that we perceive and judge specific colors according to the colors that surround them. This is not a very scientific definition of LAB color mode but is enough to get you started. If you want to know more about the scientific side of LAB color mode check out this Wikipedia article.
5 steps photo enhancement
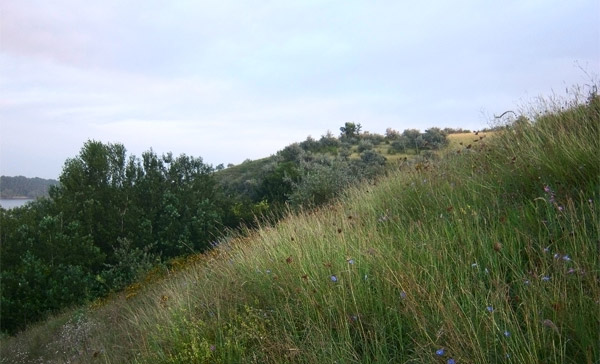
Select one photo similar to mine and let’s open it in Photoshop. At our first look we notice that it is a fairly dark picture with some bland colors and what seems to be a light blue color cast. I would normally do a “channel walk“ and see how each color channel looks like, then I would make some color samples in the darkest and the lightest places of our image to see if there is a color cast. But these steps require time and let’s assume that I have to improve and color correct this photo in 3 minutes. Well, good luck doing that in RGB! Let’s LAB this picture.
Step 1
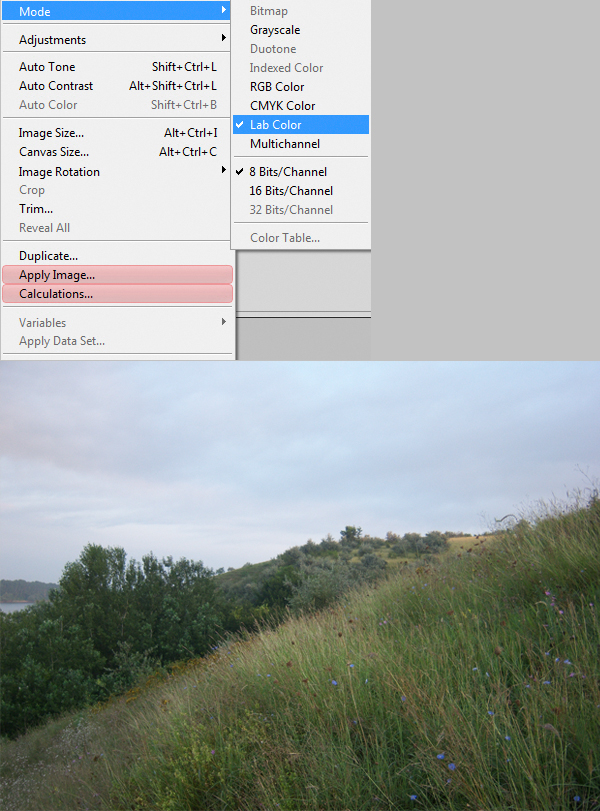
Choose Image > Mode > Lab Color. You shouldn’t see any change.
Step 2
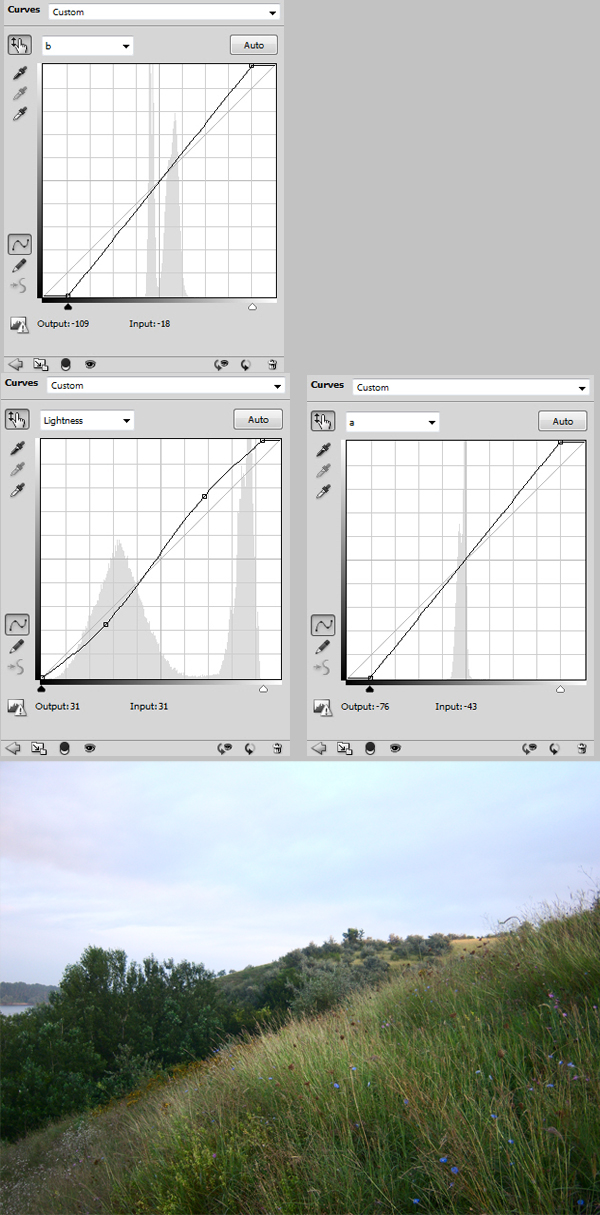
Choose Layers > New Adjustment Layer > Curves. Your histogram of the lightness channel may be different to mine but follow these following guidelines:
- Make a so called “S Curve”. Click to make a point in the upper part of the histogram (highlights) and drag it upwards. Click in the lower part of the histogram (shadows) and drag it downwards. Don’t overdo the adjustments, aim for a balanced tone distribution (equal amounts of light and shadow). The “S Curve” adds contrast to the middle tones while flattening the highlights and shadows. Look at the histogram and if you see an empty space at the right drag the highlights slider until it is positioned below the histogram values. This move will set the white point and increase the contrast in the middle tones. You could do the same thing for the shadows slider but to a lesser extent because this usually introduces ugly black artifacts.
- Change to “a” channel and drag the left and right slider to the center in equal amounts. It helps if you have a more detailed grid ( Alt + click to make the grid more detailed) ). I dragged the sliders all the way to the first vertical line. Change to “b” channel and repeat.
Step 3
Convert the “Background“ layer to a smart object. To do this right click the layer and choose “Convert to smart object“.
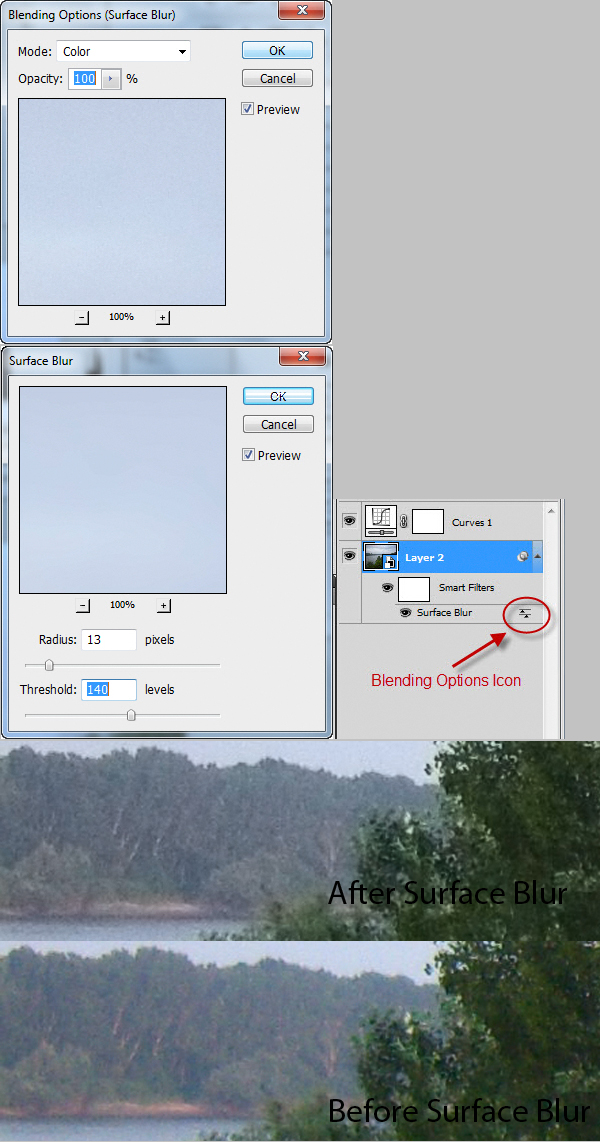
Step 4
Choose Filter > Blur > Surface Blur. Apply some high values. Remember that a big threshold and radius value means more blur. Don’t worry if your image looks blurry, we will fix that. Double click the little icon to the right of our surface blur smart filter to enter the blending options and choose color as our blending mode. This step will drastically reduce or completely remove any color noise or color fringing from our image.
Step 5
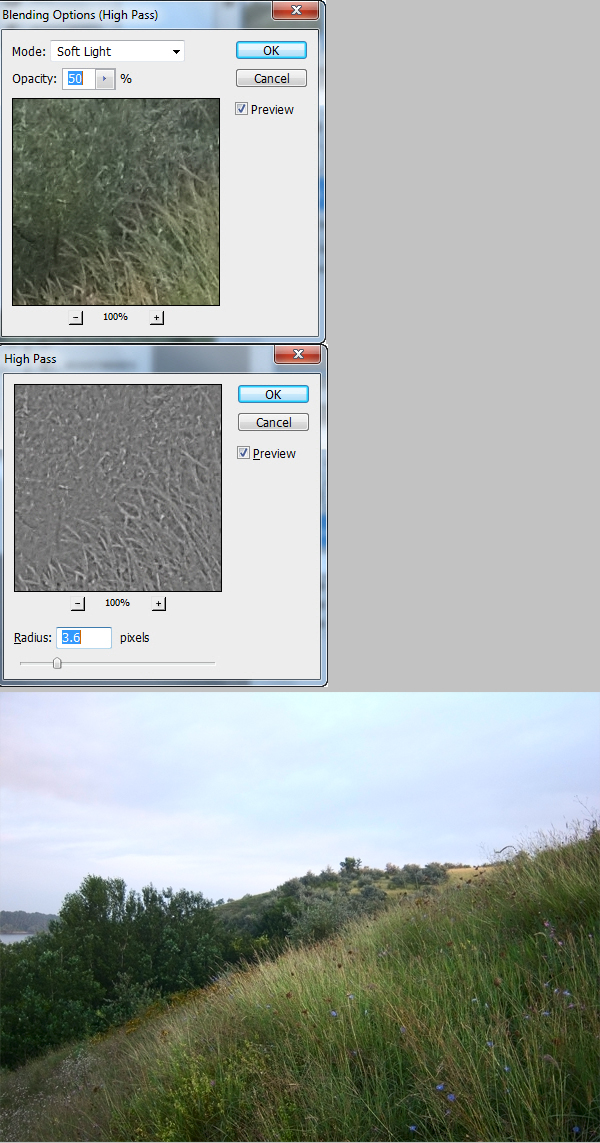
Choose Filter > Other > High pass and apply a rather small radius, just until the details start to emerge from the grays. Double click the blending options icon and change the blend mode to soft light.
An alternative step would be to apply a Smart Sharpen or an Unsharp Mask and change the blend mode to luminosity. This would apply sharpening only to our luminosity channel, while our color channels will remain free of noise. I choose not to apply these filters to our photo because they tend to add noise and we already have a bit of a noisy image. And I think the amount of clarity provided by the High Pass filter is enough. But If you have a rather blurry image feel free to apply some amount of sharpen using the filters I mentioned above. Don’t forget to change their blending mode to Luminosity.
These steps are much faster than they seem when you get to grips with them. It took me 3 minutes to make all the adjustments above and I think we transformed this bland image into a pretty decent looking photo. The changes are subtle but effective and the image now has some natural, rich colors. Some images will benefit more from these techniques while others will require a more time consuming approach.
I hope you will start to use LAB color mode as part of your workflow and benefit from doing so. Remember that the techniques described above are not absolute ways of doing things. Adapt them to your needs and make your photos look great in a short amount of time.