
In the following Photoshop tutorial you will learn how to place any photo on a big advertisement screen. We will use some simple Photoshop tools and techniques.
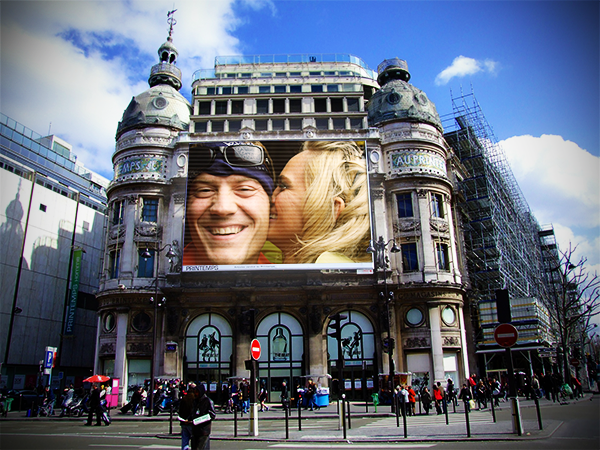
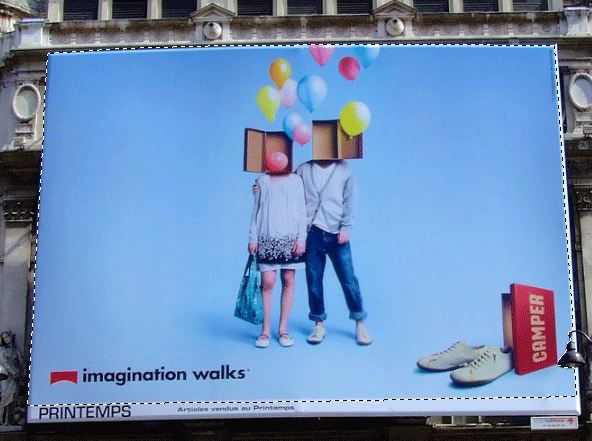
Final Image
As always, this is the final image that we’ll be creating:
Tutorial Details
- Program: Adobe Illustrator CS3
- Estimated Completion Time: 40 minutes
- Difficulty: Beginner-Intermediate
Resources
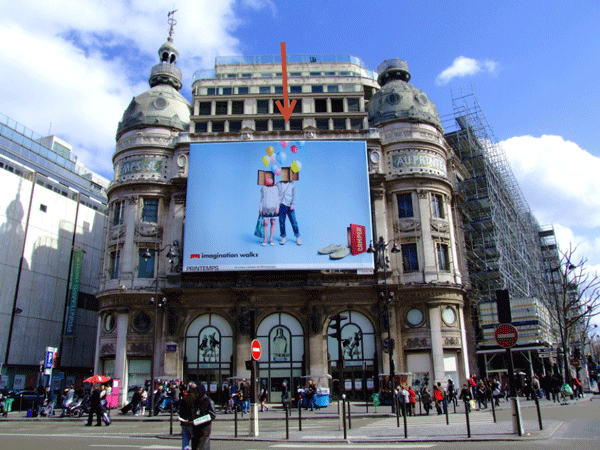
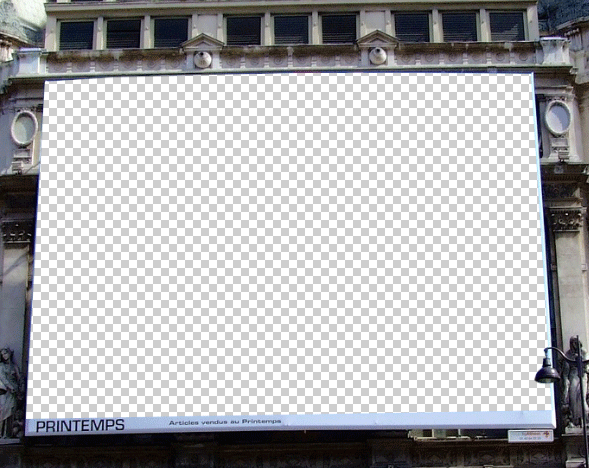
Step 1
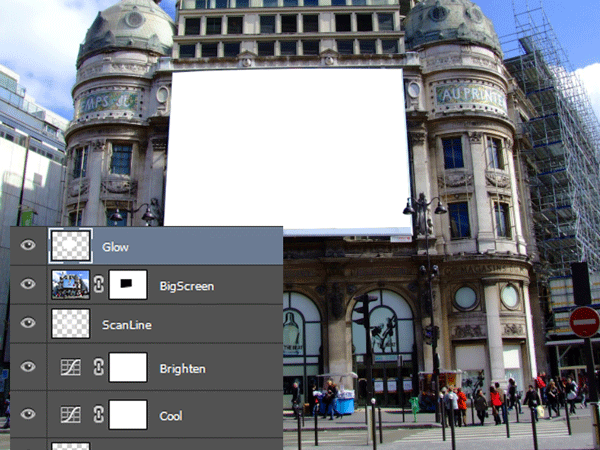
Open file “Big Screen”. We are going to place a photo of a couple instead of the commercial showing on the big screen but you can put any photo you like there.
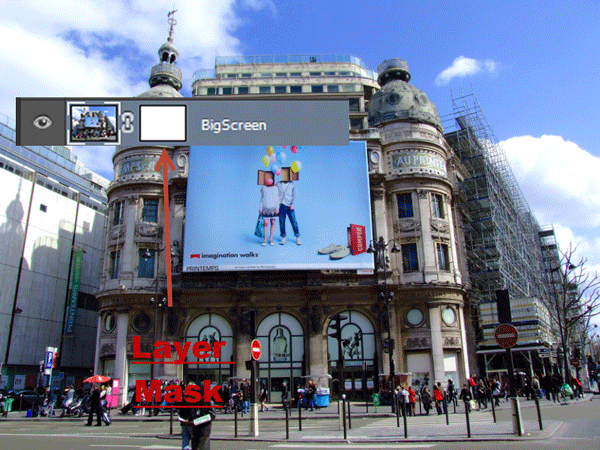
Double click the background layer and click Ok to convert it to a regular layer. Name this layer “BigScreen”.
Step 2
Add a layer mask to the “BigScreen” layer. You can do that by going to Layer > Layer Mask > Reveal All. As you can see a white thumbnail appears next to the “BigScreen” layer. That is the layer mask. If you paint with black in the layer mask you will hide the layer and if you paint with white you will reveal the layer. Because the layer mask is all white no change happened to the “BigScreen” layer. But if you choose a brush and paint with black in the layer mask you will see the transparent background below.
Step 3
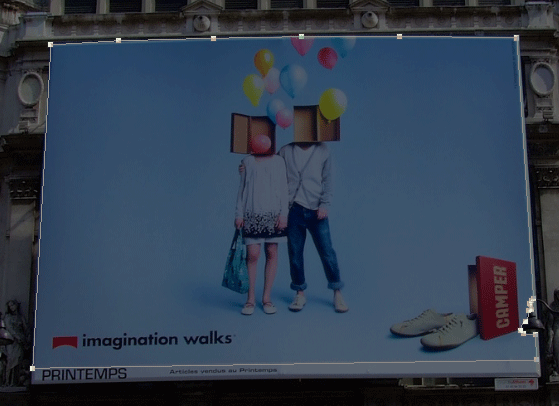
Now let’s hide the big screen in the middle of our photo. How are we going to do that? Well first we are going to make a selection of the screen and then in the layer mask we are going to fill that selection with black. The best way to make a complicated selection is by using the Pen Tool (P). Select it and create a path around the screen as I did in the image below.
Step 4
Now press Ctrl + Enter to transform the path into a selection. This trick works for all the paths you create with the Pen Tool. If you press Alt + Ctrl + Enter you will subtract from the existing selection and if you press Shift + Ctrl + Enter you will add to the existing selection.
Step 5
Click once on the layer mask to make sure it’s selected and press D to set the foreground and background colors to their defaults (black foreground and white background). Now press Ctrl + Backspace to fill the selection with black. As you can see the big screen has disappeared revealing the transparent background below. Now you can deselect everything by pressing Ctrl + D.
Step 6
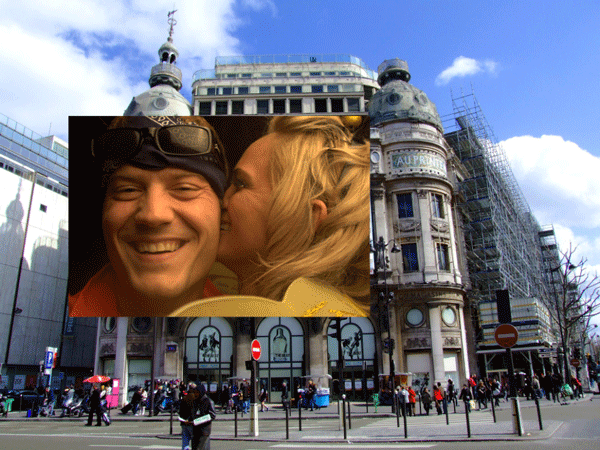
Now open the photo you want to put on the screen. Press Ctrl + A to select everything and Ctrl + C to copy. Go back to our document and press Ctrl + V to paste. Name this layer “Photo”.
Step 7
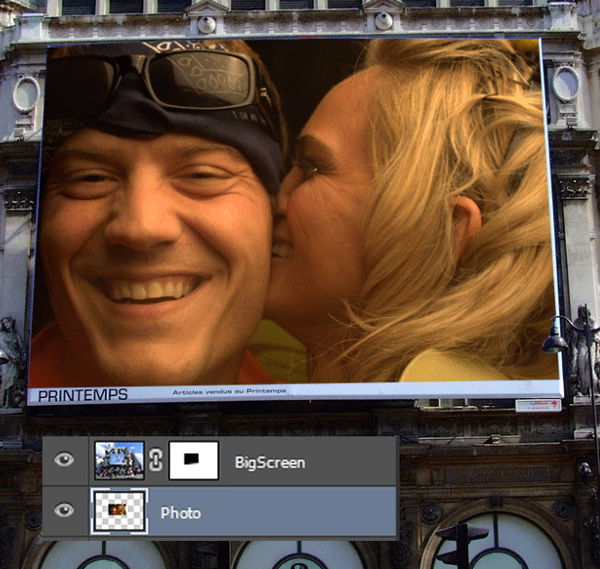
Now drag the “Photo” layer below the “BigScreen” layer as indicated below. As you can see the photo shows nicely in the big screen. Drag the photo around to position it as you like and you can even resize it if it is too big by pressing Ctrl + T to enter Free Transform and dragging the corner handles that will appear while holding Shift for symmetrical resize.
Step 8
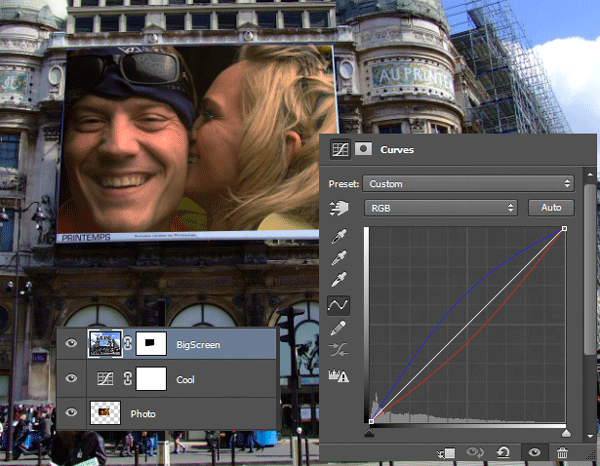
You can apply various adjustments to the photo below to make it blend better with the overall scenery. In our case the photo looks a little bit too warm so we’ll add a Curves Adjustment Layer (Layer > New Adjustment Layer > Curves) and play with the settings to cool the tone of the photo.
Step 9
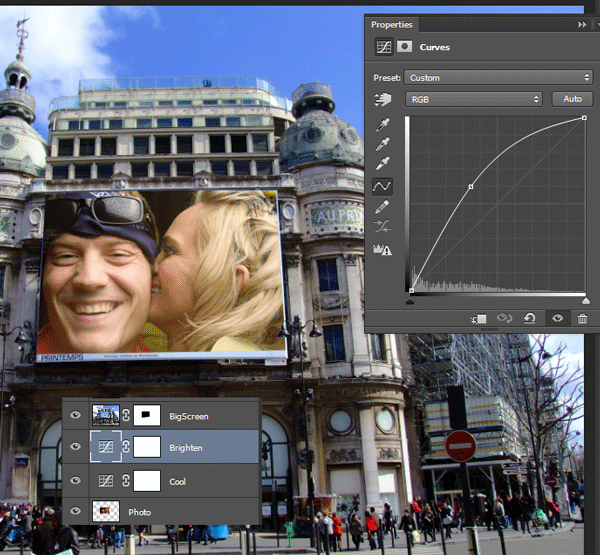
This is supposed to be an Lcd screen so we should have a little more brightness. Create another Curves Adjustment Layer and drag the curves up as shown below to lighten the photo.
Step 10
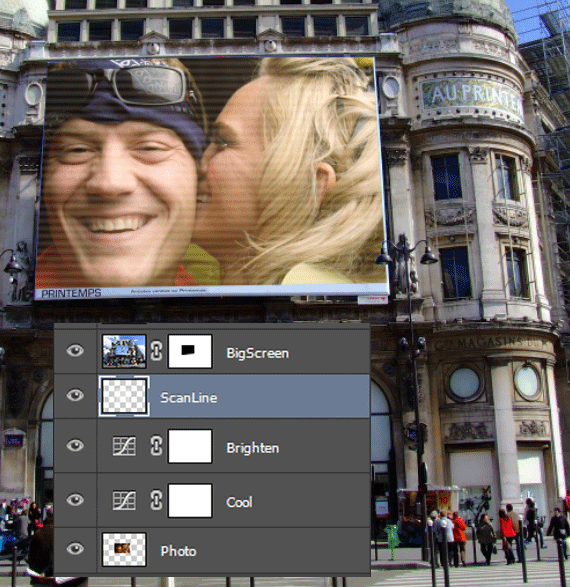
Import the ScanLine brush (in order to import a brush either double click on the .abr file and it will automatically open Photoshop and load the brushes or go to Edit > Presets > Preset Manager and click on the button Load Brush to select the downloaded brush). Create a new layer (Ctrl + Shift + Alt + N) and use the brush “lines-3” to create some white scanlines (resize the brush until it fits the photo and click once). Lower the scanline layer opacity to 14%.
Step 11
Now let’s create some glow around the photo. In order to do that first let’s create a new layer (Ctrl + Shift + Alt + N) and place it above the “BigScreen” layer. Name this layer “Glow”. Now Ctrl-click on the “BigScreen” layer mask in order to reselect the screen shape and Ctrl + Shift + I to invert the selection.
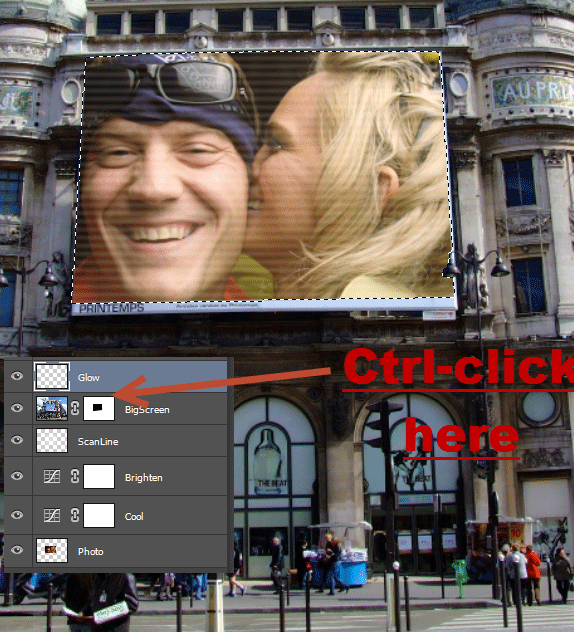
Step 12
Now click on the “Glow” layer to select it and press Alt + Backspace in order to fill it with the foreground color. You can deselect everything by pressing Ctrl + D.
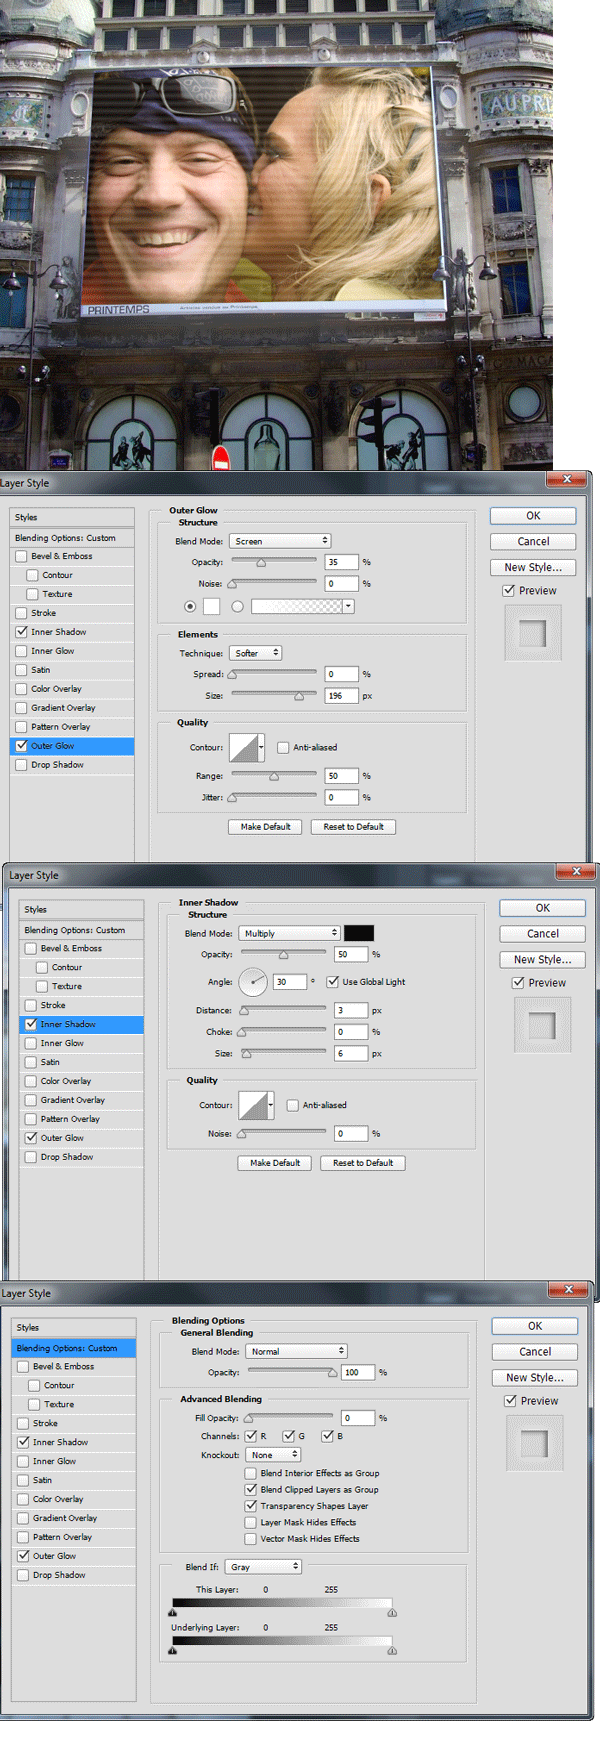
Step 13
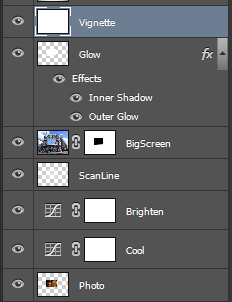
Double click the “Glow” layer to open Blending Options Window. First of all lower the Fill Opacity to 0. This will hide the layer but it will reveal the effects. Next add some Inner Shadow and Outer Glow – you can see the settings I used below.
Step 14
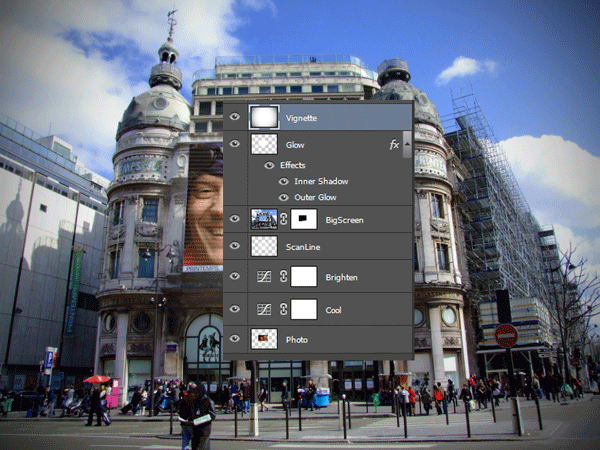
The image is looking pretty good but we can still improve it a little. Let’s add a subtle vignette effect. First create a new layer (Ctrl + Shift + Alt + N) and fill it with white (press D to set the foreground and background colors to default and Ctrl + Backspace to fill the layer with the background color). Name this layer “Vignette”.
Step 15
Now go to Filter > Lens Correction and click on the Custom tab. There you will see some sliders named Vignette and Midpoint. Drag the Vignette slider to -30 and the Midpoint slider to +30. Click Ok. Now simply change the blending mode of the “Vignette” layer to Multiply and you will that all that remains is the nice dark vignette.
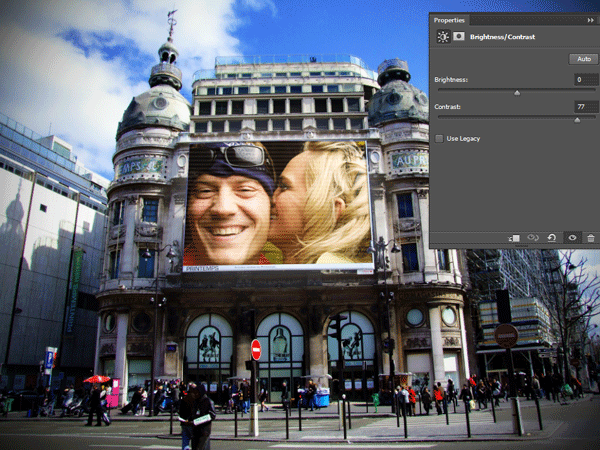
Step 16
As a final adjustment let’s increase the contrast of your photo. Create a Brightness/Contrast Adjustment Layer and drag the Contrast Slider to 77.
And We’re Done!