In this Photoshop tutorial I will teach you how to add a Polaroid frame to any photo.
We’ll be using layer masks and selections but don’t be intimidated – I’ll guide you gently through the process. Let’s begin!
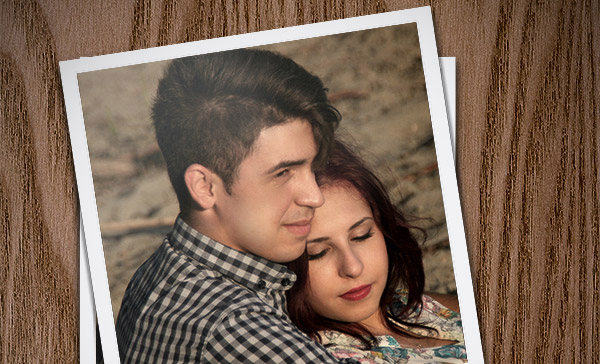
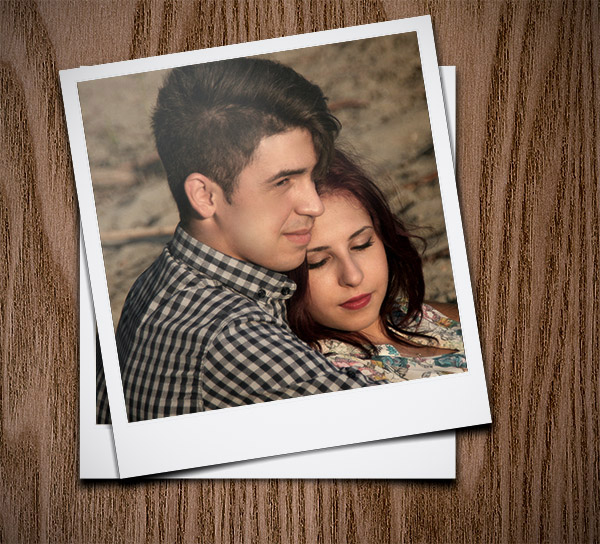
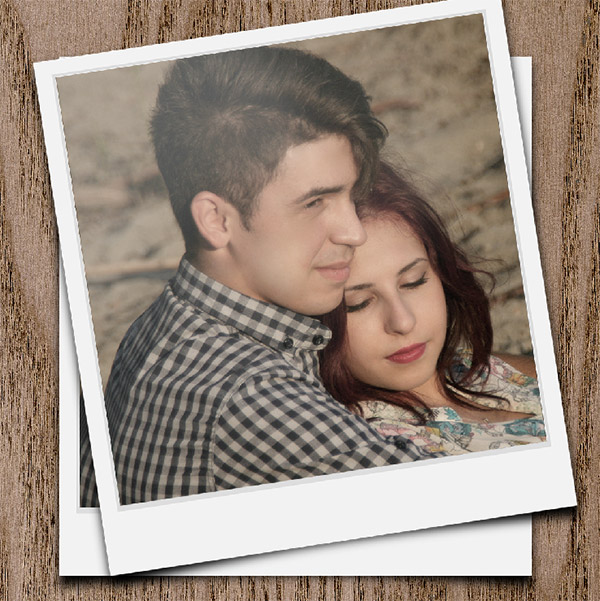
Final Image
As always, this is the final image that we’ll be creating:
Tutorial Details
- Program: Adobe Photoshop CS3
- Estimated Completion Time: 40 minutes
- Difficulty: Beginner-Intermediate
Resources
Step 1
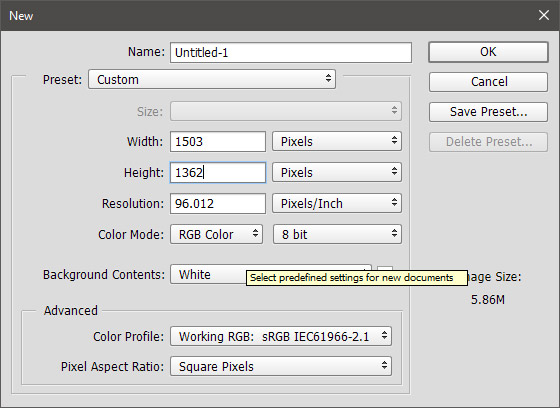
Let’s start by creating a new document 1503×1362 by pressing Ctrl + N.
Step 2
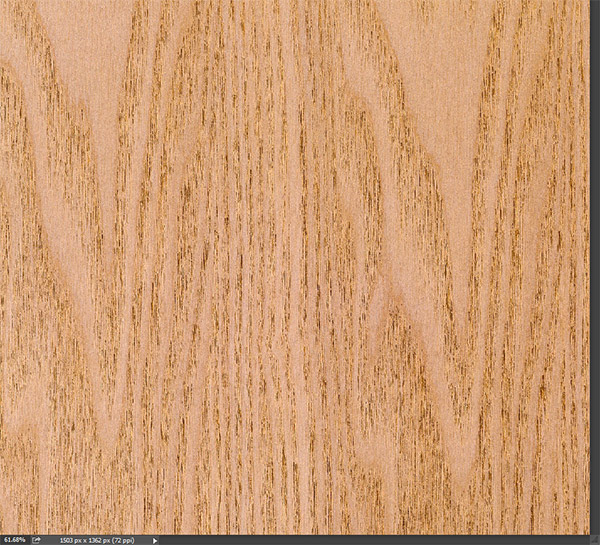
Open the file “Wood Texture”. Select all by pressing Ctrl + A and copy by pressing Ctrl + C.
Go back to our newly created document and press Ctrl + V to paste.
This will be our background for the polaroid photos.
Step 3
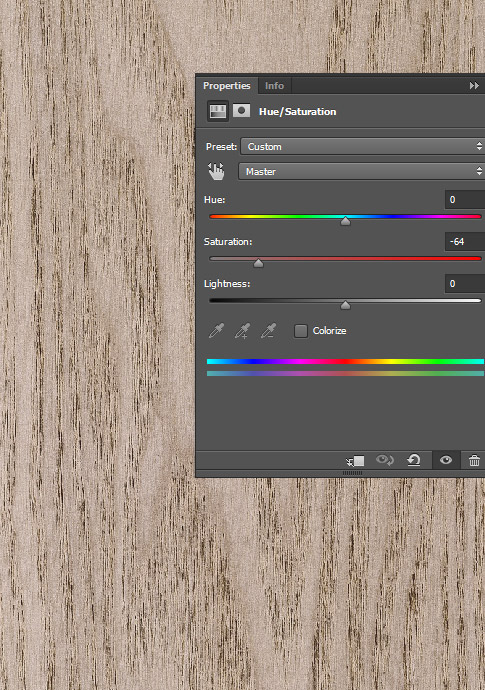
The color of the wood is a bit too intense and may prove distracting in our final scene so let’s tone it down a bit.
Create a new Hue/Saturation Adjustment Layer (Layer > New Adjustment Layer > Hue/Saturation) and drag the saturation slider to -64.
Step 4
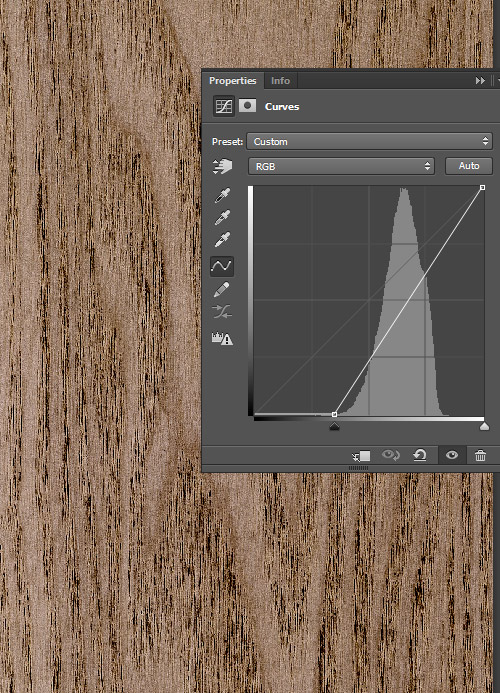
Let’s further adjust the color of our wood background layer by making it darker.
Create a new Curves Adjustment Layer by going to Layer > New Adjustment Layer > Curves. Drag the left slider towards the center to darken the image and boost the contrast at the same time.
Your scene should look like the photo below.
Step 5
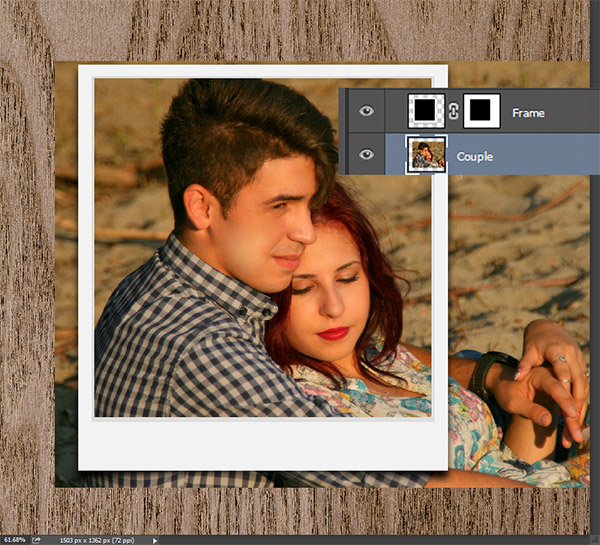
Open the file “Polaroid” with Photoshop. Inside you should find an already cut out polaroid frame with shadows already added. Select all by pressing Ctrl + A, copy (Ctrl + C) and paste the frame into our scene by pressing Ctrl + V.
Press Ctrl + T to enter Free Transform (basically when in free transform you can position and resize your layer freely by dragging from the corner handles – holding shift while dragging will resize the layer proportionally) and resize/position the polaroid frame as shown in the picture below:

Step 6
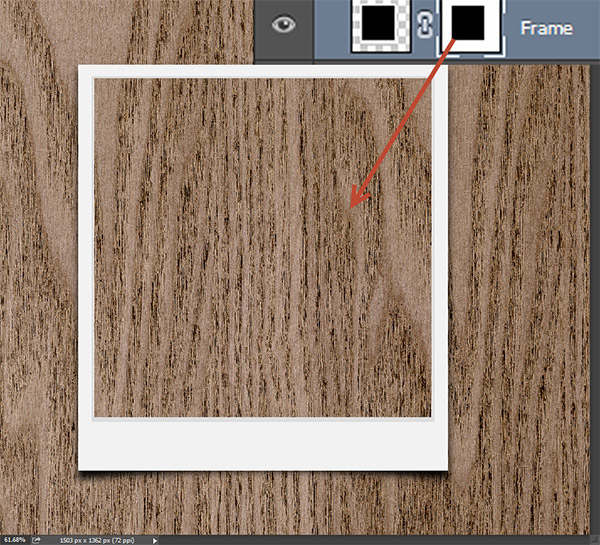
Let’s get rid of the black region where the actual photo is supposed to be. Since this region is a square let’s do this the easy way – with the Rectangular Marquee Tool.
First add a layer mask to our polaroid frame layer by first clicking on the layer in the layers palette to make it active and afterwards by going to Layer > Layer Mask > Reveal All. You should see a white thumbnail appearing next to the polaroid preview thumbnail in the layer palette. In a layer mask black color conceals and white reveals – since your layer mask is completely white the polaroid frame is completely visible.
Select the Rectangular Marquee Tool (M) and try to create a selection around the mentioned black region .

Step 7
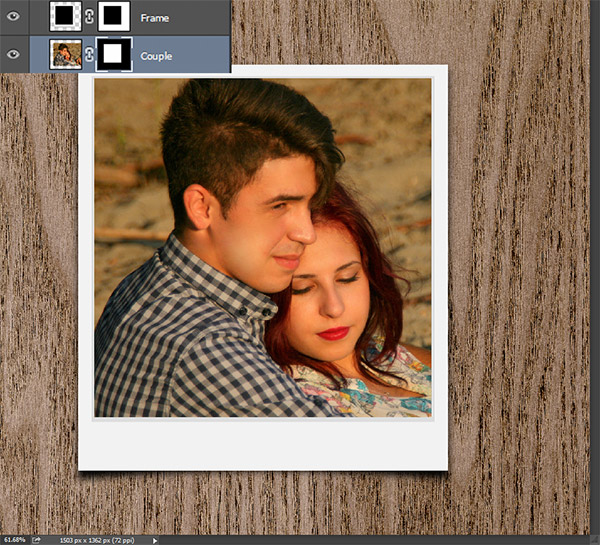
Now press D to set the colors to default and click on the layer mask thumbnail in the layers palette. Now simply press Ctrl + Backspace to fill the selection with black and voila – the black region has disappeared from our polaroid frame.
Since we no longer need the rectangular selection press Ctrl + D to deselect everything.
Step 8
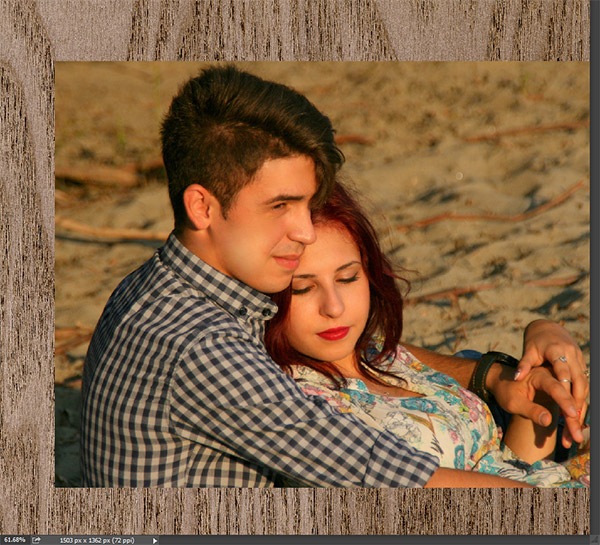
Open the file “Couple”. Select all by pressing Ctrl + A and copy (Ctrl + C).
Go back to our document and paste (Ctrl +V). Press Ctrl + T to enter Free Transform and position/resize the photo as shown below.
Step 9
Move the “Couple” layer below the polaroid layer in the layer palette. In order to do that simply drag the couple layer below the polaroid layer in the layers palette.
Step 10
Now we need to mask the contents of the couple layer that lay outside the inner polaroid frame. We could use a new layer mask and create selections and so on but I’ll show a little tip to do it faster.
Hold the Alt key and drag the layer mask from the polaroid frame on the couple layer below. If a window appears asking you if you’re sure press ok. Now simply press Ctrl + I to invert the selection and there you have it, the photo shows only inside the polaroid frame. One word of caution – when you press Ctrl + I make sure that the layer mask thumbnail is active – simply click on it to make it active – otherwise you’ll be inverting the colors in your photo which is something you don’t want.
Step 11
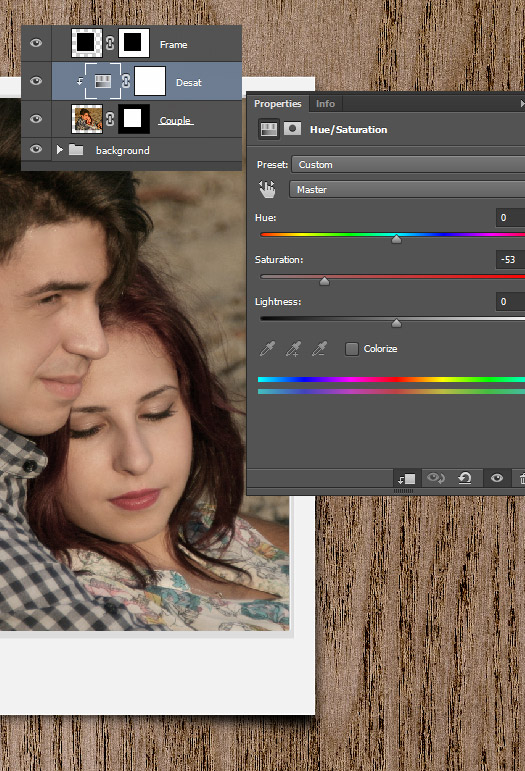
Our photo looks good but usually polaroid photos don’t have such saturated colors. Let’s desaturate the couple layer a little.
Create a Hue/Adjustment Layer (Layer > New Adjustment Layer > Hue/Saturation) and drag the saturation slider to -53.
Place this adjustment layer above the couple layer in the layers palette and while holding the Alt key click between the two layers (also in the layers palette) in order to clip the upper layer to the lower. This way the desaturation effect will only be applied to the couple layer.
Step 12
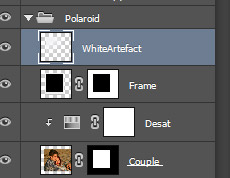
Polaroid photos weren’t perfect – they had slight imperfections and discolorations. Let’s replicate this in our scene.
Create a new layer (Ctrl + Shift + Alt +N) and with the round standard soft brush paint (at 400px size) and 30% Opacity click once somewhere in the upper frame of the polaroid frame. If the effect is too strong further lower the opacity of the layer until a pleasant effect is achieved.

Step 13
Put all the polaroid related layers into a group by first selecting the layers (hold the Ctrl key while clicking on them) and pressing Ctrl + G.
Step 14
Duplicate the polaroid group by pressing Ctrl + J. Press T to enter Free Transform and rotate this group slightly as shown below.
Step 15
Let’s improve the contrast in our scene. Create a new Curves Adjustment Layer and use the settings below to boost the contrast.
Step 16
Finally, let’s add a vignette effect.
Create a new layer and fill it with white (Shift + F5). Go to Filter > Lens Correction, click on the Custom Tab and apply the settings shown below to create a vignette.
Change the blending mode to Multiply and there it is – a nice black subtle vignette.
And We’re Done!