
In this Photoshop tutorial I will show you how to apply Dodging and Burning to a photo in a non-destructive way that will make your photos really pop and stand out.
Final Image
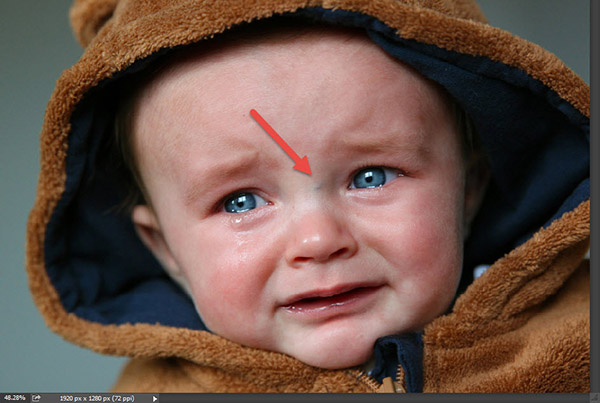
As always, this is the final image that we’ll be creating:

Tutorial Details
- Program: Adobe Photoshop CS3
- Estimated Completion Time: 30 minutes
- Difficulty: Beginner-Intermediate
Resources
Step 1
Open the file “Baby”. We will use Dodge and Burn to make this image really stand out. You’ll see a small blue spot on the nose – we’ll correct that in the next step.
Step 2
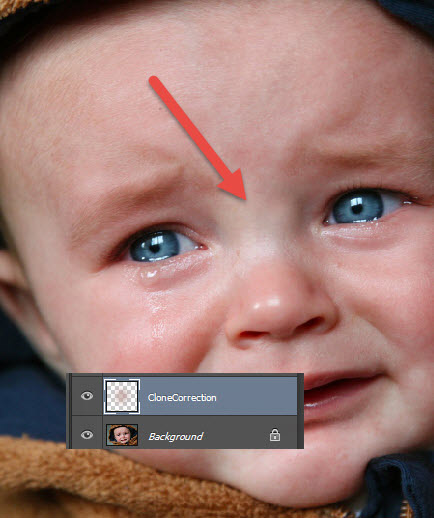
Create a new layer (Ctrl + Shift + Alt +N) and use the Clone Tool (S) to hide the blue spot on the nose. You can Alt-click somewhere in a clean area (next to the spot) and then paint over the blue spot.
Step 3
Before starting to Dodge and Burn the image let’s add a vignette first to put focus on the center of the scene.
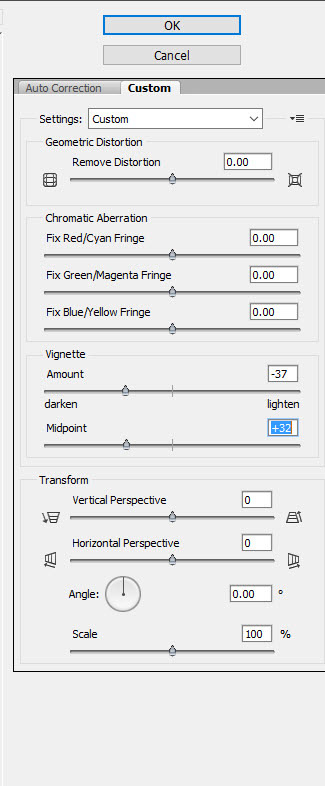
Create a new layer and fill it with white (Shift + F5). Now go to Filter > Lens Correction and use the settings show below to create a black vignette.
Step 4
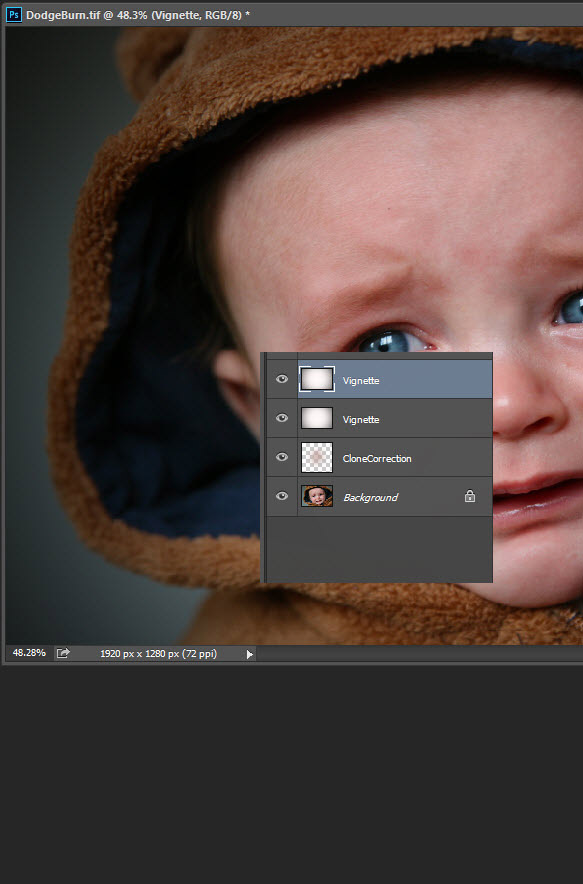
Change the blending mode of the vignette layer to Multiply – this will get rid of the white color and leave only the nice black vignette around the image. Duplicate the vignette layer by pressing Ctrl + J to intensify the vignette effect.
Step 5
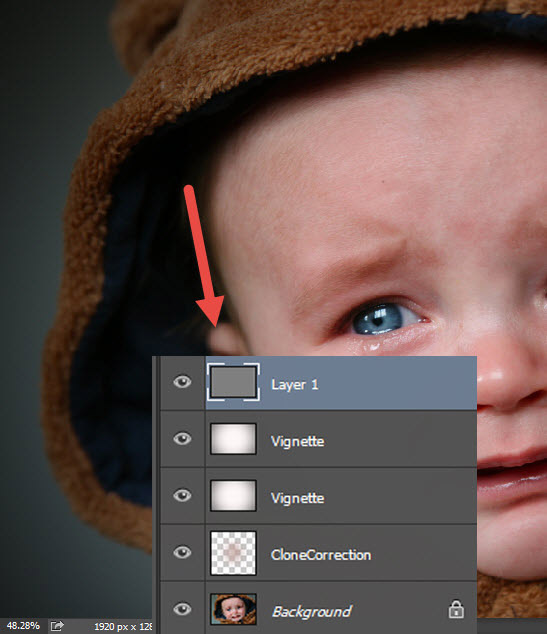
There are multiple ways of applying Dodge and Burn. One way would be to simply create a new layer from all the visible layers and use the Dodge and Burn tools on that layer. But this means that if we want to change something below that layer we won’t be able to (because we just made a snapshot of all the layers below).
So my favorite method of applying Dodge and Burn is a non-destructive method which will allow us to change every layer without worrying about merged layers (those snapshots of all the visible layers made with Ctrl + Shift + Alt + E).
Create a new layer and fill it with 50% Gray (Shift + F5). Now change the blending mode of the layer to Overlay. Nothing will change in the scene because 50% gray on Overlay blending mode is just our playground for the Dodge and Burn tools – and we haven’t used them yet.
Step 6
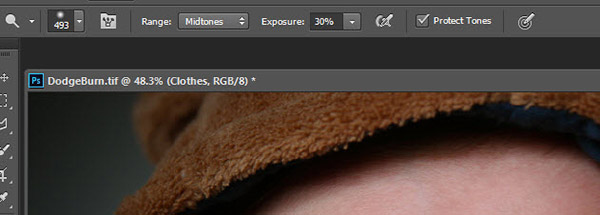
Now it’s time to play. Choose the Dodge tool (O) and use the settings shown below (they can be found just below the menu toolbar in the upper section of Photoshop). Before we start applying dodging or burning note that we won’t select the Burn tool in this tutorial. Why? Because we can access it in a much easier way. If we have the Dodge tool selected simply by holding the Alt key we will change the active tool temporarily to the Burn Tool. When we release the Alt key we will have the Dodge tool back.
This is a very convenient way of dodging and burning because we won’t have to switch between the tools all the time.
Step 7
Use the Burn Tool to darken some of the clothing of the baby as indicated below. Paint with gentle strokes and take care not to have a very strong burn effect.
Step 8
Make a new layer and fill it with 50% gray and set the blending mode to Overlay (we’ll do this quite frequently for every step of our dodging and burning process).
With the Dodge Tool paint over the baby’s clothes highlights as shown below to make them pop.
Step 9
Again make a new layer, fill it with 50% gray and set the blending mode to Overlay. Now paint carefully with the Dodge tool over the baby’s eyes –specially over the irises. You’ll see that they will lighten considerably.

Step 10
As you will have noticed by now dodging and burning an image successfully means darkening the already dark spots and lightening the light areas.
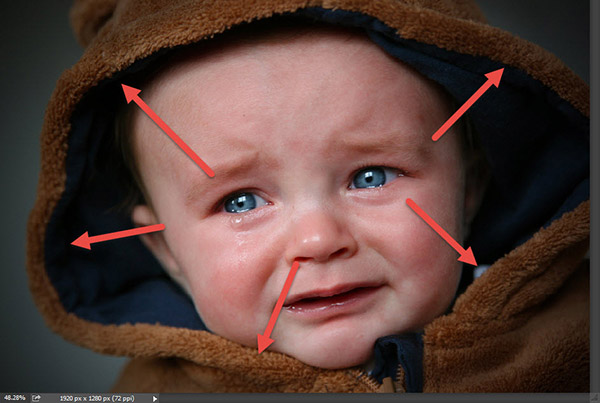
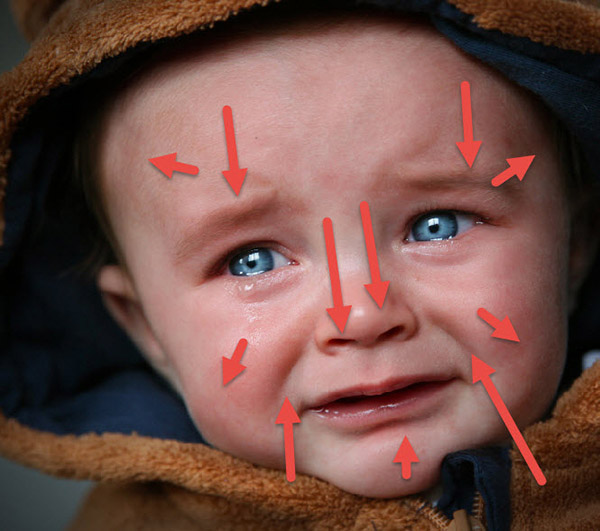
Make a new layer, fill with 50% gray and set the blending mode to Overlay. Now use the Burn tool to darken subtly the areas on the baby’s face that are already dark – nostrils, edges of his cheeks, inside of the expression lines, etc.
Step 11
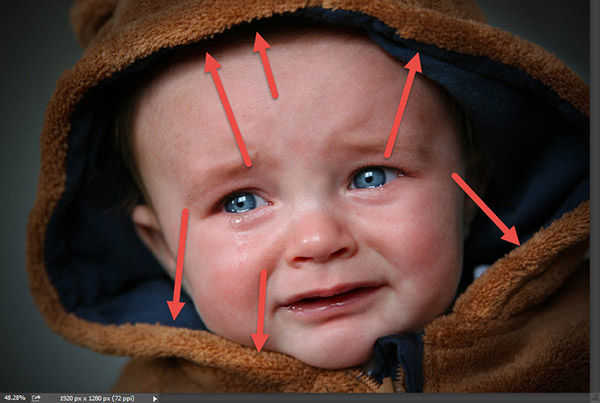
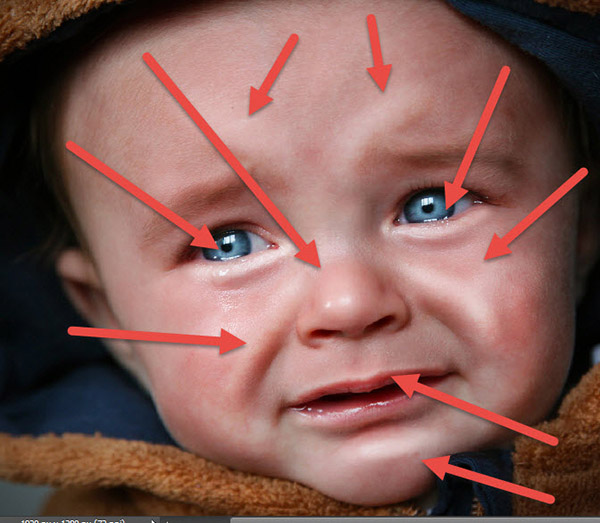
Now let’s bring those highlights up. Make a new layer, fill it with 50% gray and set the blending mode to Overlay. Paint with the Dodge Tool over the highlights of the face (cheekbones, nose, chin, etc.) – you are allowed to exaggerate the highlights a bit in order to achieve a more striking effect.
Step 12
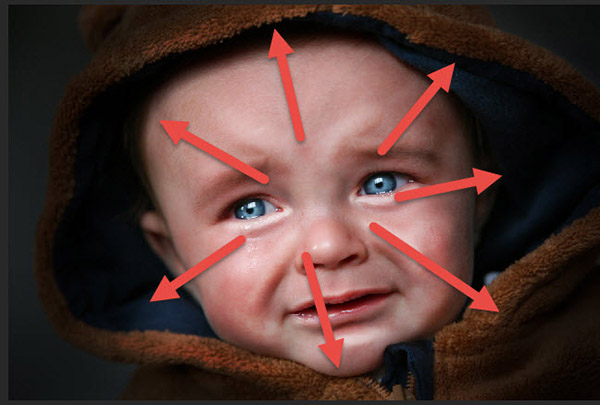
Now let’s really darken the outside areas of the face. Make a new layer, fill it with 50% gray and set the Overlay blending mode. With the Burn tool (and a large brush size) paint generously over the areas outside the baby’s face. This will create an ever bigger vignette effect and really put focus on the face.
Step 13
Alright, we’re almost done. Now let’s bring those highlights out even more but this time we’ll use a larger brush size with the Dodge tool.
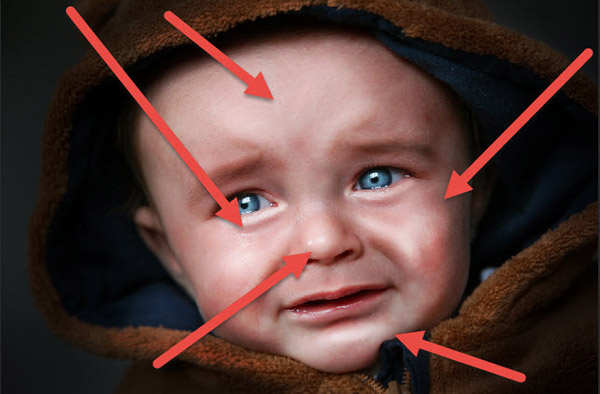
Create a new layer, fill it with 50% gray and set the blending mode to Overlay. Increase the brush size of the dodge tool to at least 150px and paint gently over the indicated areas (the highlights on the face). This will soften the highlights and make them pop even more.
And We’re Done!