
Here is new one tutorial for you how to make professional advertisement poster, which a based on color contrasts.
So, let’s start! First of all make a new document with the resolution 500×500 pixels for this tutorial. Select some appropriate colors, for example colors of #144499, #1375C4 and drag a linear gradient.

After that, I would like to add some gradients to our background. Create a new layer, then select the Elliptical Marquee Tool and make selection, then fill it with white to transparent gradient as on my picture below:

Make a new one selection and fill it with the same gradient. Your picture should look as mine:

Make a new one gradient more.

Ok, looks good, isn’t it? Then remove the selection with Ctrl+D and change layer mode to Overlay.

The next step what we need to do is mark the area where we will put our advertised object. Select the Elliptical Marquee Tool, make a rounded selection, and then fill it with color of #00387f on the new layer.

Deselect chosen area with Select > Deselect (or press Ctrl+D) and apply Filter > Blur > Gaussian Blur with similar settings to these:

You can see the result below:

Now get the Rectangular Marquee Tool (Feather: 5 px), make a new selection as on my picture below and press Delete to clear selected area.

Remove the selection with Ctrl+D, after that create a new layer, select the Polygonal Lasso Tool and make a new selection, then fill it with white color. Your image should look as mine:

Remove selection using Ctrl+D and apply Filter > Blur > Motion Blur:

Now we have something like this:

Then apply another one Filter > Blur > Gaussian Blur:

See the difference now:

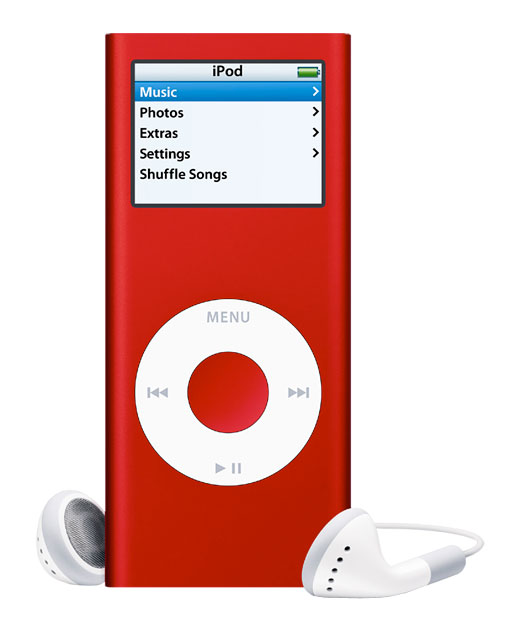
Ok, now set opacity up to 70% for this layer. Move to the next step. Now we need to find some appropriate picture, for example picture of iPod Nano, to bring it on the canvas. This picture must be contrast to blue color object, for example red. Use Google Images to find this picture or feel free to use mine. Then open it and use the Polygonal Lasso Tool to select the iPod on the picture. Then press Ctrl+C to copy selected part of image. Go back to our main document and press Ctrl+V to paste copied part of image in it. After that reduce it a little bit to give the same size as on my picture:

Now comes the important part, we need to make reflection for iPod. For creating this effect duplicate layer with iPod, flip it vertical with Edit > Transform > Flip Vertical and place it like on the image below.

We have some trouble with right earphone. Its reflection looks not so right. Ok, use the Polygonal Lasso Tool to fix this problem. Make the selection of this earphone and move it down as on print screen:

Looks better now as for me! Now set opacity up to 35% for this layer.

Use Quick Mask to hide reflection from the object on the floor progressively. Enter Quick Mask Mode, then get the Gradient Tool and make red to transparent gradient as on my picture below:

Then go back to Standard Mode. Now we have some selected area.

Press Delete to clear image into the area and press Ctrl+D to deselect area.

Ok, now we have so realistic view reflection. Hope you have the same result. Move to the next step. I would like to add some design elements to the background. For this you can use my brushes. Also you can use your own brushes if you want. Select the white color and make a couple of print using the Brush Tool.

After that get out the Custom Shape Tool and find some appropriate shape from the palette:

Drag it onto your canvas like I’ve done in the below screenshot. Use Ctrl+T to rotate it.

Add a few shapes more:

Ok, now go to the layer with iPod image and create a new one above, then get out the Elliptical Marquee Tool and create the rounded selection as on picture below. Fill this selection with white to transparent gradient. Now we have nice glare on the iPod.

After that go to the layer with iPod again and load it selection with Select > Load Selection, then press Ctrl+Shift+I to invert the selection. Then go back to the layer with white glare and press Delete to clear selected area. Remove the selection with Ctrl+D.

To finish off the advertisement poster I would like to add some inscription. Get out the Horizontal Type Tool (just the regular one) and write out something like ‘FEEL THE SOUND’ with white color.

In the above image I’ve used a font called Academy (30 pt, Crisp), which is sadly a commercial font. Feel free to use another font or buy or ‘get’ a nice font from somewhere. Duplicate this text layer and rasterize it with Layer > Rasterize > Type. After that apply Edit > Transform > Flip Vertical and move it down as on my screenshot:

Apply Quick Mask Mode again with gradient as below for this layer:

Then go back to Standard Mode. Now we have some selected area like on picture below. Press Delete to clear selected area.

Remove the selection with Ctrl+D and change opacity to 55%.

We are done for this tutorial. We made cool professional advertisement poster, which a based on contrasts. Looks cool! Hope you like this tutorial very much!
