In this simple tutorial I’ll show you how to make some cool Japanese style background what will looks as volume.
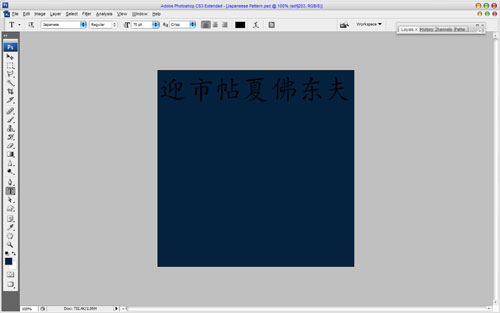
First, start by creating a new document, I’ve used a document size of 500×500 pixels and fill it with color of #04223f:

After that get out the Horizontal Type Tool and write out the text with black color in the top of canvas. Use hieroglyphs font such as Japanese for this tutorial. Feel free to download it from here.
Duplicate text layer with Ctrl+J and move lower layer 15 pixels down and 15 pixels left.

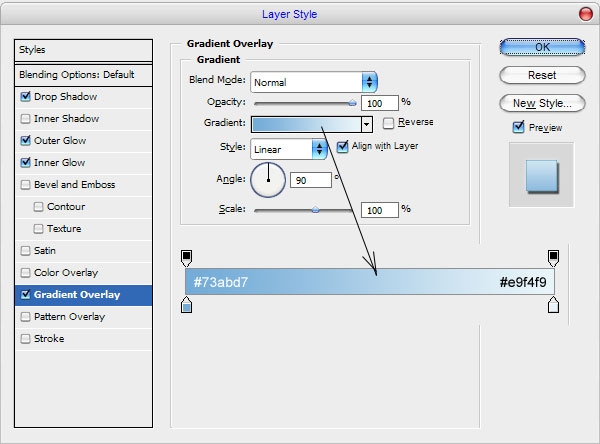
Go back to upper layer and apply following layer styles for this text layer:
• Drop Shadow
• Outer Glow
• Inner Glow
• Gradient Overlay
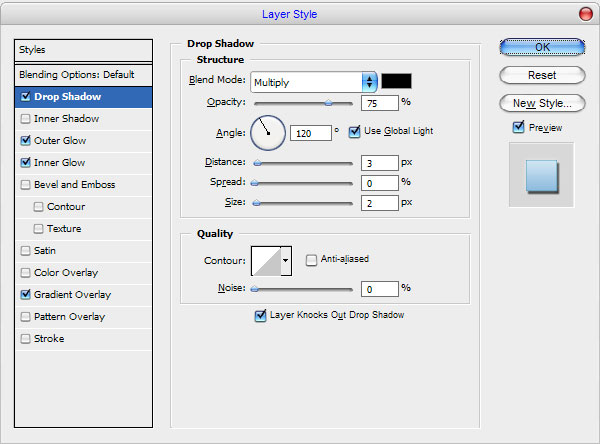
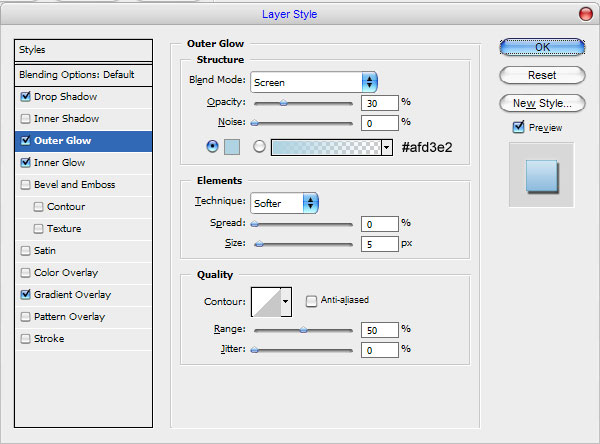
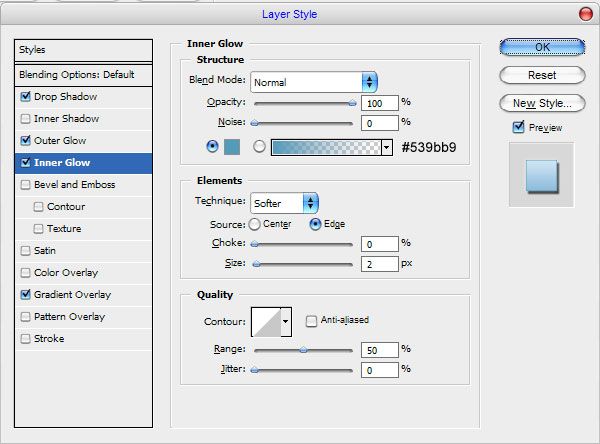
You can see the effect below.

After that add a couple of more text lines in the same way with the same effects.
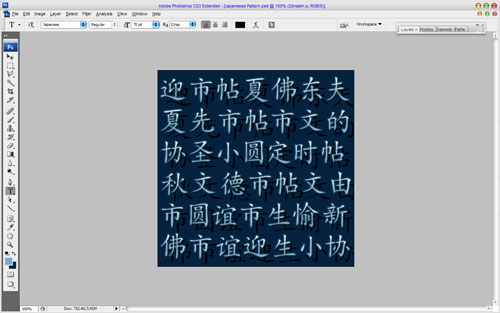
Then merge all of layers in one and use the Dodge Tool (Brush: 100px, Range: Highlights, Exposure: 100%) to bring some bright spots to the background.

After that use the Burn Tool (Brush: 100px, Range: Highlights, Exposure: 50%) to add more dark areas.

Looks volume and contrast, don’t you think? Well, we’re done for the tutorial! Try to experiment to get some different cool effects!
