![]()
This useful Photoshop Tutorial about how to make stylish icons what you can apply in your website design or use in multimedia presentation.
So, let’s start! In the beginning create a new file about 500×300 pixels and fill it with white color. Now, proceed directly to creating the icon. Create a new layer, then select the Ellipse Tool to make the round shape as you can see on my picture below.
![]()
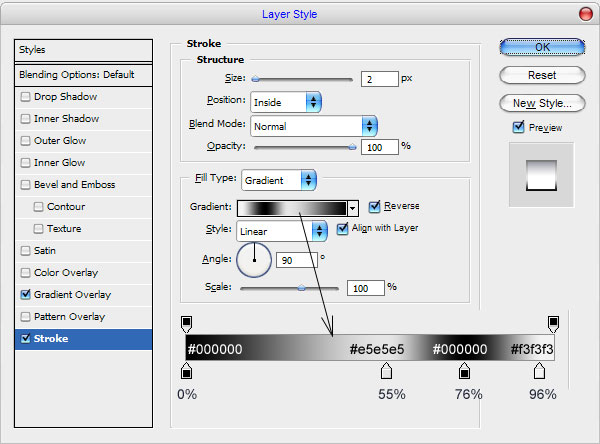
After that apply following Blending Options: Gradient Overlay and Stroke.
![]()
![]()
Now we have something like this:
![]()
Not really looks like icon is not it? Don’t worry, we process the tutorial. Now, use the Elliptical Marquee Tool to make the selection what you can see on my screenshot below, then create a new layer and fill the selection with dark blue (#1c2133) to transparent gradient.
![]()
Ok, now select our round shape icon (Ctrl+Left click on the layer thumbnail in layers palette) and invert the selection with Ctrl+Shift+I. clear selected area by pressing Delete button.
![]()
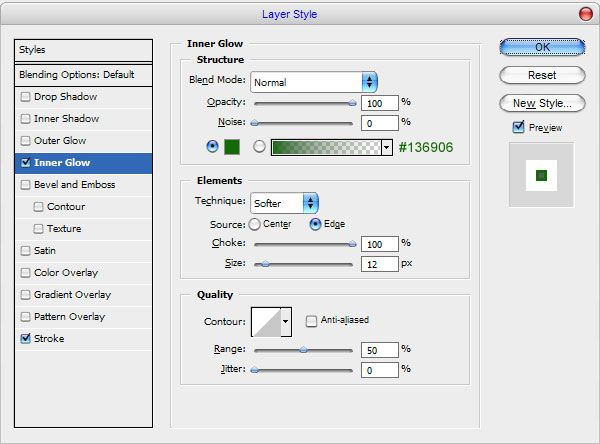
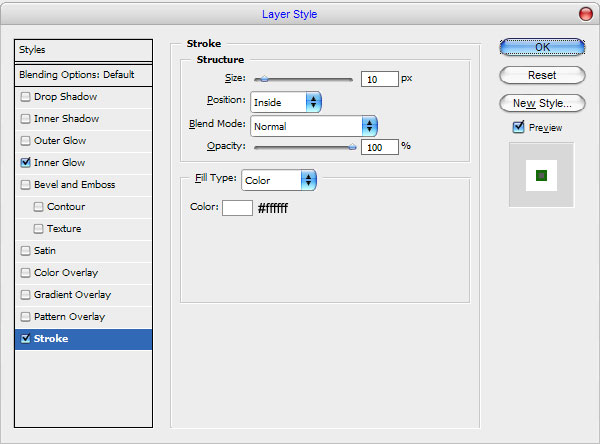
Deselect chosen area with Ctrl+D and move to the next step of the tutorial. Use the Ellipse Tool again to make a new one round shape with color of #5ebf1a. Be attentively that second one round shape should be a little bit less then the main shape.
![]()
Then apply such layer styles as Inner Glow and Stroke to this shape layer.
![]()
![]()
![]()
But we are not finished the icon yet! Go on! Rasterize this shape with Layer > Rasterize > Shape. Then get out the Elliptical Marquee Tool to make the similar selection as was before in the beginning of this tutorial, then use the Dodge Tool (Brush: 100 px, Range: Midtones, Exposure: 20%) to make the bottom part of green shape a little lighter.
![]()
After that invert the selection with Ctrl+Shift+I and change Dodge Tool Range from Midtones to Highlights and continue to work.
![]()
Ok, after that revert the selection back and now use the Burn Tool (Brush: 100px, Range : Midtones, Exposure: 30%) to add the contrast to the button.
![]()
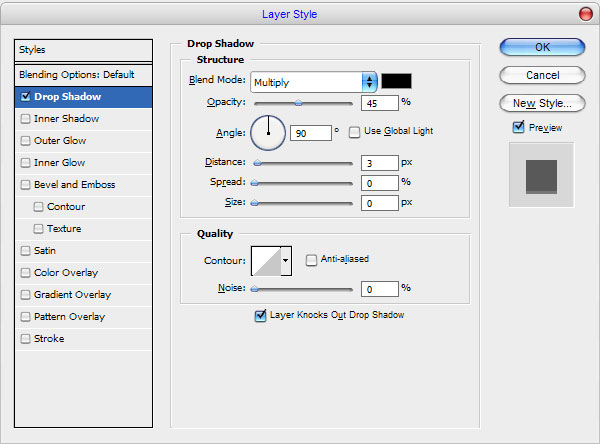
Ok, we are almost done! Remove the selection with Ctrl+D and move to the next step. I would like to bring some ornament to the green shape. Select the Custom Shape Tool and use one of the standard Photoshop shapes from the gallery. I tried to use this one:
![]()
It will look better if we apply some Blending Option such as Drop Shadow
![]()
The result should be the same as mine:
![]()
Ok, now merge all of layers of the icon in one and apply Edit > Transform > Distort:
![]()
After that duplicate this layer using Ctrl+J and move the lower original layer as in my picture below:
![]()
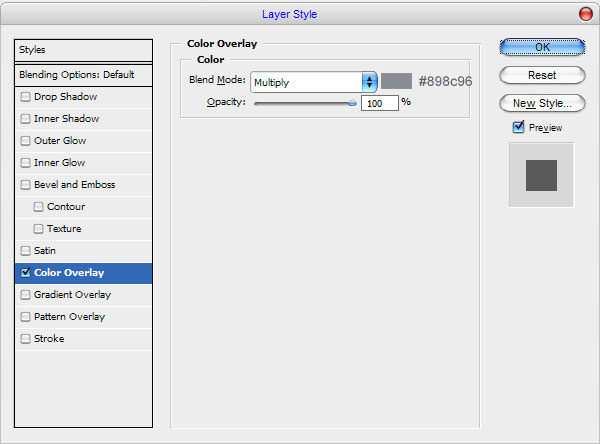
Use the Color Overlay layer style for this layer.
![]()
See the difference now?
![]()
It remains to add a shadow at the bottom and our icon will be ready. Ok, move to the background layer and create a new layer above. Select the Elliptical Marquee Tool to create the selection as on my picture below and fill it with black color.
![]()
Deselect this layer with Select > Deselect and apply Filter > Blur > Gaussian Blur with similar settings to these:
![]()
Then apply another one Filter > Blur > Motion Blur.
![]()
The result should be the next:
![]()
Ok, we are done for now! Also I made a couple of icons more. Try to experiment and the result will be better that ever!
![]()