
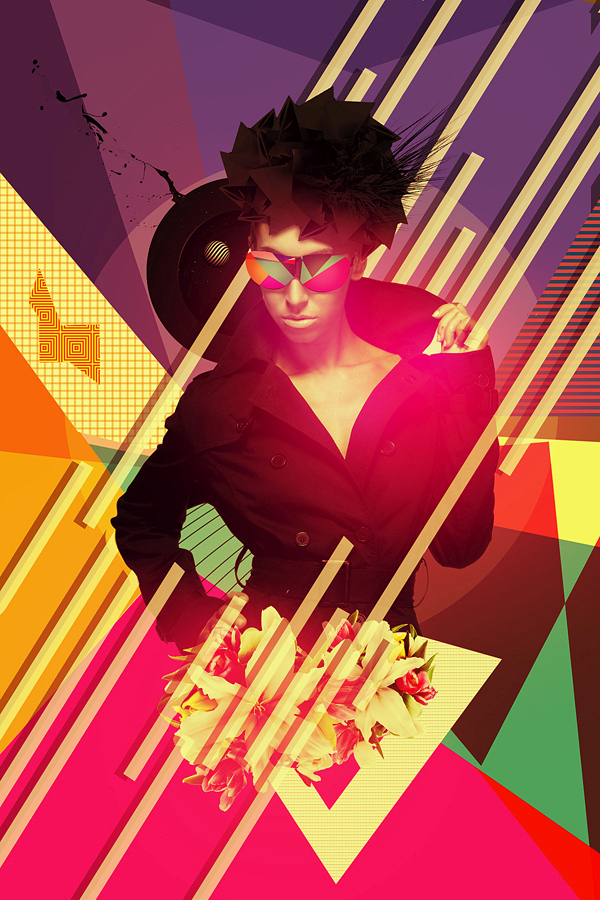
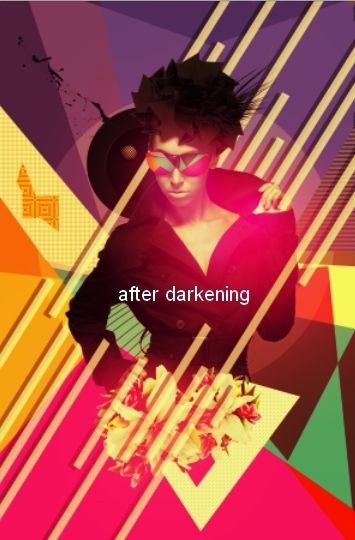
In this tutorial I’ll show you how to create a fashion mixed media artwork. You’ll learn how to work with abstract elements, create patterns and play with shapes and colors.
Final Image
Tutorial Details
- Program: Photoshop CS3 +
- Estimated Completion Time: 2 hours
- Difficulty: Intermediate
Resources
Step 1
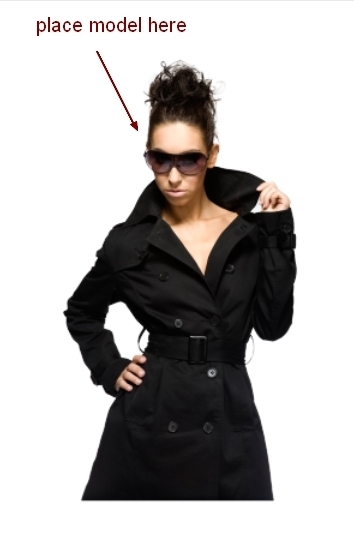
Create a new document and fill it with white. The ratio of the width/height is 2/3 but you can adjust it to fit your requirements.
Extract the model and place her at the center of the white canvas:
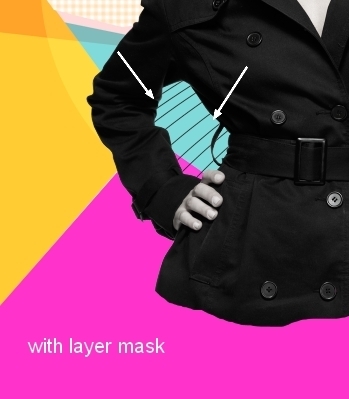
Step 2
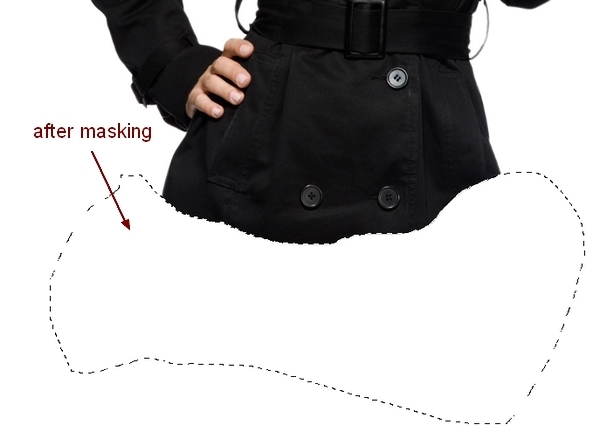
Click the second button at the bottom of the Layers Pallete to add a mask to the model layer. Use the Lasso Tool (L) to make a selection at the bottom of the model’s coat:

Activate the Brush Tool (B) and on the layer mask, use a hard black brush to remove the selected part:
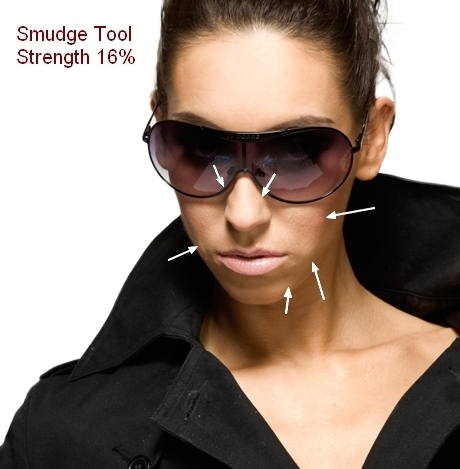
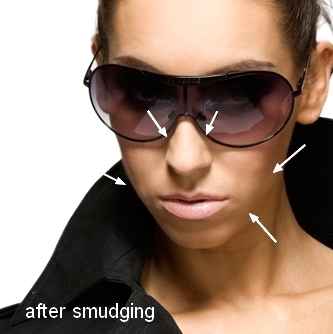
Step 3
To retouch the model’s skin, on the model layer, hit Cmd/Ctrl+Shift+N to make a new layer with Clipping Mask:
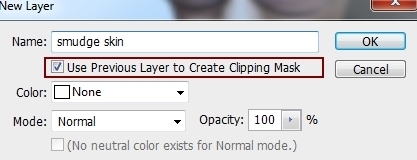
Use the Smudge Tool with Strength about 16% to soften the skin following the face details, especially the cheeks, nose sides:
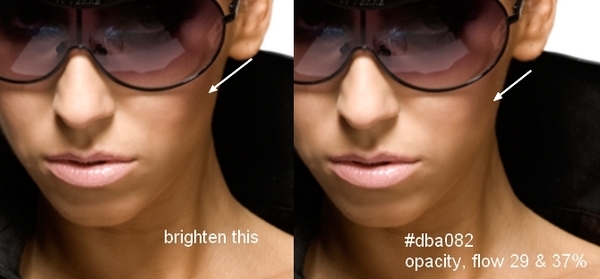
Step 4
Make a new layer (Clipping Mask) and use brush with color #dba082, opacity and flow about 29-37% to brighten the shadow on the model’s right cheek (from the viewers):
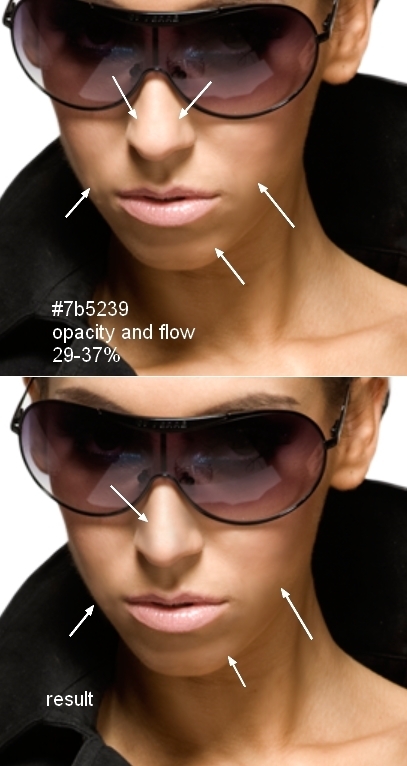
Step 5
On a new layer, I used a brush with color #7b5239 with similar opacity and flow to paint on the cheeks, nose, lip corners and chin to create a smoother look for the skin and make the nose smaller and longer:
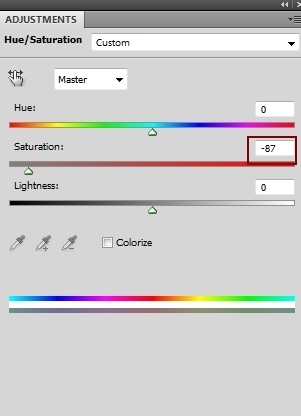
Step 6
I added an adjustment layer to reduce the model layer’s saturation. Go to Layer > New Adjustment Layer > Hue/Saturation:

Step 7
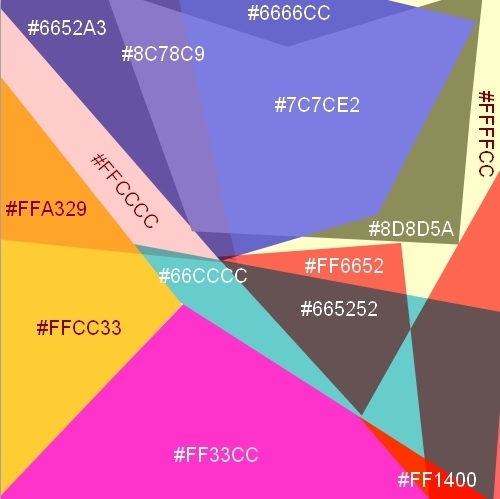
In this step we’ll make a colorful pattern to replace the white background. Make a new document and fill it with any colors you like. You can use your own size but it should be the same or larger than the size of our main one.
Activate the Pen Tool with Shape Layers options (not Paths) and draw some colorful shapes over the background. Be bold and choose the colors you wish, don’t be afraid if some of them are contrasting. Here is my choice of colors if you want a reference:
Step 8
Merge all the shape layers (Cmd/Ctrl+Option/Alt+Shift+E) and move the merged layer into the document containing the model. Place it under the model layer:
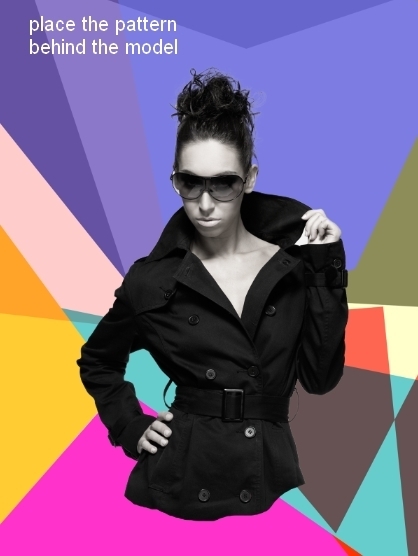
Name it “pattern” or whatever you like.
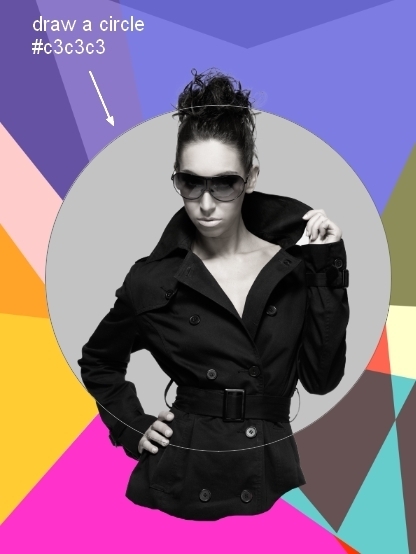
Step 9
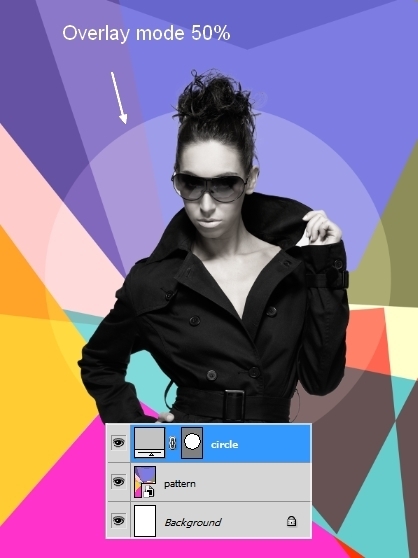
Make a new layer above the pattern layer. Use the Ellipse Tool with color #c3c3c3 to draw a circle behind the model, then change the layer mode to Overlay 50%:
Step 10
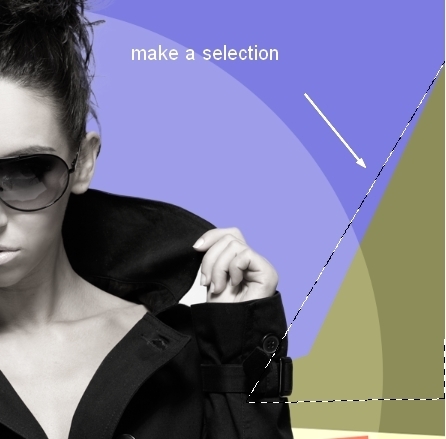
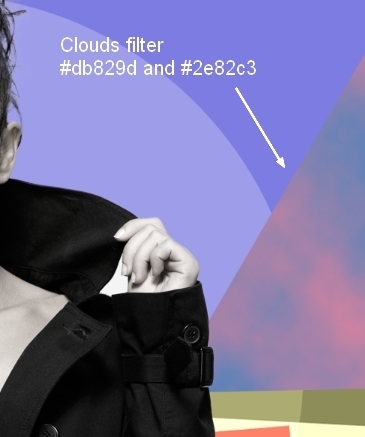
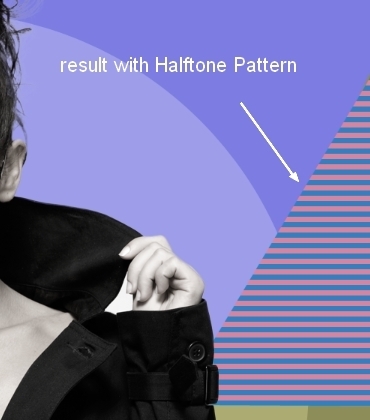
Make a new layer above the circle layer. Change the foreground and background colors to #db829d and #2e82c3. Use the Polygonal Lasso Tool (L) to make a selection of a triangle at the right corner of the image:
Choose Filter > Render > Clouds:
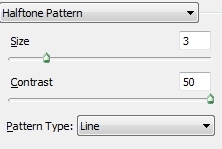
Go to Filter > Sketch > Halftone Pattern:
Step 11
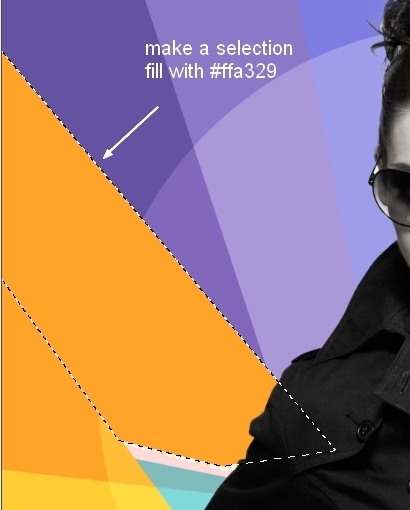
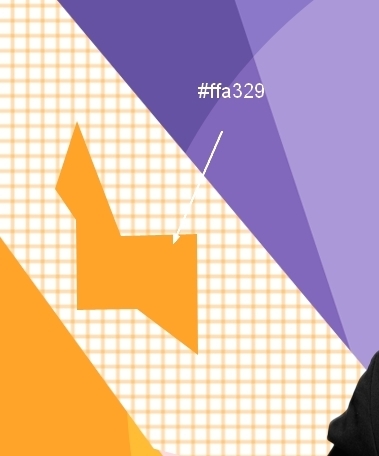
Make a new layer at the left side of the image and fill with color #ffa329:
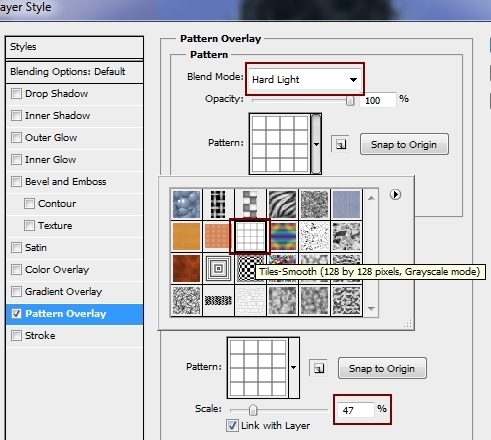
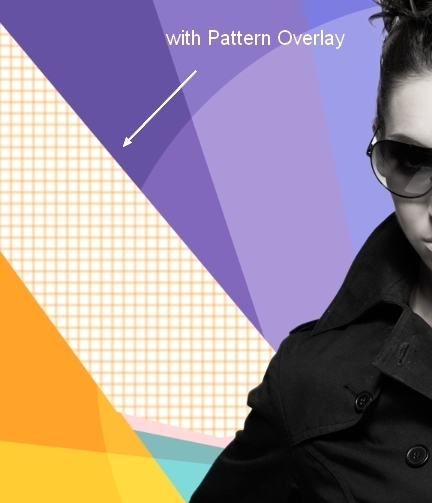
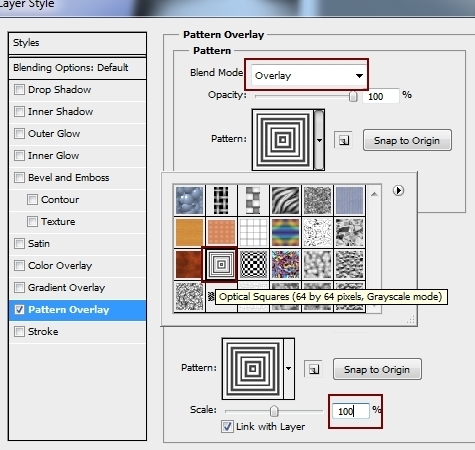
Double click this layer, choose Pattern Overlay:
Step 12
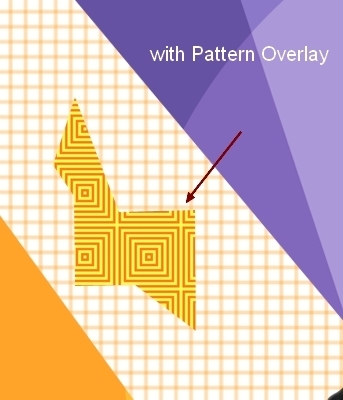
Create a new layer and use the Polygonal Lasso Tool to make a selection inside the one in the previous step and fill with color #ffa329:
Apply Pattern Overlay:
Step 13
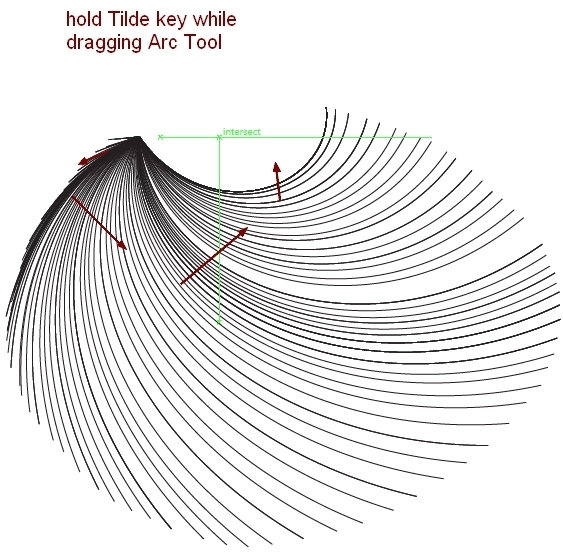
In this step we’ll make some lines to add to our picture. Open Illustrator and make a new document with white background. Set Fill to None and Stroke to 1 pt. Choose the Arc Tool and hold Tilde key (~) while dragging this tool to get a similar result to that shown below:
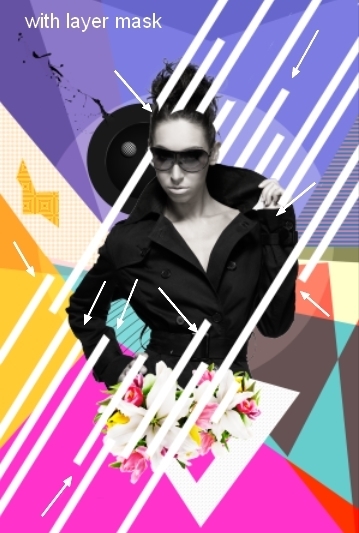
Step 14
Press Cmd/Ctrl+A and Cmd/Ctrl+C to copy this result then come back to Photoshop. Press Cmd/Ctrl+V to paste it into our main document. Choose Paste As Smart Object and use the Transform tool (Cmd/Ctrl+T) to rotate and scale it down:
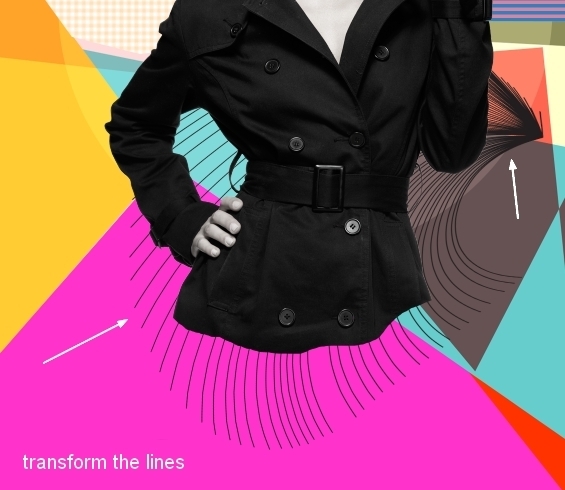
Use a layer mask to remove unwanted lines:
Step 15
Create a circle behind the left of the model with color #191919:
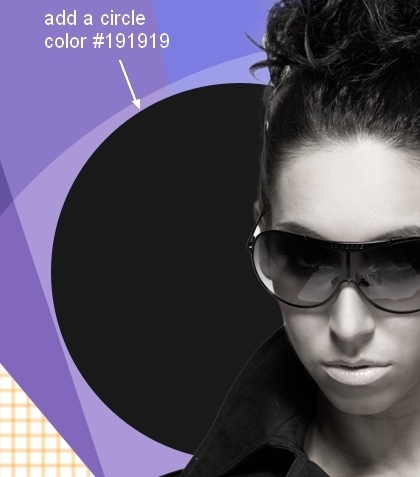
I named it “circle 2”.
Step 16
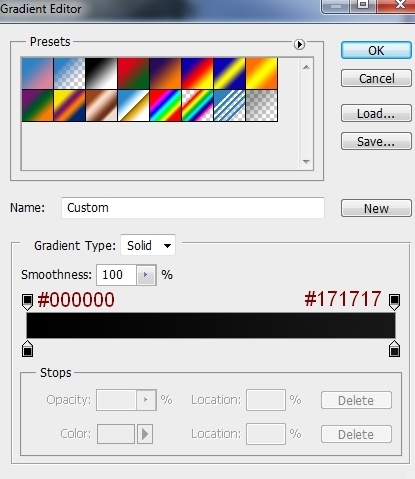
Make a smaller circle inside the circle 2 and fill with black.
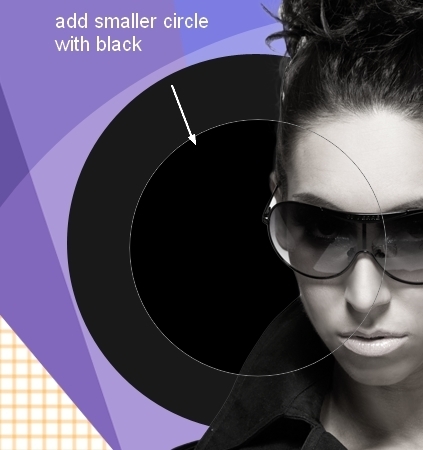
Double click this layer, choose Gradient Overlay:
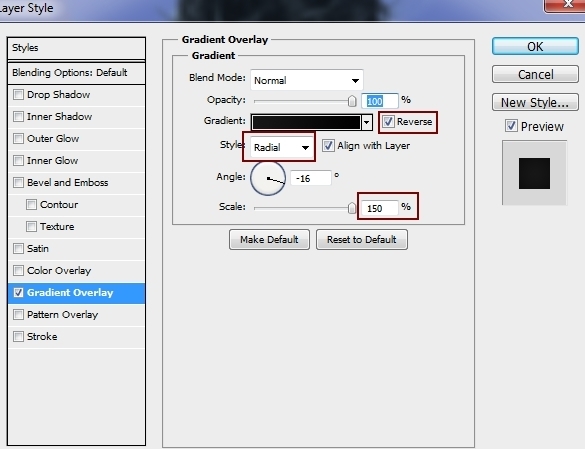
Here is the result:
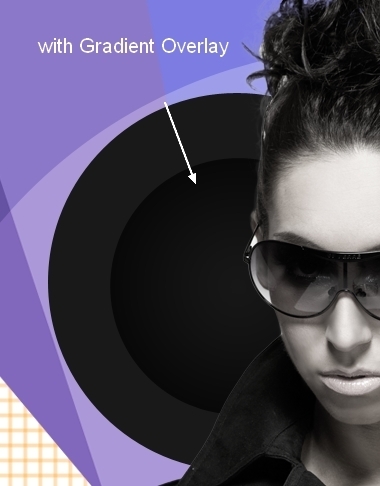
I named it “circle 3”.
Step 17
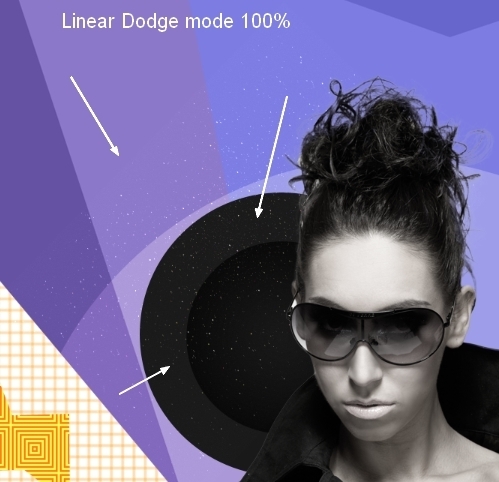
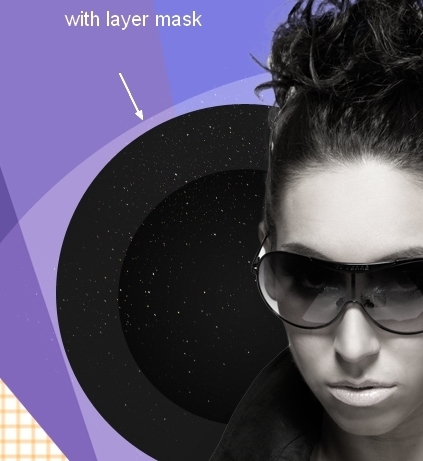
Open the star background pack. I used “starry 1” and put it onto the two dark circles:
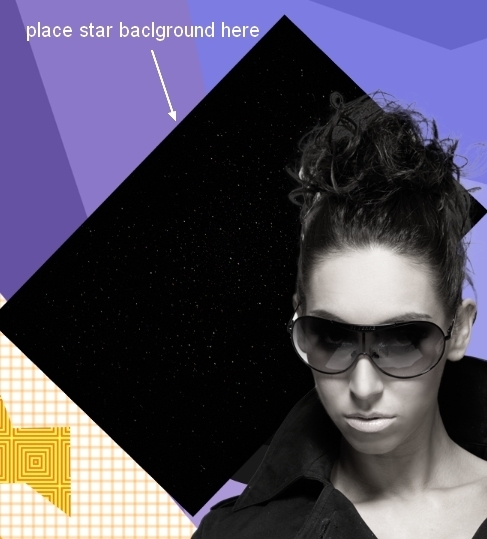
Change the mode to Linear Dodge 100% and use a layer mask to remove stars outside the circles:
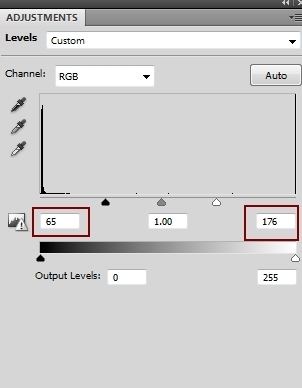
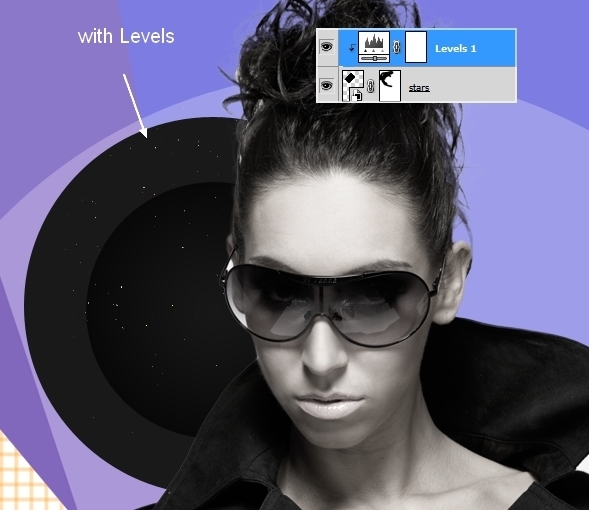
Step 18
To enhance this effect, I used a Levels layer with Clipping Mask:
Step 19
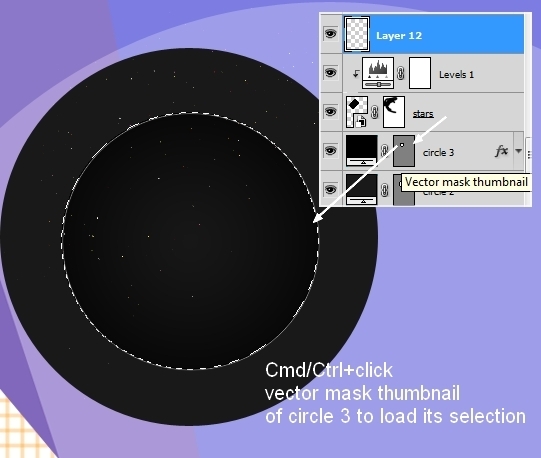
Make a new layer, hold Cmd/Ctrl key while clicking vector mask thumbnail of circle 3 layer to load its selection (I turned off the model group to make it clearer to see):
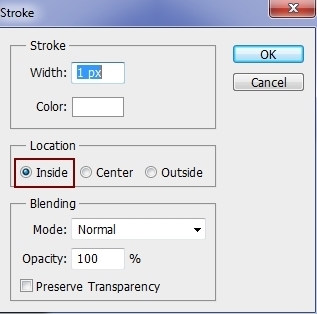
Go to Edit > Stroke and pick white:
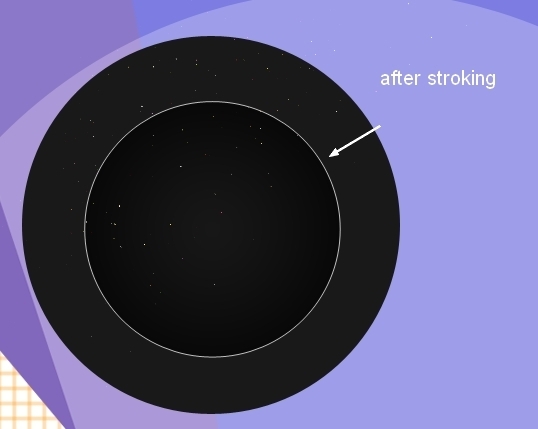
Step 20
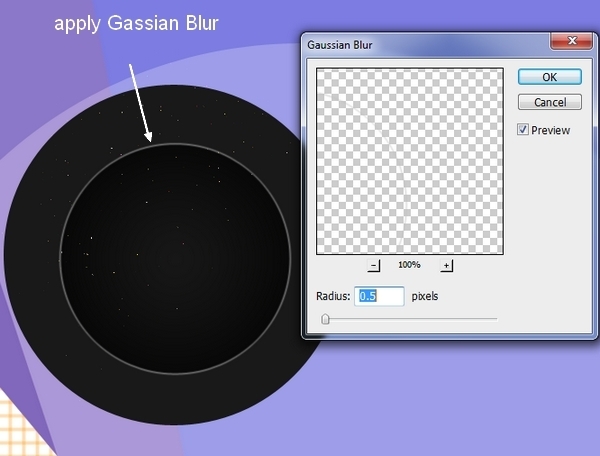
Go to Filter-Blur-Gassian Blur to soften the stroke:
Use a layer mask to remove and reduce the stroke opacity to get a shiny look as shown below:

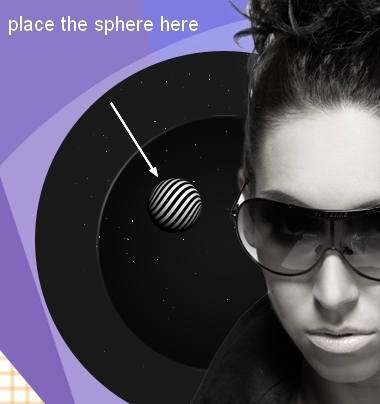
Step 21
Choose one from the sphere pack and put it inside the circle 3 after resizing:
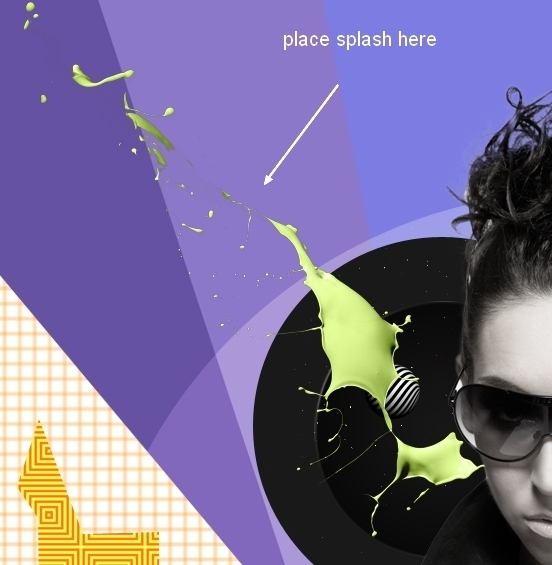
Step 22
Open the splashes pack. I chose a green one to isolate, and placed it onto the circles:
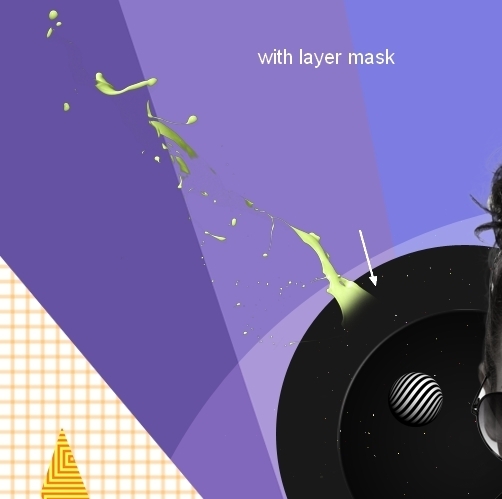
Use a layer mask to blend the splash with the circles:
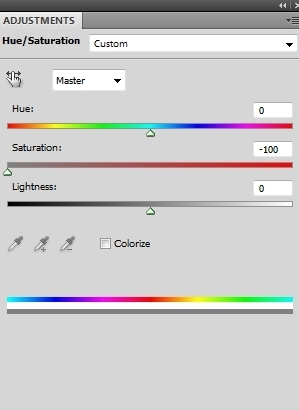
Step 23
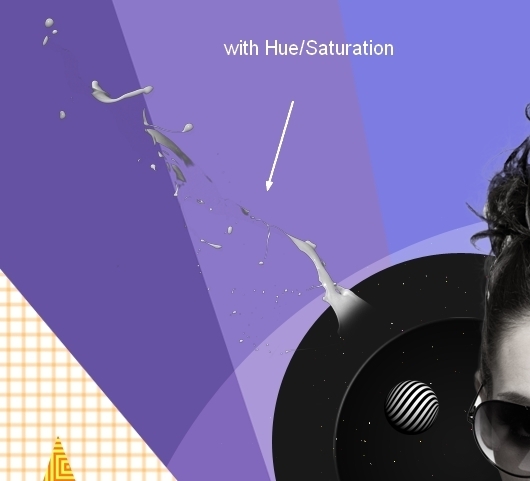
Add a Hue/Saturation layer to the splash:
Step 24
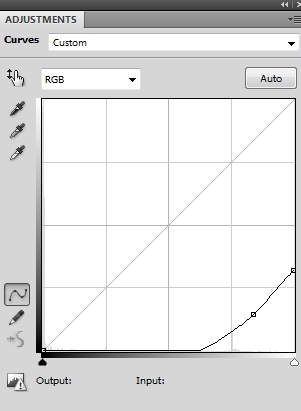
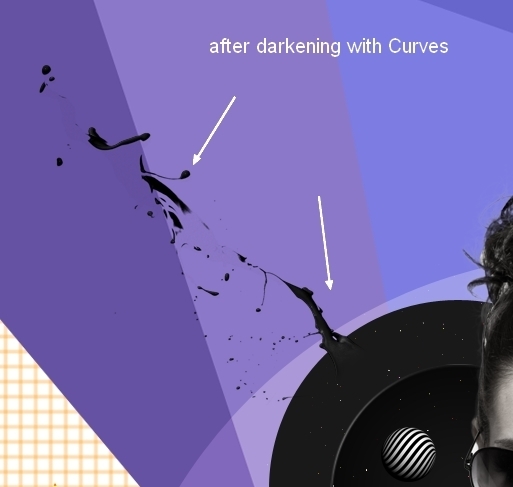
Use Curves to darken the splash and match it with the circles:
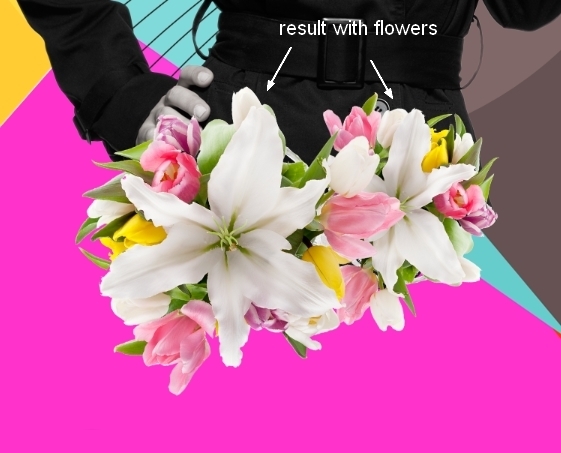
Step 25
Cut out the flower bunch and position it at the bottom of the model. Set this layer above the model group.
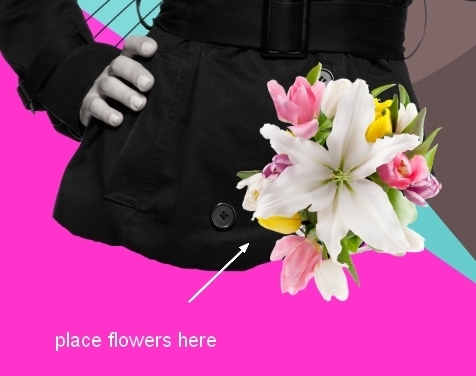
Duplicate this bunch and make it larger, rotate it and place it to cover the model’s coat:
Step 26
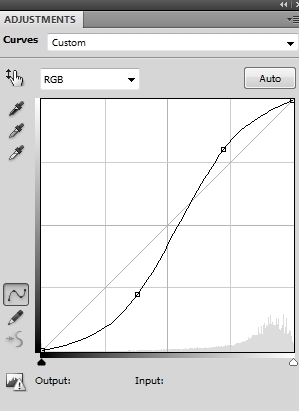
Select the 2 flowers layers, then press Cmd/Ctrl+G to group them. Change the mode of this group from Pass Through (default group mode) to Normal 100%. Create a Curves layer within this group to change the contrast of the flowers:

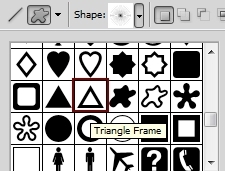
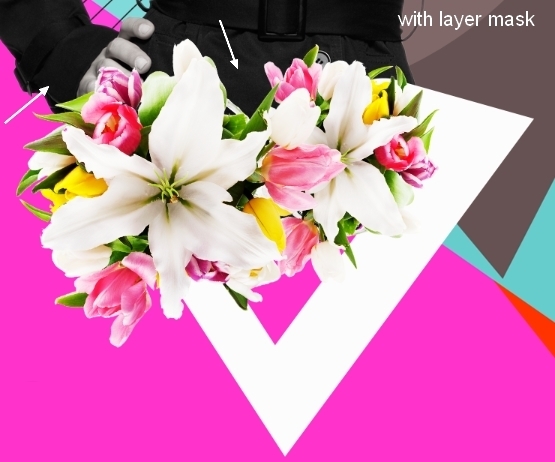
Step 27
Make a new layer under the flowers group. Choose the Shape Tool with Triangle Frame and draw a shape under the model with white:
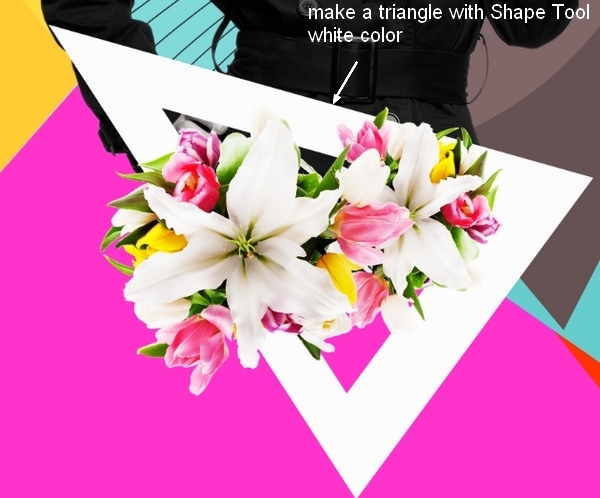
Use a layer mask to erase one side of this triangle:
Step 28
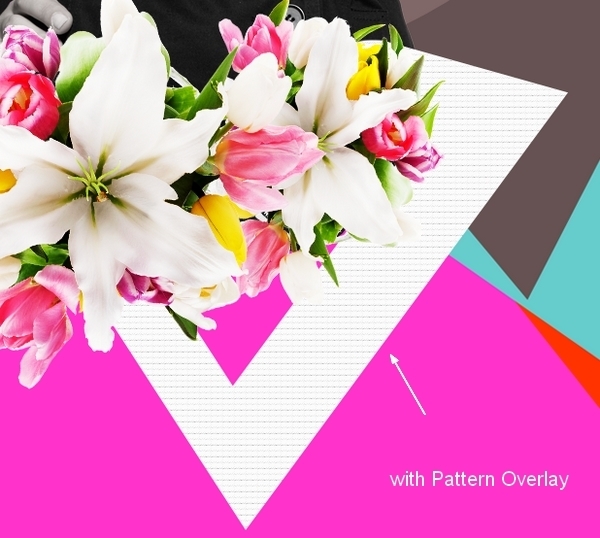
Apply a Pattern Overlay:

Step 29
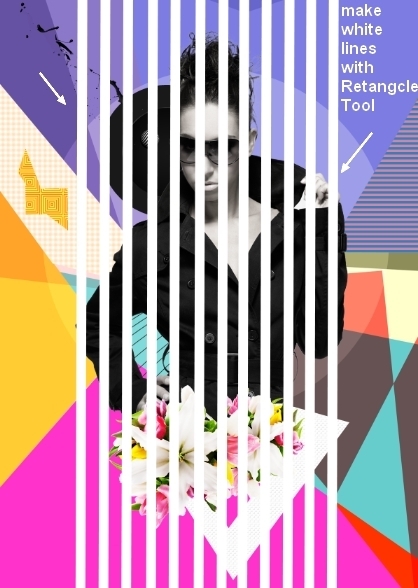
Use the Rectangle Tool (U) to make several lines with white as shown below:
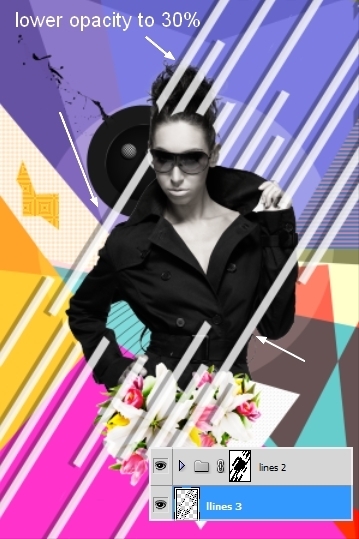
Step 30
Group all these lines layers. Use Cmd/Ctrl+T to rotate this group:
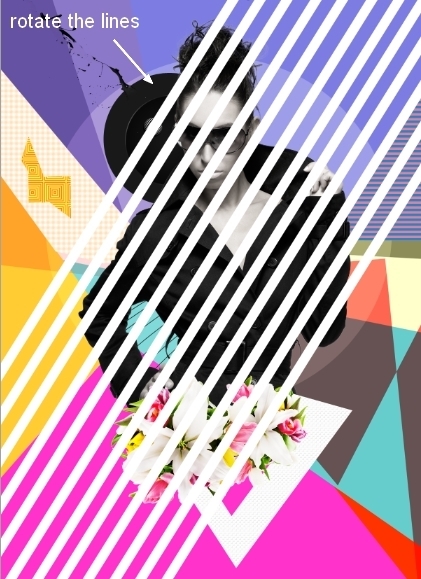
Add a layer mask to this group. Use a hard black brush to break the lines to get the look shown below:
Lower the opacity of this group to 80%:

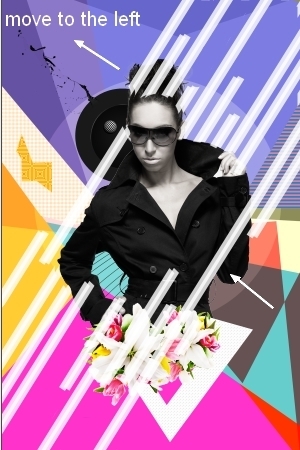
Step 31
Right click the lines group, choose Duplicate Group. Right click the lower group, choose Merge Group. Use the Move Tool to drag it to the left:
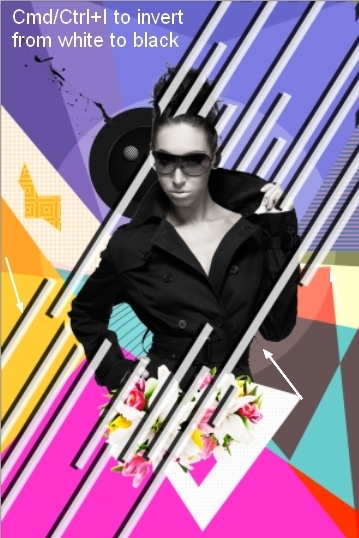
Step 32
Press Cmd/Ctrl+I to invert the color of these lines from white to black then lower the opacity to 30%:
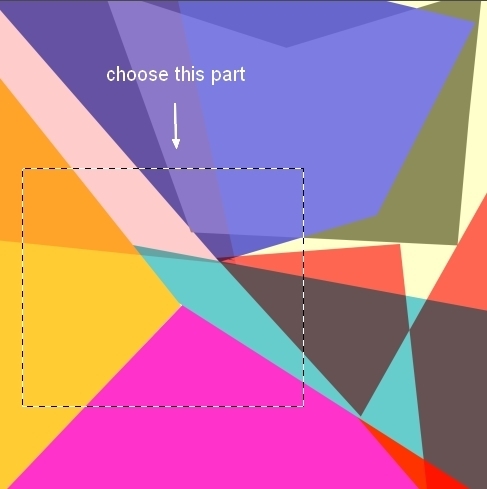
Step 33
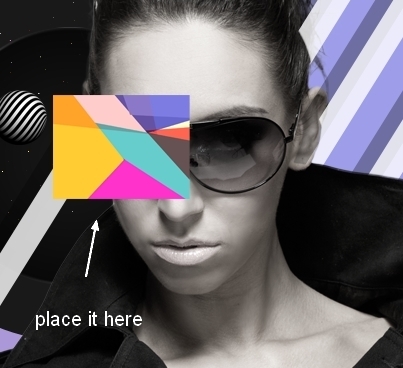
Open the colorful pattern which was used for the background. Use the Rectangular Marquee Tool to choose a part of it then use the Move Tool to place it onto the side of the model’s glasses:
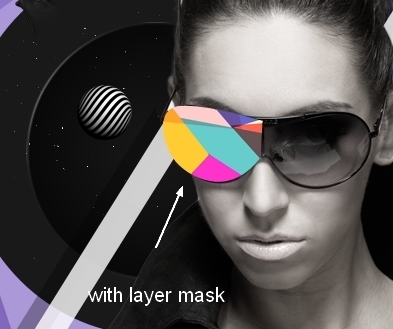
I removed unecessary parts with a layer mask:
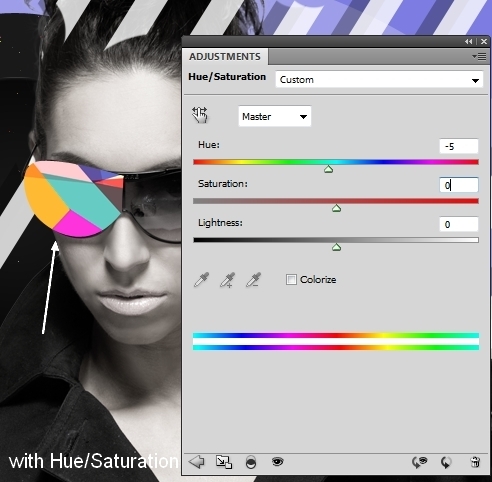
Step 34
I used a Hue/Saturation layer to change the color of this part a little:
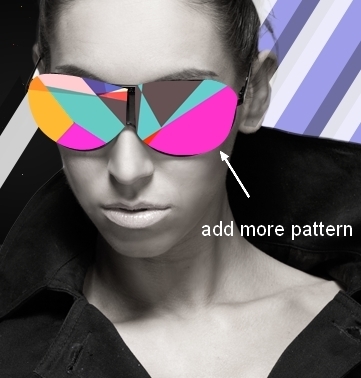
Step 35
I added more colorful pattern to the other side of the glasses:
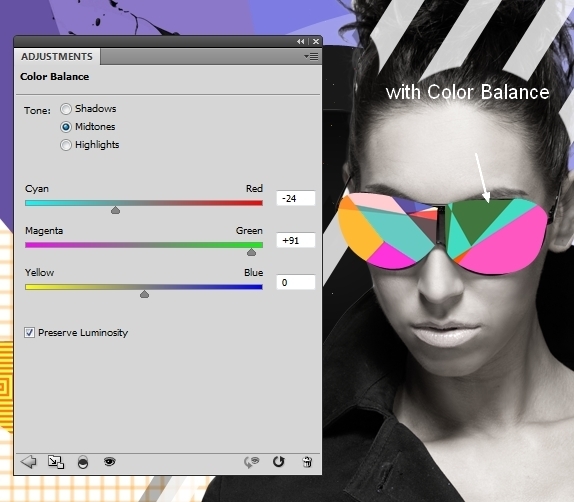
Step 36
I used Color Balance for this layer:
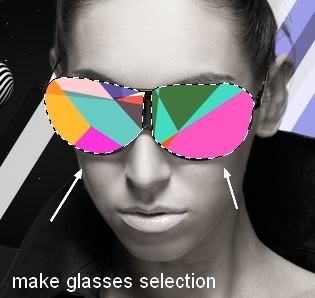
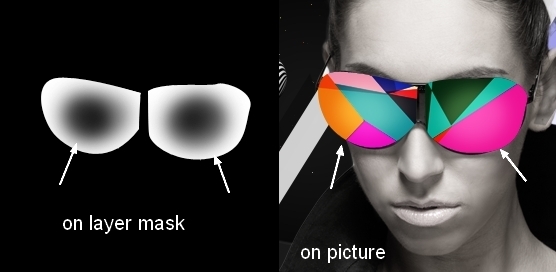
Step 37
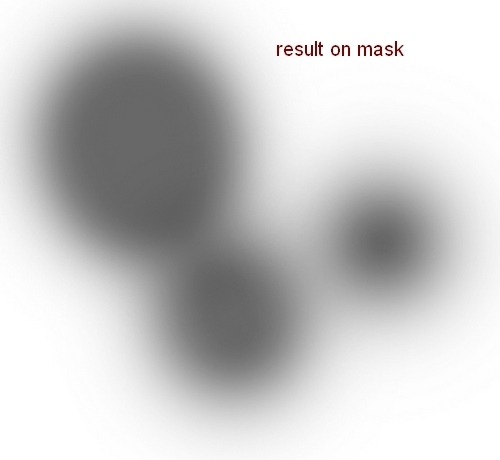
Make a selection of the glasses only then go to Layer-New Adjustment Layer-Curves:
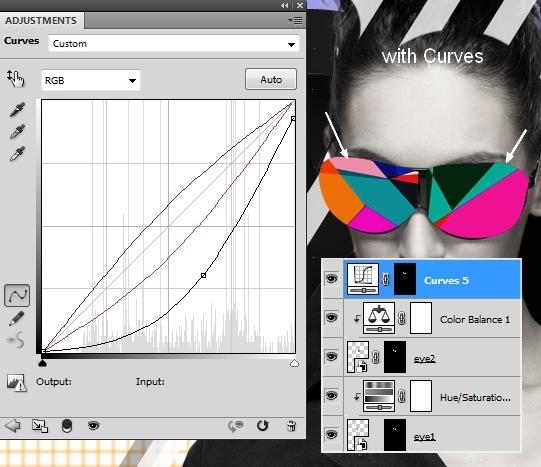
Use a soft black brush with opacity about 20% to reduce the Curves effect on the center of the glasses. You can see how I did it with a layer mask and the result on the image below:
Step 38
Open the abstract shapes image. I chose the left one to put onto the model’s head:
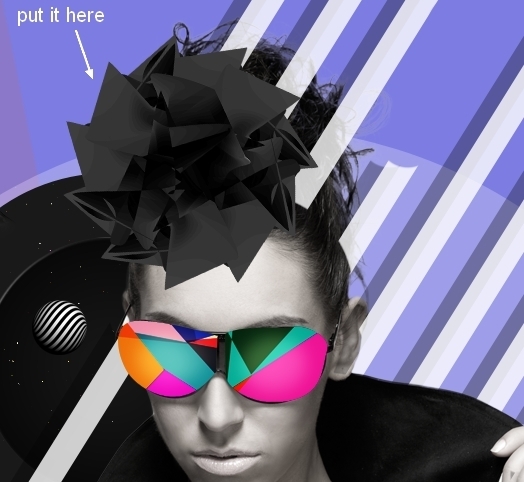
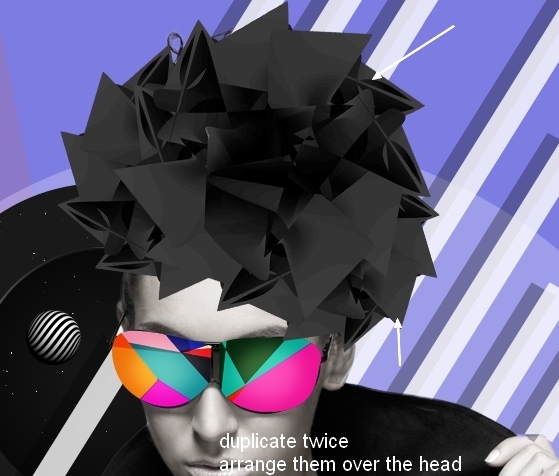
Duplicate it twice and arrange them as shown below:
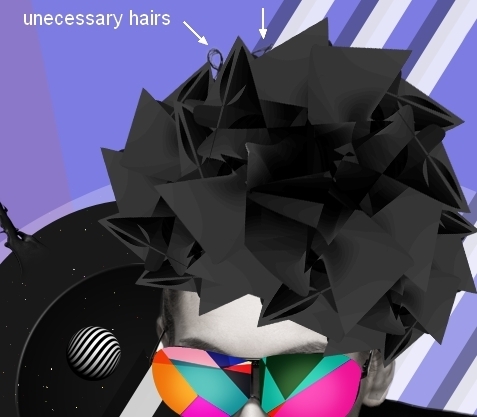
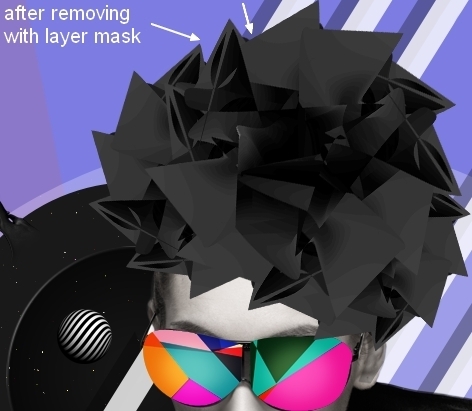
Step 39
Come back to the model layer mask. Use a black brush to remove unecessary hairs:
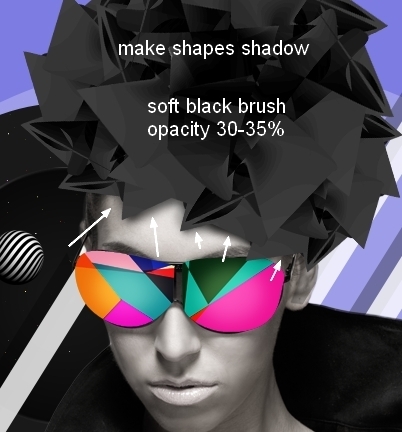
Step 40
Make a new layer under these shapes layers. Use a soft black brush with opacity about 30-35% to paint shadows for the shapes on the model’s forehead:
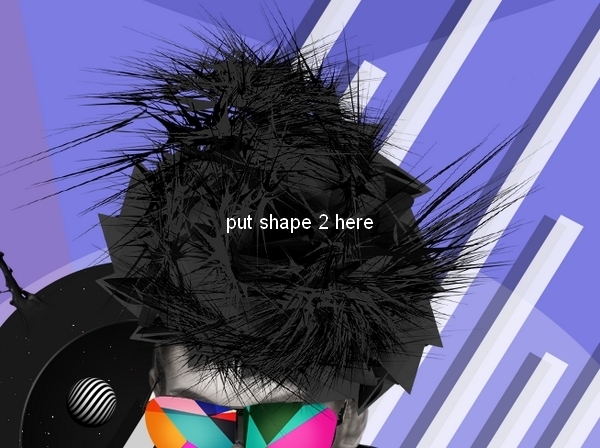
Step 41
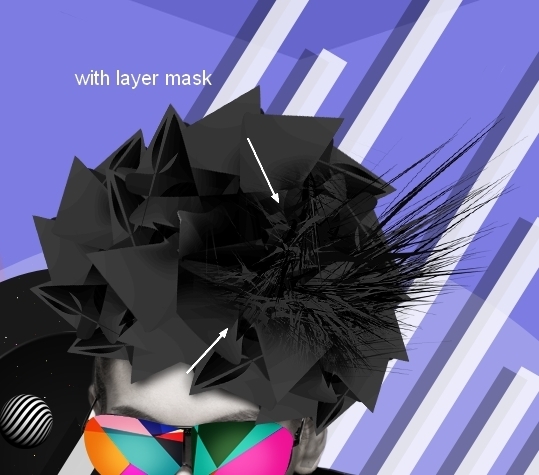
Use another shape from the stock and place it above the model’s head:
Use a layer mask to remove the left side of it:
Step 42
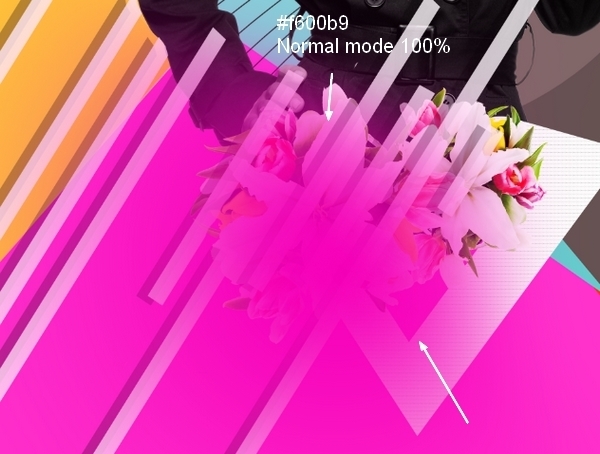
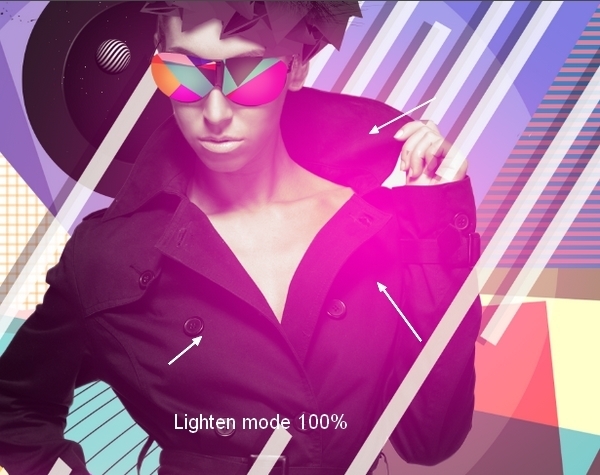
Make a new layer on the top. Use a soft brush with color #f600b9 to paint on the flowers, then change the mode to Lighten 100%:
Step 43
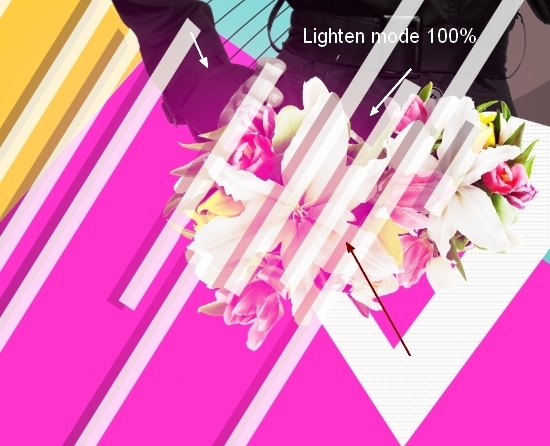
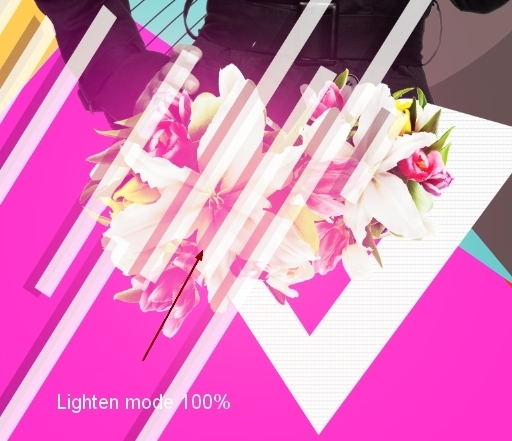
On a new layer, use a brush with color #f759a7 to paint on the flowers again. I set the mode to Lighten 100%:

Step 44
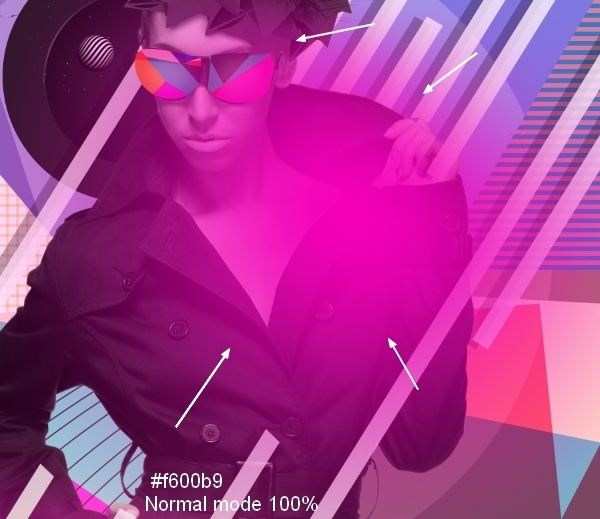
I added a new layer and used a brush with color #f600b9 to paint on the parts of the model’s shoulder, arm, neck and face. Change the mode to Lighten 100%:
Step 45
To give a retro look to this work, I added a Curves layer at the top:
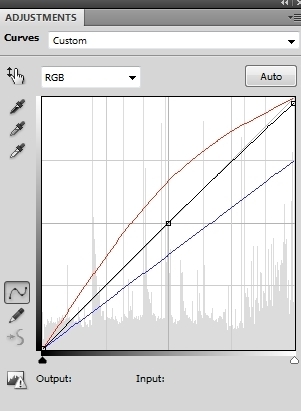
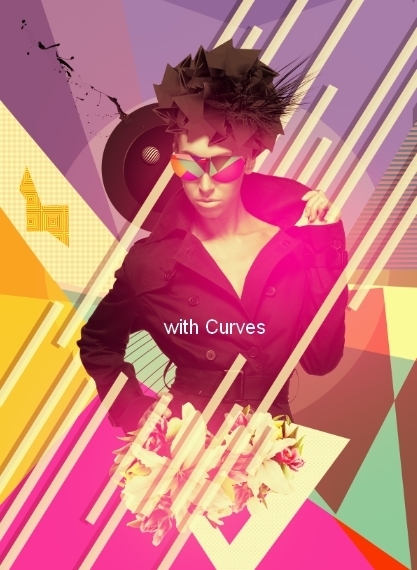
Step 46
I used another Curves layer to strengthen the effect:

On the Curves layer mask use a soft black brush with opacity about 20% to reduce the contrast on the model’s skin:
Step 47
Final step: Hit Cmd/Ctrl+Option/Alt+Shift+E to merge all visible layers. On the merged layer, go to Filter>Sharpen>Unsharp Mask:
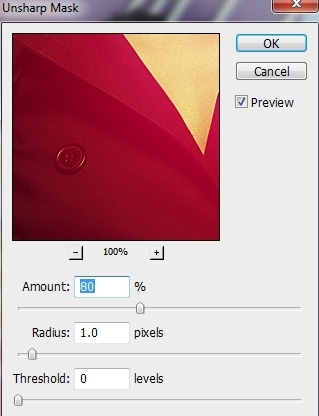
And We’re Done!
I hope that you enjoyed the tutorial.