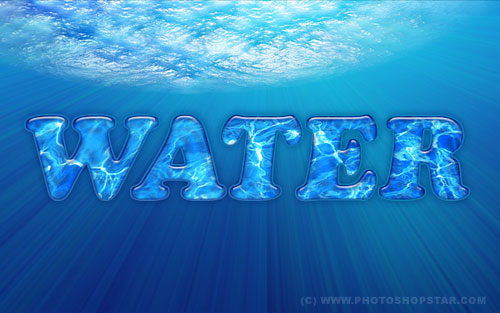
I’m going to share with you about how to make underwater text effect by using some layer styles. Is it interesting for you? If yes, let’s start to read and make!
First of all, find a good photo of underwater. Use Google Images to find the picture. Also you can use mine. Open this picture, then select the Horizontal Type Tool to write out something like ‘WATER’ with any color in the middle of canvas. Color is not important in this case.
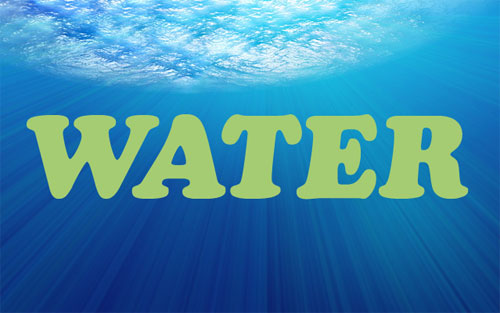
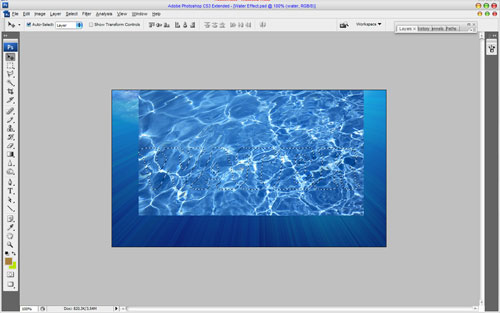
In the above image I’ve used a font called AG_Cooper, which is sadly a commercial font. Feel free to try a different font. Ok, go on! I would like to find another one water texture where we can demonstrate water text effect. Use Google Images again or feel free to use my picture. Open it and bring to our main canvas. Select the text (Ctrl+ left click on the text layer in layer palette thumbnail).
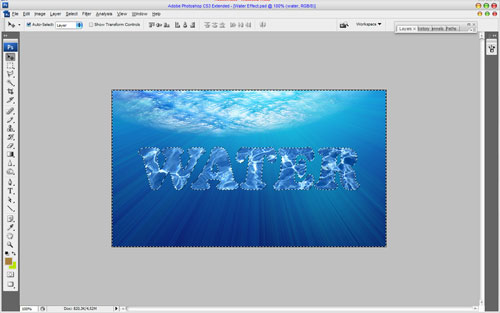
Then press Ctrl+Shift+I to invert the selection and clear selected area by pressing Delete.
Remove the selection with Ctrl+D and apply Inner Shadow, Outer Glow, Inner Glow, Bevel and Emboss, Contour, Satin, Color Overlay and Stroke layer styles for current layer.
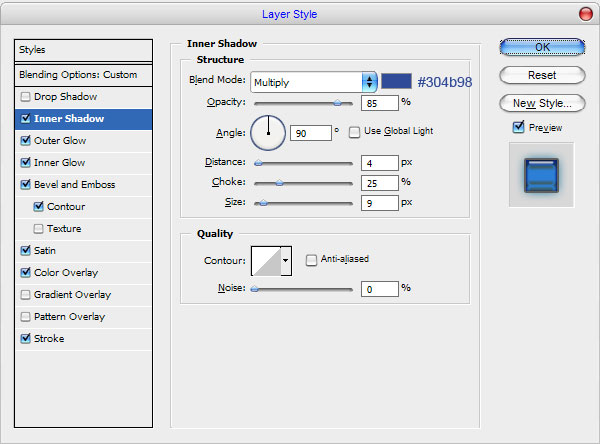
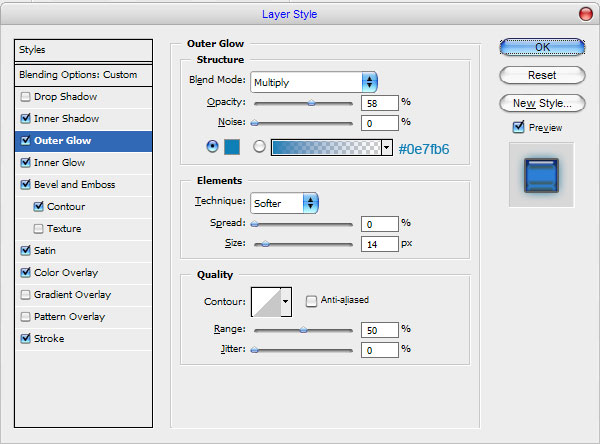
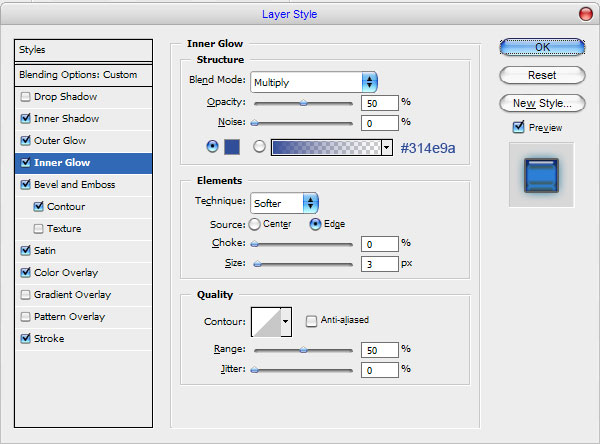
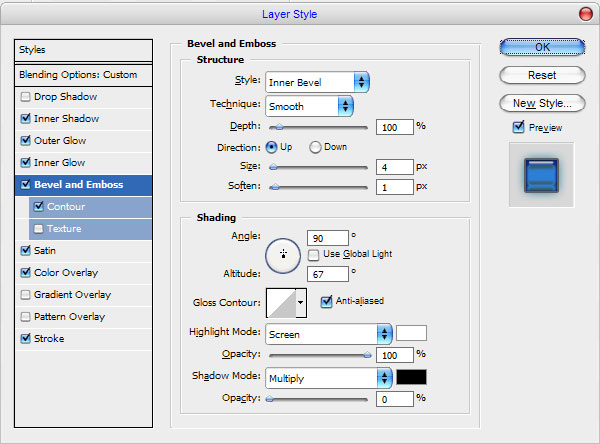
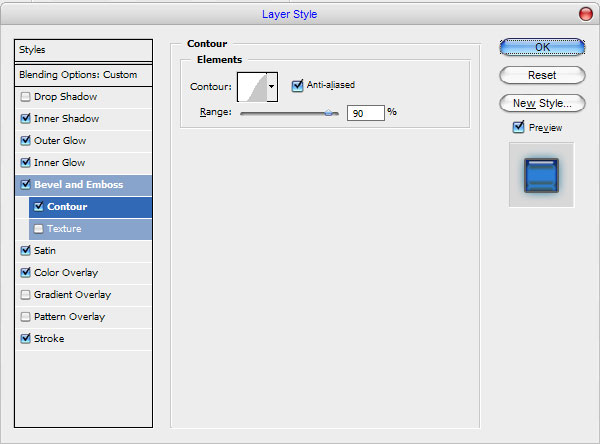
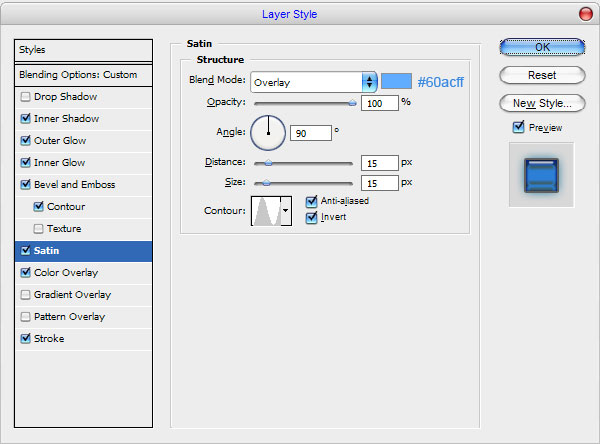
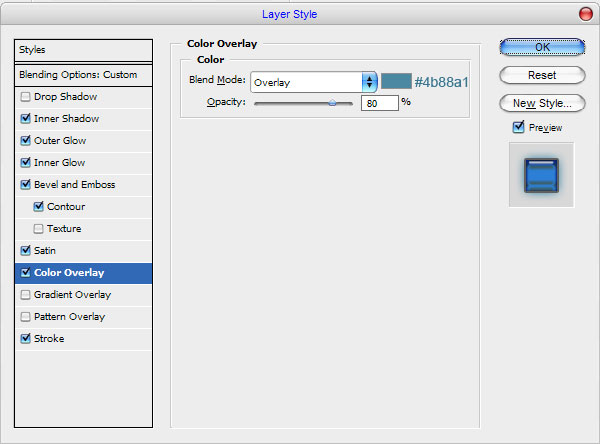
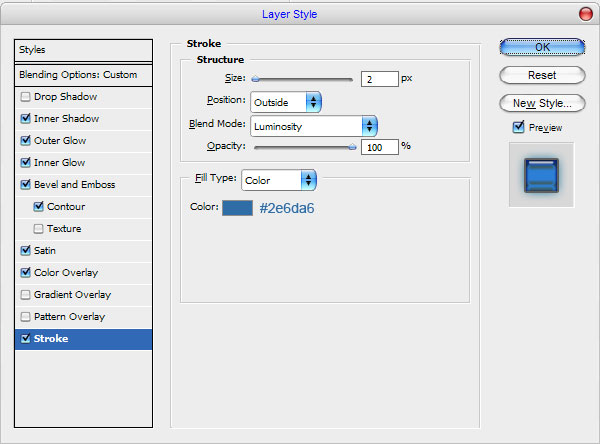
Ok, the result should be next:
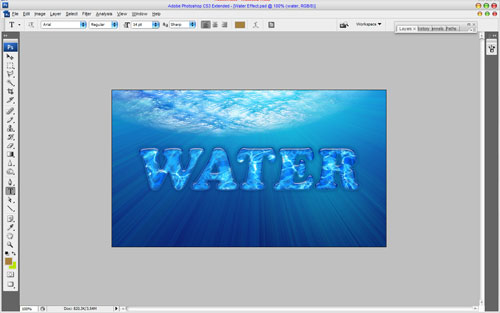
We are done for this tutorial. Hope, this small tutorial was useful for you.

