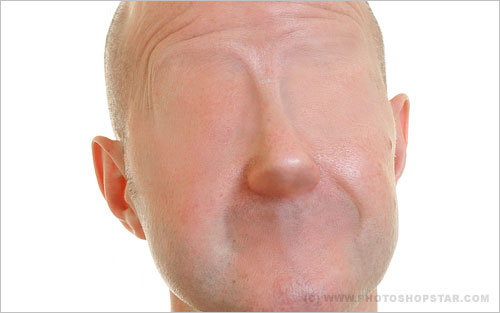
Hey, are you interesting on cheating methods in Photoshop? If yes then I’ll show u how to create one interesting effect with human face. I’m going to cover almost all the face with plain skin. This lesson is more suitable for those users who have some experience with Photoshop.
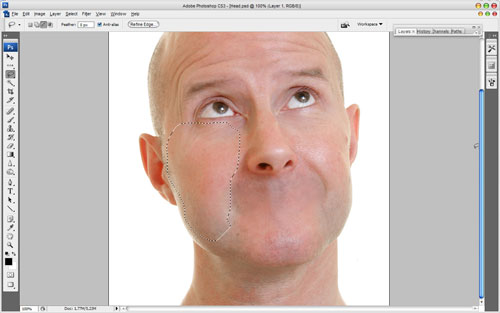
Let’s start! In the beginning you should find the picture of a human face to experiment with. I prefer to use this one. Also feel free to use your own pictures. Open up the file and start covering mouth with skin. Get out the Lasso Tool to create selection as shown on my picture below:
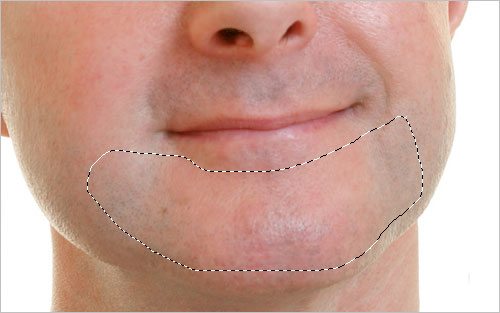
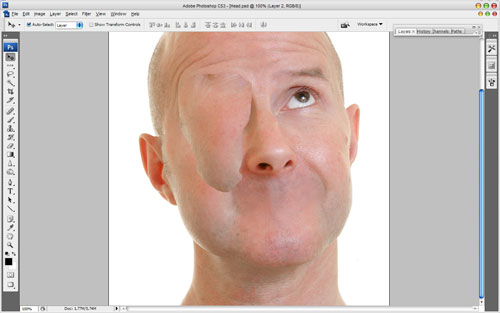
Then press Ctrl+J to duplicate selected area on the new layer and move it up a little bit with Move Tool.
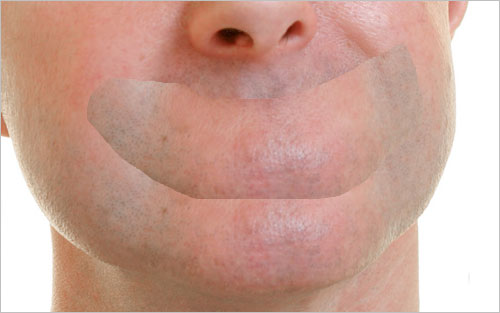
After that select the Eraser Tool and the soft round brush to remove borders clearness for current layer. Try to get the same result as on my picture, which you can see below.

Ok, now use the Brush Tool (Brush: 150 px, Range: Midtones: Exposure : 20%) to make skin darken a slightly.
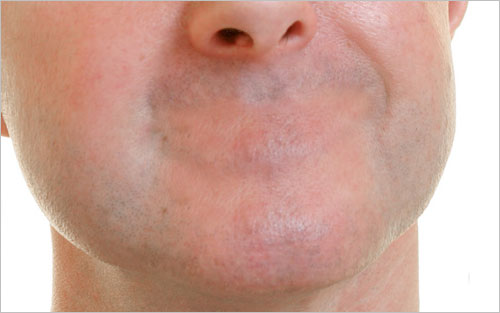
Merge current layer with previous one. Now, select the Clone Stamp Tool (Brush: 40 px, Opacity: 50%) and hold down the Alt key — the cursor will change to a target. Click the point you wish to use as a sampling point. This will be used as the reference point for cloning. Click and draw where you want the cloned image to appear. As you draw, a cross will appear on the original image while a corresponding circle appears where you are drawing.

Now apply the Sharpen Tool to increase the sharpness a little bit.

Ok, move to the next area. Now I’m going to process eye area. Use the Lasso Tool again to select another one area.
Press Ctrl+J to duplicate selected area to the new layer and move it a little bit as on my picture you can see below.
After that use the Eraser Tool and a soft round brush again to process clear skin borders for current layer.
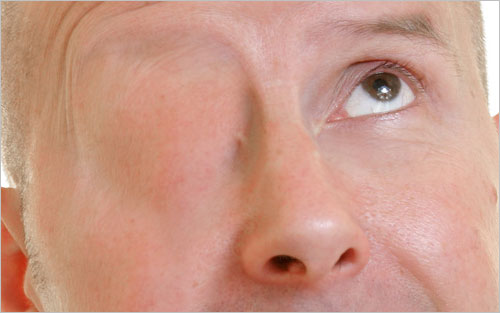
Merge this layer with background layer again and use the Clone Stamp Tool one more time to remove skin mixing defects.
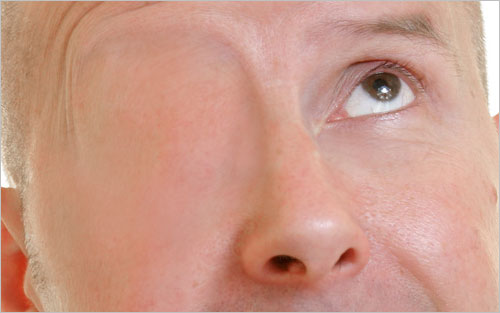
Increase sharpness with Sharpen Tool for current area also.
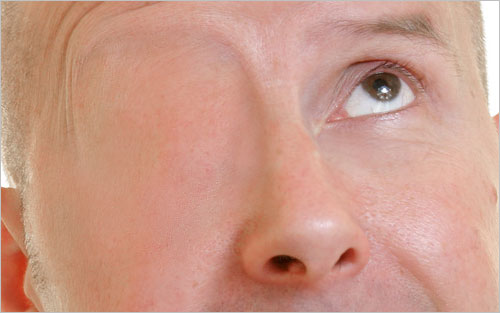
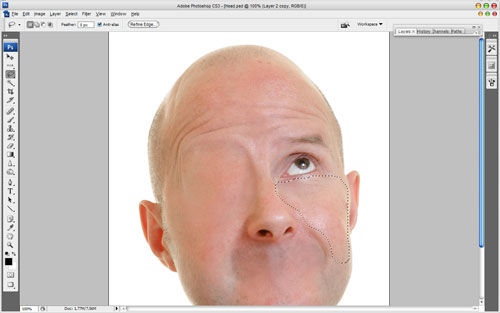
Ok, process another eye on the same way. Use the Lasso Tool to create another selection again.
Press Ctrl+J to duplicate selected area on the new layer and move it above.
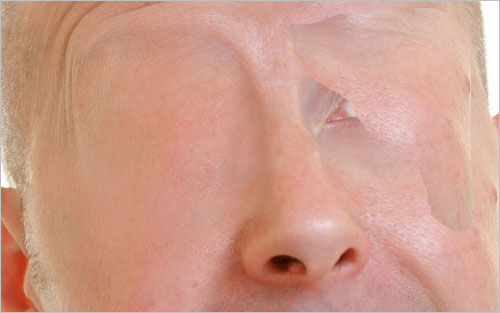
Use the Eraser Tool again to process skin borders.
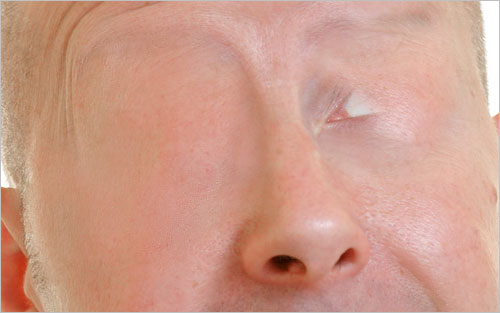
Duplicate current layer again with Ctrl+J and move it down and left a little bit.
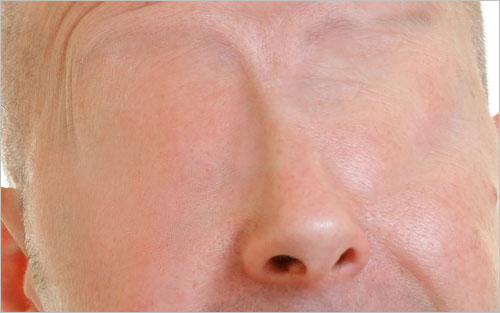
Use the Eraser Tool again to correct this layer.

Merge all layers again and apply Clone Stamp Tool one more time to hide all the defects.
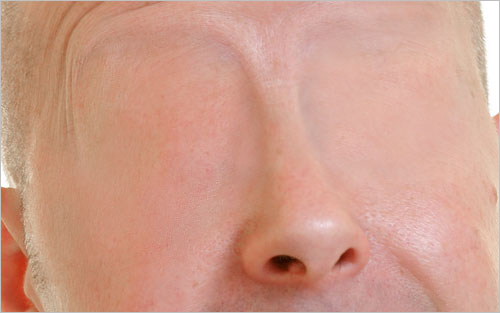
Add more sharpness with Sharpen Tool.

Time to process the nostrils. On this step u don’t need to duplicate skin area again to hide the nostrils, it will be much easer to use only Clone Stamp Tool. Use the soft round brush about 25 pixels to do it neatly.
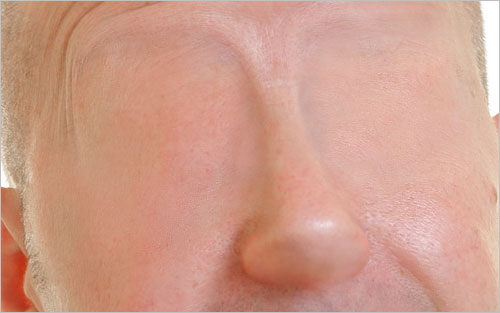
Now, select the Dodge Tool (Brush: 70 px, Range: Midtones, Exposure: 20%) to make some dodge work on the left part of the noise to bring our nose more realistic view.
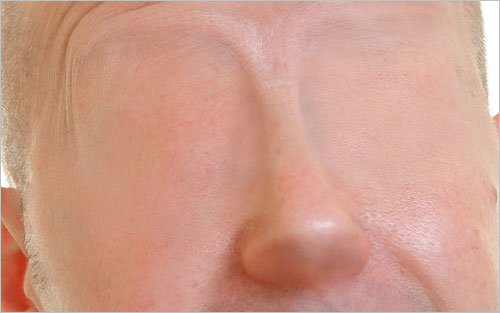
Ok, on this step we are done with out Photoshop tutorial. Human head without face looks so professional processed, isn’t it? Hope you got the same good result as me. If not, don’t be upset, may be you need to have more practice with Clone Stamp Tool, after that you will get the same good result or may be better than mine!

