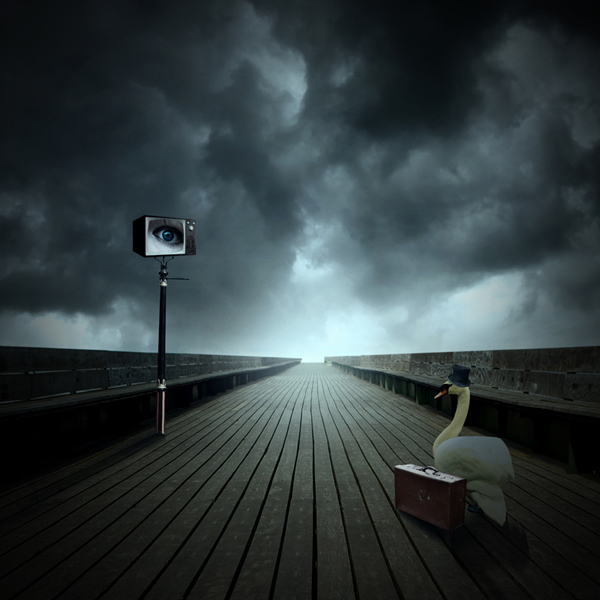
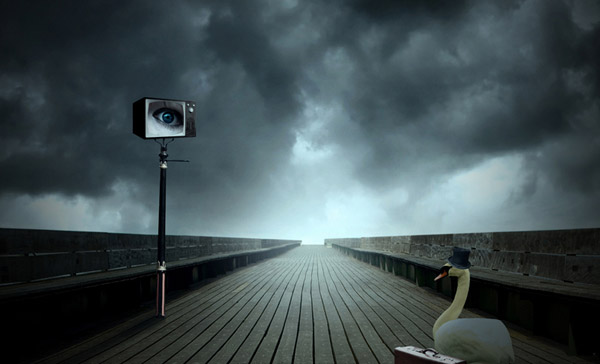
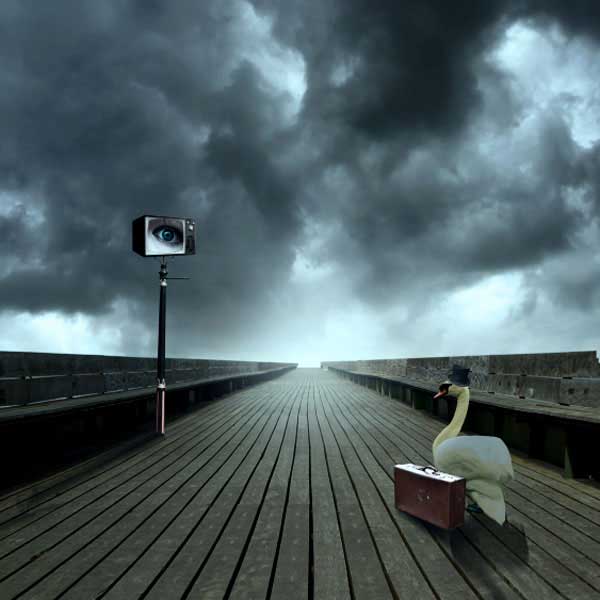
In this tutorial I’ll show you how to create a Dark dreamy emotional photo manipulation. We’ll come through techniques of manipulating, retouching, layer mask, adjusting light and shadow as well as other several techniques.
Final Image Preview

Resources
- Swan IV – IQuitCountingStock
- Clevedon Pier – sxc.hu
- desolate storm – night-fate-stock
- Old top hat set – Azenor-stock
- Retro TV- sxc.hu
- Dark Blue eyes – awakenbydreams-stock
- Suitcase 5- Meow-Stock
- Victorian Street Lamp 3- GothicBohemianStock
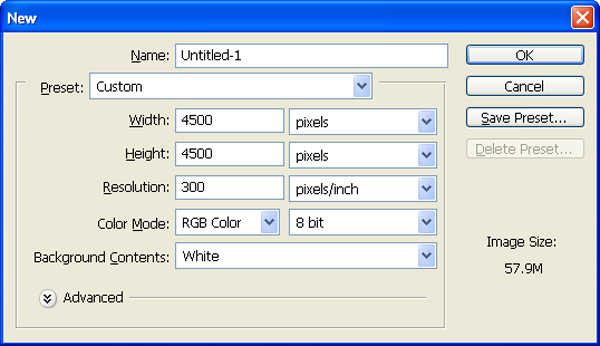
Step 1
Create a new file with a width of 4500 px and a height of 4500 px at 300 dpi (Dots per Inch). Background should be White.
Step 2
Let’s start with our background (sky).
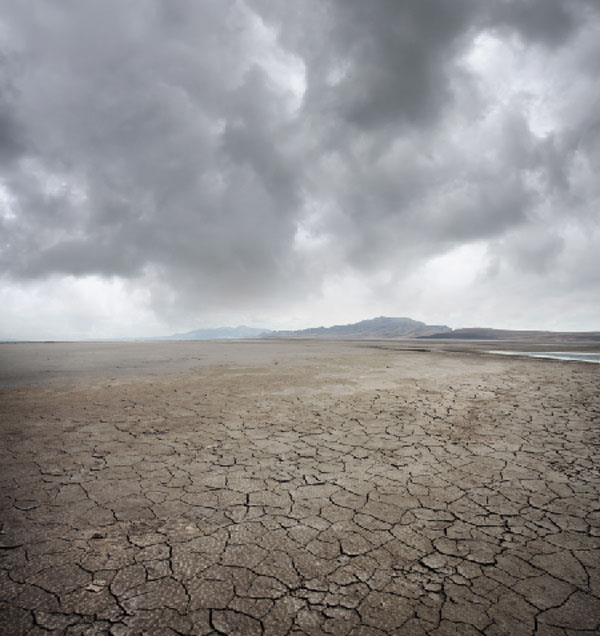
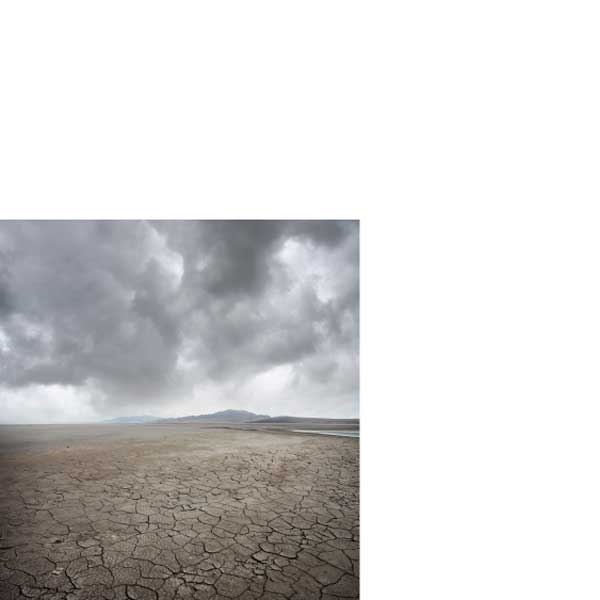
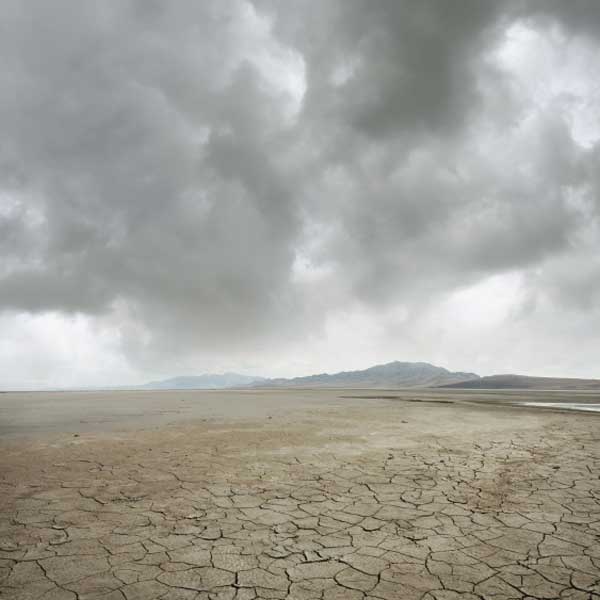
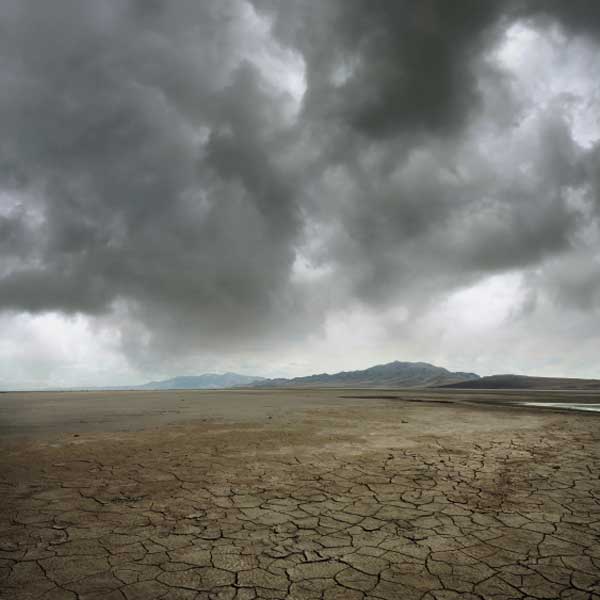
Let’s open the desolate storm in Photoshop. We will be using the sky from this stock image so we will need to transfer it to our main canvas.
Click the desolate storm image and press V to activate the Move Tool. Left-click the image and drag the image to the main canvas and change layer name to “sky”.
Step 3
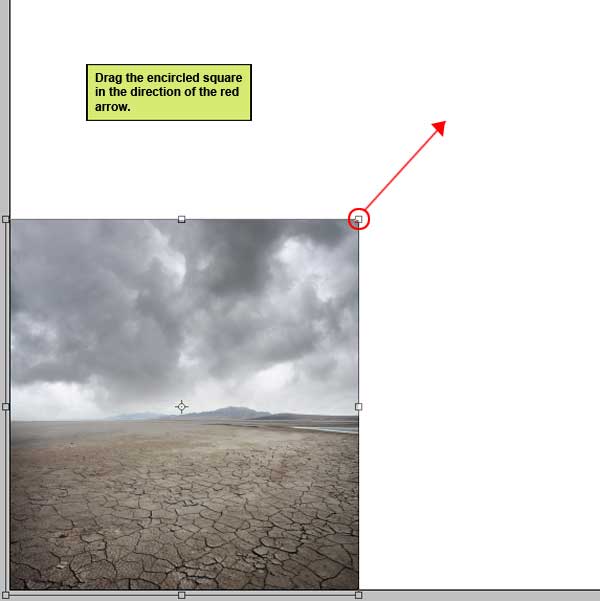
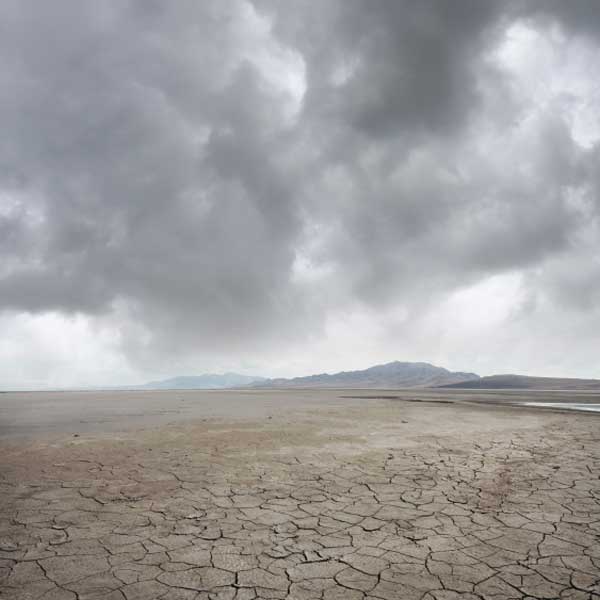
Next, activate the Transform tool (Ctrl/Cmd +T), then while the “sky” layer is selected resize it as shown below:
Step 4
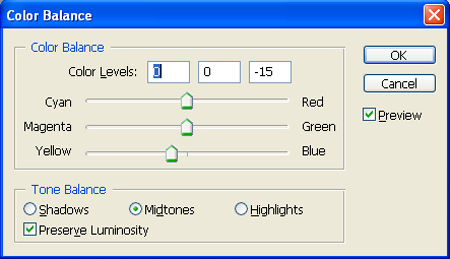
Now Create new color balance adjustment layer from the bottom of layers palette.
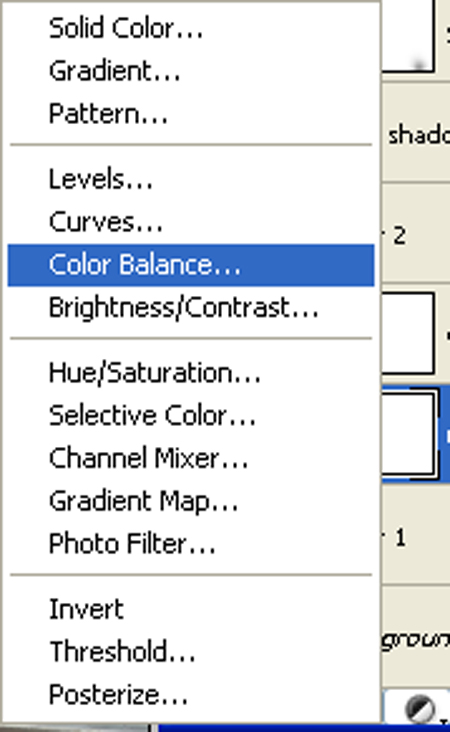
Fill values see as below :
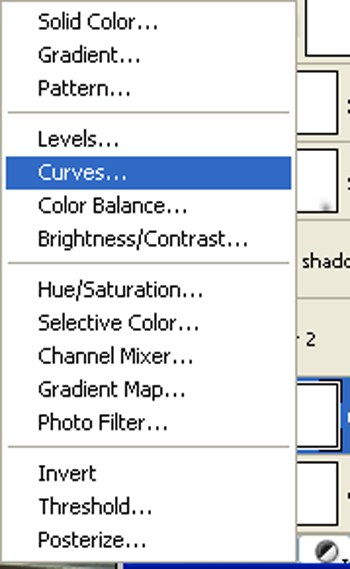
Now Create new Curves adjustment layer from the bottom of layers palette.
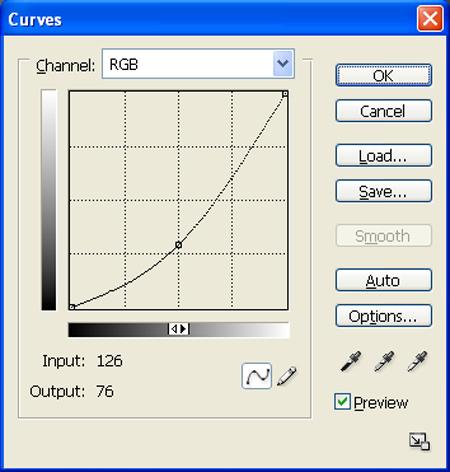
When the Curves box opens, input the following:
Step 5
First off, let’s open the Clevedon Pier – sxc.hu stock in Photoshop. We will be using the Clevedon Pier from this stock image so we will need to transfer it to our main canvas.
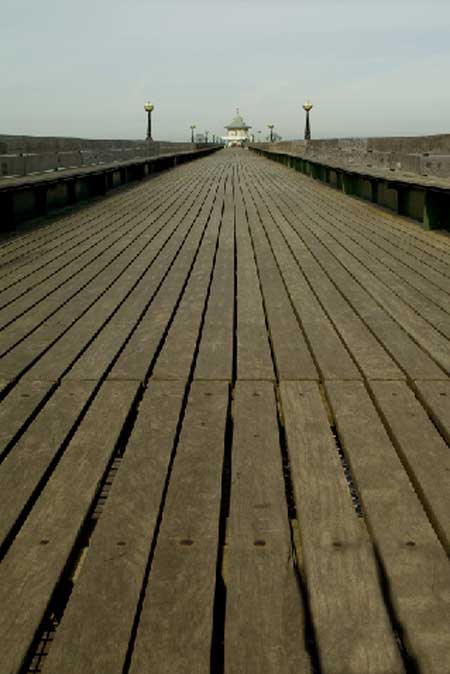
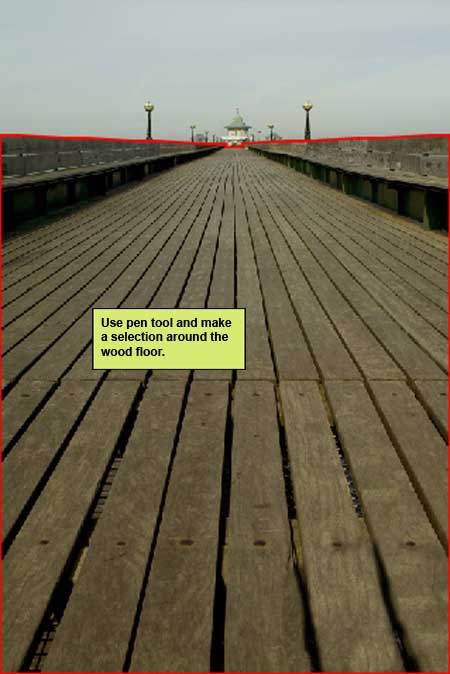
Click the Clevedon Pier and press P to activate pen tool and then make a selection around the Clevedon Pier and then click V to activate the Move Tool. Left-click the image and drag the image to the main canvas and change layer name to “Clevedon Pier”.
Step 6
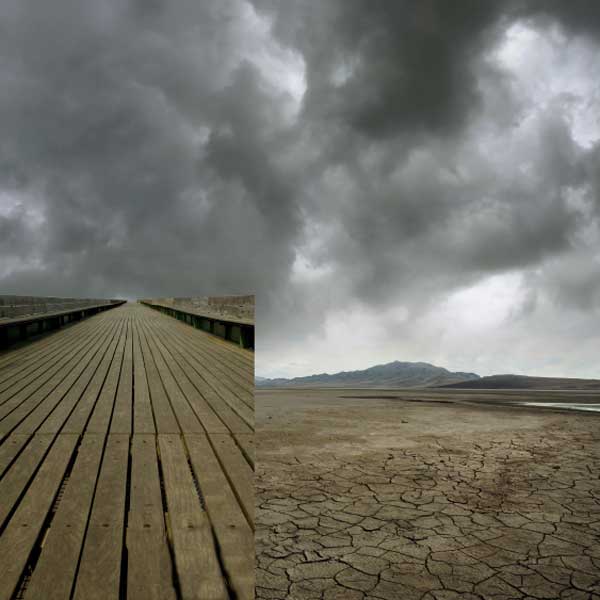
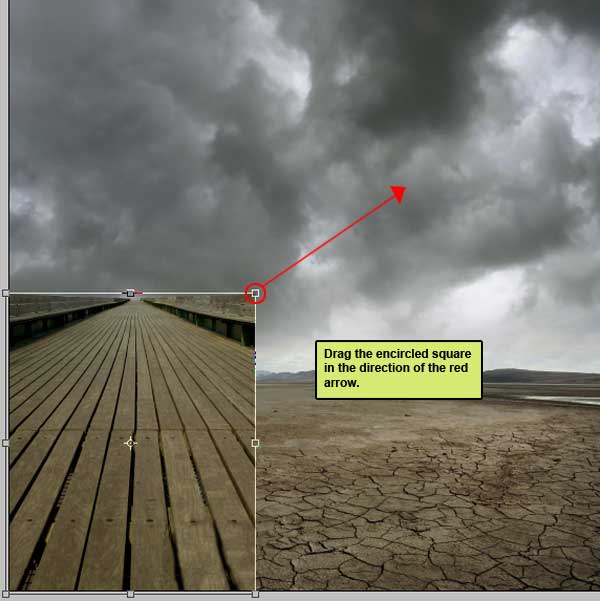
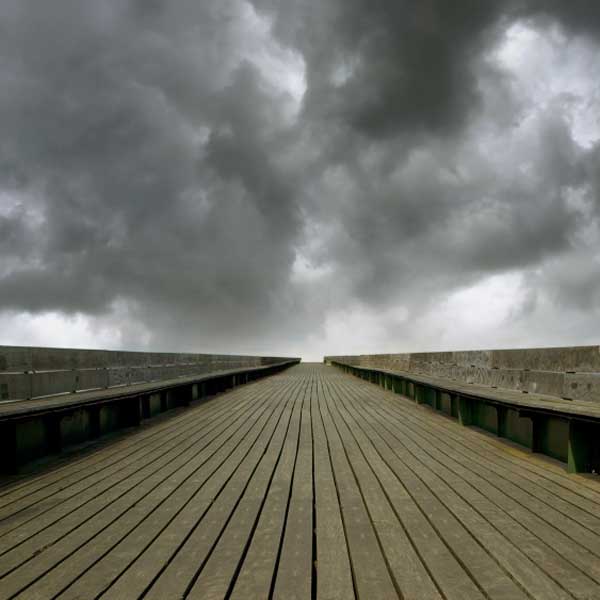
Next, activate the Transform tool (Ctrl/Cmd +T), then while the “Clevedon Pier ” layer is selected and then resize it as shown below:
Step 7
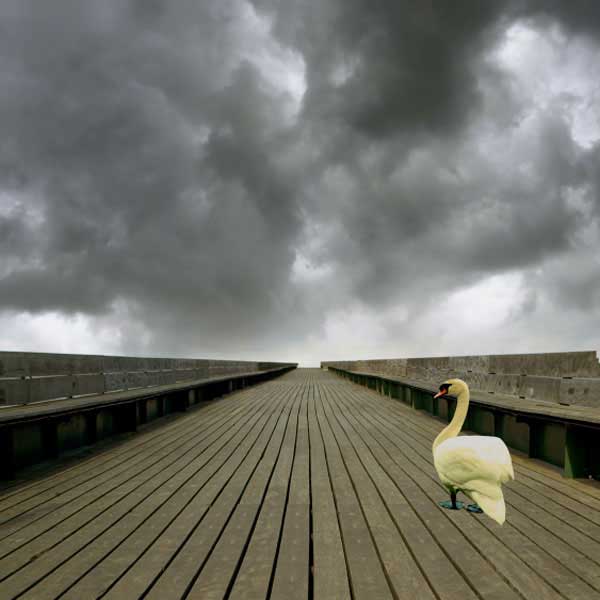
First off, let’s open the Swan IV – IQuitCountingStock stock in Photoshop. We will be using the Swan from this stock image so we will need to transfer it to our main canvas.
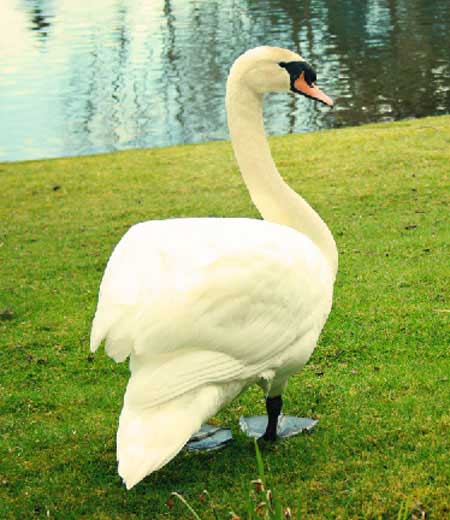
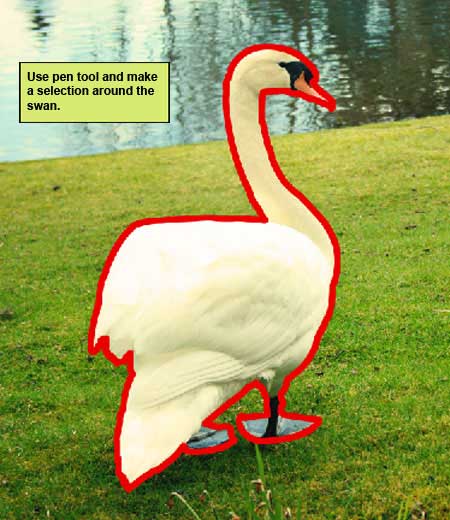
Click the Swan and press P to activate pen tool and then make a selection around the Swan. Click V to activate the Move Tool. Left-click the image and drag the image to the main canvas and change layer name to “Swan”:
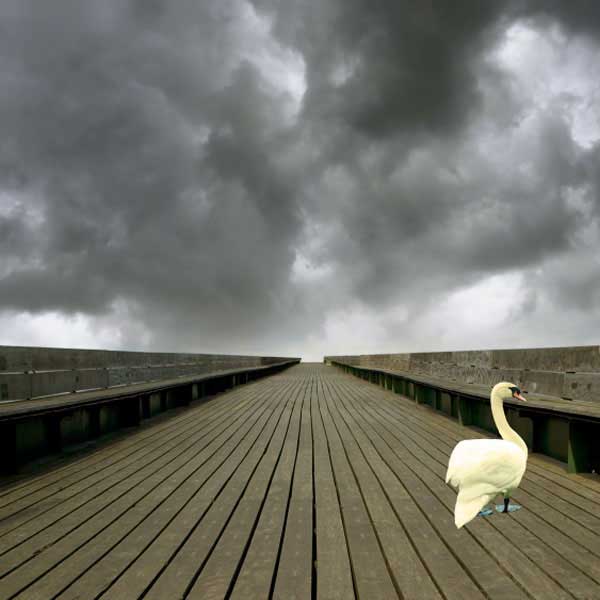
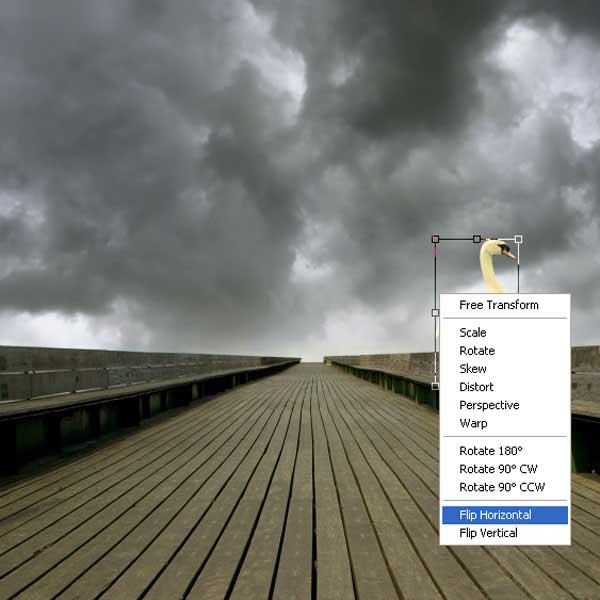
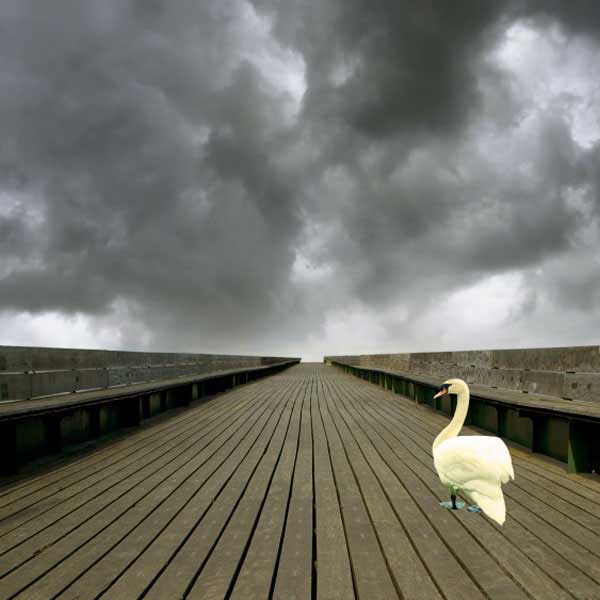
Activate transform tool and then make a right click and choose flip horizontal
Step 8
Now Create new Curves adjustment layer from the bottom of layers palette.
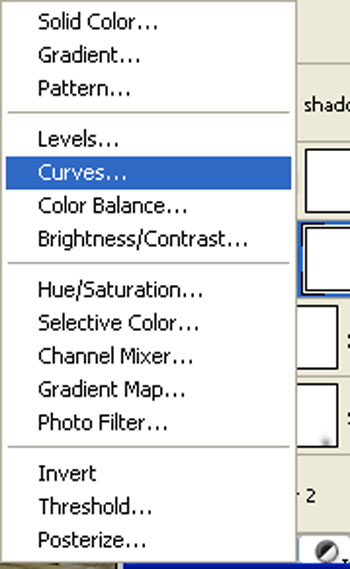
When the Curves box opens, input the following:
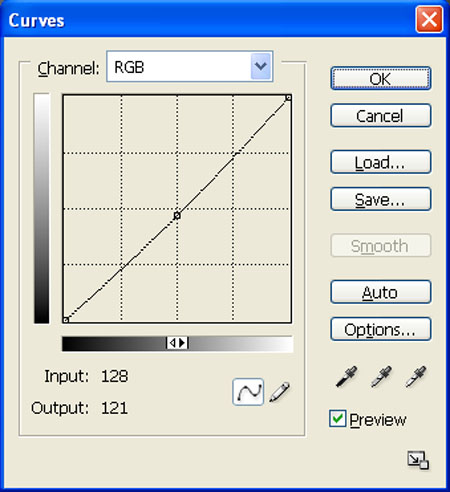
Press Alt+left click in between 2 layer’s (swan and Curves) to make a mask.
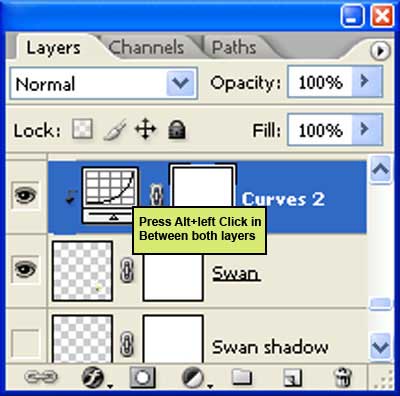

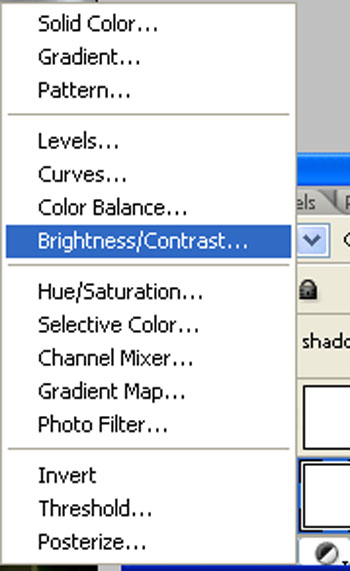
Create new brightness/contrast adjustment layer from the bottom of layers palette.
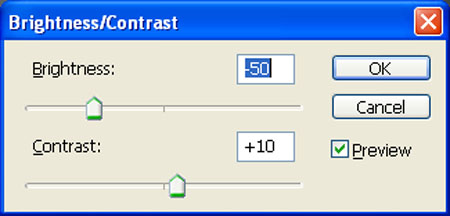
Input the following and Press Alt+left click in between 2 layer’s (swan and brightness/contrast) to make a mask.
Step 9
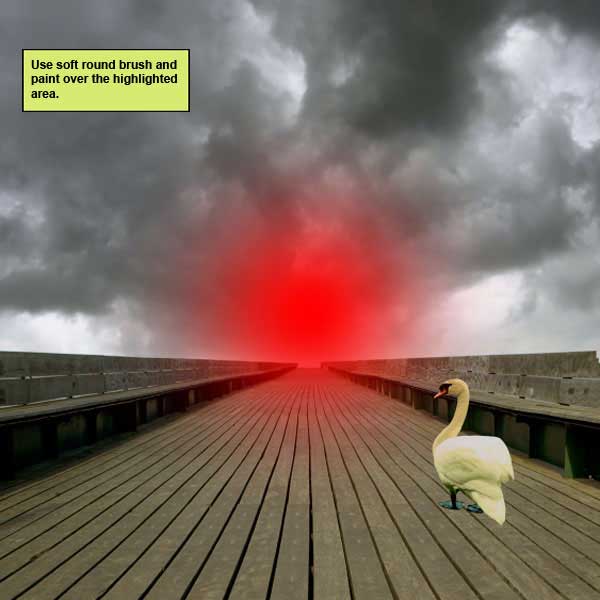
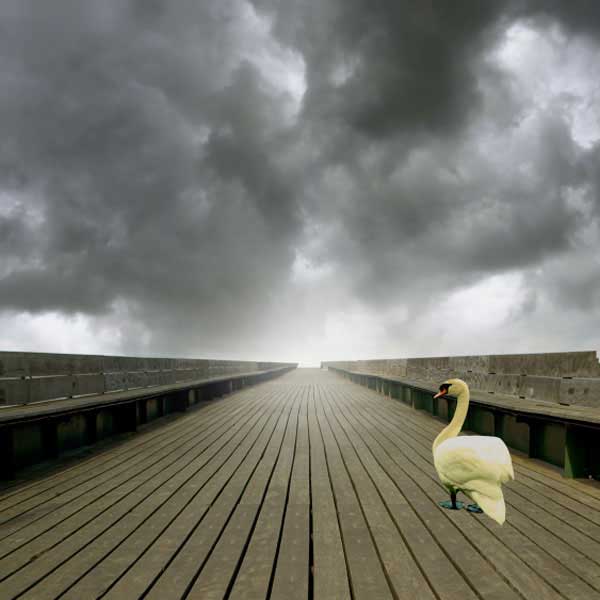
Let’s make a Source light to our image.Activate a new layer (ctrl+n) and name it “Source light”.
Activate Brush tool (B) with these settings :
Brush size: 600px
Hardness: 0%
Opacity: 40%
Flow: 100%
Color: #FFFFFF
Paint over the highlighted area.
Step 10
Let’s make swan’s shadow.Activate a new layer and name it “swan shadow”
Make a duplicate of swan layer by using Ctrl+J, activate transform tool (ctrl+t) and right click and choose flip vertical.
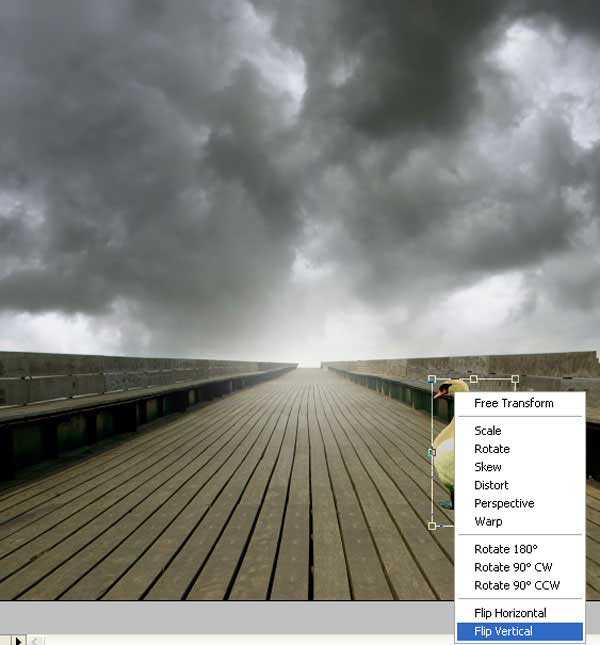
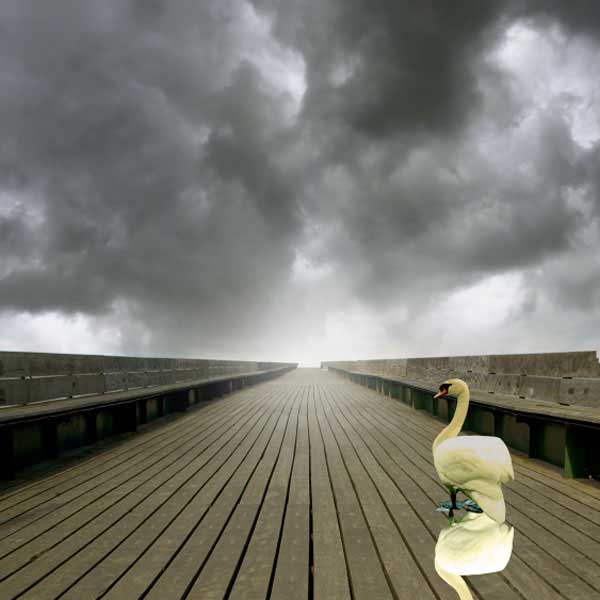
Activate the duplicate layer by (ctrl+left click on duplicate layer) and fill with black color.
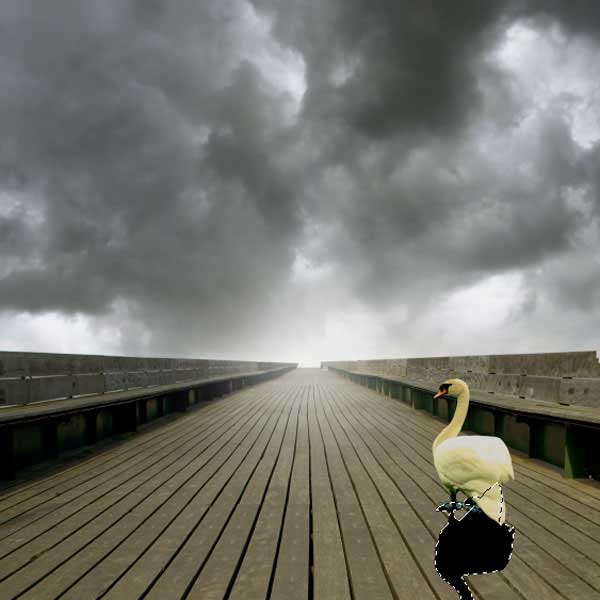
Activate Erase tool (E) with these settings:
Brush size: 200px
Hardness: 0%
Opacity: 40%
Flow: 100%
Let’s erase and ease little bit of our shadow to make it light.
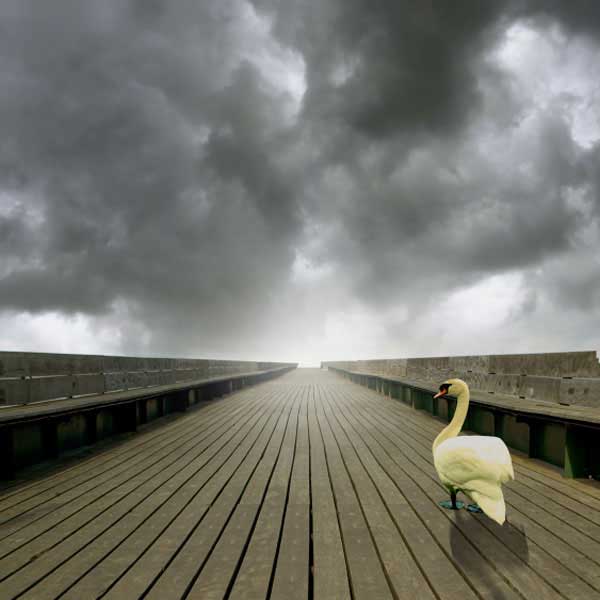
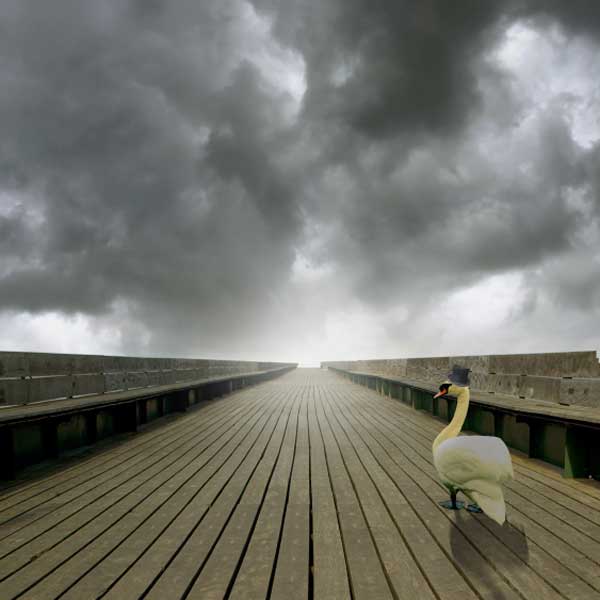
Step 11
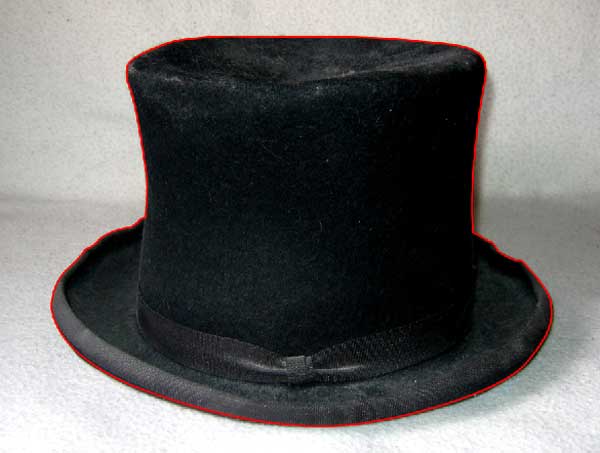
First off, let’s open the Old top hat set stock in Photoshop. We will be using the hat from this stock image so we will need to transfer it to our main canvas.
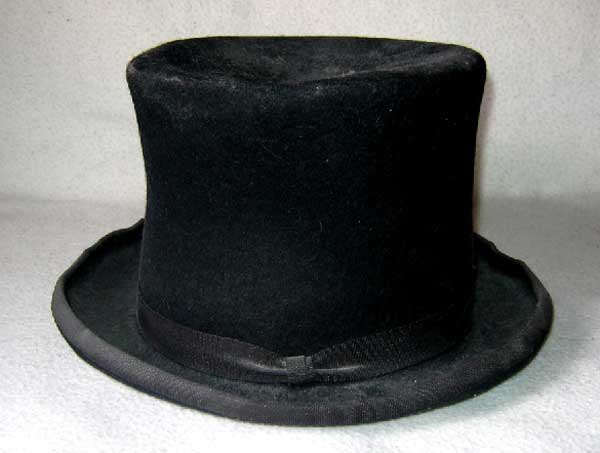
Click the Old top hat and press P to activate pen tool and then make a selection around the hat and then click V to activate the Move Tool. Left-click the image and drag the image to the main canvas and change layer name to “hat”.
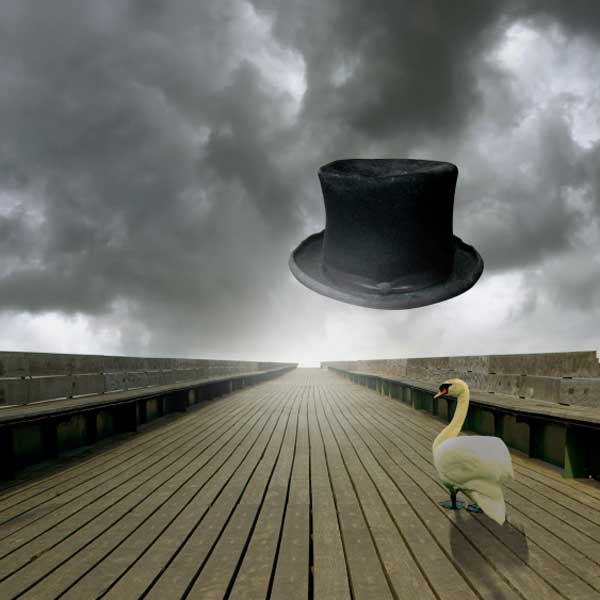
Step 12
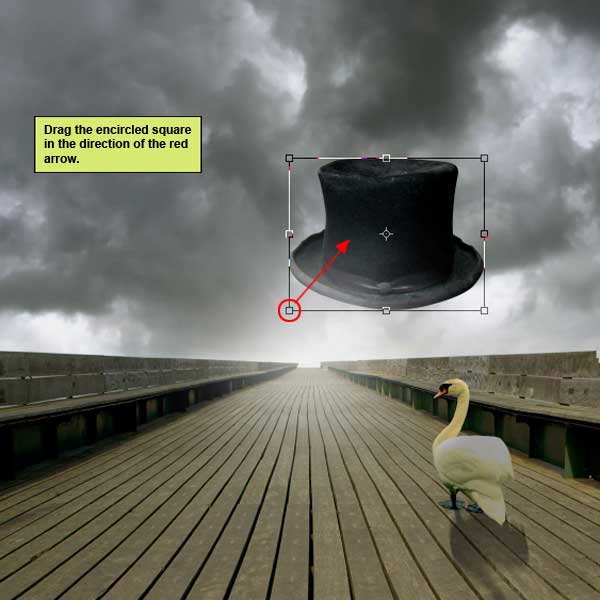
Next, activate the Transform tool (Ctrl/Cmd +T), and while the “Hat” layer is selected resize it as shown below:

Step 13
Now Create new Brightness/Contrast adjustment layer from the bottom of layers palette.
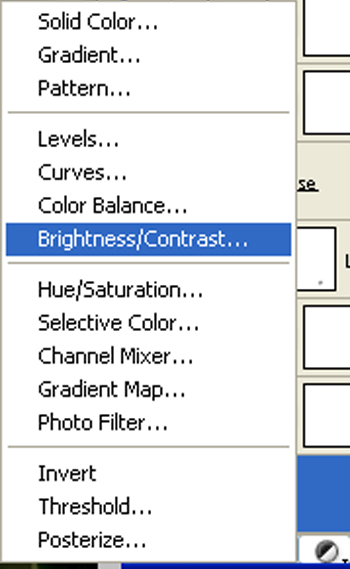
When the Color Balance box opens, input the following.

Press Alt+left click in between 2 layer’s (Hat layer and Brightness/Contrast) to make a mask.
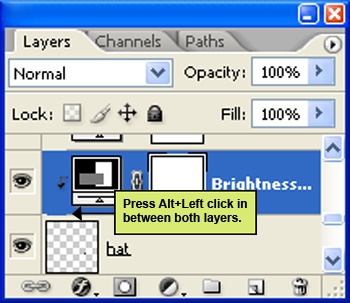
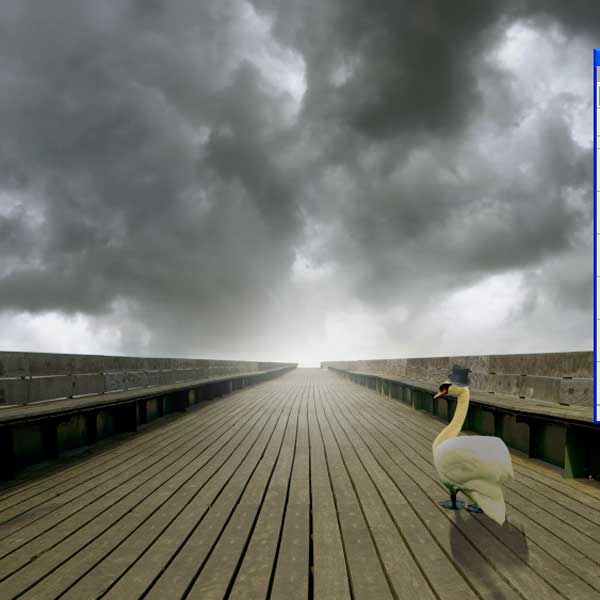
Now Crate new Hue/Saturation adjustment layer from the bottom of layers palette.
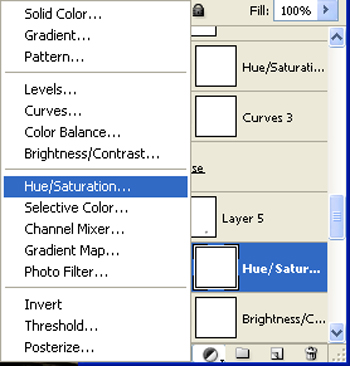
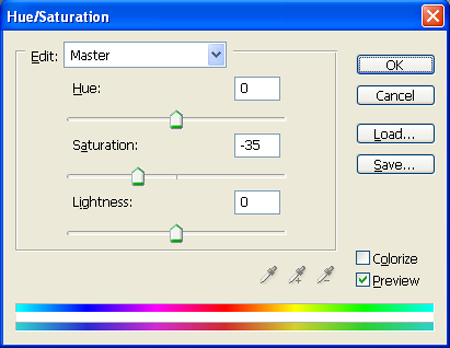
When the Hue/Saturation box opens, input the following.Press Alt+left click in between 2 layer’s (Hat layer and Hue/Saturation) to make a mask.
Step 14
First off, let’s open the Suitcase 5 stock in Photoshop. We will be using the Suitcase from this stock image so we will need to transfer it to our main canvas.
Click the Suitcase 5 and press P to activate pen tool and then make a selection around the snail and then click V to activate the Move Tool. Left-click the image and drag the image to the main canvas and change layer name to “Suitcase”.
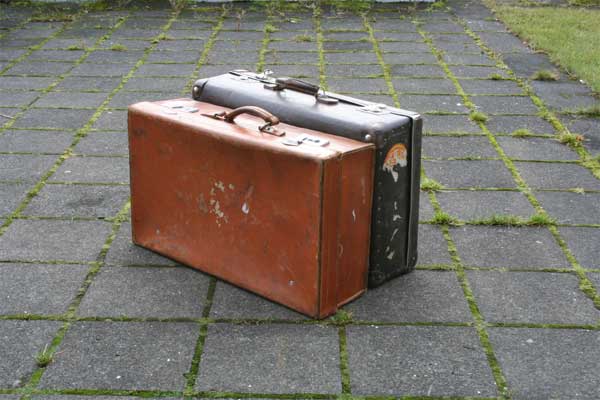
The result should be similar to this:
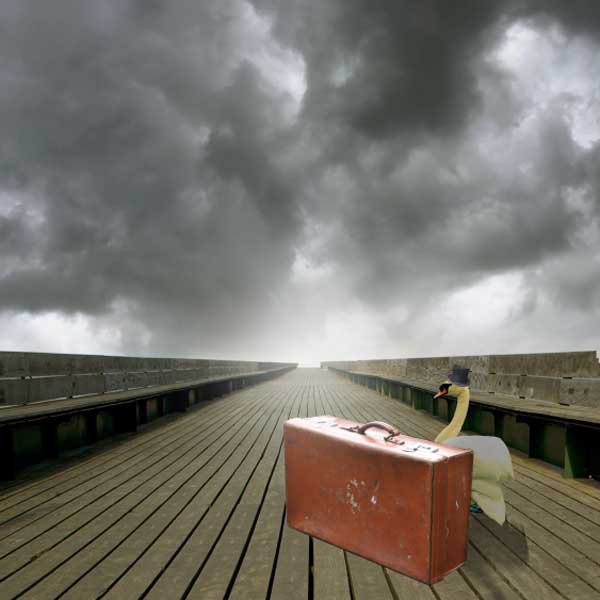
Next, activate the Transform tool (Ctrl/Cmd +T) and while the “Suitcase” layer is selected resize it as shown below:
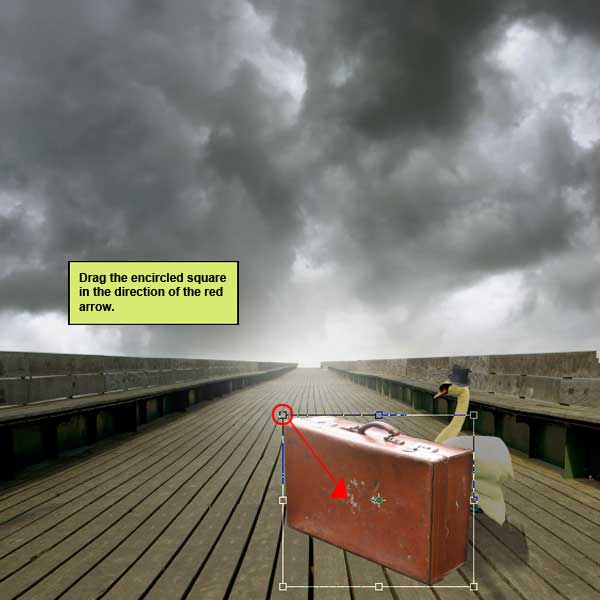
The result should be similar to this:
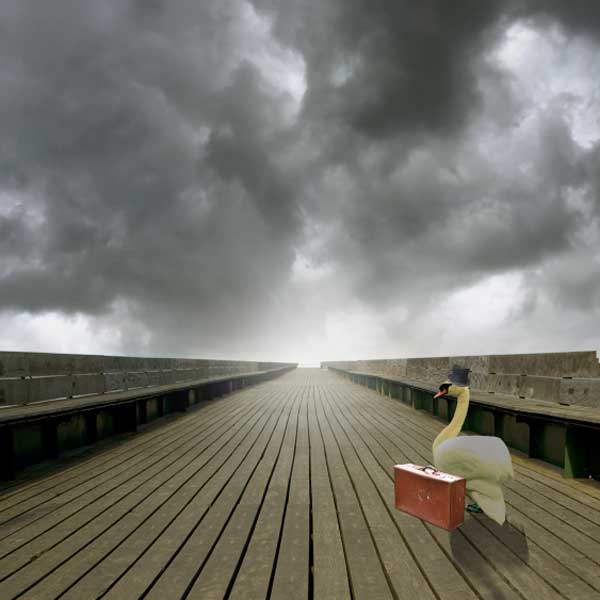
Step 15
Now Create new Curves adjustment layer from the bottom of layers palette .
When the Curves box opens, input the following:
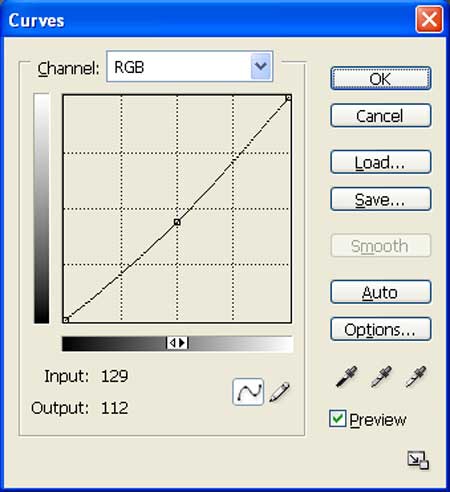
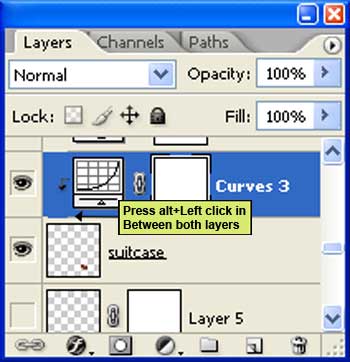
Press Alt+left click in between 2 layer’s (Suitcase layer and Curves) to make a mask.
The result should be similar to this:
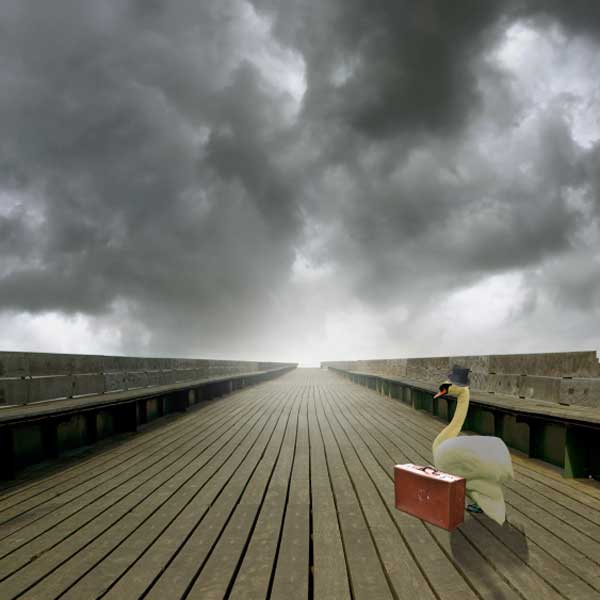
Create a Hue/Saturation adjustment layer which can be found by pressing on the Create New Fill/Adjustment layer button shown on the layer window:
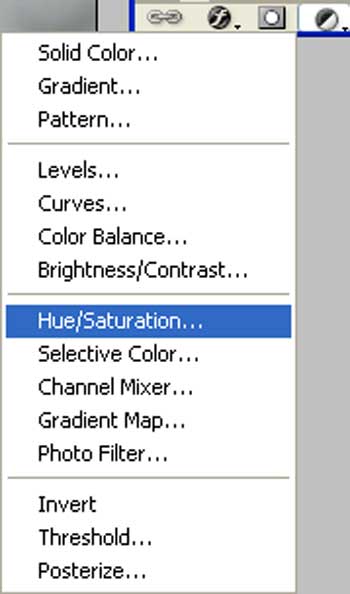
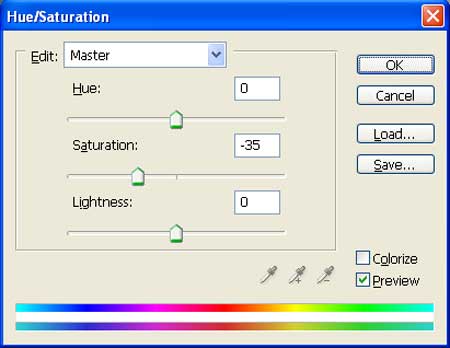
When the Hue/Saturation box opens, input the following settings. Press Alt+left click in between 2 layer’s (Suitcase layer and Hue/Saturation) to make a mask.
The result should be similar to this:

Step 16
Let’s create Suitcase’s shadow. Activate new layer and name it”Suitcase shadow”.
Activate Brush tool (B) with these settings :
Brush size: 100px
Hardness: 0%
Opacity: 40%
Flow: 100%
Color: #000000
Now paint over the highlighted area.
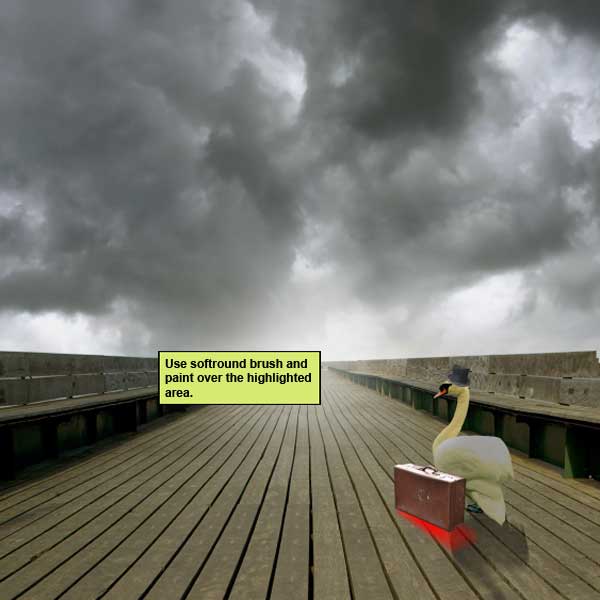
The result should be similar to this:

Step 17
First off, let’s open the Victorian Street Lamp 3 stock in Photoshop. We will be using the Lamp from this stock image so we will need to transfer it to our main canvas.
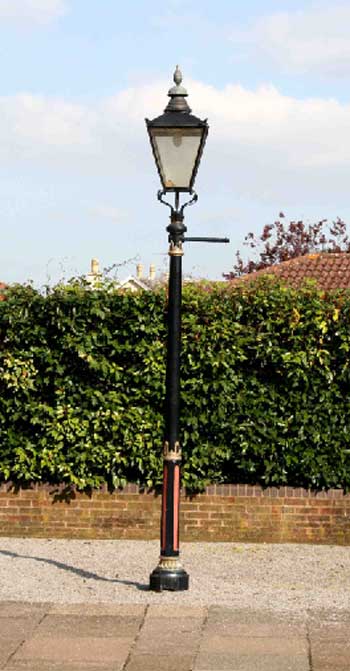
Click the Victorian Street Lamp 3 and press P to activate pen tool and then make a selection around the Lamp and then click V to activate the Move Tool. Left-click the image and drag the image to the main canvas and change layer name to “Lamp”.
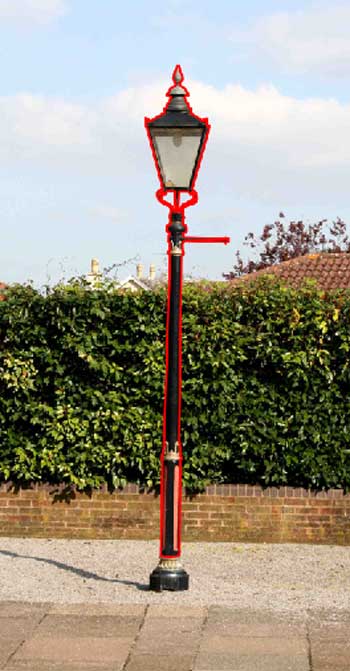
The result should be similar to this:

Next, activate the Transform tool (Ctrl/Cmd +T) and while the “Lamp” layer is selected resize it as shown below:
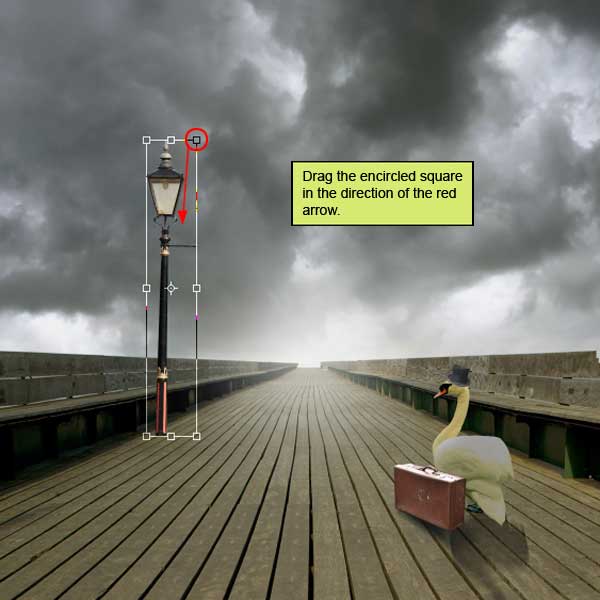
The result should be similar to this:
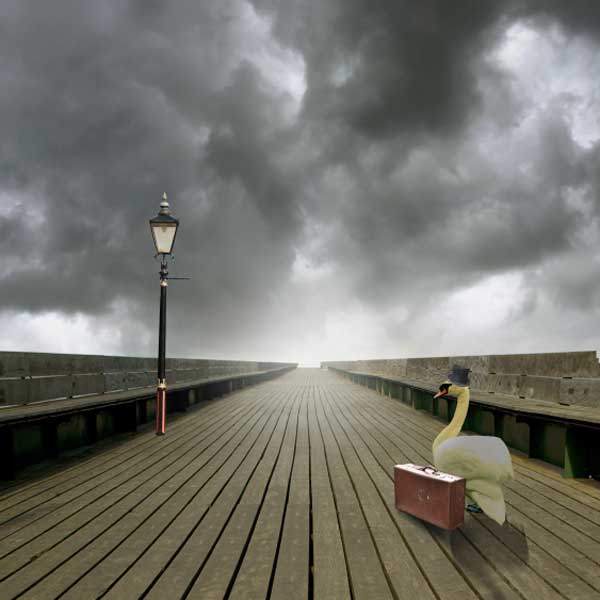
Now activate Erase tool (E) with these settings Now let’s erase :
Brush size: 100px
Hardness: 0%
Opacity: 75%
Flow: 100%
Paint over the highlighted area.
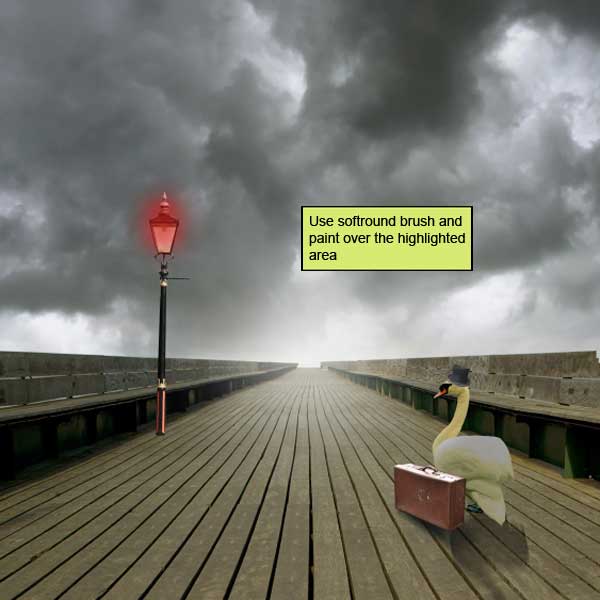
The result should be similar to this:

Step 18
Create new Hue/Saturation adjustment layer from the bottom of layers palette .
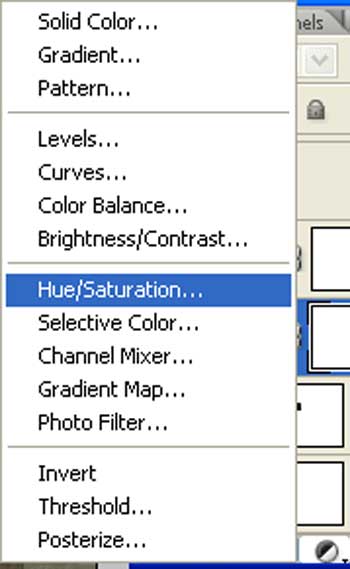
When the Hue/Saturation box opens, input the following settings. Press Alt+left click in between 2 layer’s (Lamp layer and Hue/Saturation) to make a mask.
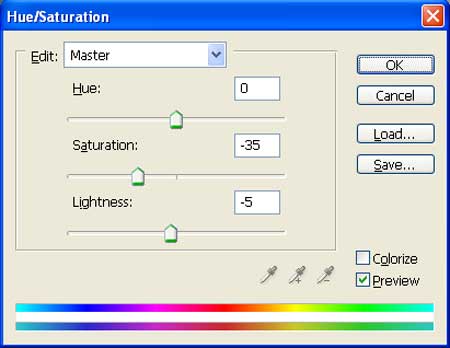
The result should be similar to this:

Create new Brightness/Contrast adjustment layer from the bottom of layers palette .
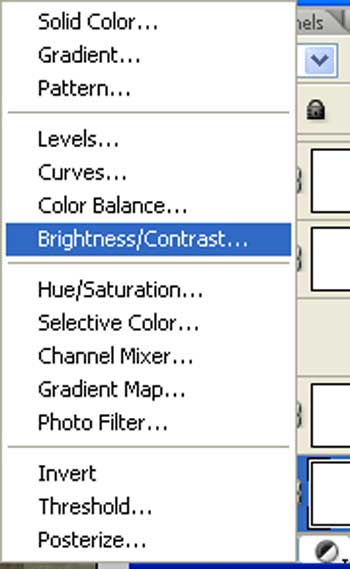
When the Brightness/Contrast box opens, input the following info. Press Alt+left click in between 2 layer’s (Lamp layer and Brightness/Contrast) to make a mask.

The result should be similar to this:

Step 19
First off, let’s open the Retro TV stock in Photoshop. We will be using the tv from this stock image so we will need to transfer it to our main canvas.
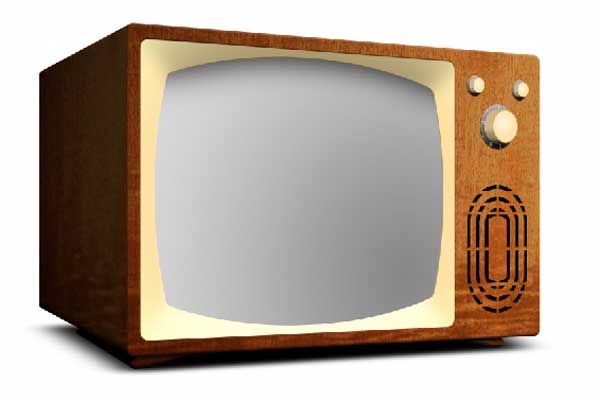
Click the Retro TV and press P to activate pen tool and then make a selection around the tv and then click V to activate the Move Tool. Left-click the image and drag the image to the main canvas and change layer name to “Tv”.
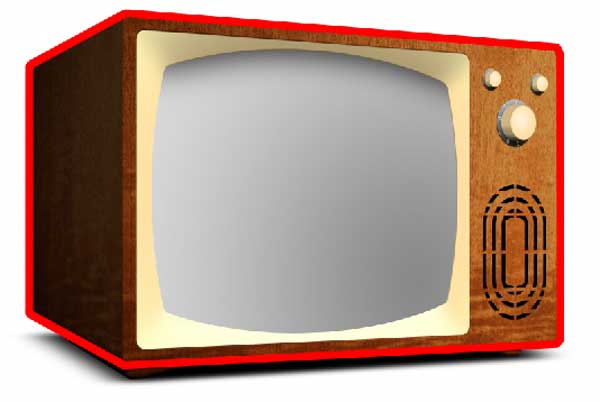
The result should be similar to this:
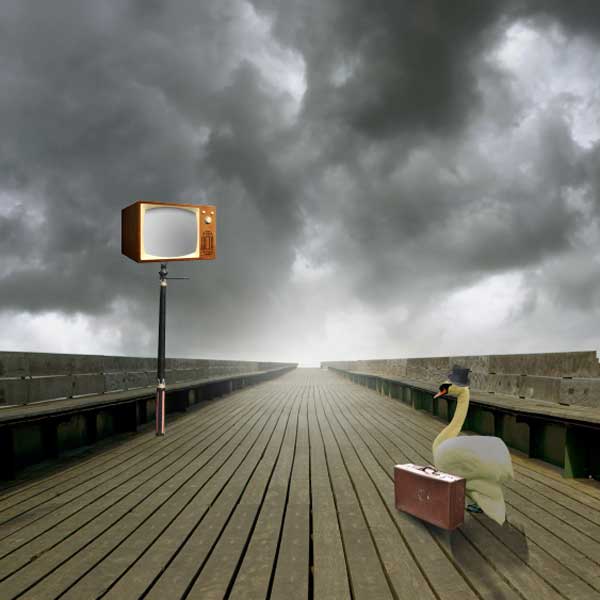
Activate the Transform tool (Ctrl/Cmd +T) and while the “Tv” layer is selected resize it as shown below:
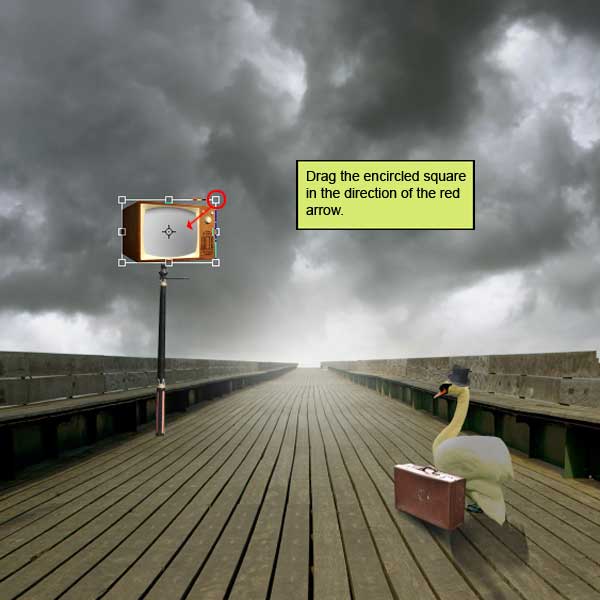
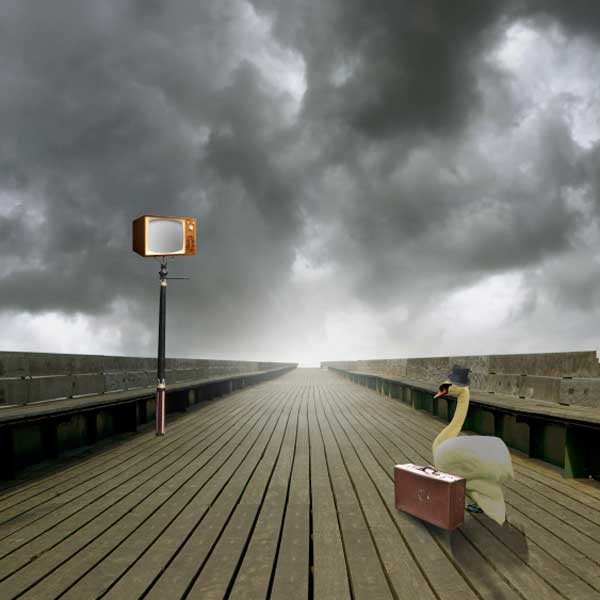
The result should be similar to this:
Step 20
Create new Hue/Saturation adjustment layer from the bottom of layers palette .
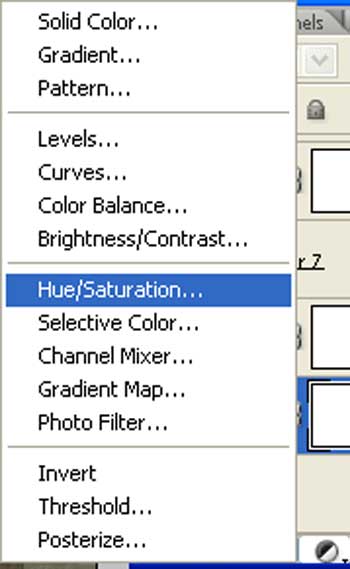
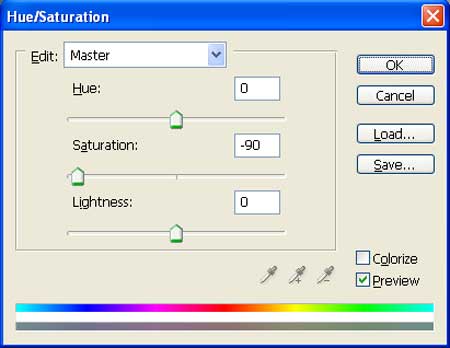
When the Hue/Saturation box opens, input the following info. Press Alt+left click in between 2 layer’s (Tv layer and Hue/Saturation) to make a mask
The result should be similar to this:

Create new Brightness/Contrast adjustment layer from the bottom of layers palette .
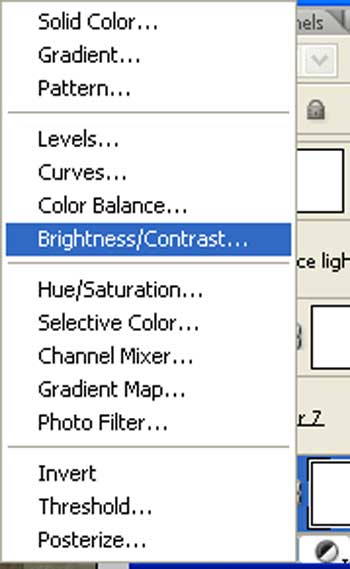
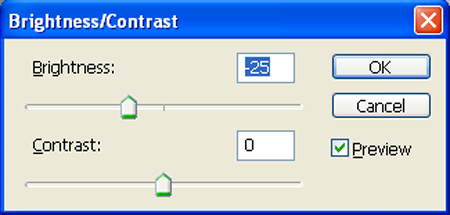
When the Brightness/Contrast box opens, input the following info. Press Alt+left click in between 2 layer’s (tv layer and Brightness/Contrast) to make a mask
The result should be similar to this:

Step 21
Let’s open the Dark Blue eyes in Photoshop. We will be using the Eye from this stock image so we will need to transfer it to our main canvas.
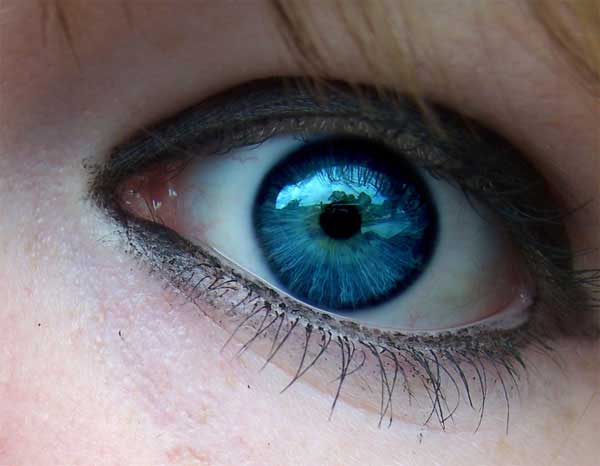
Click the Dark Blue eyes and press V to activate the Move Tool. Left-click the image and drag the image to the main canvas and change layer name to “Eye”.
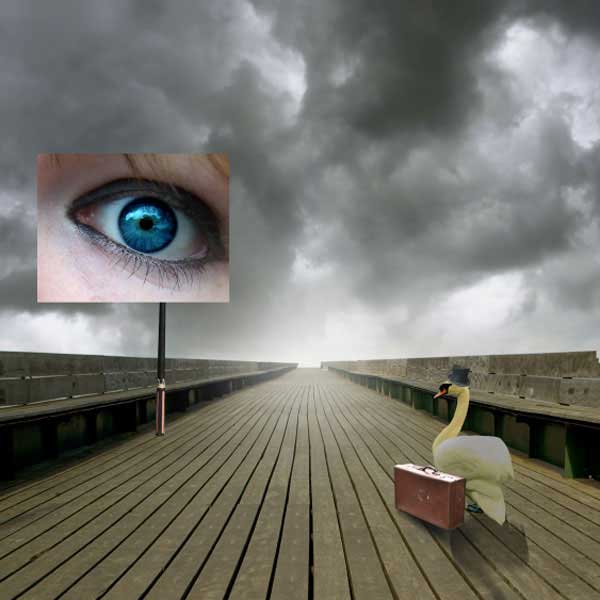
Next, activate the Transform tool (Ctrl/Cmd +T) and then while the “Eye” layer is selected resize it as shown below:
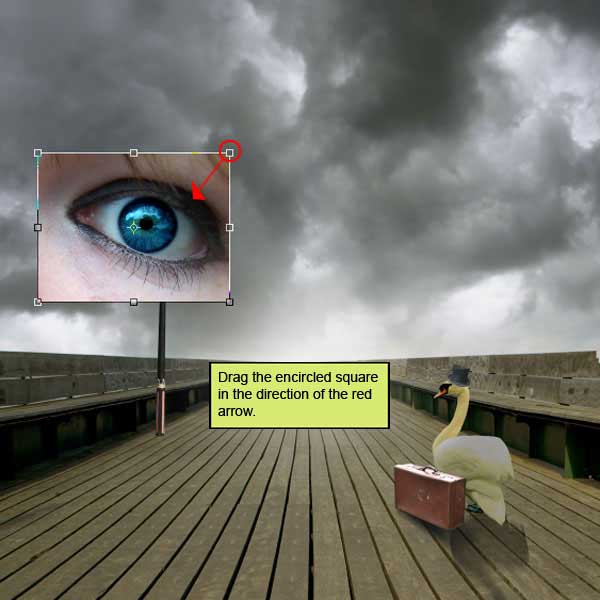
The result should be similar to this:

Create new Hue/Saturation adjustment layer from the bottom of layers palette.
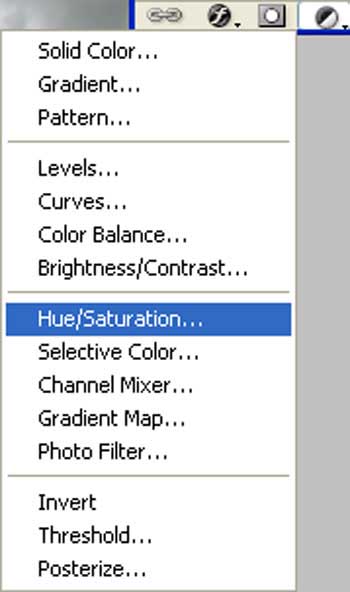
When the Hue/Saturation box opens, input the following info. Press Alt+left click in between 2 layer’s (Eye layer and Hue/Saturation) to make a mask.
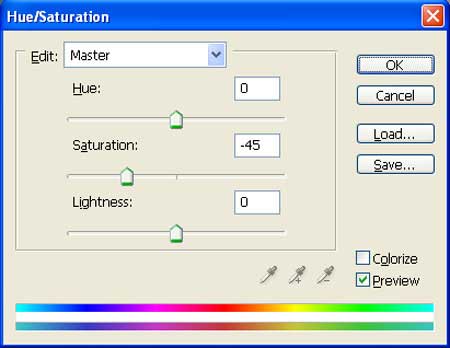
The result should be similar to this:

Step 22
Let’s make lamps shadow so activate a new layer and name it “lamps shadow”.
Activate Brush tool (B) with these settings :
Brush size: 100px
Hardness: 0%
Opacity: 40%
Flow: 100%
Color: #000000
Paint over the highlighted area.
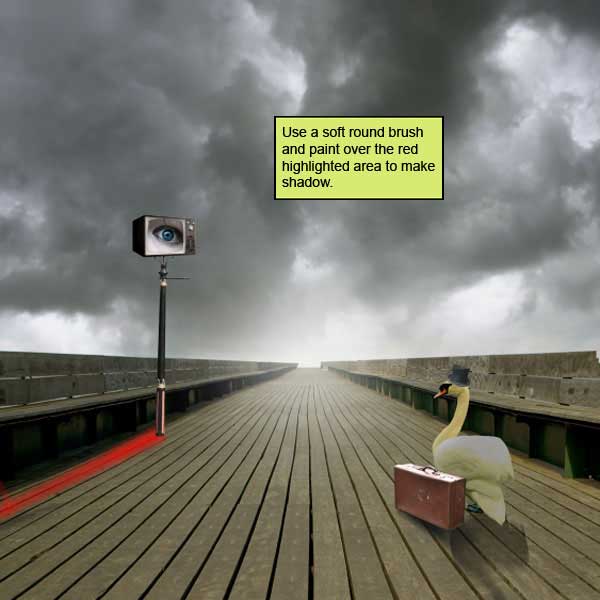
The result should be similar to this:
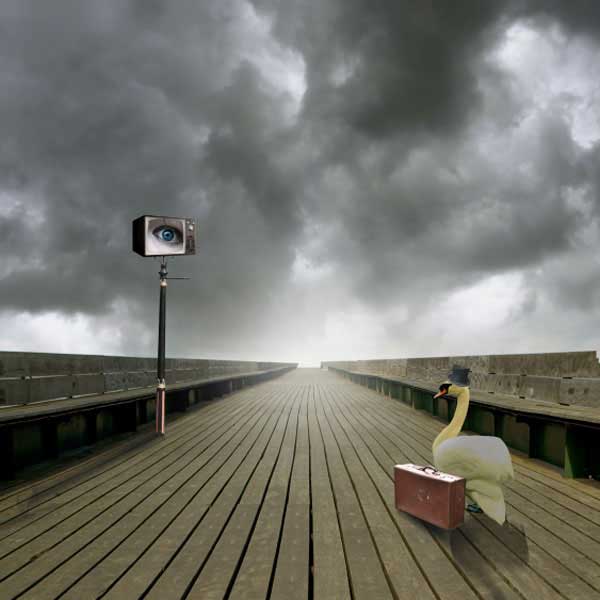
Step 23
Let’s adjust image environment.
Now create a Solid color adjustment layer which can be found by pressing on the Create New Fill/Adjustment layer button shown on the layer window:
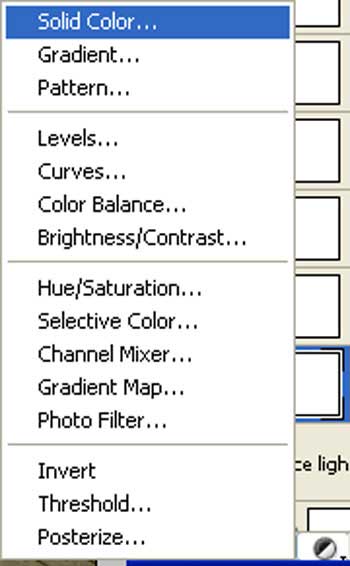
When the Solid color box opens, input the following:
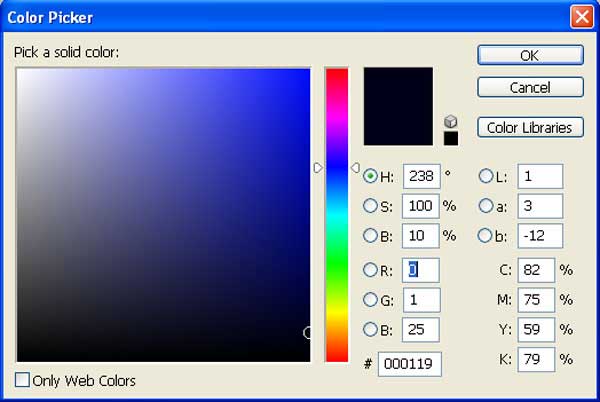
Change layer blend mode to “Exclusion” and opacity to “30%”.
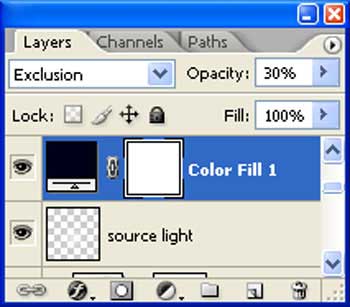
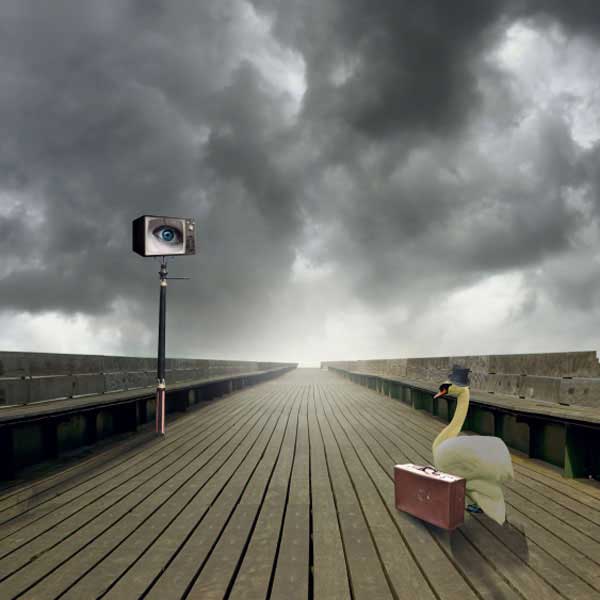
The result should be similar to this:
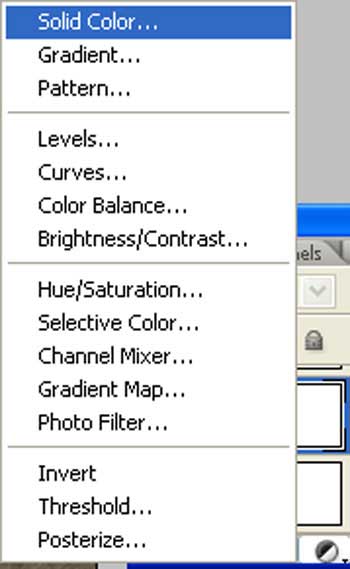
Create a Solid color adjustment layer which can be found by pressing on the Create New Fill/Adjustment layer button shown on the layer window:
When the Solid color box opens, input the following:
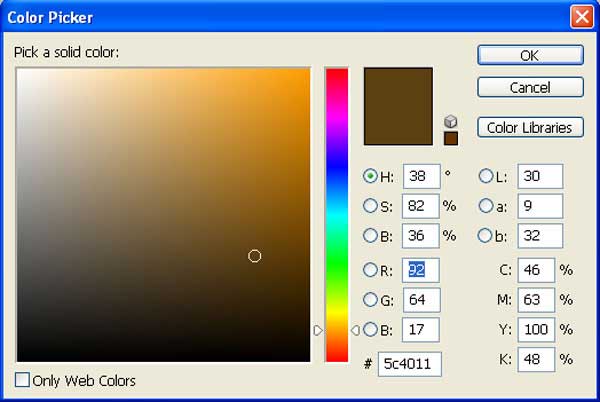
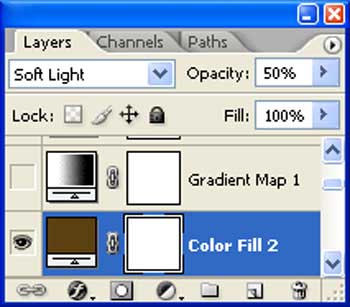
Change layer blend mode to “Soft light” and opacity to “50%”.
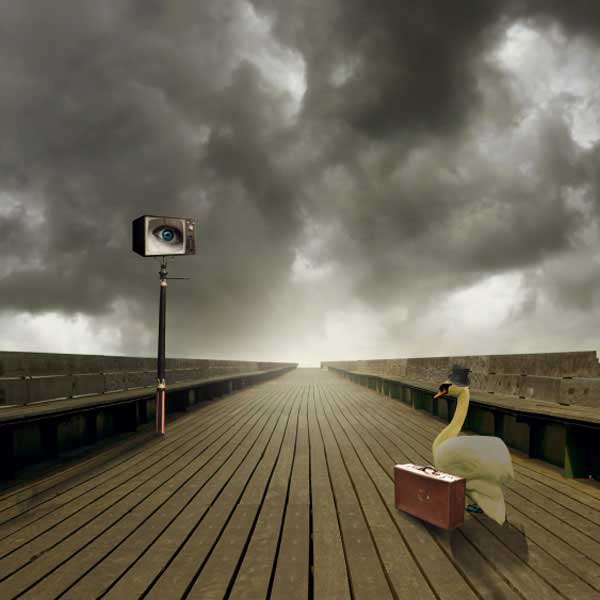
The result should be similar to this:
Create a Gradient map adjustment layer which can be found by pressing on the Create New Fill/Adjustment layer button shown on the layer window:
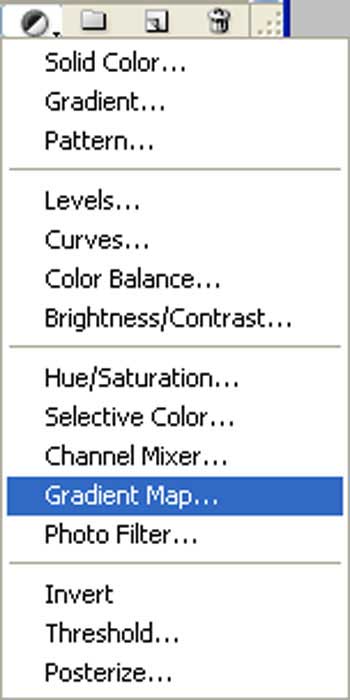
When the Gradient map box opens, input the following:
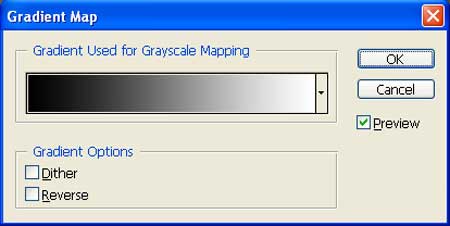
Change layer blend mode to “Luminosity” .
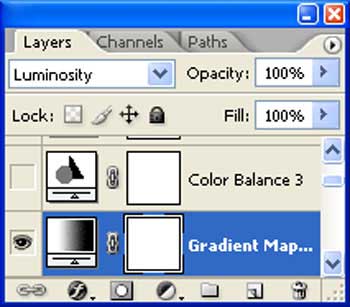
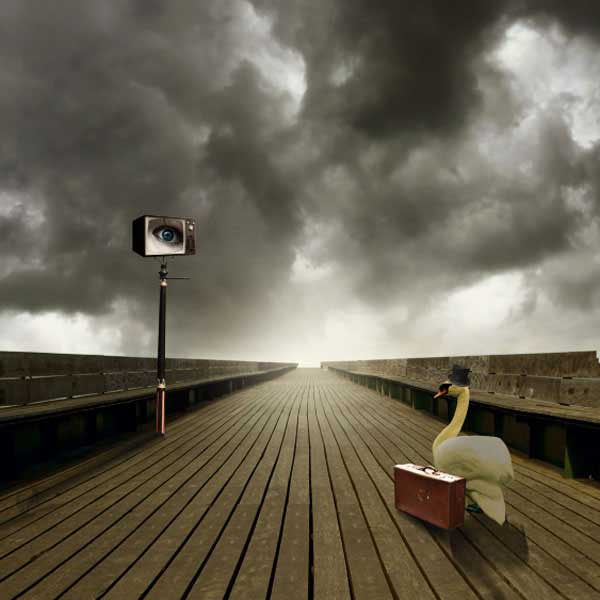
The result should be similar to this:
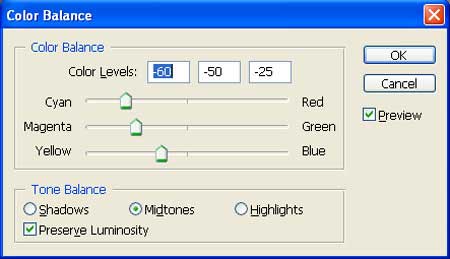
Create a Color Balance adjustment layer which can be found by pressing on the Create New Fill/Adjustment layer button shown on the layer window:
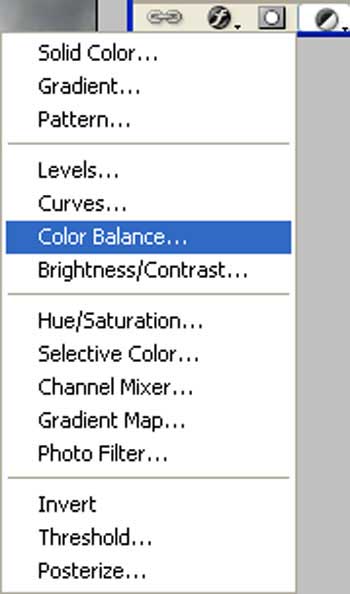
When the Color Balance box opens, input the following:
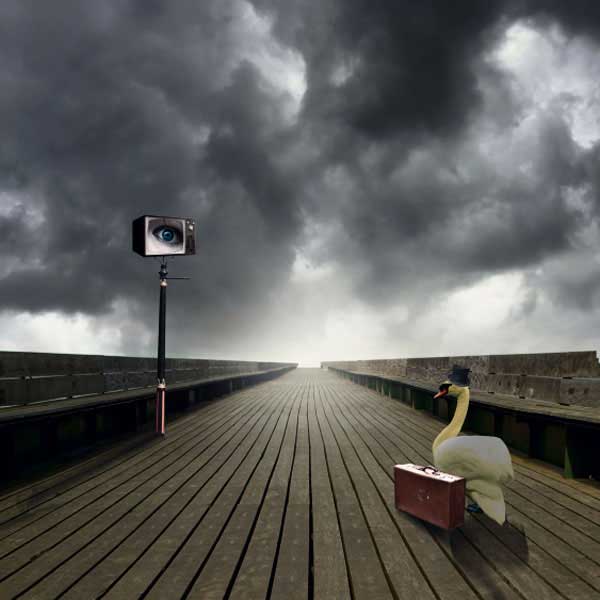
The result should be similar to this:
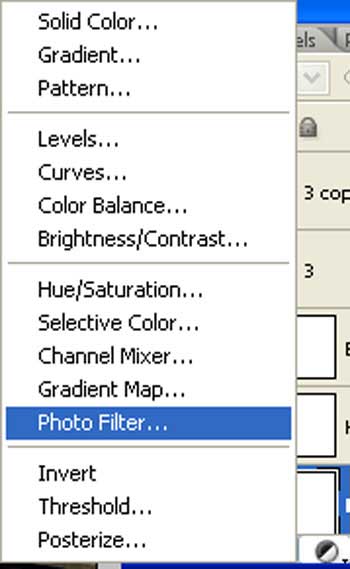
Create a Photo Filter adjustment layer which can be found by pressing on the Create New Fill/Adjustment layer button shown on the layer window:
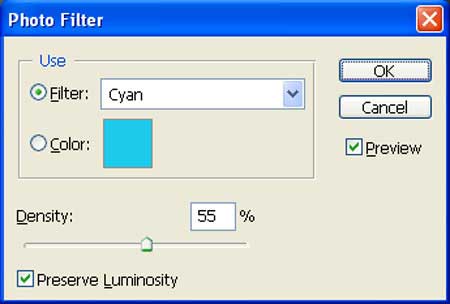
When the Photo Filter box opens, input the following:
The result should be similar to this:

Create a Hue/Saturation adjustment layer which can be found by pressing on the Create New Fill/Adjustment layer button shown on the layer window:
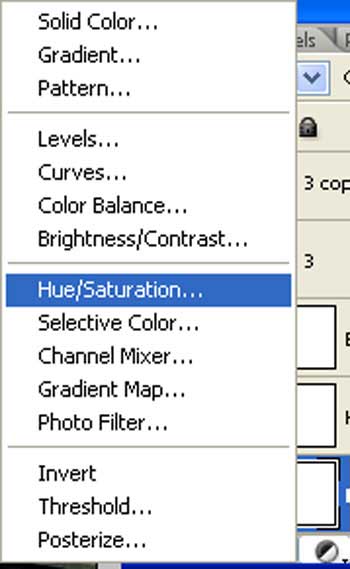
When the Hue/Saturation box opens, input the following:
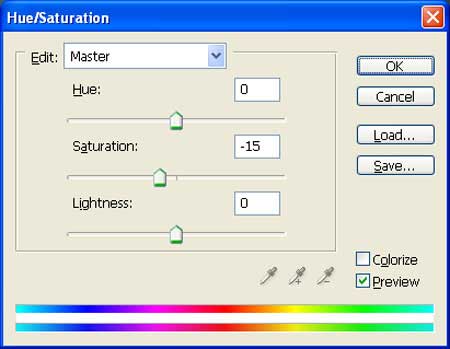
The result should be similar to this:

Create a Brightness/Contrast adjustment layer which can be found by pressing on the Create New Fill/Adjustment layer button shown on the layer window:
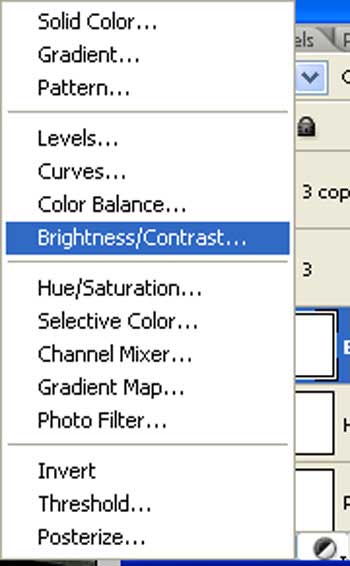
When the Brightness/Contrast box opens, input the following:
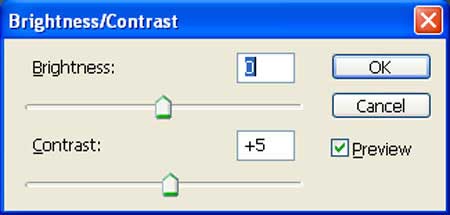
The result should be similar to this:
Step 24
Create a new layer and name it “Vignette”. Fill it with White color “#ffffff”.

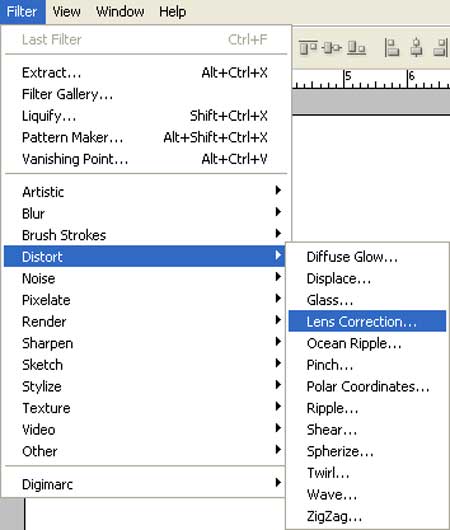
Now go to Filters > Distort > Lens Correction:
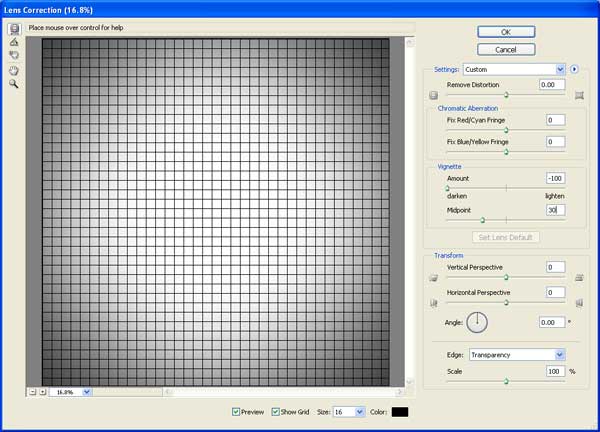
When the Lens Correction box opens, input the following:
The result should be similar to this:

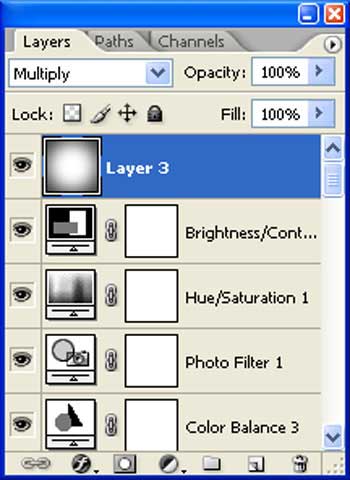
Change the layer mode to “Multiply” and the opacity to 100%:
Final Image
