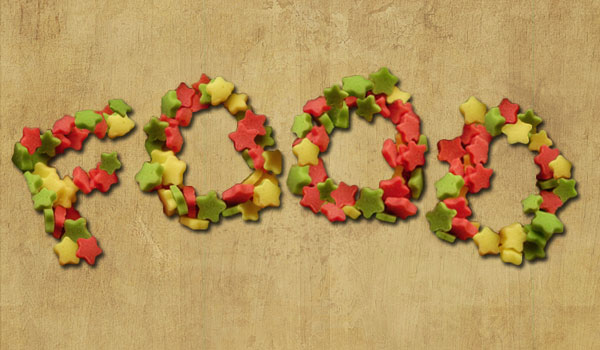
This Photoshop tutorial will show you how to use a stars-candy texture to create a nice stars candy text Effect.
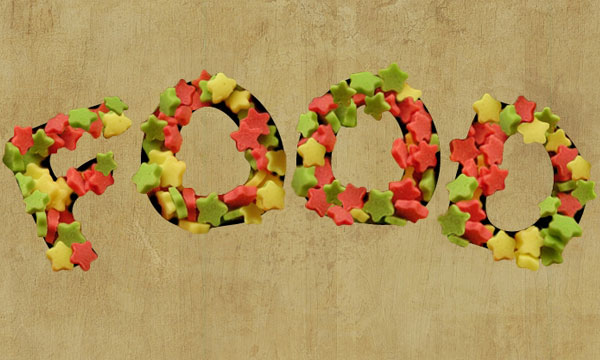
Final Image Preview
Resources
- 8 wooden patterns by celestesd
- Grungy Cracked Wall by Light-Hiruma
- Sweet Stars
Step 1
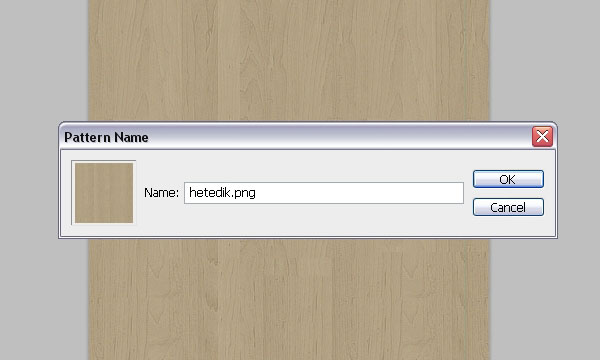
Open the “hetedeik.png” image from the 8 wooden patterns set, then go to Edit > Define Pattern.
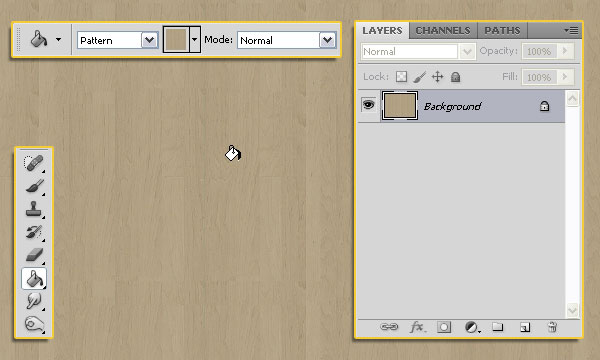
Create a new 1024 x 768 px document, and fill the Background with the wood pattern.
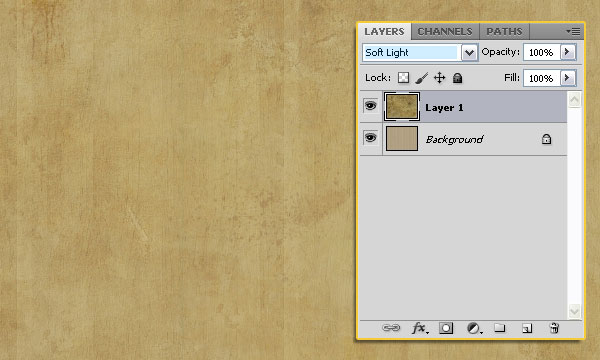
Place the Grungy Cracked Wall texture on top of the Background, and change its layer’s Blend Mode to Soft Light.
Step 2
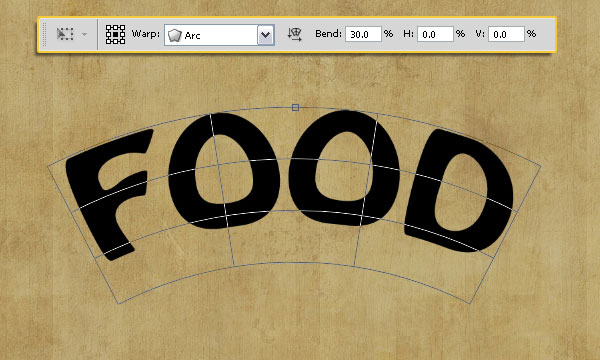
Use the Horizontal Type Tool (T) to create your text in Black. The font used is ‘Hobo Std’, and the size is 200 pt.

Go to Edit > Transform > Warp, choose Arc from the Warp drop-down menu, and set the Bend value to 30. Hit Enter to accept the changes.
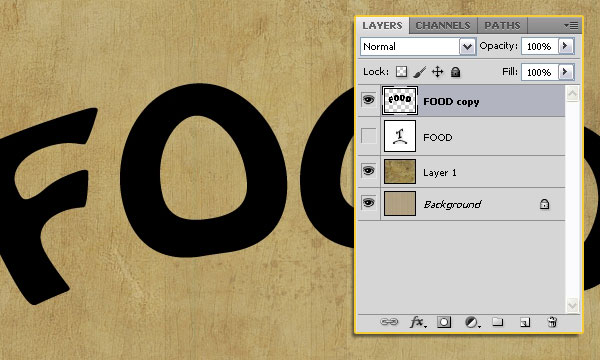
Duplicate the text layer, and make the original one invisible (by clicking the eye icon next to it).

Right-click on the copy text layer and select Rasterize Type.
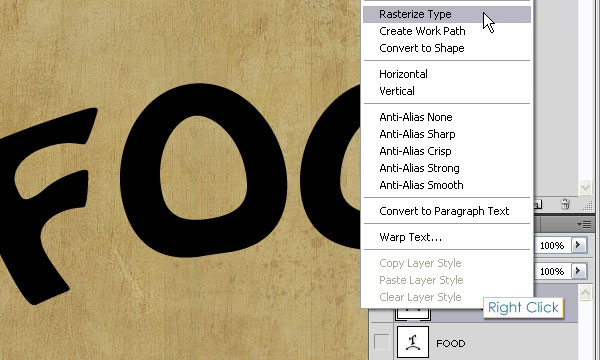
The text is no longer editable now, so make sure to modify the text before this step.
Step 3
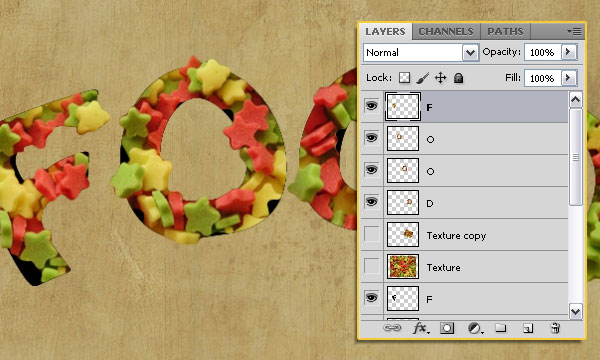
Use the Lasso Tool to select the first letter. Make sure the copy (rasterized) text layer is selected (active).
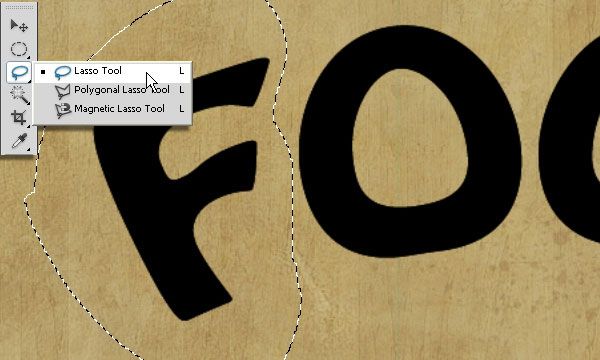
Press Ctrl/Cmd + J to duplicate the letter to a separate layer, then rename the duplicated layer to whatever letter it has.
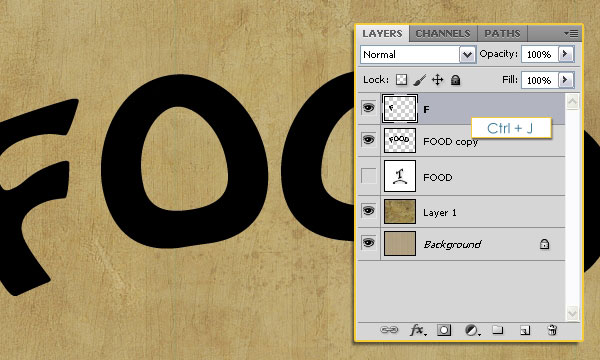
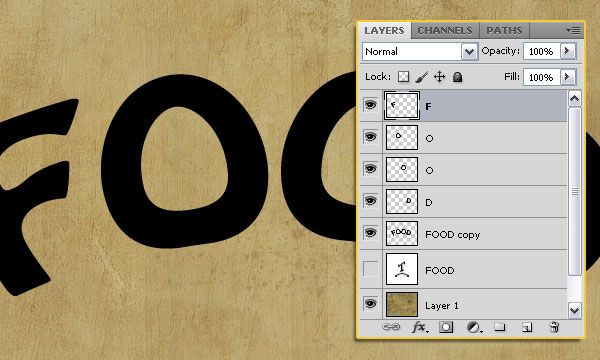
Do the same thing for the rest of the letters. Don’t forget to select the rasterized text layer each time before pressing Ctrl/Cmd + J.
Step 4
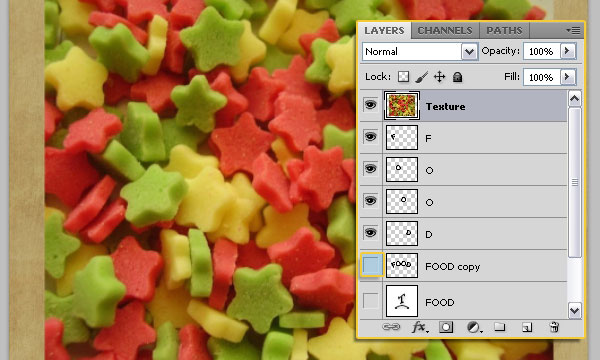
Place the Sweet Stars texture on top of all layers, rename its layer to “Texture“, and make the rasterized text layer invisible, so that only the separate letters layers are visible.
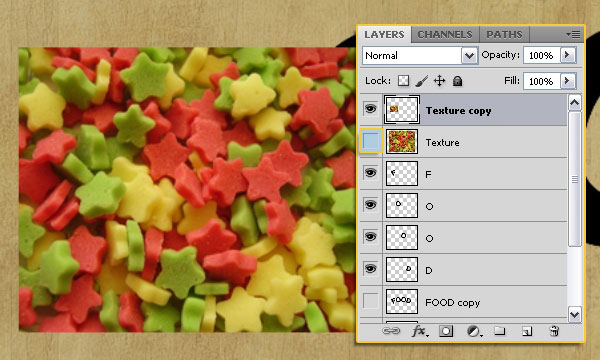
Duplicate the “Texture” layer then make it invisible. Resize (Edit > Transform > Scale) the texture (in the “Texture copy” layer) so that it almost covers one letter only.
Press Ctrl/Cmd key, and click on the first letter layer’s thumbnail (icon) to create a selection.
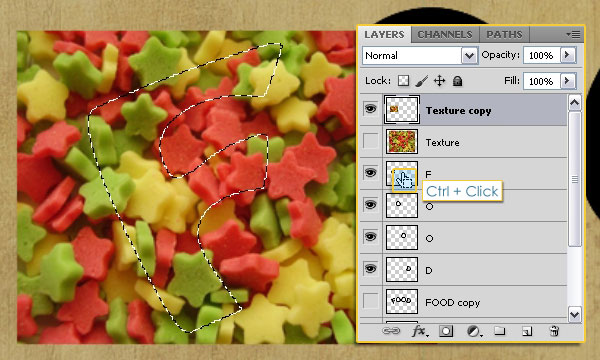
Use the Polygonal Lasso Tool OR the Magnetic Lasso Tool (L), whichever one you prefer, to add missing parts of the stars on the edges or Subtract those extra ones from the selection you have (click the Add to Selection or Subtract from Selection icons in the Options bar to do so).
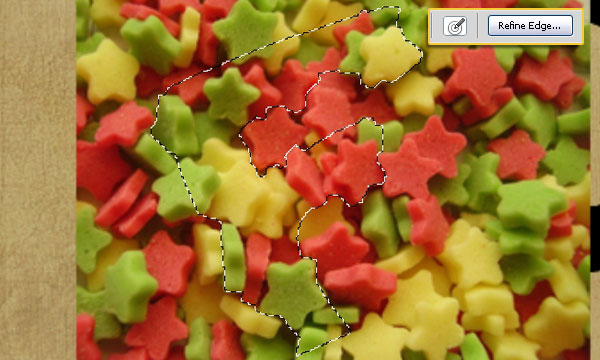
This doesn’t have to be perfect, and it’s fine if you forgot some parts, as you can still fix those in the following Steps. Just try to cover as many stars as possible, and take your time in this Step.

Once you’re done, click the “Refine Edge” button in the Options bar.
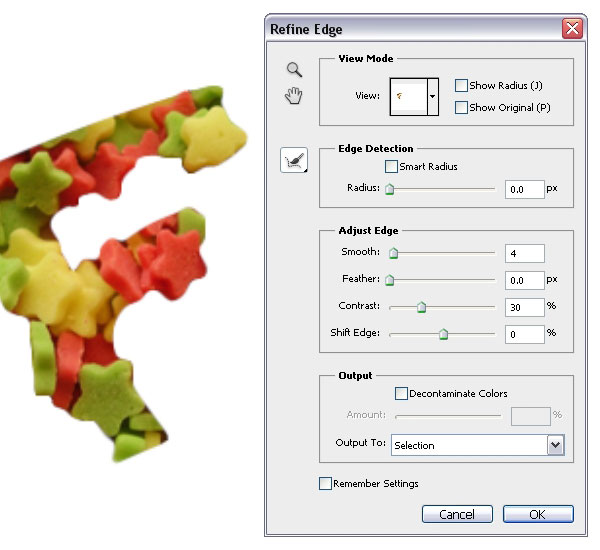
Modify the Smooth and Contrast values till the edges are soft, then click OK.
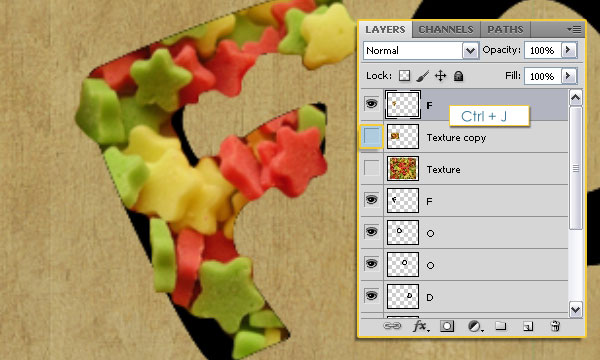
Press Ctrl/Cmd + J to duplicate the selected texture on a separate layer. You can make the “Texture copy” layer invisible to see how the texture looks, but don’t forget to make it visible once again (by clicking in the empty square next to the layer) before moving on to the next step.
Step 5
Move the texture to cover the next letter. You can as well rotate it (Edit > Transform > Rotate), and always hit Enter to accept changes when you’re done.

Repeat the same steps till you have a texture for all of the letters, each one on a separate layer.
Now, use any of the Lasso Tools to select a couple of stars from the texture. Choose ones that are not missing any parts, in different angles and colors, to add them to the letters.
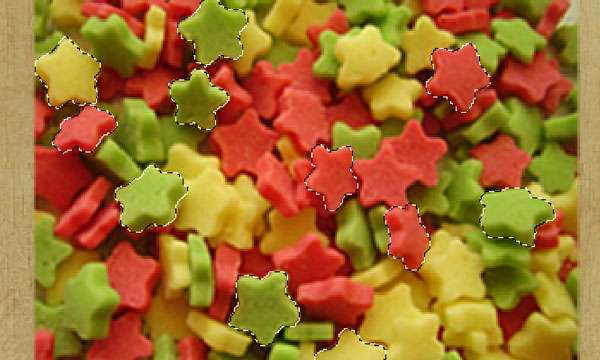
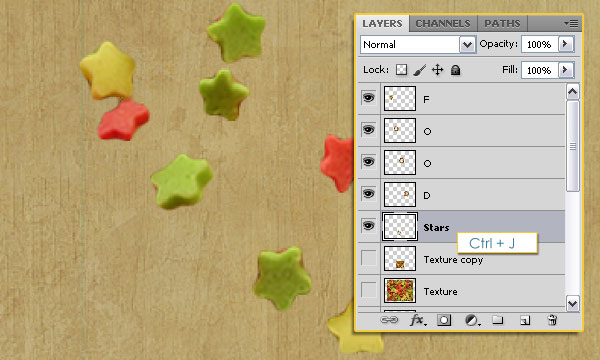
Redefine the selection Edges, then press Ctrl/Cmd + J to duplicate those stars into a separate layer, and rename it to “Stars“. Once you’re done, make the “Texture copy” layer invisible.
Step 6
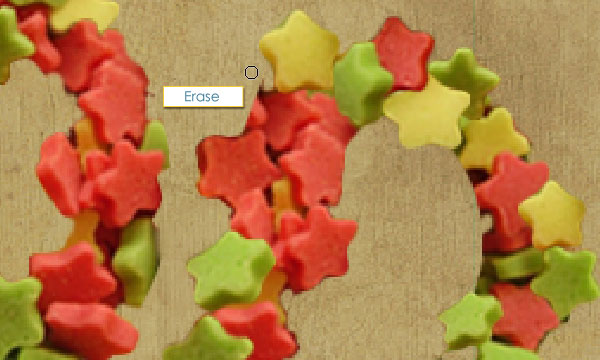
Select a star using the Lasso Tool, duplicate it to a separate layer (Ctrl/Cmd + J), then move it around to fill in the empty edges. You can make as many copies as you need of each star, and you can rotate and scale them as well. Try to cover all the empty areas in the letters’ texture.
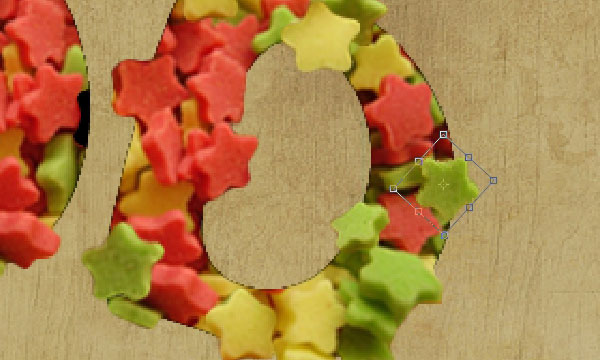
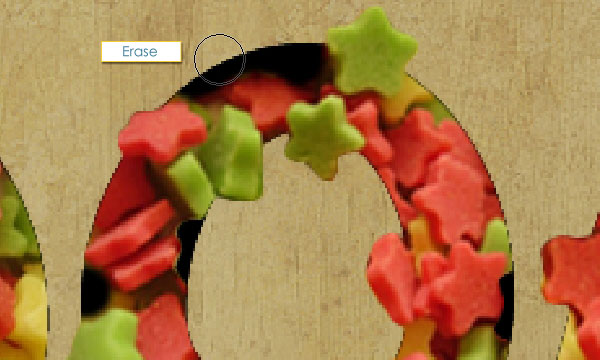
You can use the Eraser Tool to get rid of any unwanted parts.
This step might take a while, but it’s important to make sure no areas are empty or incomplete, so take your time.
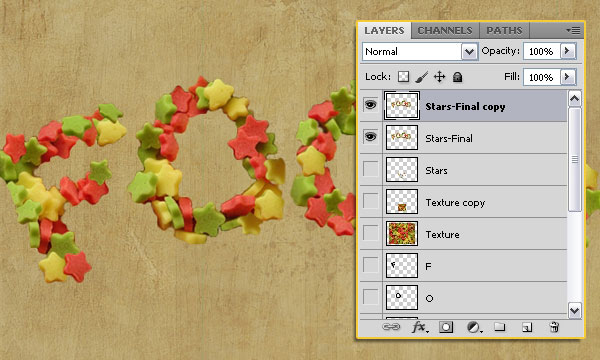
When you’re done, select all the Stars texture layers, and press Ctrl/Cmd + E (Layer -> Merge Layers) to have the texture in one layer. Rename the merged layer to “Stars-Final“.
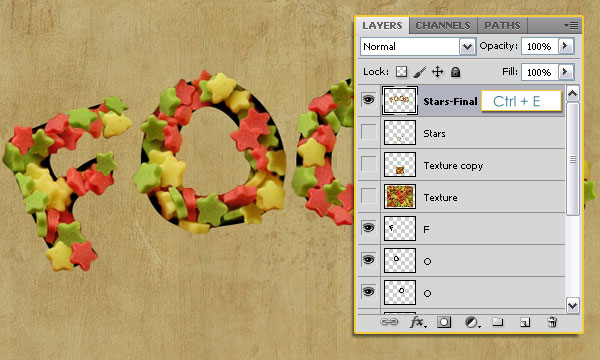
Make all other text layers invisible.

You might notice some areas that still need to be erased, so go ahead and do so.
Step 7
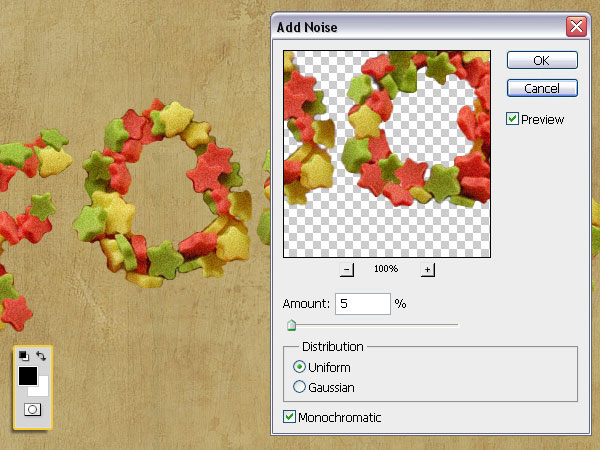
Duplicate the “Stars-Final” layer.
Set the Foreground and Background colors to Black and White, then go to Filter > Noise > Add Noise, and change the values as shown below:
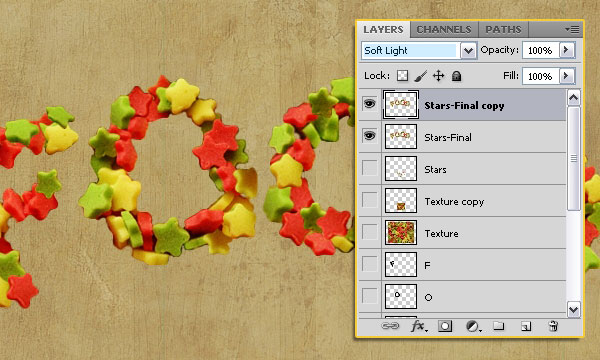
Change the “Stars-Final copy” layer’s Blend Mode to Soft Light.
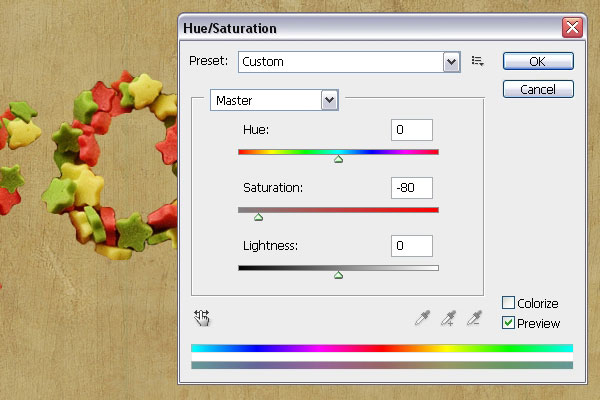
Go to Image > Adjustments > Hue/Saturation (Ctrl/Cmd + U), and set the Saturation to -80.
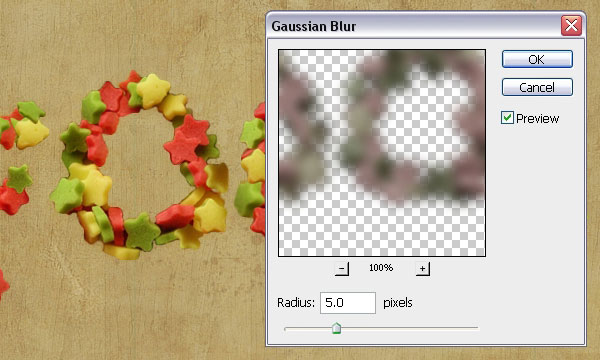
Go to Filter > Blur > Gaussian Blur, and set the Radius to 5. This will soften the texture.
Step 8
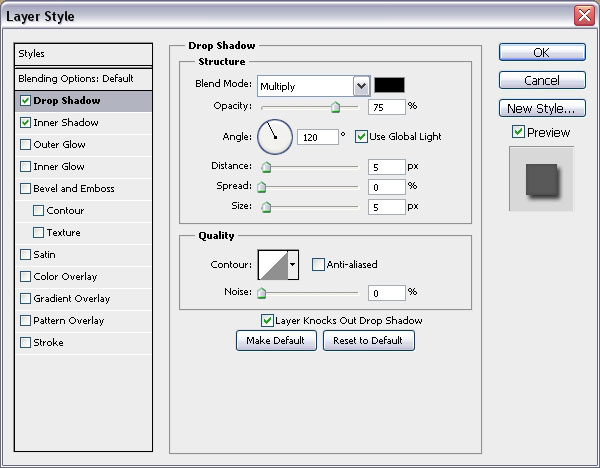
Double click on the “Stars-Final” layer to add some shadows. Start with Drop Shadow, and use the default values.
Then, add Inner Shadow. Change the color to #a7a7a7, and the Distance to 0.
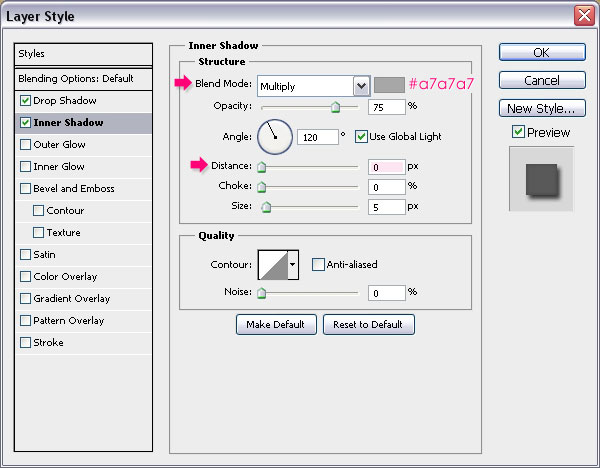
This will add depth to the texture.

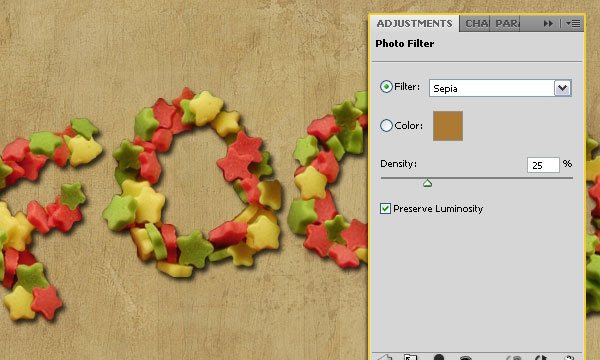
Click the Create a new fill or adjustment layer icon down the Layers panel, and choose Photo Filter.
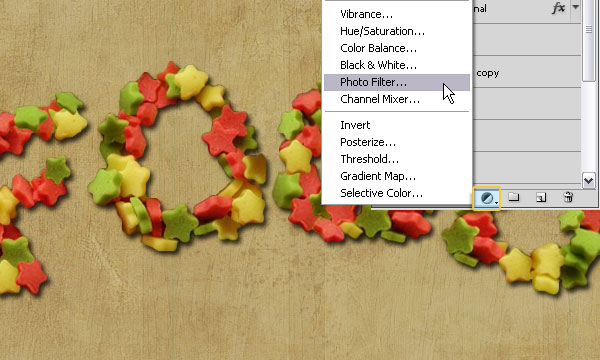
Select the Sepia Filter.
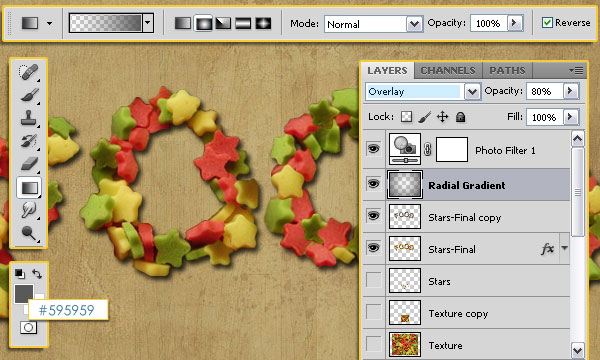
Create a new layer right below the Photo Filter Layer and call it “Radial Gradient“. Set the Foreground color to #595959, choose the Foreground to Transparent Gradient, and check the Reverse box. Create a Radial Gradient from the center of the document to one of the corners, and change the layer’s Blend Mode to Overlay and its Opacity to 80%.
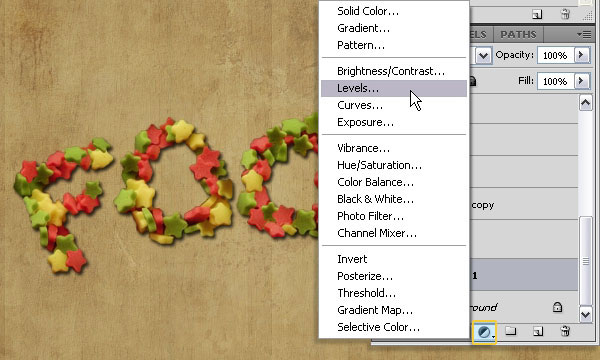
Finally, click the Create a new fill or adjustment layer icon again, but this time select Levels, and make sure to place the Levels layer right on top of the Background layer.
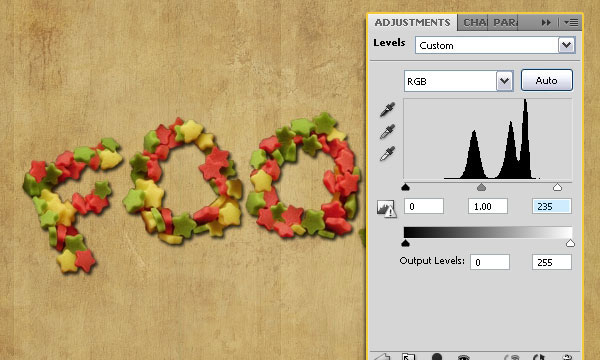
Update the Highlights value to 235 to brighten up the Background a bit, and that’s it!
Final Image
This is the final result. You can use the same technique with any other type of candy or food texture to create other delicious text effects!