Alright, here’s a quick and easy way how to make some nice golden text. I know this tutorial isn’t the most unique or special thing around, but I thought I’d make a nice, quick and easy tutorial for you 😉

1. New Document/Background
First create a new document in which you can make your text. I used a document size of 400 x 140 pixels.
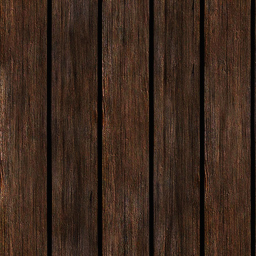
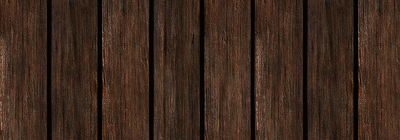
Now make a background that will suit the text. I used this wood texture for my background.
2. Writing Out Your Text, Layer Styles
Now write out your text with an olden-style sort of font. I used: Times New Roman, Bold, 42pt, #885f18.

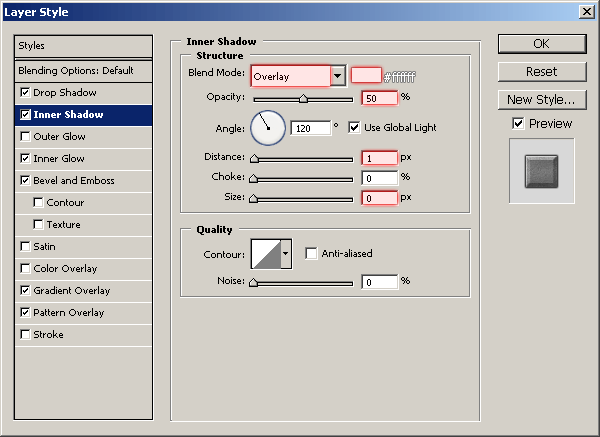
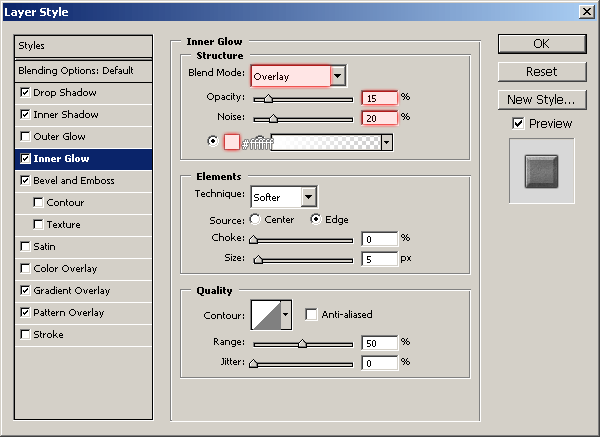
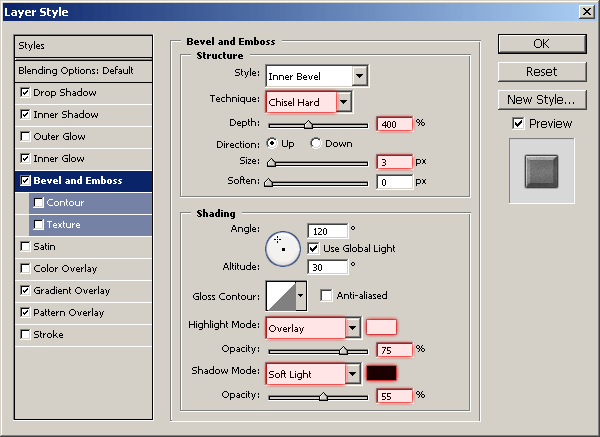
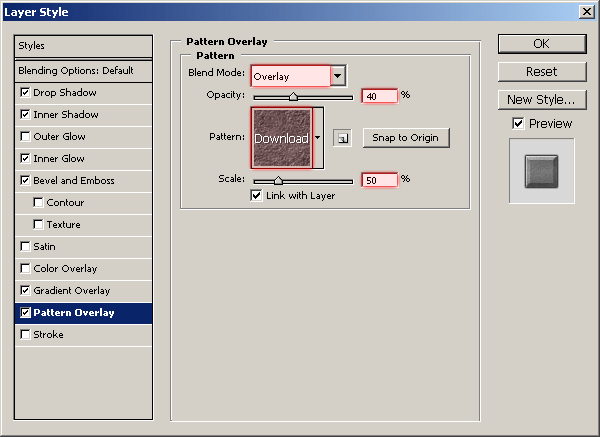
There, that’s your golden text! I’m just joking 😉 Right-click your text layer in the layer’s palette, use the following layer styles and options:
- Drop Shadow
- Inner Shadow
- Inner Glow
- Bevel and Emboss
- Gradient Overlay
- Pattern Overlay (Pattern: .pat – .jpg)
Wow, that was a few layer styles! But, you should now have a cool result like this:

Looking alright so far, but I like to add a few nice effects to it to finish it off.
3. Finishing Touches
To finish these kind of things off, I very often flatten the image, apply Filter > Sharpen > Sharpen, fade the sharpen a bit (Edit > Fade) then apply Filter > Render > Lighting Effects. I love it! 😛
Mess around a little bit with the layer styles and you might be able to come up with a completely unique and nicer effect, be creative!