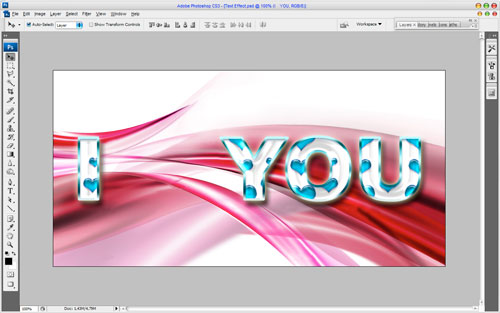
I’m going to write for you a tutorial on how to make semitransparent amorous text effect by using some layer styles.
Ok, let’s start by making a new document in Photoshop. I created a new document sized 1000×500 px. Now time to bring some background to our canvas. For this you can use some abstract or whatever! A good place to start is Google Images. Also you can use my picture.
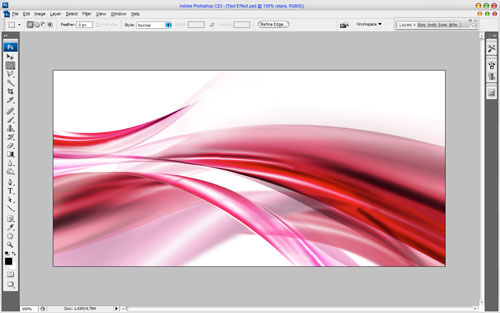
This is the easy part; all you have to do is write out your desired text on the canvas. Get out your Horizontal Type Tool (just the usual one) and write out your text in whatever color you want.
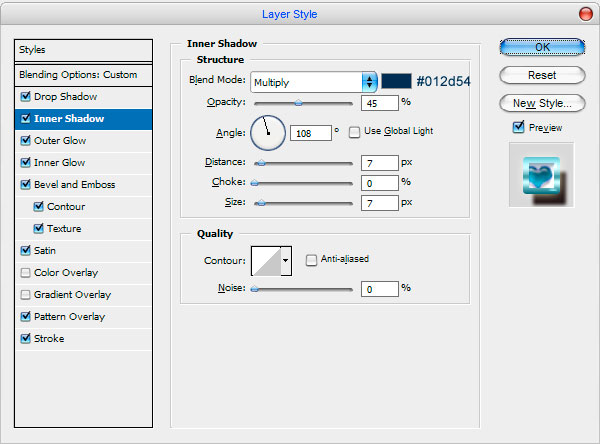
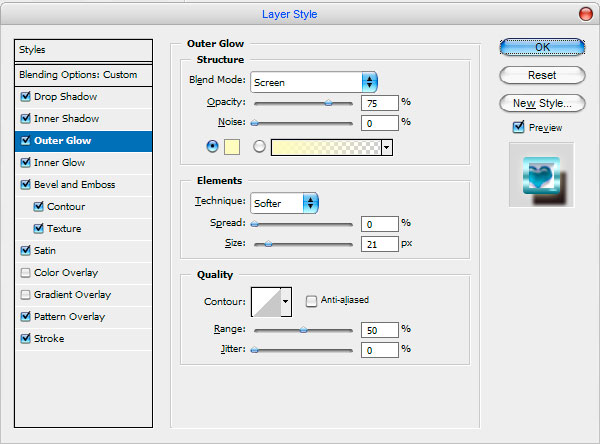
In the above image I’ve used Arial Black (220 pt, Smooth) as my font of choice. Do not forget to leave more space between letters. We will add the heart there later. Now I would like to add some pattern to our pattern gallery before we will start creating our text effect. Open this pattern or find another one using Google Images. Use Edit > Define Pattern to save it as pattern. After that go back to our main document, set fill opacity to 0% up for the text layer, after that apply the Drop Shadow, Inner Shadow, Outer Glow, Inner Glow, Bevel and Emboss, Contour, Texture, Satin, Pattern Overlay, Stroke layer styles to get the next result:

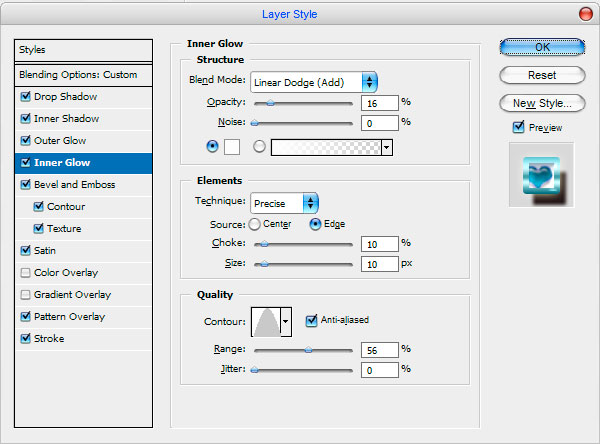
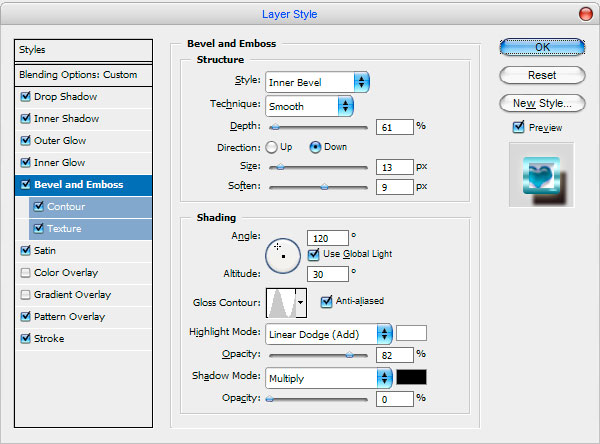
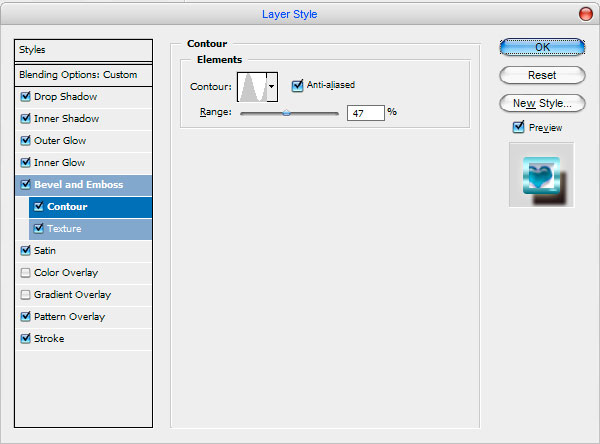
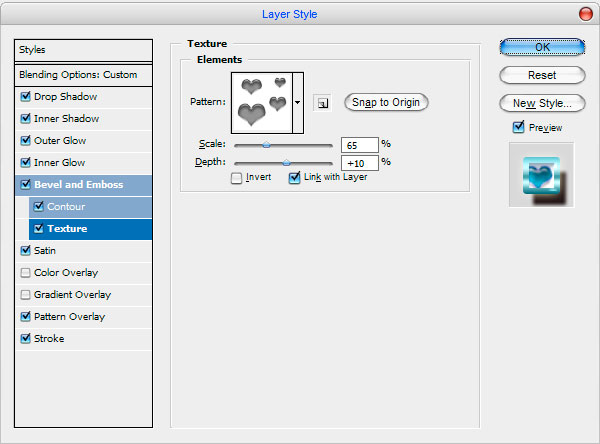
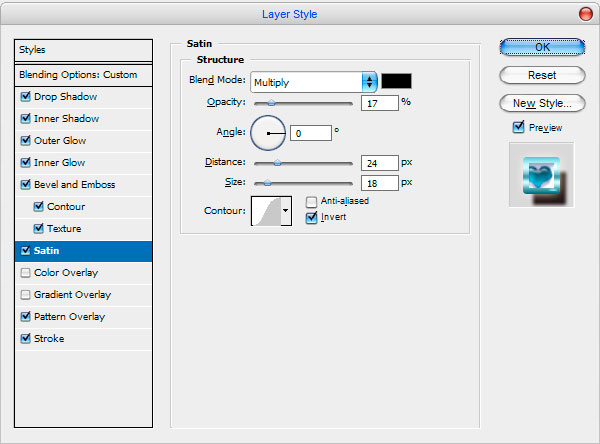
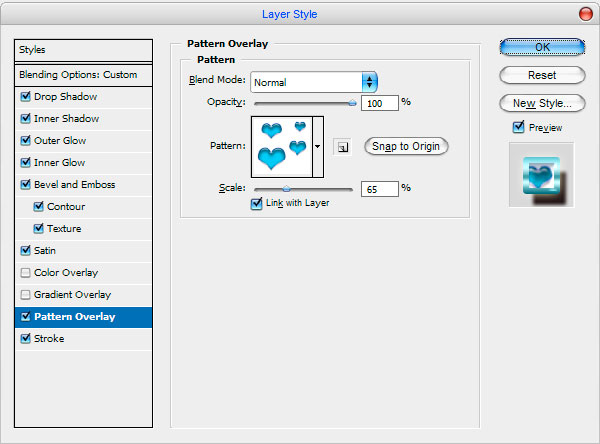
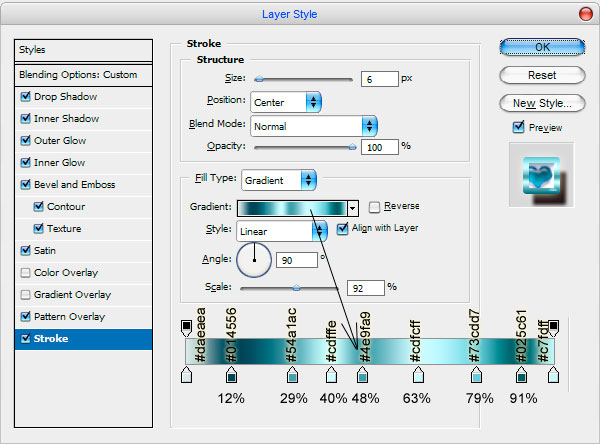
Now time to add shape to our text. Get out the Custom Shape Tool and select the next shape from the gallery
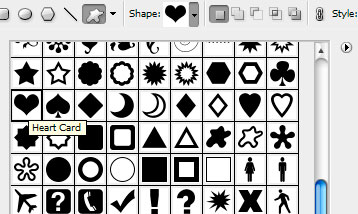
and write out your text in whatever color you want.

Now set fill opacity to 0% up for this layer, then select the text layer and copy it: right click the Layer Thumbnail in the Layers Palette and select Copy Layer Style:
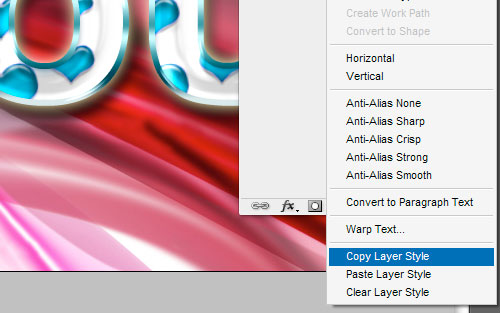
After that go back to shape layer and apply copied layer style to it: right click the Layer Thumbnail in the Layers Palette and select Paste Layer Style:

You can see the result below:

Looks pretty good as for me! Now I would like to change color for our shape to make it different from the text. Add the Color Overlay layer style to this layer:


Pretty much the final thing we need to do is add glowing star to our heart to make it actually look good. Create a new layer, then select the Rectangular Marquee Tool and make selection like mine and fill it with white color:

Remove the selection with Ctrl+D and apply Filter > Blur > Motion Blur with similar settings to these:
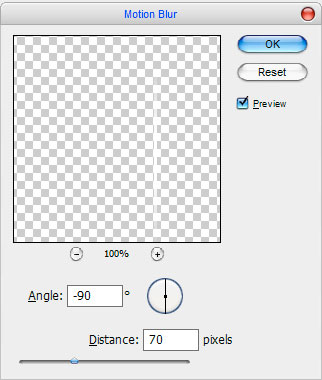
See the difference:

Duplicate this layer with Ctrl+J and rotate the copy with Edit > Transform > Rotate 90 CW:

Select the Elliptical Marquee Tool to make selection as on picture below, after that create a new layer and fill it with white color.

Remove selection with Ctrl+D and apply Filter > Blur > Gaussian Blur with next presets:
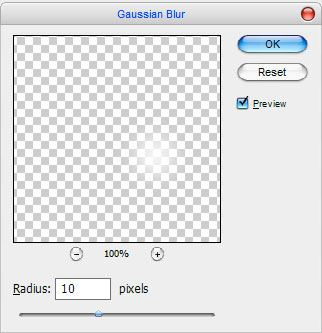
See the result below:

Ok, now merge three of those layers in one and apply Outer Glow layer style to the new composed layer:
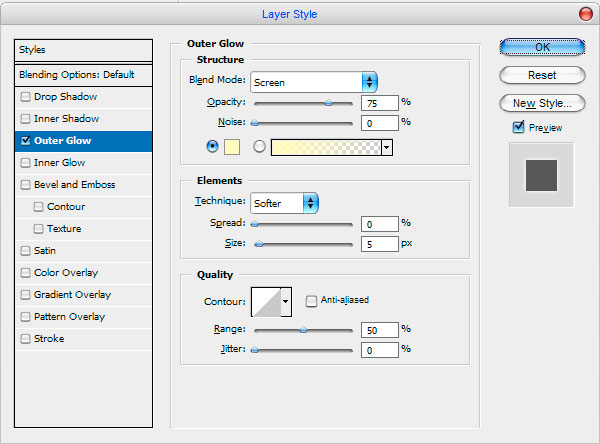

After that rotate the star with Ctrl+T. And now our picture should look like this:
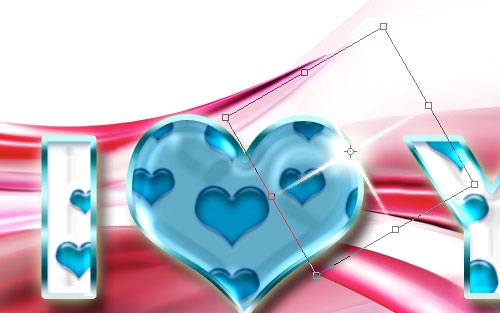
Well, we’re pretty much finished for this tutorial, thanks for taking the time to read it!

