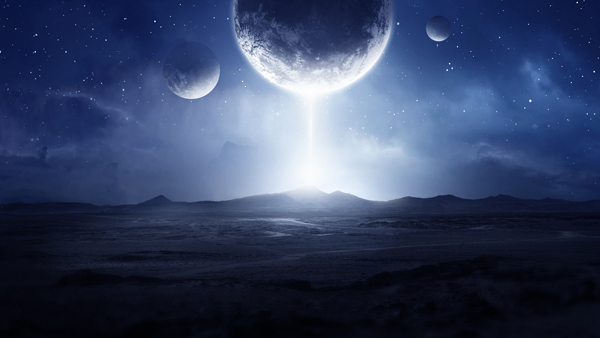
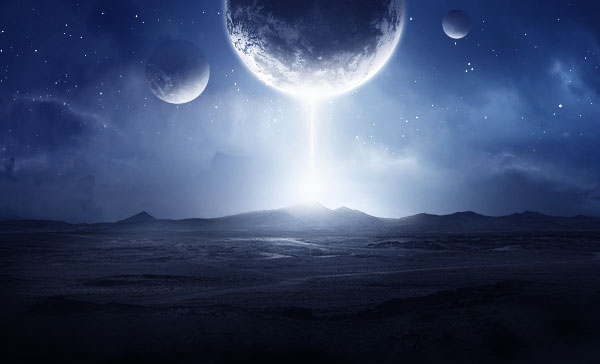
In this Photoshop tutorial I’ll show you how to create a sci-fi landscape scene with stars and planets.
You’ll learn how to blend different images together, make a planet and create lighting effects.
Final Image

Tutorial Details
- Program : Photoshop CS3 +
- Estimated Completion Time : 60 minutes
- Difficulty : Intermediate
Resources
Step 1
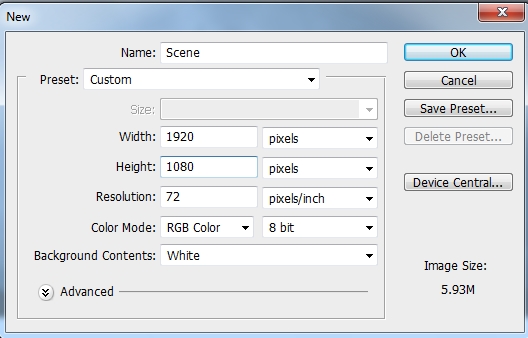
Create a new document in Photoshop with the settings below:
Step 2
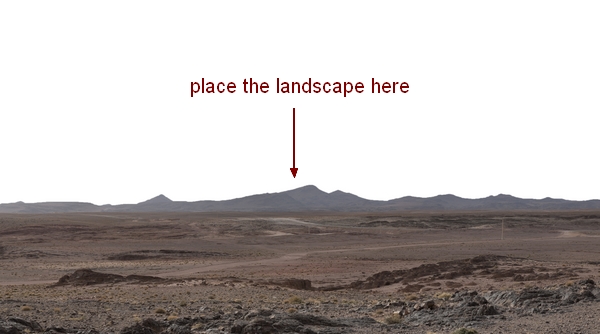
Open the landscape image. Use any tools you’re familiar with to isolate the landscape from the background and drag it into the white canvas using the Move Tool (V). Convert this layer to a Smart Object.
Step 3
Go to Filter > Blur > Gaussian Blur and change the radius to 8 px:
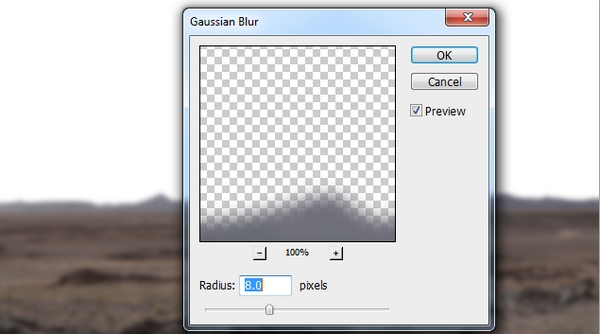
On this filter mask, use a soft black brush to erase the blur effect at the background and make it only visible at the foreground.
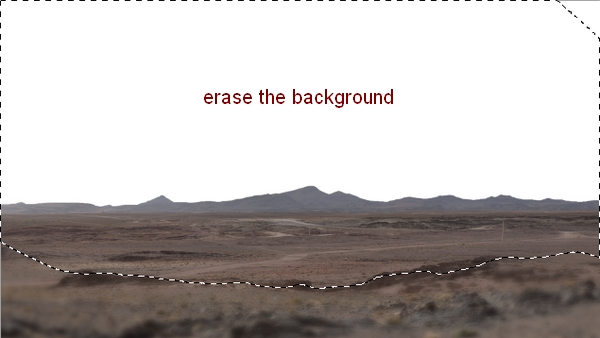
This step is to add some depth to the ground.
Step 4
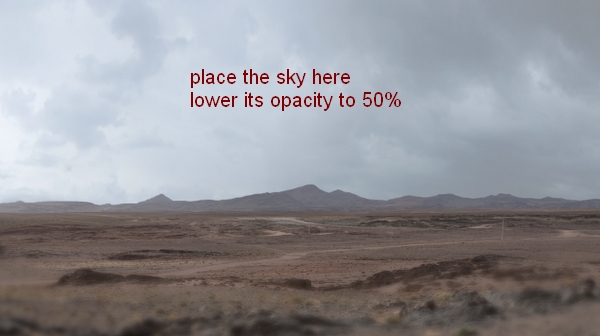
Drag the sky image into our working document and place this layer under the landscape one. Lower the opacity of the sky to 50%.
Step 5
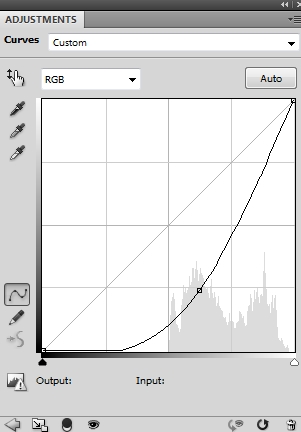
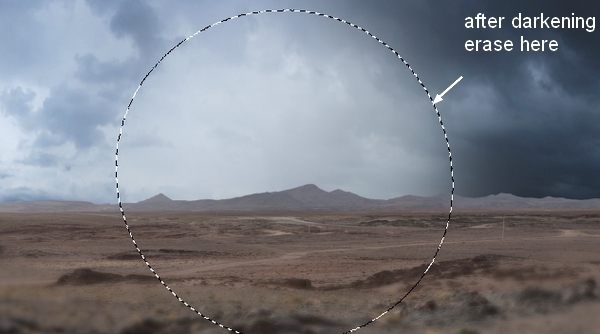
Create a Curves adjustment layer to darken the sky. On this layer mask, use a soft black brush to erase the middle area as we aim to make the main light there.
Step 6
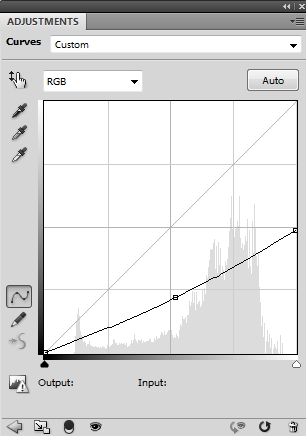
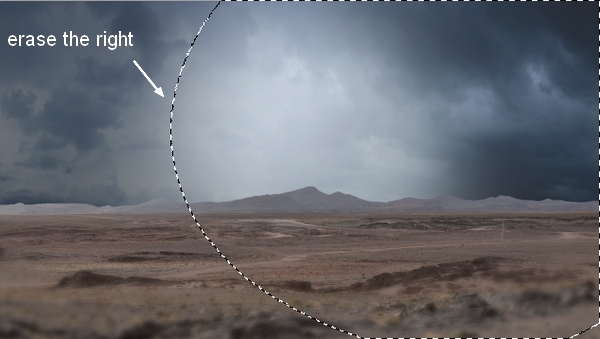
Make another Curves adjustment layer to darken the left of the sky again. On this layer mask, use a soft black brush to erase the right side:
Step 7
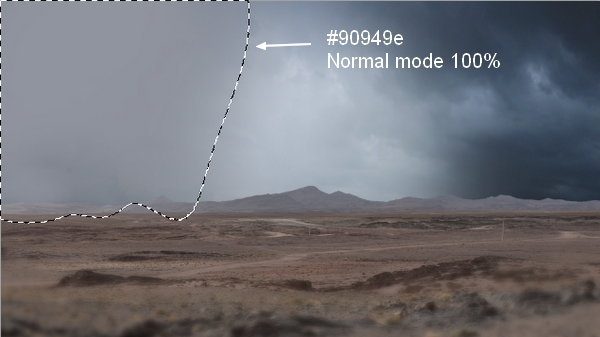
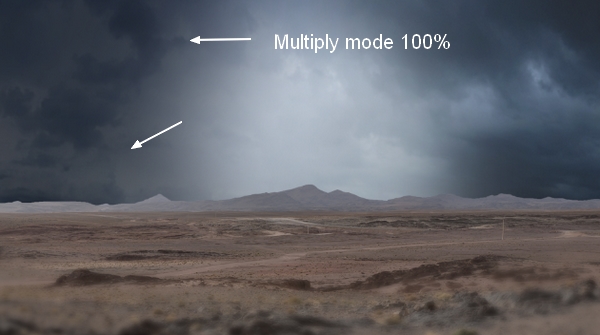
To darken the left more, make a new layer and use a soft brush with the color #90949e to paint there. Change this layer mode to Multiply 100%.
Step 8
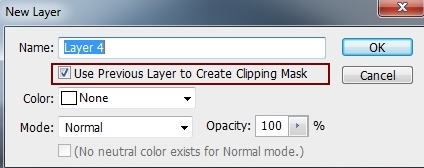
Come back to the landscape layer. To remove an unwanted detail on the ground, make a new layer and set it as Clipping Mask.
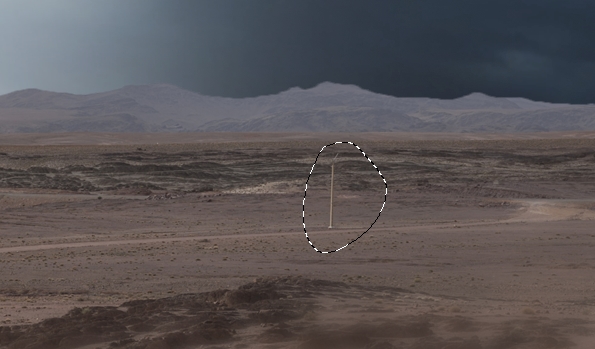
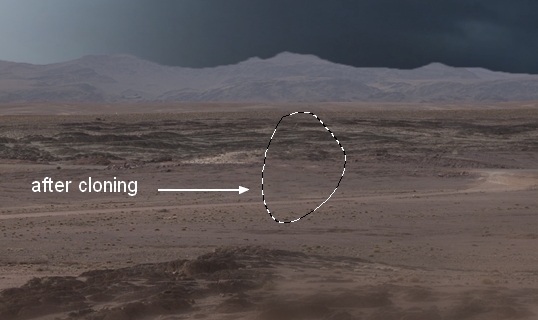
Active the Clone Tool (S) and use this tool to remove the indicated detail.
Step 9
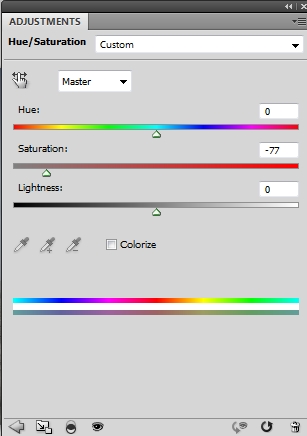
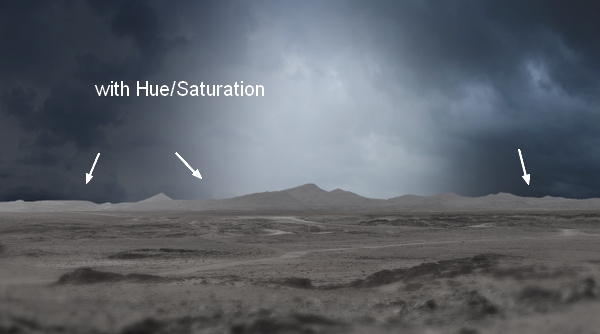
Make a Hue/Saturation adjustment layer for the landscape one (set as Clipping Mask) and reduce the Saturation value.
Step 10
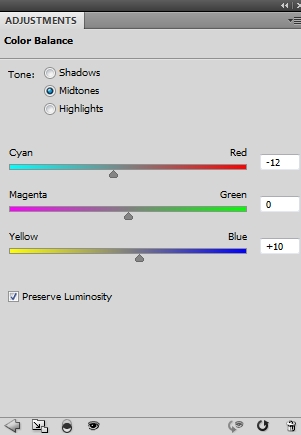
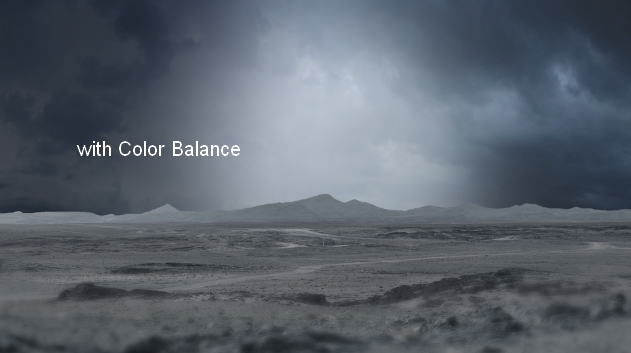
Use a Color Balance adjustment layer to give some cyan/blue to the landscape to match the sky color.
Step 11
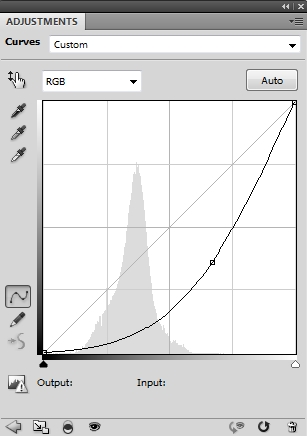
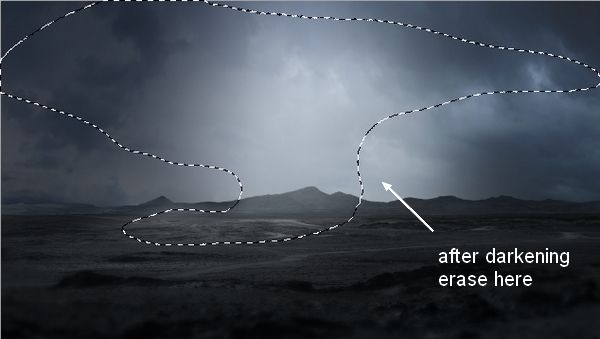
Use Curves to darken the landscape. On this layer mask, use a soft black brush to erase the dark in the middle area which is near to the background light.
Step 12
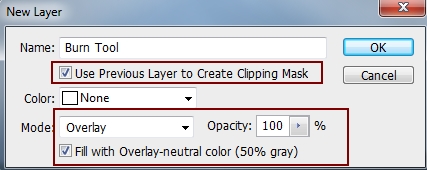
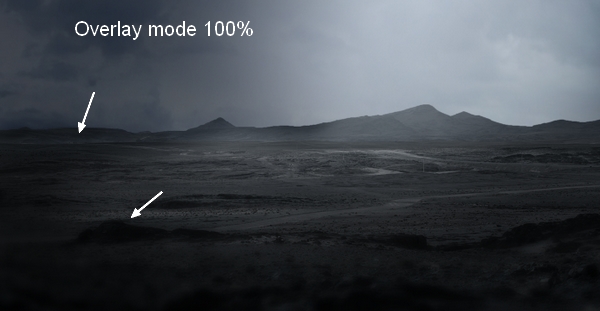
Make a new layer, change the mode to Overlay 100% and fill with 50% gray.
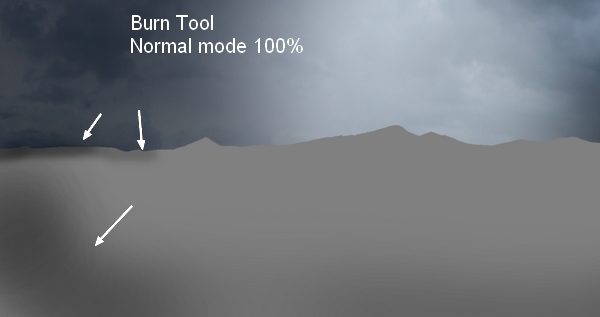
Active the Burn Tool (O) with Midtones Range, Exposure about 10-15% to darken the left edge of the landscape. You can see how I did it with Normal mode and the result with Overlay mode:
Step 13
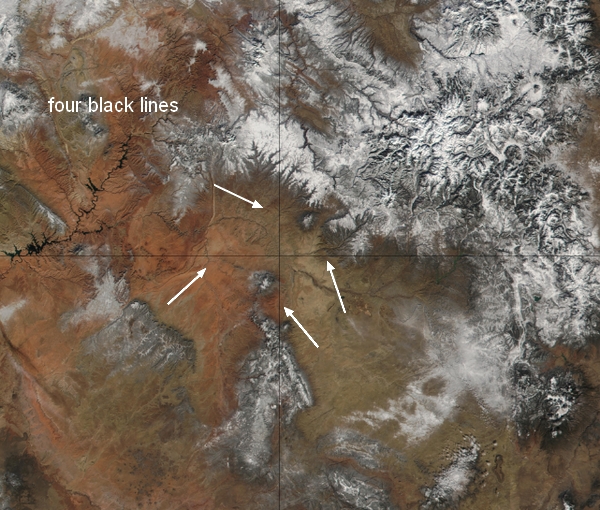
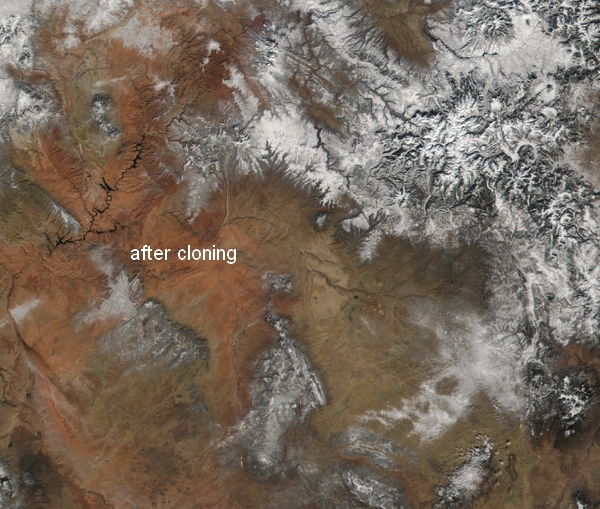
Open the planet texture. Make a new layer and use the Clone Tool to remove four black lines over the image.
Step 14
Hit Cmd/Ctrl+Option/Alt+Shift+E to merge the background and the clone layer into a new one. On this new layer, use Elliptical Marquee Tool (M) to draw a circle:
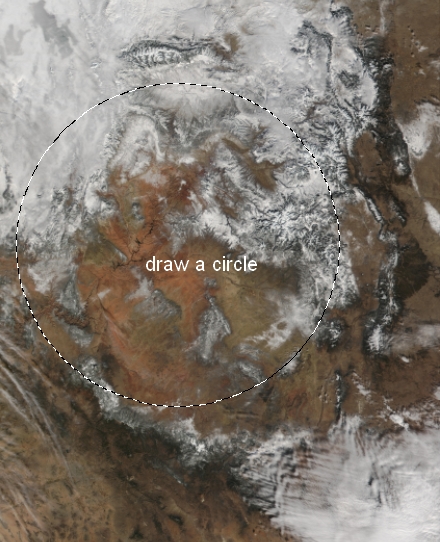
Go to Filter > Distort > Spherize:
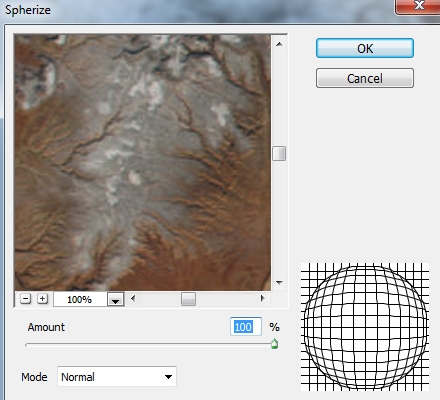
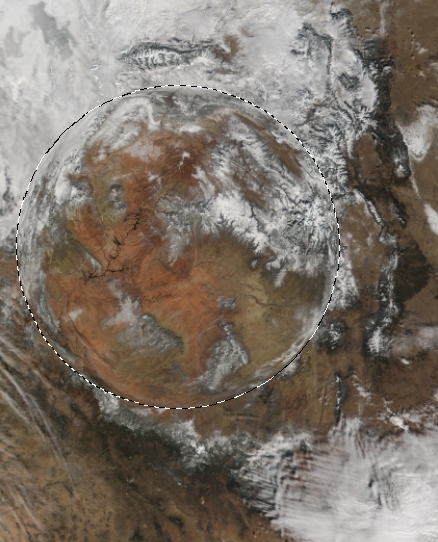
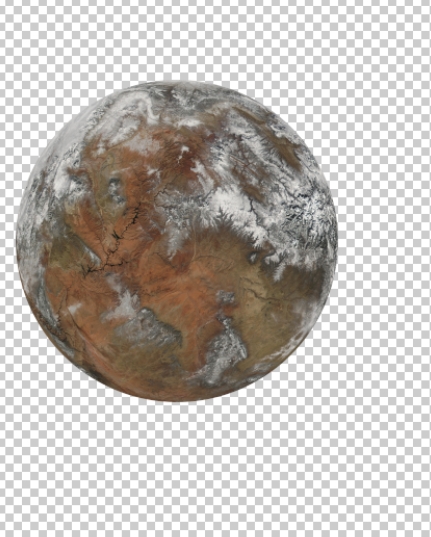
Right click this selection, choose Layer via Copy. We now have it on a new transparent layer.
Step 15
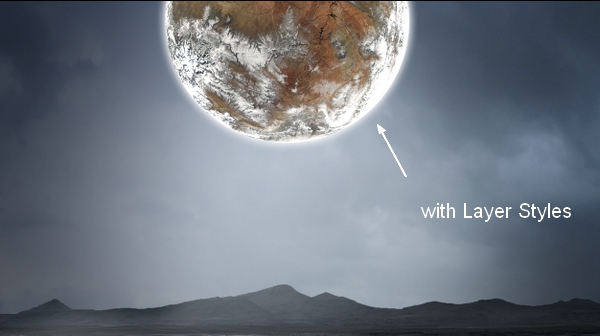
Drag the planet into our sci-fi land document, place it onto the top middle.
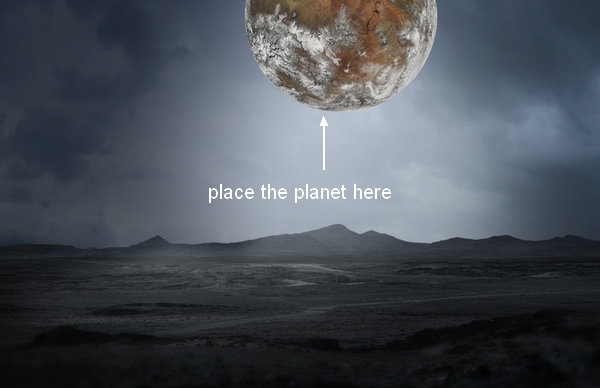
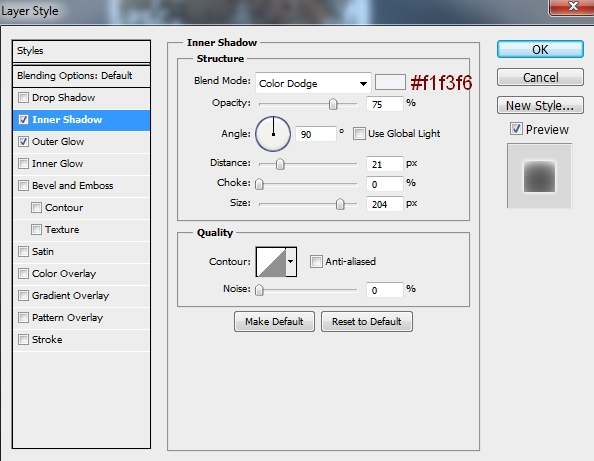
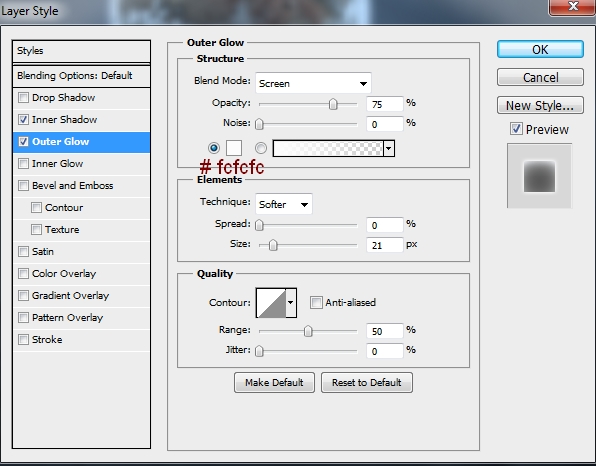
Double click the planet layer, choose Inner Shadow and Outer Glow:
Step 16
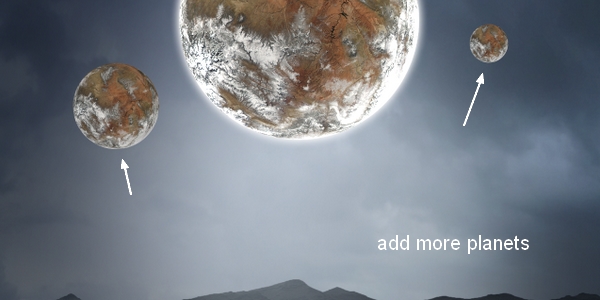
Drag the planet again into our main file and resize it to be smaller than the first. Duplicate this layer and position them both beside the big planet.
Step 17
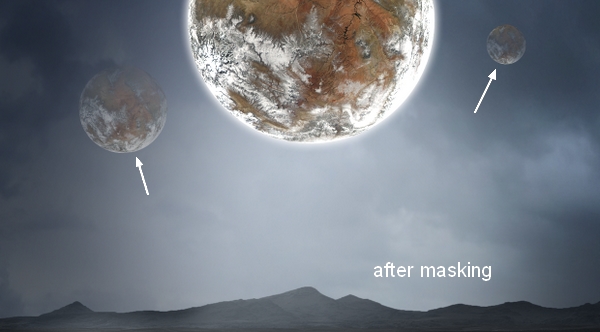
Add a mask to each of two planets layers and use a soft black brush to make them faded into the sky.
Step 18
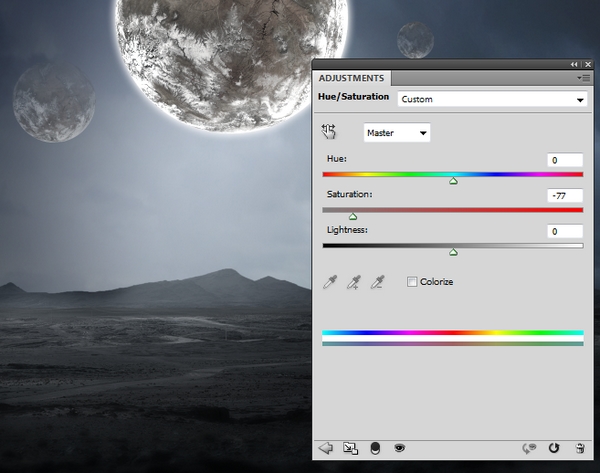
Select all the planet layers and press Cmd/Ctrl+G to make a group for them. Change the mode of this group from Pass Through (default group mode) to Normal 100%. Create a Hue/Saturation adjustment layer within this group to desaturate the planets’ color.
Step 19
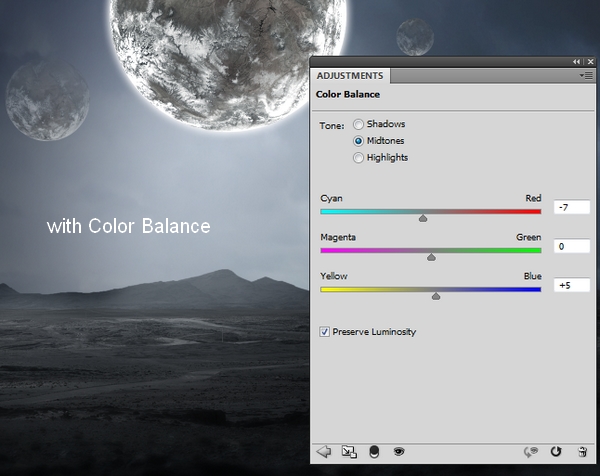
Create a Color Balance adjustment layer to change the planets’ color.
Step 20
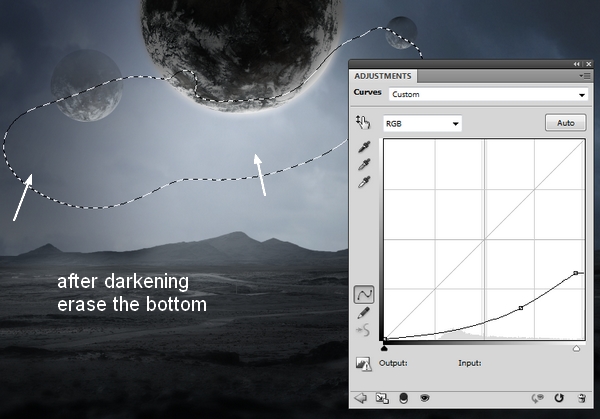
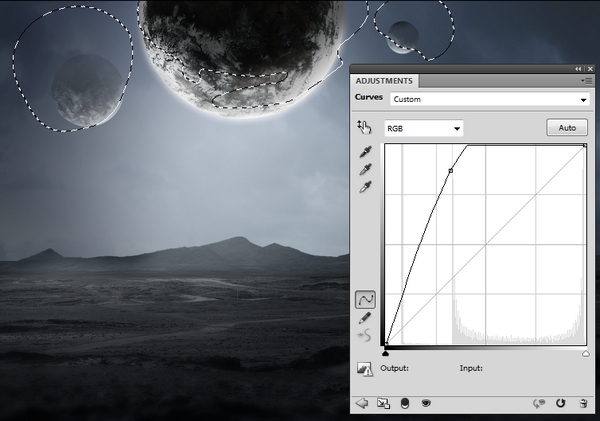
Use a Curves adjustment layer to darken the planets. On this layer mask, use a soft black brush to erase the bottom of the planets as they are the illuminated parts.
Step 21
Use another Curves adjustment layer to increase the highlight on the planets. On this layer mask, use a soft black brush to erase the higher parts of the planets to keep the shades there.
Step 22
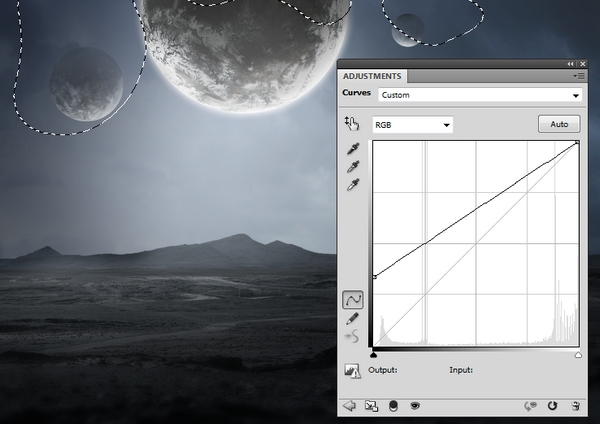
Make another Curves ajustment layer to add more fantasy light to the planets. Use a soft black to reduce the light on the following parts:
Step 23
Drag the nebula image into our document and change the mode to Linear Dodge 100%.
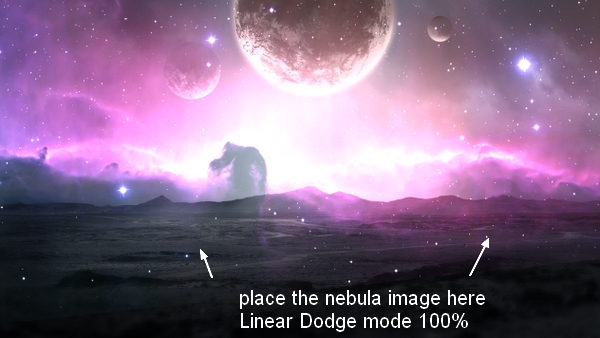
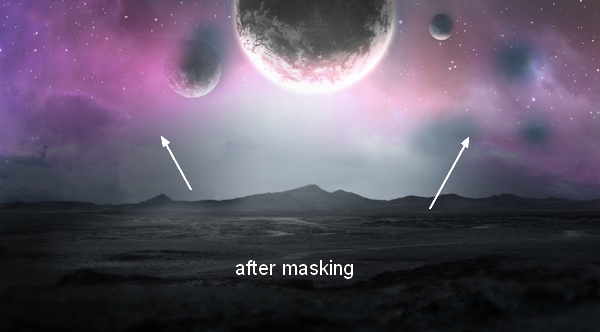
Add a mask to this layer and clear the hard edges using a soft black brush.
Step 24
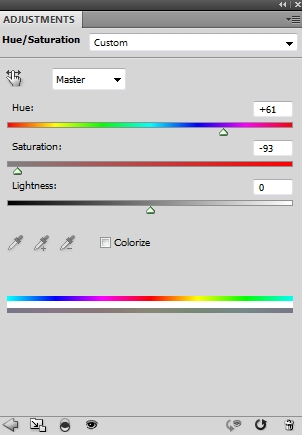
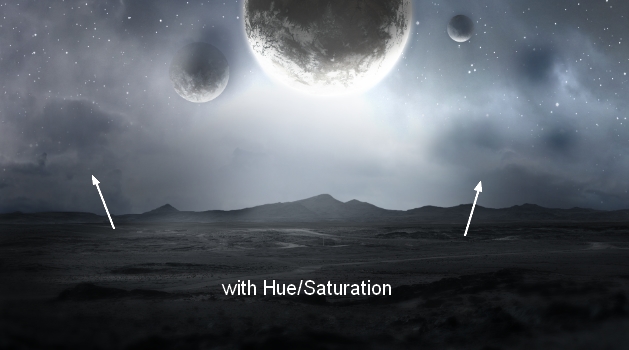
Add a Hue/Saturation adjustment layer to desaturate the nebula effect.
Step 25
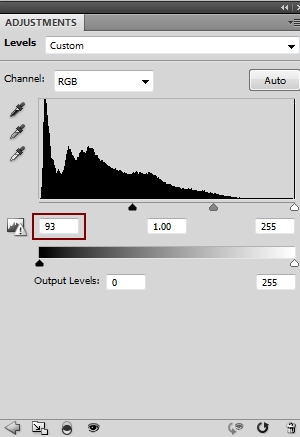
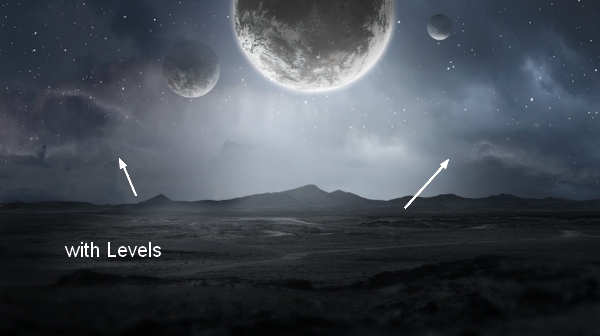
Use a Levels adjustment layer to darken the effect:
Step 26
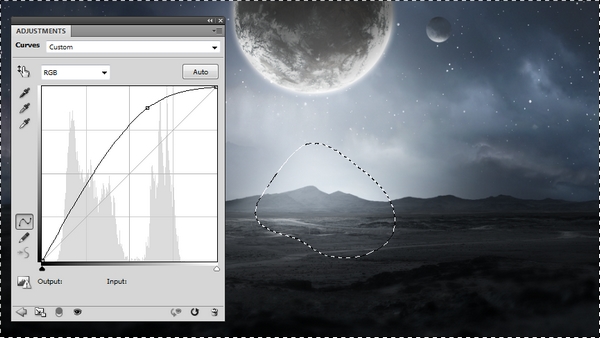
Make a Curves adjustment layer on the top of all layers. On this layer mask, use a soft black brush to erase around the middle mountains on the background to make this area brighter than the rest.
Step 27
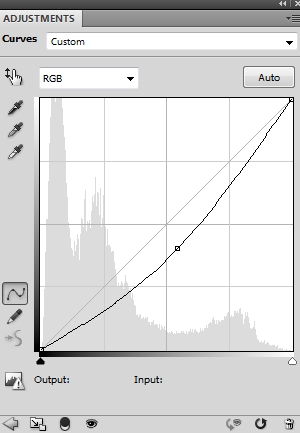
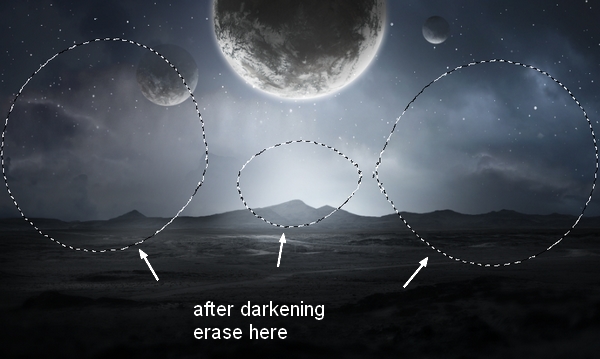
Use another Curves adjustment layer to darken the whole scene a little. On this layer mask, use a soft black brush to refine the scene contrast as shown below:
Step 28
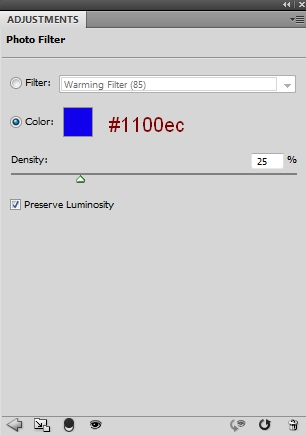
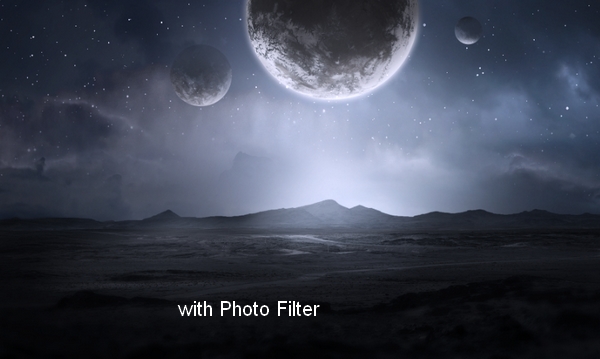
Use a Photo Filter adjustment layer to change the scene color.
Step 29
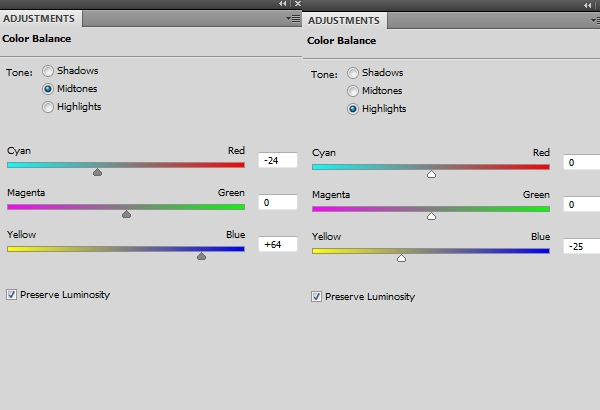
Use Color Balance to continue changing the color.
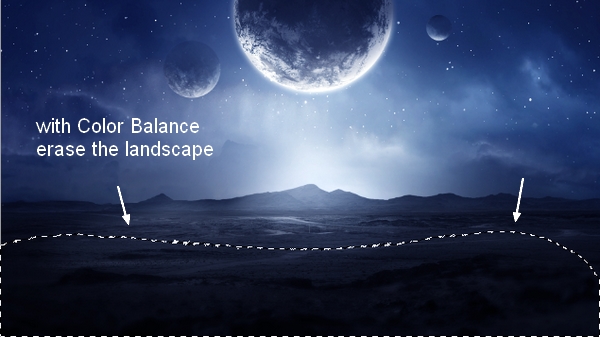
On this layer mask, use a soft black brush with the opacity about 30% to erase the landscape as I don’t want it to be so blue – it would look unatural.
Step 30
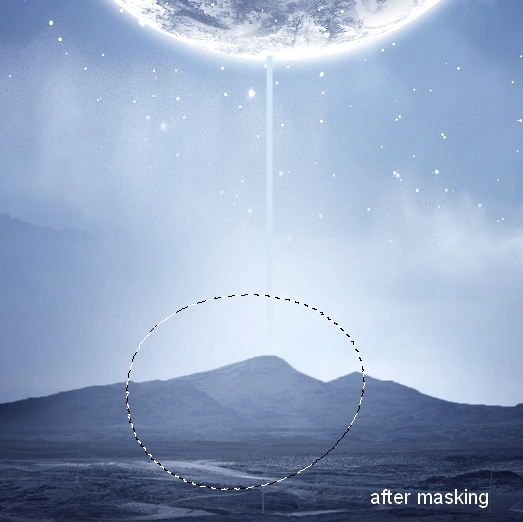
Make a new layer and activate the Line Tool (U). Draw a line of 4 px and the color #bbccee from the bottom middle of the big planet to the top of the middle mountain.
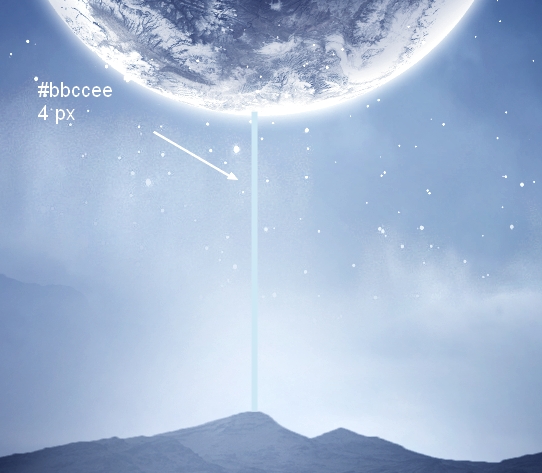
Add a mask to this layer and make the bottom of the line faded a little.
Step 31
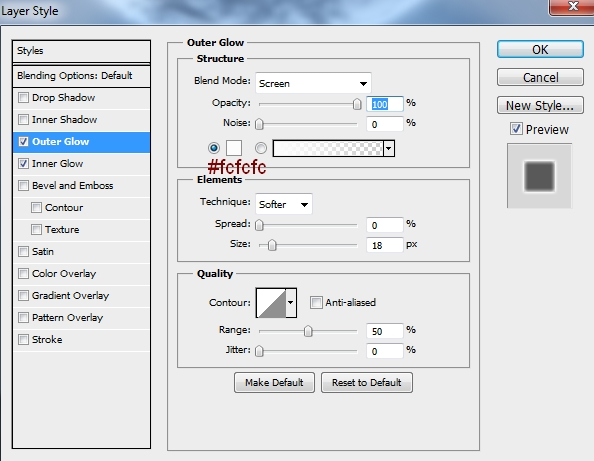
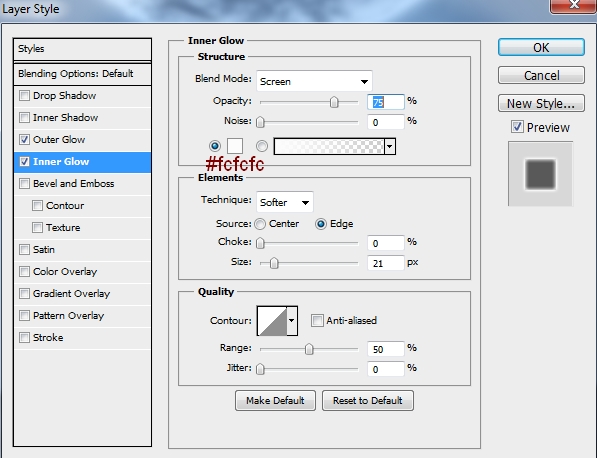
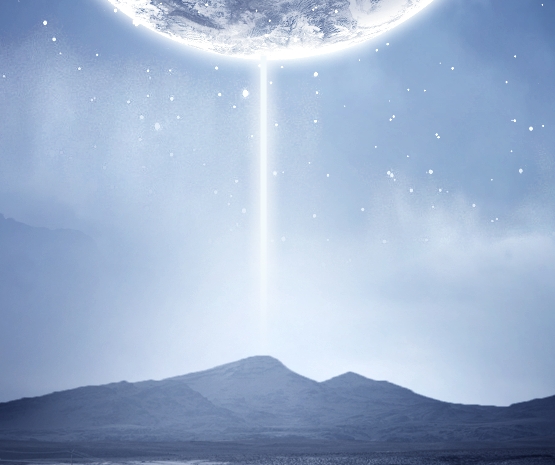
Double click this layer, choose Outer Glow and Inner Glow:
Step 32
To add more light to the scene, make a new layer and use a soft brush with the color #f1f3f6 to paint around the light part. Change this layer mode to Overlay 100%.
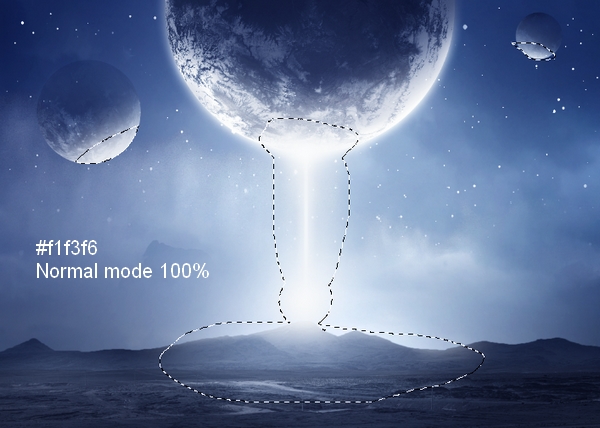
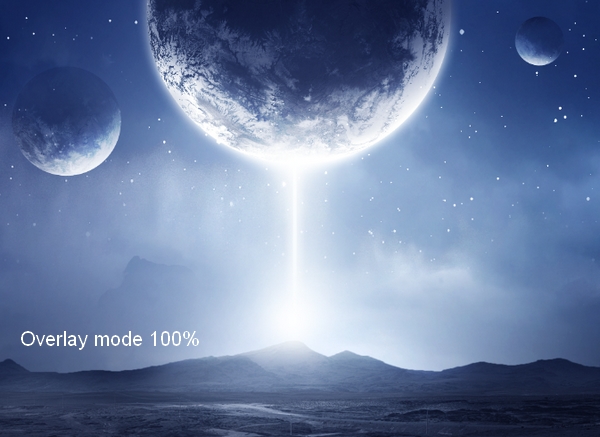
Step 33
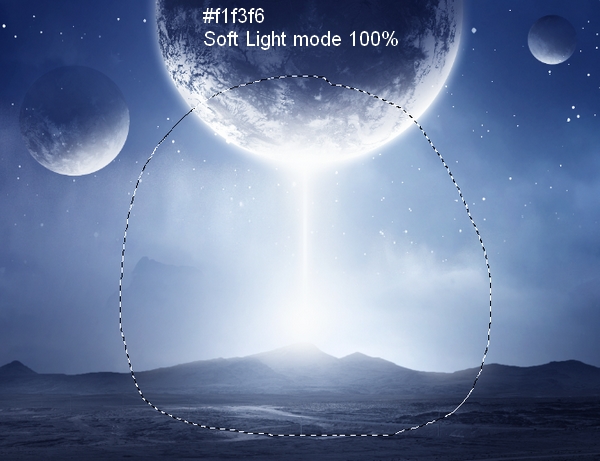
To create more glowing light, use a new layer and a soft brush with the same color to paint around the light line. Change this layer mode to Soft Light 100%.
And We’re Done!
You can view the final outcome below. I hope that you enjoyed the tutorial.
