
In this Photoshop tutorial we’ll be designing ruinous brick wall effect.
First of all you’ll have to start by making a new document; in my case 500×500 pixels and fill it with color of #504C43.

After that apply Filter > Texture > Texturizer with similar settings to these:

To get the effect on the picture below:

Now apply one more Filter > Noise > Add Noise:

See the difference now:

Time to bring some picture on the wall. Select the Custom Shape Tool and choose any picture from the custom shape palette:

Select the color of #f8f1d5 and make the same print as below:

Then right click the Layer Thumbnail in the Layers Palette and select Raterize Layer:

Now apply the Outer Glow layer style to this layer:

You can see the result:

Ok, now create a new layer with Ctrl+Shift+N and merge it with previous to get all effects in one layer. Then change layer mode to Overlay:

Then I would like to bring this dog print more realistic view. For this effect get out the Eraser Tool and choose the next brush from the brushes palette:

Then do a little bit of clean-work on the shape to get result as on my picture:

Looks better the before, isn’t it? Ok, now I would like to make this print a little bit discolored and bring it old style view. For this effect use the Dodge Tool and the Burn Tool. Select the Dodge Tool (Brush: 80 px, Range: Highlights, Exposure: 30%.) at first and do a little bit of dodge-work on the shape:

The select the Burn Tool (Brush: 65 px, Range: Midtones, Exposure: 35%.) to make some parts darker as shown below:

Now it’s time for some more old style effects. I think it will be good to bring some splits on the wall. We can do it by using the Polygonal Lasso Tool. Create a new layer at first and then make the same selection as on picture below and fill it with black color:

Make a new one selection and fill it with black color again on the same layer.

Create the same split one more time.

Ok, now remove selection with Ctrl+D and duplicate layer using Ctrl+J to apply Filter > Blur > Gaussian Blur with similar settings to these for the new layer:

After that mess with the layer mode & opacity/fill. I tried Soft Light with opacity of 55%.

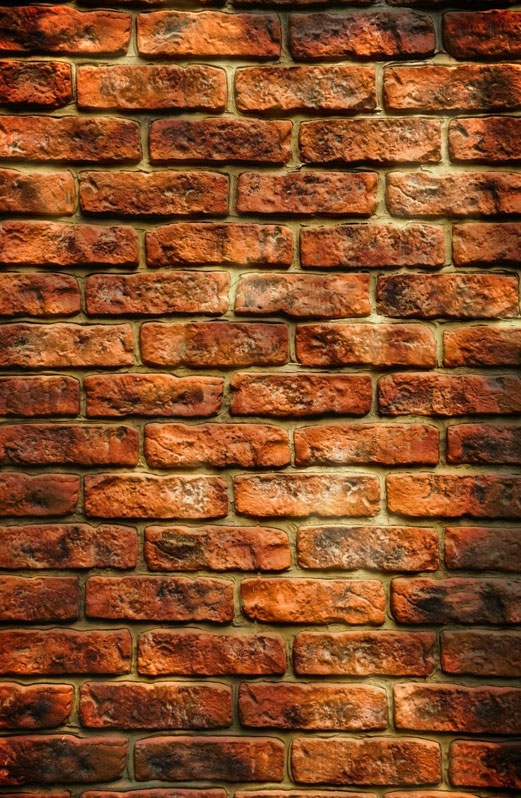
So, the next step in our composing tutorial that we need to do is finding some appropriate brick wall texture. You can find it using Google search or buy some texture from stock photo resources or feel free to use my brick texture. Copy this texture onto your canvas at first.
Now resize and duplicate the it a couple of times, and then combine it as below. Use the Eraser Tool (soft round brush about 25 px) to make texture borders edges when combine it.

Ok, go to the next step. Select the Poligonal Lasso Tool and select place for the future hole. After that press Delete to clear selected area. Our hole almost vizualizated, but as for me it will be more realistic with some shadow effects.

Remove the selection with Ctrl+D and after that apply the Drop Shadow and Outer Glow layer styles to this layer:


And the last one thing… I would like to bring some durty gradients to our stone wall. Go to the layer with stone wall, then get out the Burn Tool with moderate settings (Range: Shadows, Exposure: 10%.) and select the next brush from the standard Photoshop brushes palette:

Do a little bit of dodge-work on the wall:

To finish off the tutorial select the Dodge Tool with moderate settings (Range: Highlights, Exposure: 30%) and use the same brush to make a couple of light spots on the wall.

Well, we’re done for this tutorial! I hope it was useful for you. Good luck!
