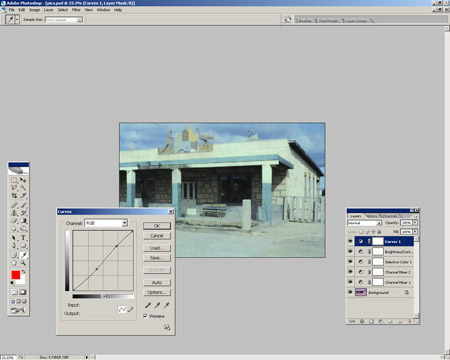
Correcting a red over-saturated photo using Photoshop can be either very easy, or very hard. For example, if you have a photo that is completely red rather than just a little bit over the top, then I think you would basically have to desaturate the photo and recolor it from scratch – now this, you don’t want to do.
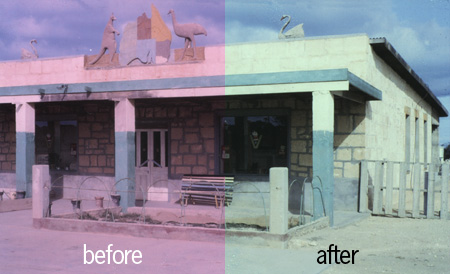
The easy case though, when you have a photo that is only tinted an abnormal red, this is nice and easy to fix. There’s a few ways to do it, but in this tutorial we’re going to be using some adjustment layers, mostly the Channel Mixer adjustment layers. 😀
1. Open a Photo
Start by opening up a photo in Photoshop, you’ll probably want to find an older photo that has a color problem, if you don’t have one on the computer you could scan one in, or just use the photo that I’m using.
2. Channel Mixer Adjustment Layers
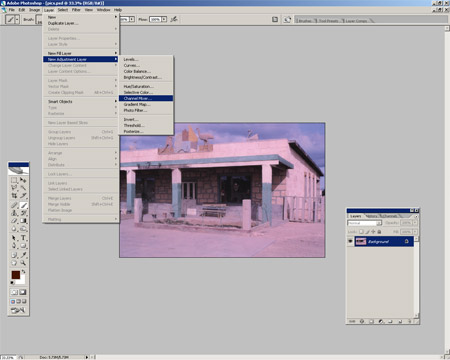
After opening your photo, make a ‘Channel Mixer adjustment layer’ by going to Layer > New Adjustment Layer > Channel Mixer… under the Photoshop menus.
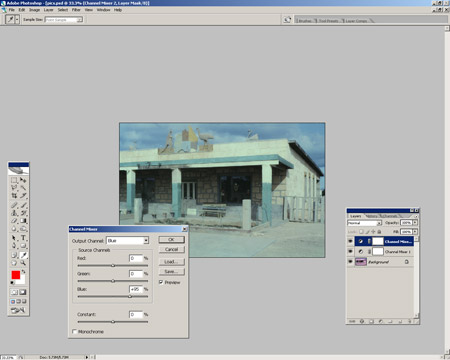
After clicking to create your adjustment layer, you’ll have to input some settings, in the below image you can see what I’ve used, but I recommend messing around with all of the settings to get a suitable color.
After adding in that one adjustment layer, I end up with this:
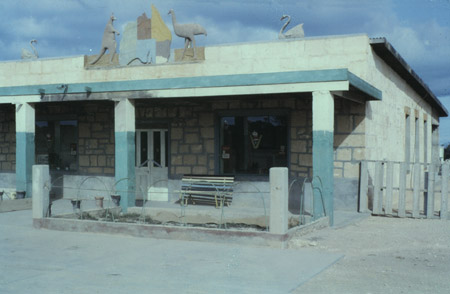
After adding just one adjustment layer it’s almost perfect already! I added one more Channel Mixer adjustment layer to my photo, and simply changed the Blue to +95 under the Blue Output Channel, this gave it a little more yellow, which I’m not actually sure was necessary.
2. Additional Adjustments
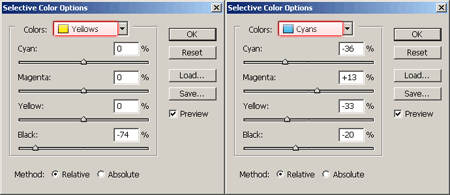
Even though the photo is much better than it was to begin with, I still want to add a few more adjustment layers to make it look a bit better. Start by adding a Selective Color adjustment layer (Layer > New Adjustment Layer > Selective Color…) then use settings similar to mine:
Not much difference was made to my photo, but slight improvements at least. It mostly just gave it a little bit of brightness. Now, depending on how your photo is looking, you might not have to add anything more to it, or if the color is still terribly off you need to go back and try different settings/different adjustment layers.
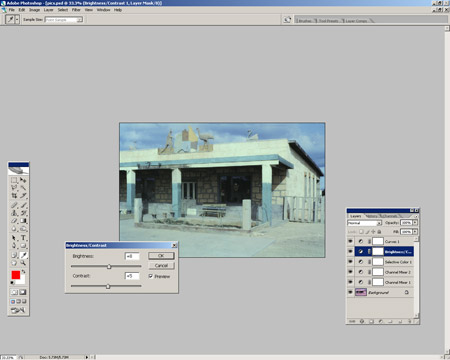
I finished off by adding in a Brightness/Contrast adjustment layer and also a Curves adjustment layer, to make it a little brighter, better-looking, etc. 😉

Well, that’s pretty much all my photo needed doing to it, how about yours? Hopefully I’ve helped. Just remember, you need to try different adjustment layers and mess with the settings to get the result you need.
Thanks for reading, I hope you enjoyed the tutorial.

