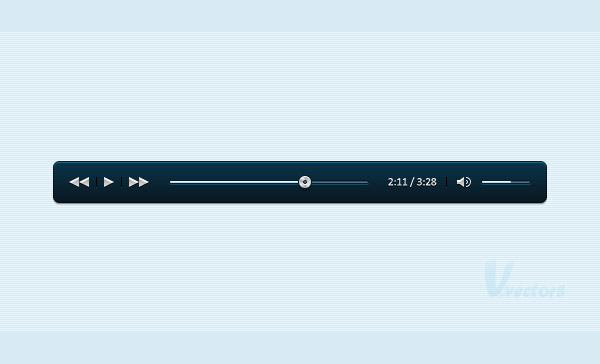
In the following tutorial you will learn how to create a mini music player using Photoshop.
Final Image
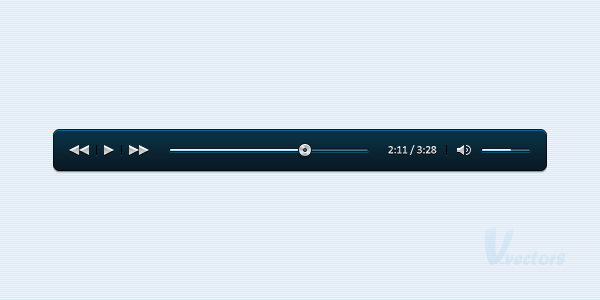
As always, this is the final image that we’ll be creating:
Step 1
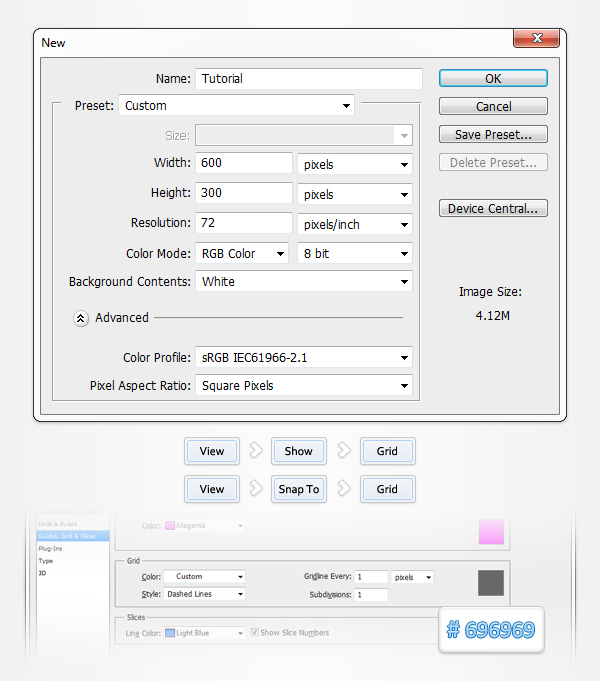
Open Photoshop and hit Control + N to create a new document. Enter all the data shown in the following image and click OK. Enable the Grid (View > Show > Grid) and the Snap to Grid (View > Snap To > Grid).
You’ll need a grid every 1px. Go to Edit > Preferences > Guides, Grid & Slices and focus on the Grid section. Enter 1 in the Gridline Every box and 1 in the Subdivision box. Also, set the color of the grid at #696969. Once you set all these properties click OK. Don’t get discouraged by all that grid. It will ease your work later. You should also open the Info panel (Window > Info) for a live preview with the size and position of your shapes.
Step 2
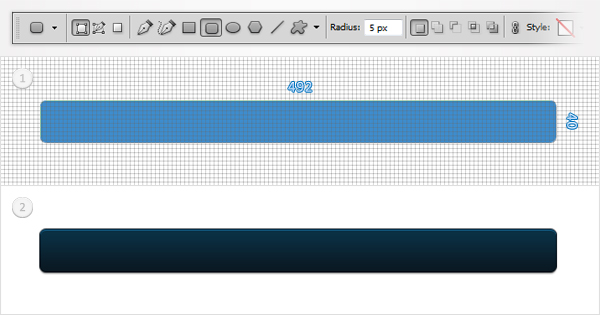
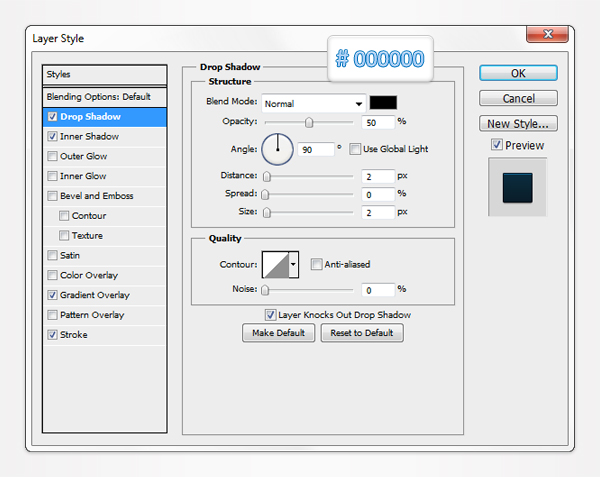
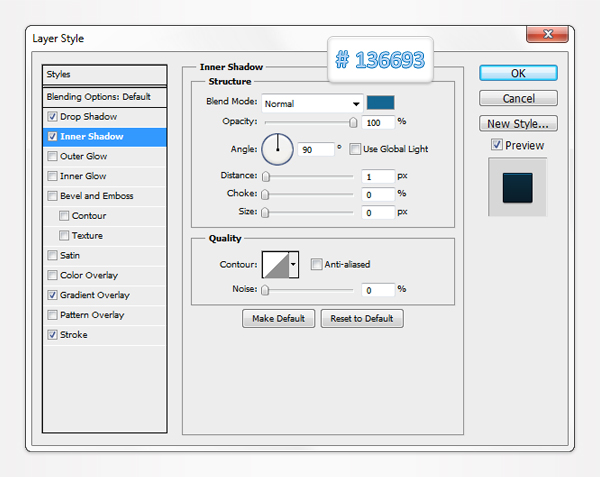
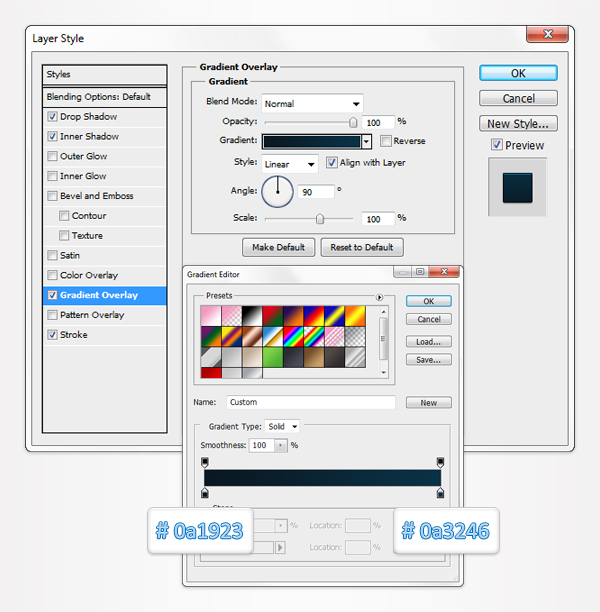
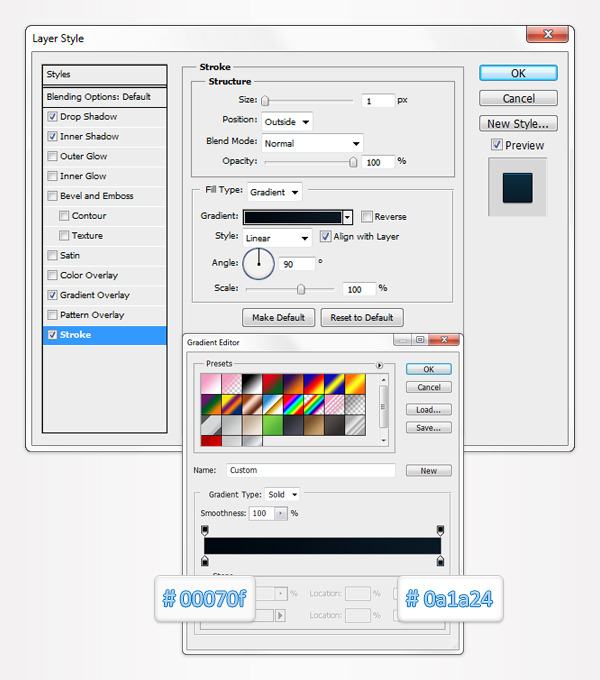
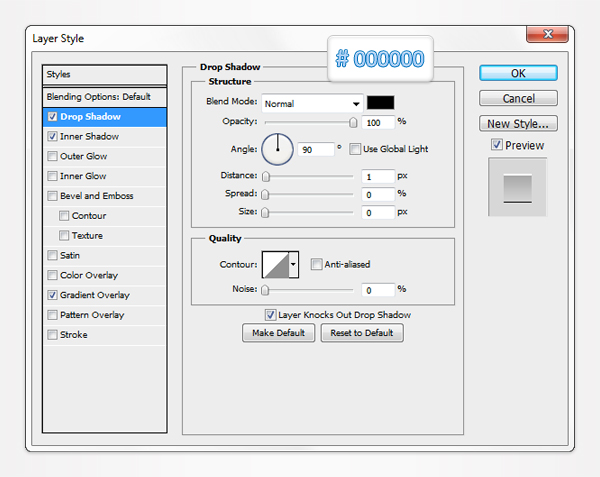
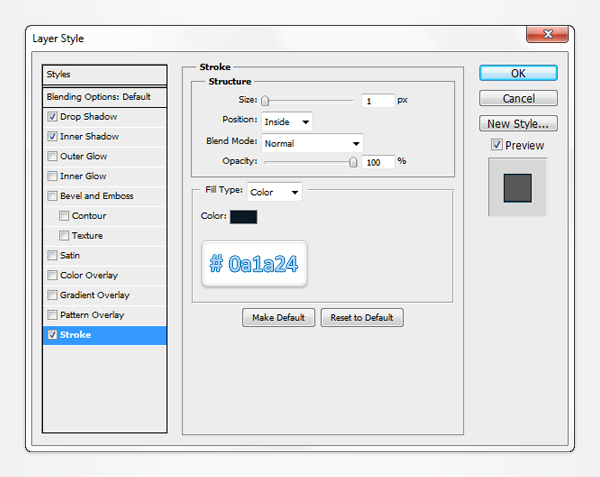
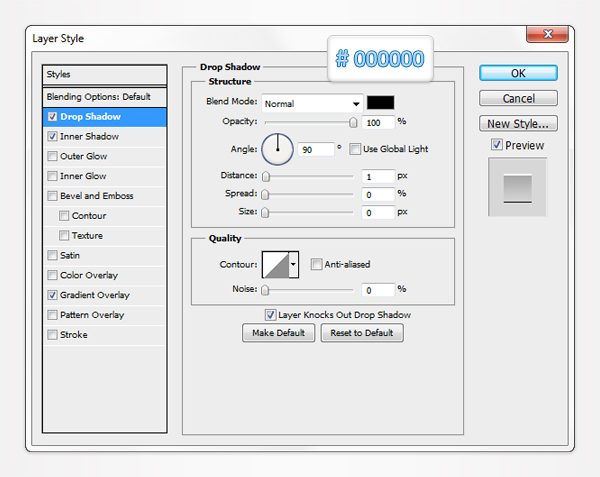
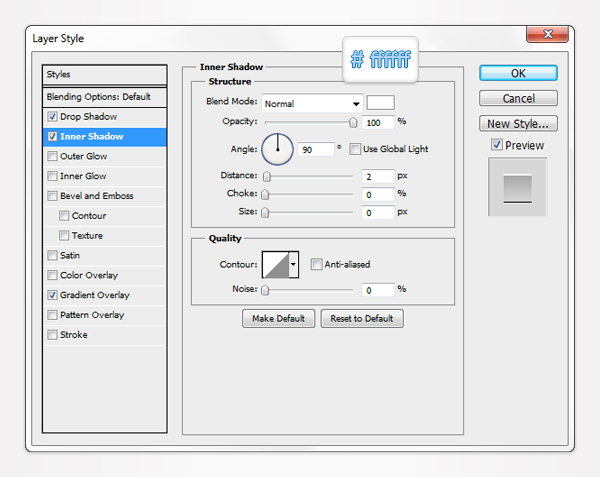
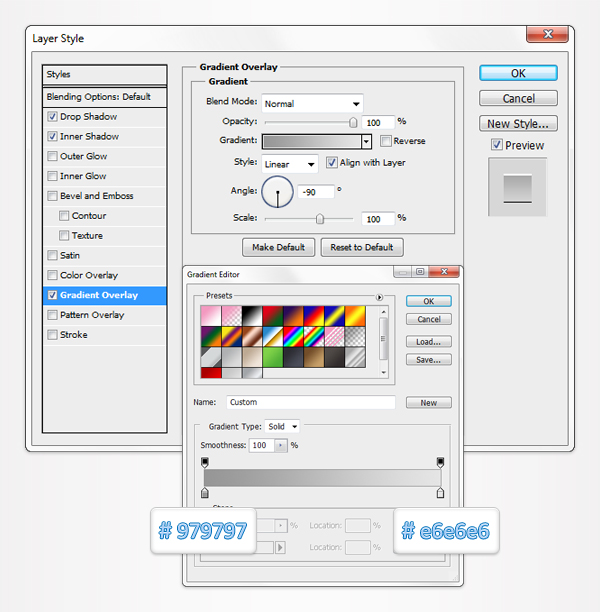
Pick the Rounded Rectangle Tool, set the radius at 5px and create a 492 by 40px vector shape. Move to the Layers panel and double click on this new shape to open the Layer Style window. Enter all the properties shown in the following images and click OK.
Step 3
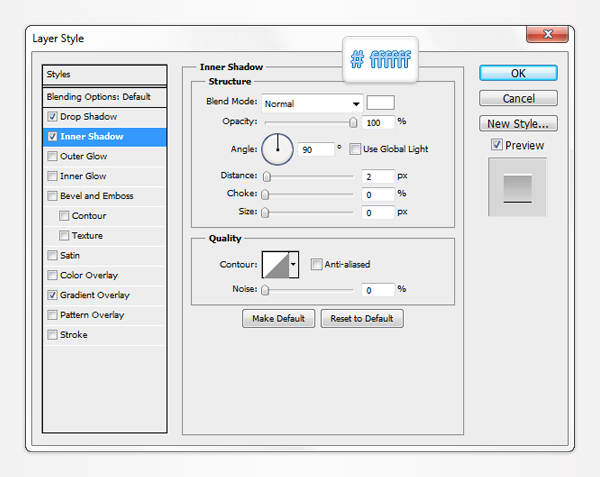
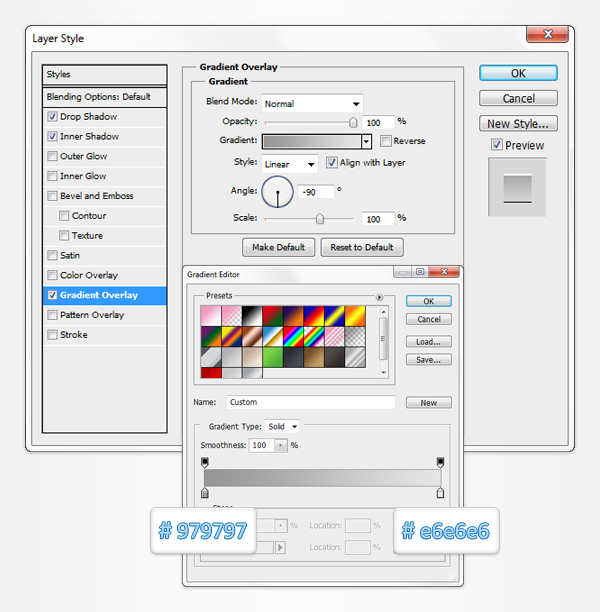
Pick the Rectangle Tool and create a 10px square. Select this new vector shape and switch to the Direct Selection Tool. Select the top, left anchor point and move it 5px down then select the bottom, left anchor point and move it 5px up. In the end your rectangle should turn into a triangle. Open the Layer Style window for this new shape and enter the properties shown in the following images.
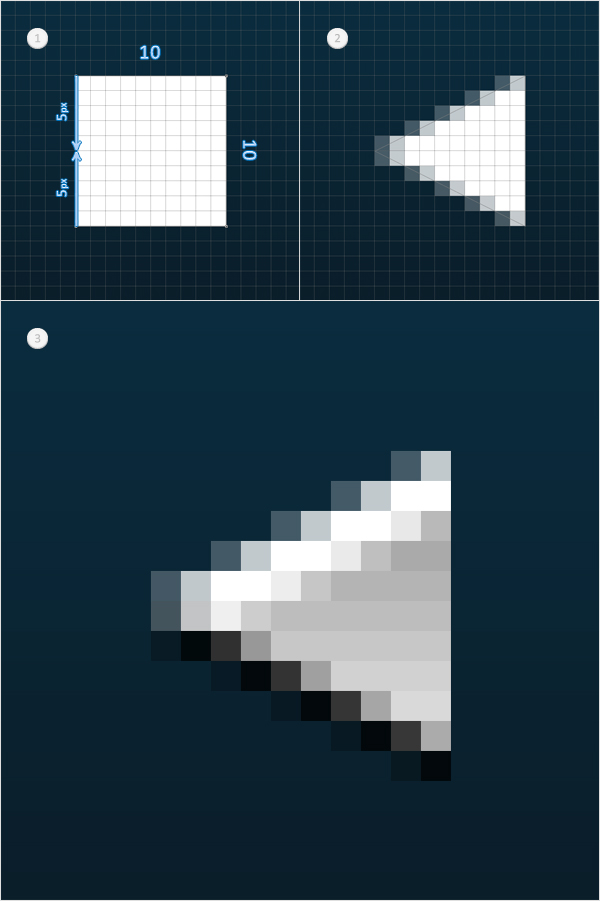
Step 4
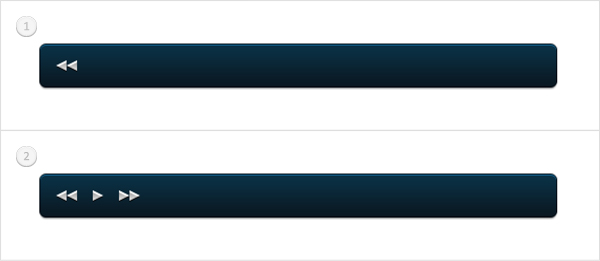
Duplicate the triangle created in the previous step (Control + J) and move the copy a few pixels to the right. Select this copy along with the original triangle and place them as shown in the first image. Make three new copies of your triangle, rotate them 180 degrees and places them as shown in the second image.
Step 5
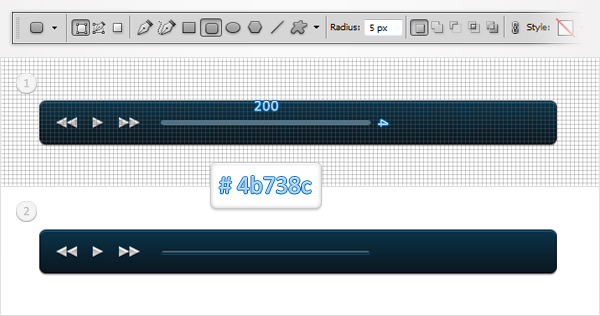
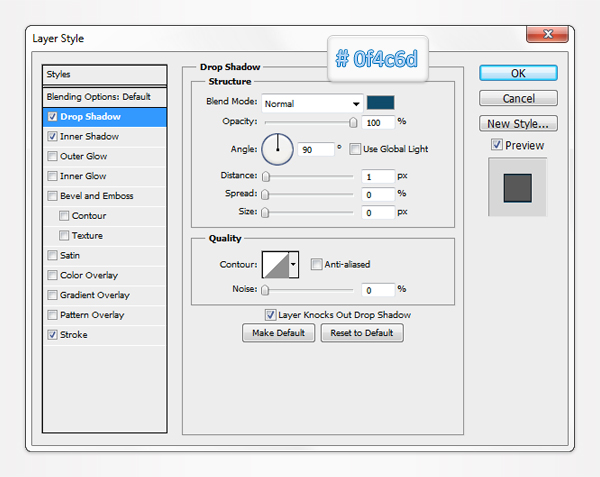
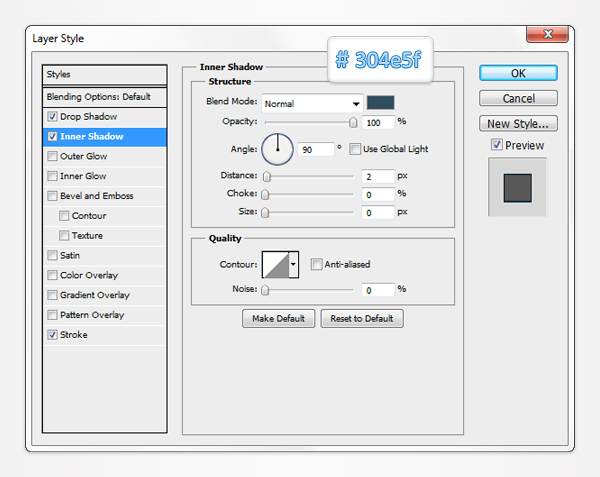
Pick the Rounded Rectangle Tool and make sure that the radius is set at 5px. Set the foreground color at #4b738c, create a 200 by 4px vector shape and place it as shown in the first image. Open the Layer Style window for this new shape and enter the properties shown in the following images.
Step 6
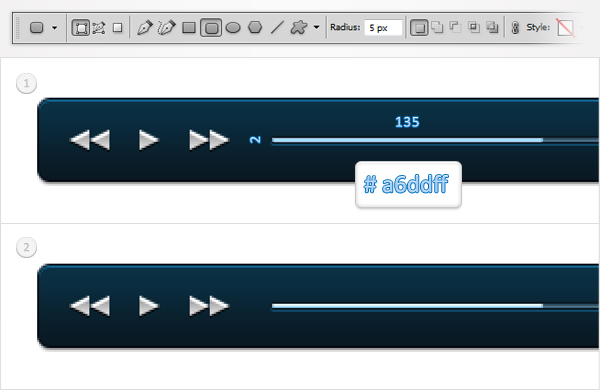
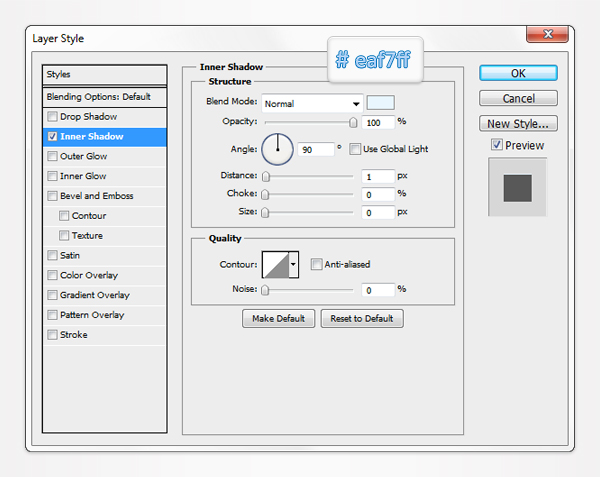
Pick the Rounded Rectangle Tool, set the foreground color at #a6ddff, create a 135 by 2px vector shape and place it as shown in the first image. Open the Layer Style window for this new shape and enter the properties shown in the following images.
Step 7
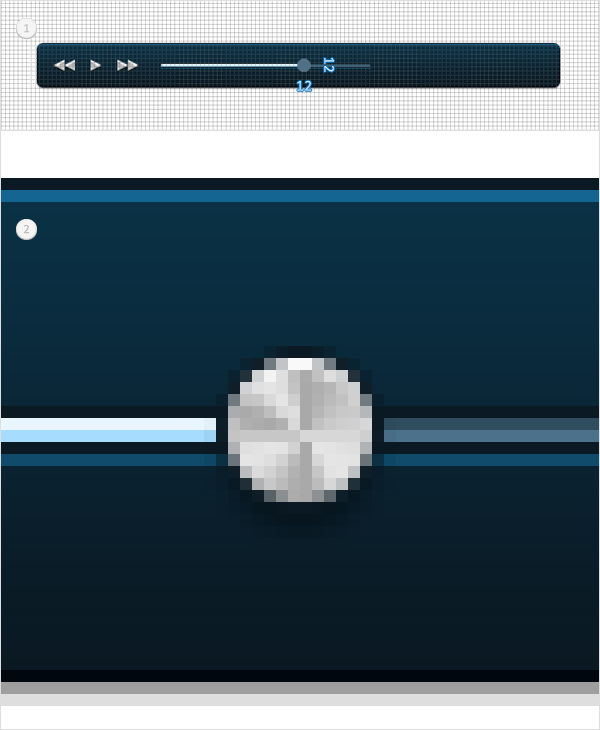
Pick the Ellipse Tool, create a 12px circle and place it as shown in the first image. Open the Layer Style window for this new shape and enter the properties shown in the following images.
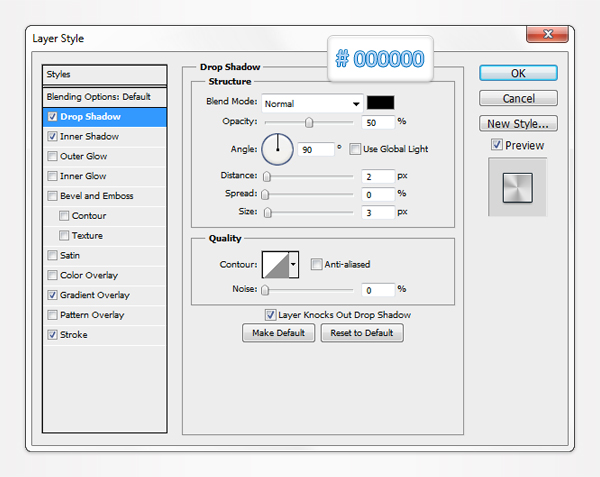
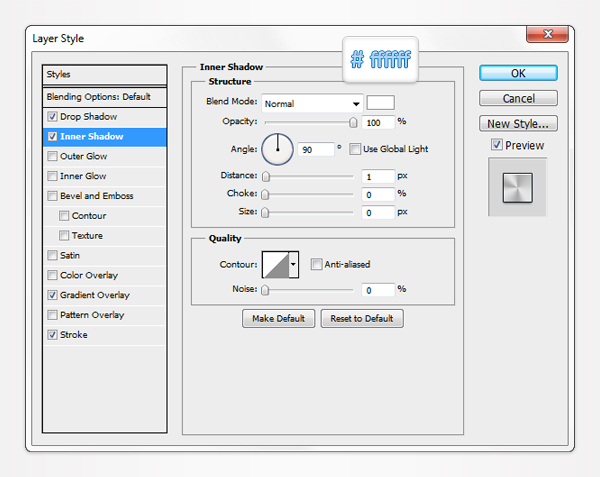
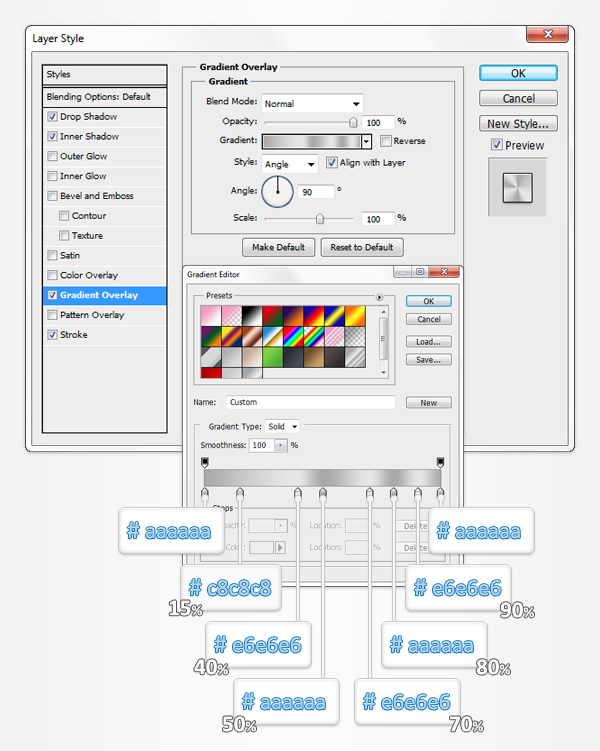
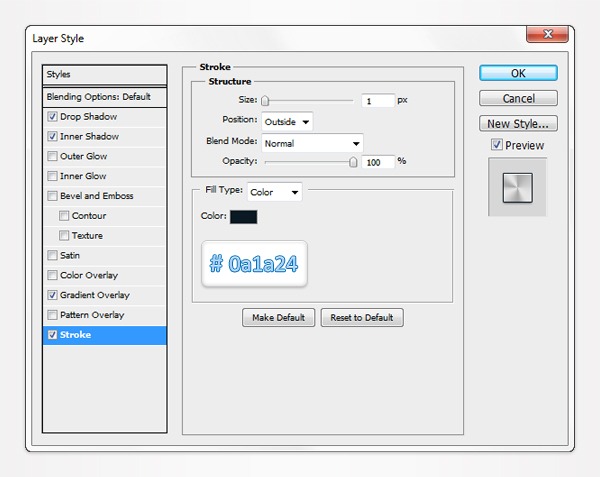
Step 8
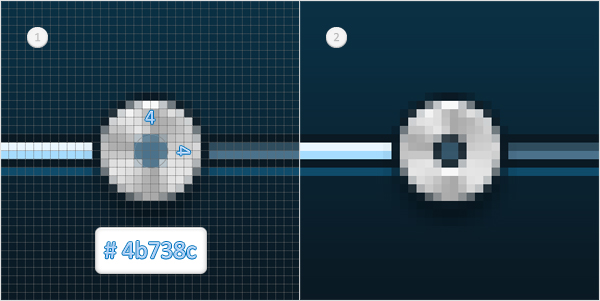
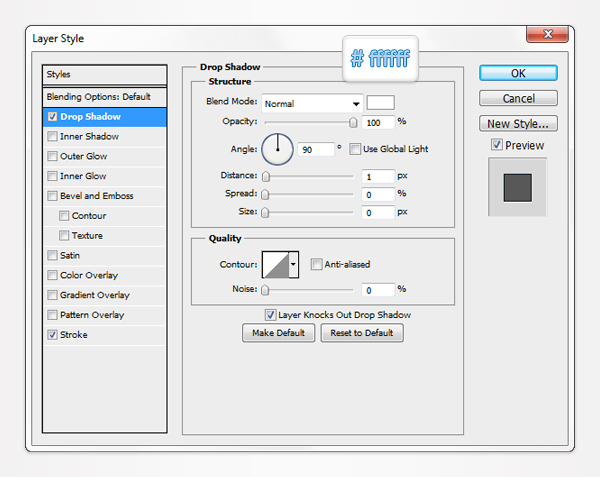
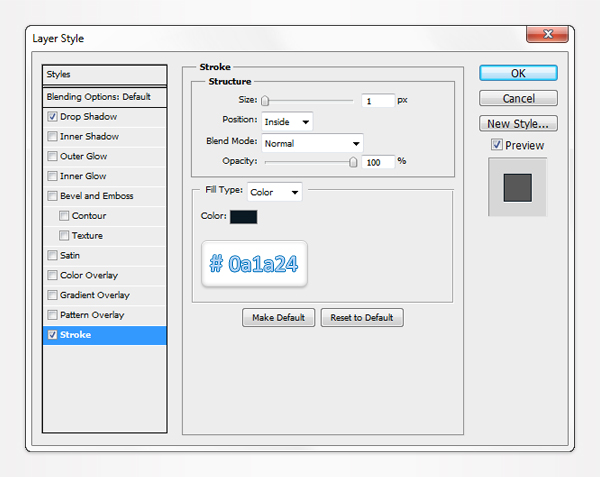
Pick the Ellipse Tool, set the foreground color at #4b738c, create a 4px circle and place it as shown in the first image. Open the Layer Style window for this new shape and enter the properties shown in the following images.
Step 9
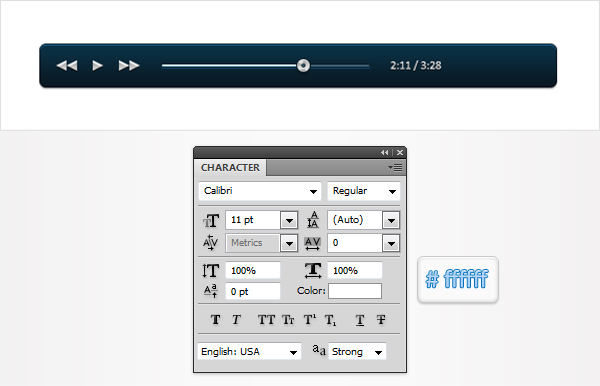
Pick the Type Tool and add some white text as shown in the following image. Use the Calibri font with the size set at 11pt. Open the Layers Style window for your text and enter the properties shown in the following images.
Step 10
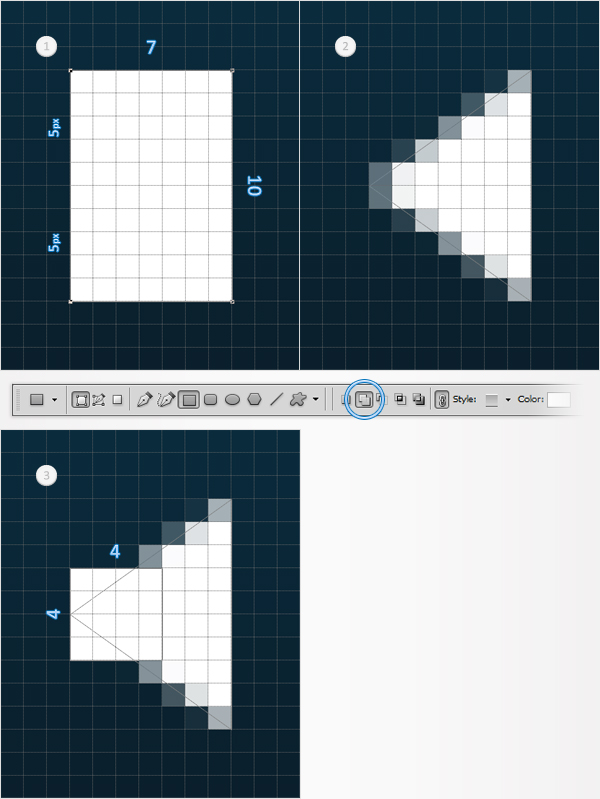
Pick the Rectangle Tool and create a 7 by 10px vector shape. Select it and switch to the Direct Selection Tool. Select the top, left anchor point and move it 5px down then select the bottom, left anchor point and move it 5px up. In the end your rectangle should turn into a triangle. Select it and pick the Rectangle Tool. Check the "Add to Shape Area" button from the top bar and create a 4px square as shown in the third image.
Step 11
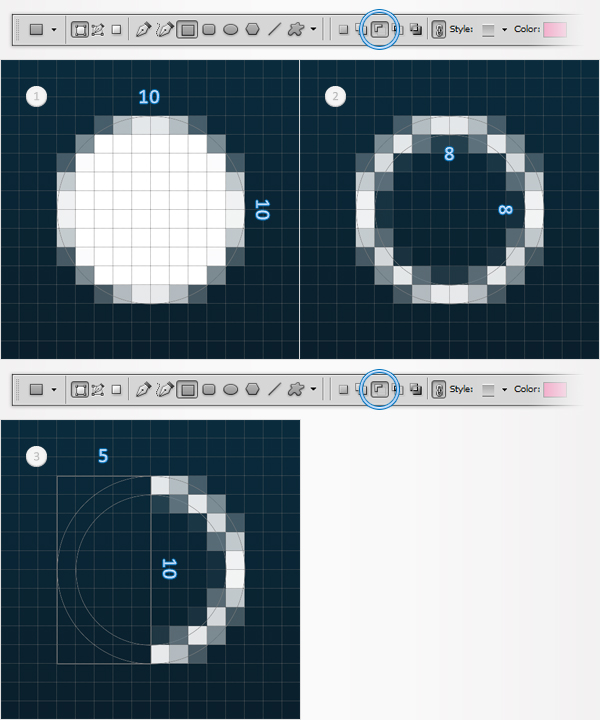
Pick the Ellipse Tool, create a 10px circle and select it. Continue with the Ellipse Tool, check the "Subtract from Shape Area" button from the top bar and create an 8px circle as shown in the second image.
Now, your vector shape should look like in the second image. Select it and switch to the Rectangle Tool. Make sure that the "Subtract from Shape Area" button is still checked and create a 5 by 10px rectangle and shown in the third image.
Step 12
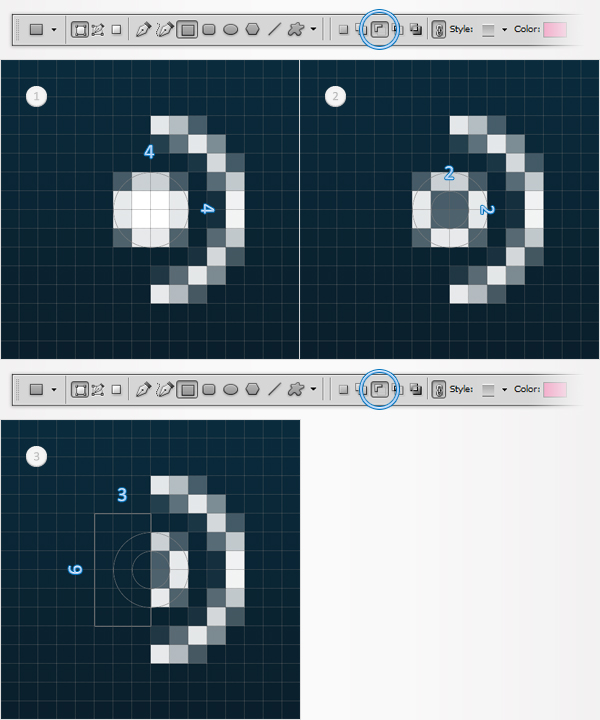
Pick the Ellipse Tool, create a 4px circle and select it. Continue with the Ellipse Tool, check the "Subtract from Shape Area" button from the top bar and create an 2px circle as shown in the second image.
Now, your vector shape should look like in the second image. Select it and switch to the Rectangle Tool. Make sure that the "Subtract from Shape Area" button is still checked and create a 3 by 6px rectangle and shown in the third image.
Step 13
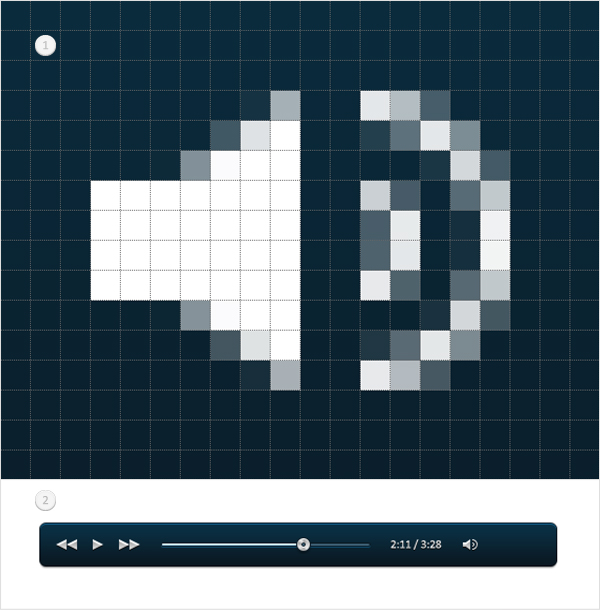
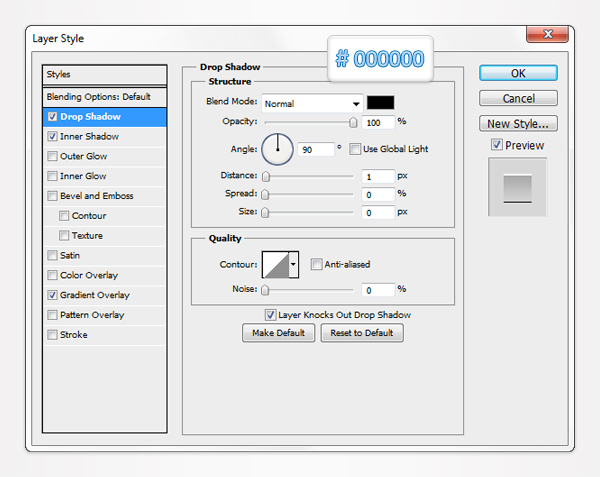
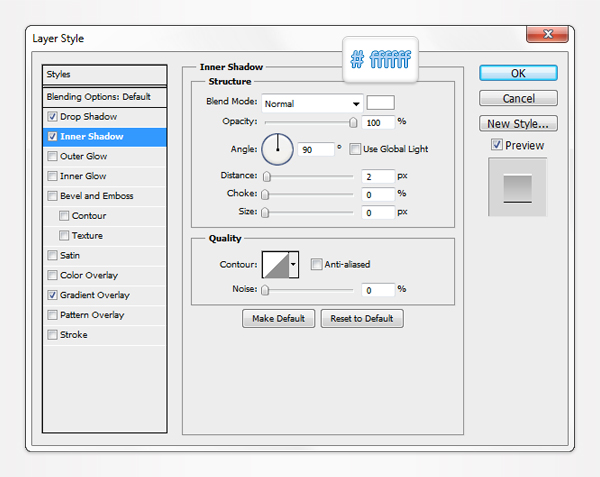
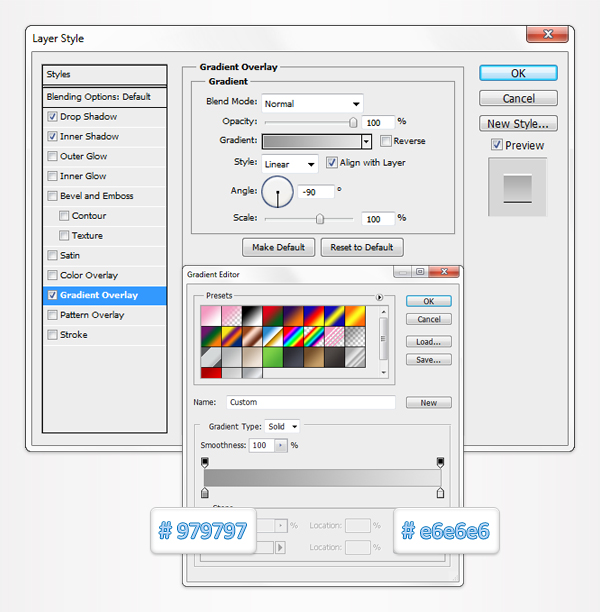
Select the vector shapes created in the last three steps and place them as shown in the following image. Open the Layer Style window for these shapes and enter the properties shown in the following images.
Step 14
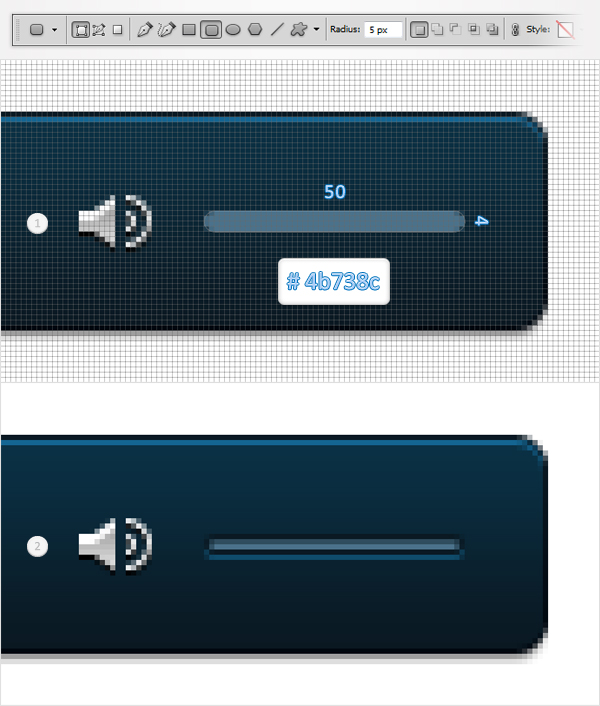
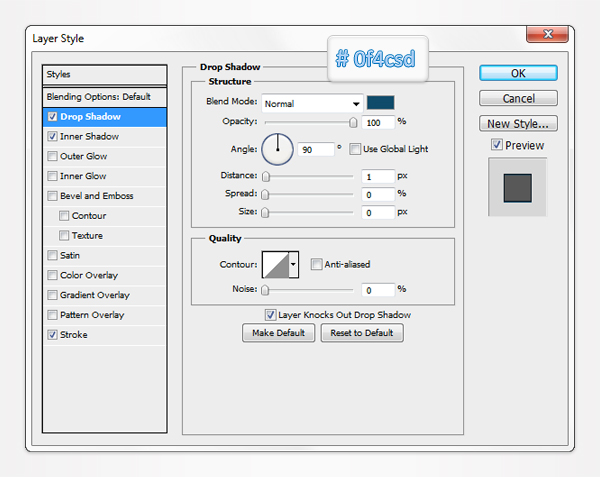
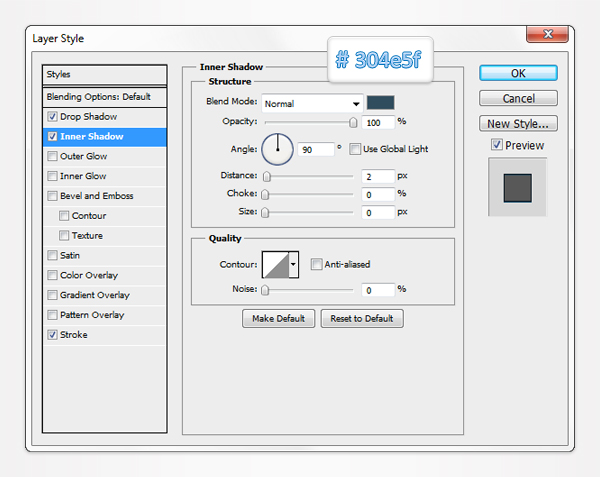
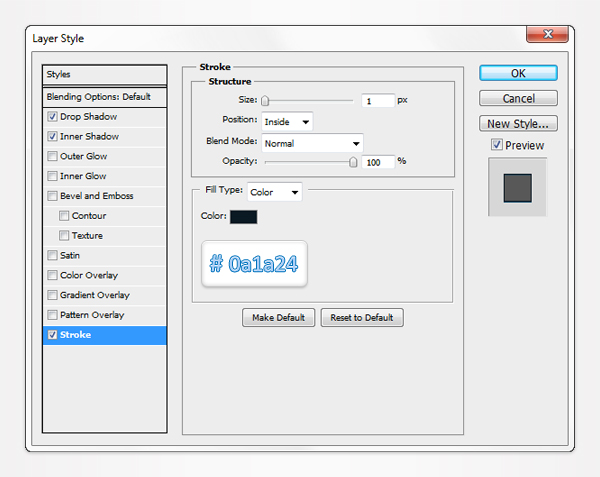
Pick the Rounded Rectangle Tool and make sure that the radius is set at 5px. Set the foreground color at #4b738c, create a 50 by 4px vector shape and place it as shown in the first image. Open the Layer Style window for this new shape and enter the properties shown in the following images.
Step 15
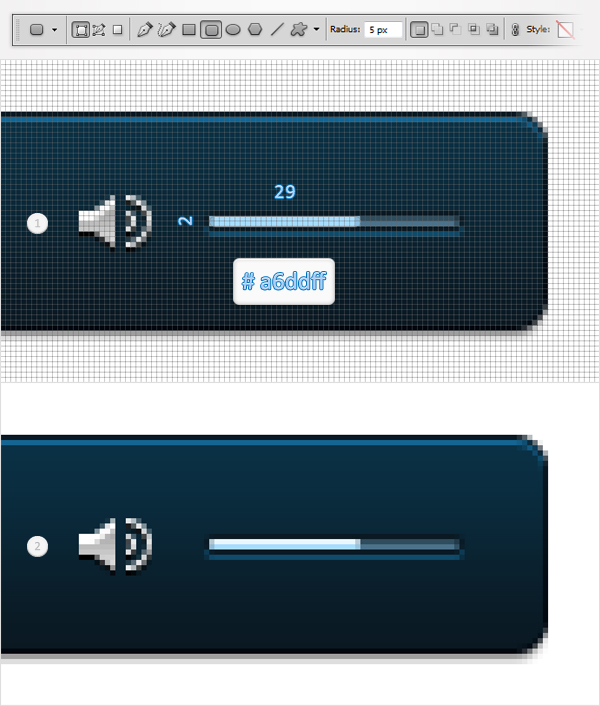
Pick the Rounded Rectangle Tool, set the foreground color at #a6ddff, create a 29 by 2px vector shape and place it as shown in the first image. Open the Layer Style window for this new shape and enter the properties shown in the following images.
Step 16
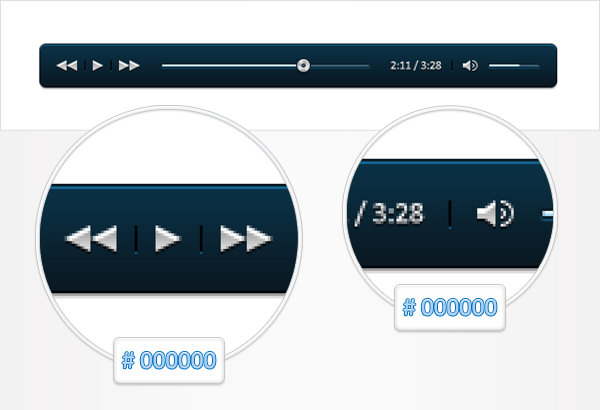
Finally, pick the Rectangle Tool and set the foreground color at black. Create three, 1 by 10px vector shapes and place them as shown below. Open the Layer Style window for these new shapes and enter the properties shown in the following images.
Final Image
Here is how your final result should look.


