This short Photoshop tutorial will show you an easy and effective way of making colour palettes.
1. Document Creation
Let’s start by making a new document in Photoshop. You can use whatever size you want, something fairly small though, preferably. I used a document size of 210 x 360 pixels.
Leave your background color as white (#ffffff).
2. Base Squares
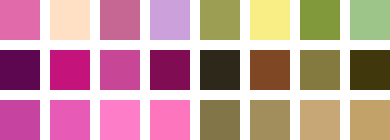
In your new document make a bunch of random-colored squares. For this you can use the rectangular marquee tool. Make a selection, color it, move the selection and color it again. Try to use as many different colors here as possible.
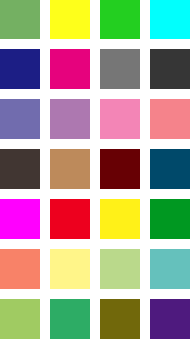
I made each of my squares 40 x 40 pixels in size.
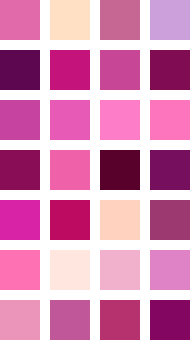
3. Colorize
In your layers window, add a solid color layer by clicking the create new fill or adjustment layer button, then choosing solid color from the drop down menu.
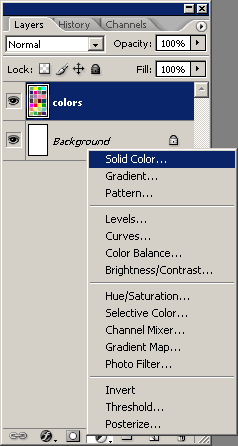
After you’ve done this, choose any old color for the Solid Color adjustment layer.
4. Settings
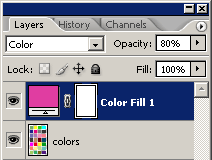
Lower the opacity for the color layer to 80%, then change the layer mode to Color.
Since I used a pinkish color I’m left with this palette:
Now you have a very cool colour palette that you can use in your design that will work well together. Save your images as .gif images and open them up any time you need a nice colour palette.
Credit to Mash11 from deviantART.