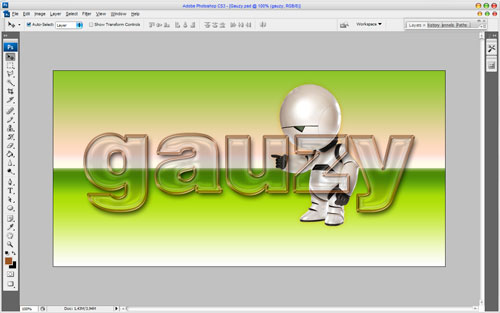
One more interesting tutorial about how to create gauzy text effect in Photoshop.
Now, firstly, you’ll have to create a new document in which you can make this text. For this tutorial I’m going to be using a size of 1000×500 pixels with the default resolution (DPI) of 72 and white background.
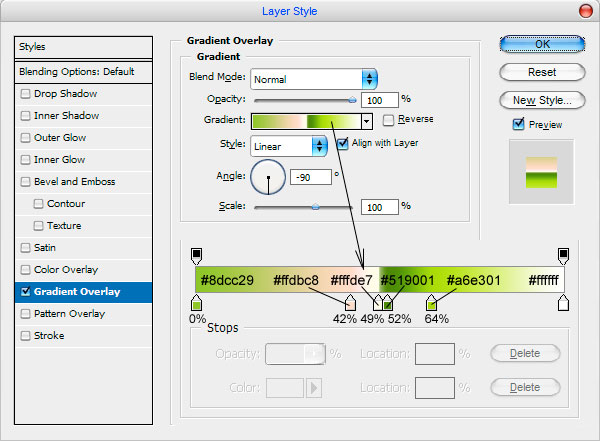
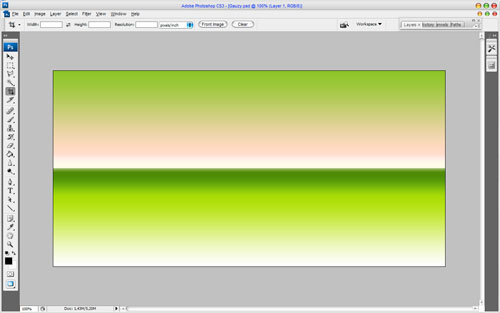
After creating your document, add in a suitable background using Gradient Overlay layer style:
Now we have something like this:
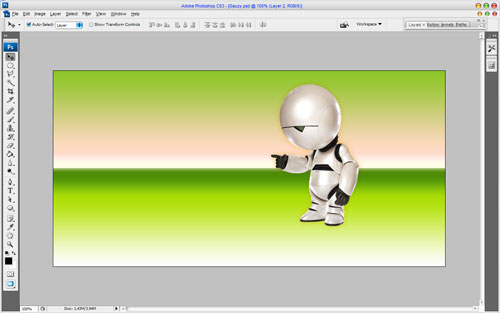
After that I would like to bring some picture to background to make the text effect more evident. Actually, you can use different pictures, but I prefer to use this one picture of robot Marvin. Bring it to the canvas and then reduce it a little bit as shown on a picture below:
I ended up with this for my background. If you want to download the picture of robot used above, please feel free: Robot.png
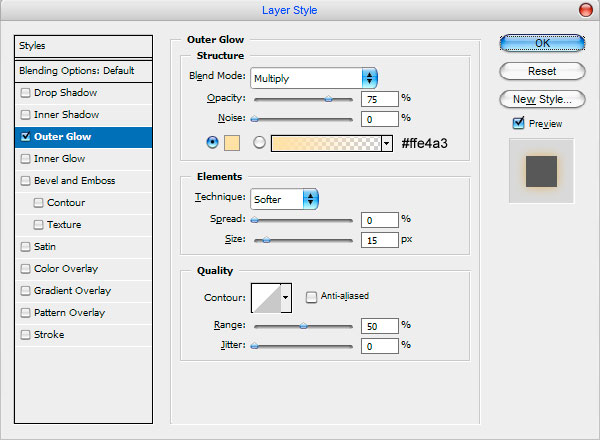
Use the Outer Glow layer style to make the picture more contrast.
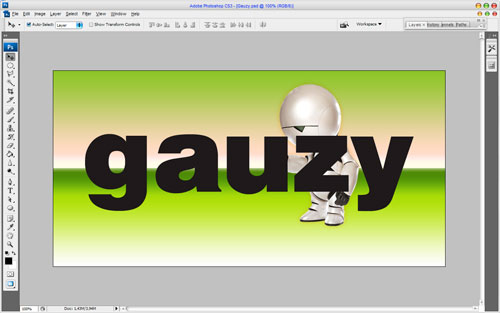
Alright, time to write out your text. I’ll just be using the font called Helios Black (270 pt, Crisp) for this tutorial, which is commercial. If you don’t have it, just try different font. Write out something like ‘gauzy’ in the middle of canvas using Horizontal Type Tool.
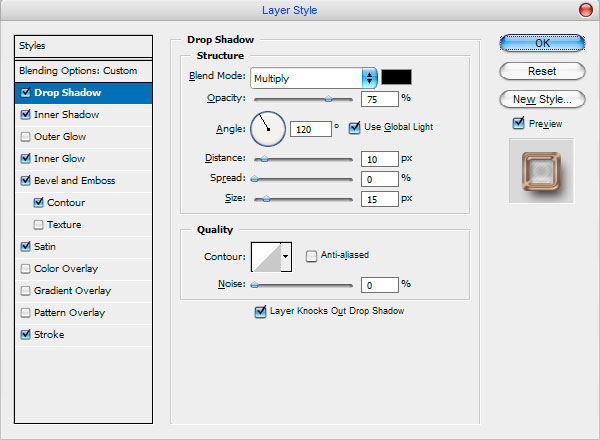
Now set fill opacity to 0% up, after that apply Drop Shadow, Inner Shadow, Inner Glow, Bevel and Emboss, Contour, Satin, and Stroke layer styles to this text layer:
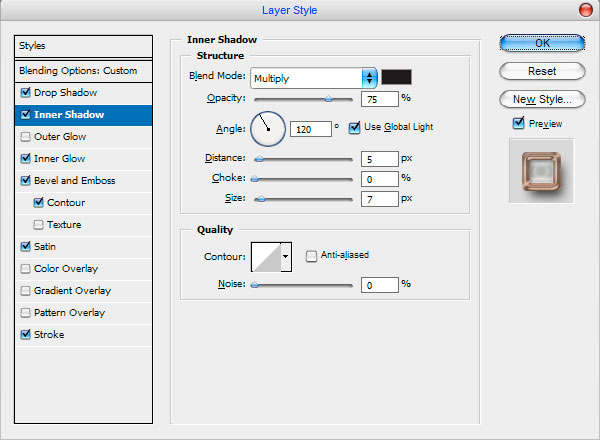
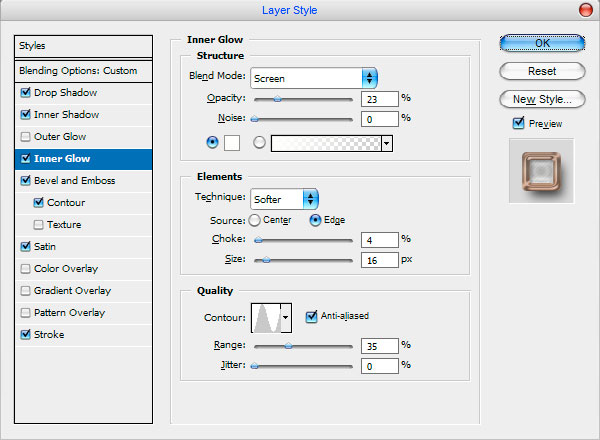
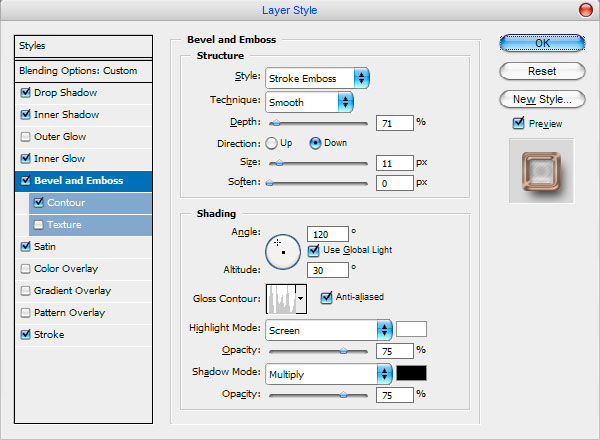
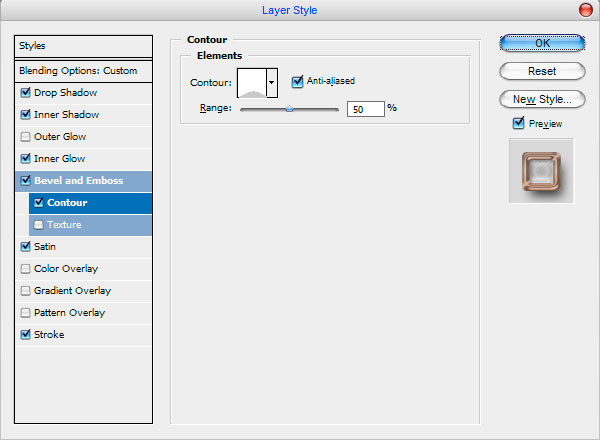
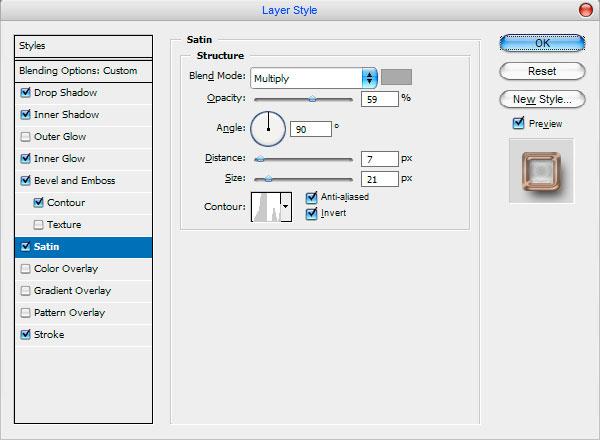
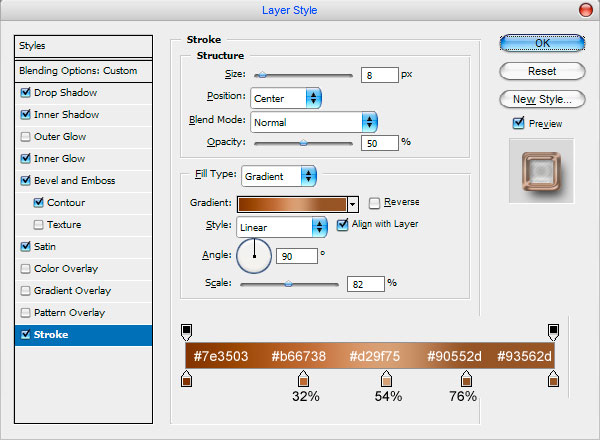
Also I would like to add some pattern to our gauzy text style. For this effect create a new document with size of 5×5 pixels and draw cross lines by using Pencil Tool as on picture below:
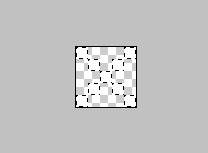
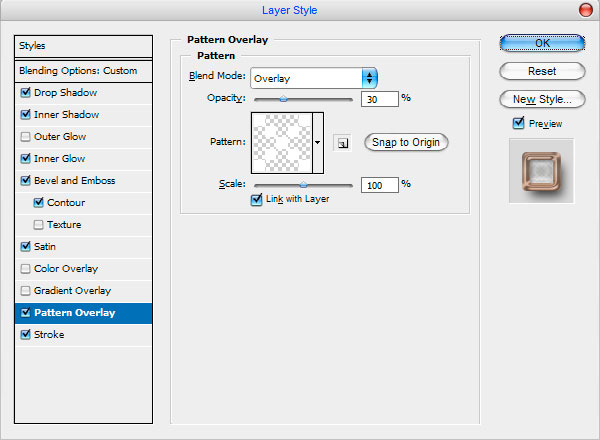
Then go to Edit > Define Pattern and save it as pattern. After that go back to our main document and apply the Pattern Overlay layer style to get the next picture:
Thanks for reading everyone! Hope it was really very interesting for you!

