In this Photoshop tutorial, I’ll show you how to create a fantasy dragon scene using a variety of photo manipulation techniques.
You’ll learn how to combine several stock images, how to change the color, adjust lighting and atmosphere and more
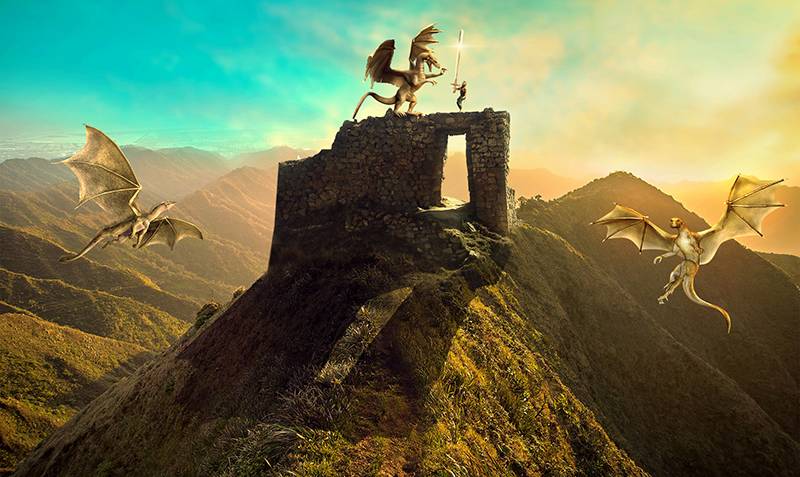
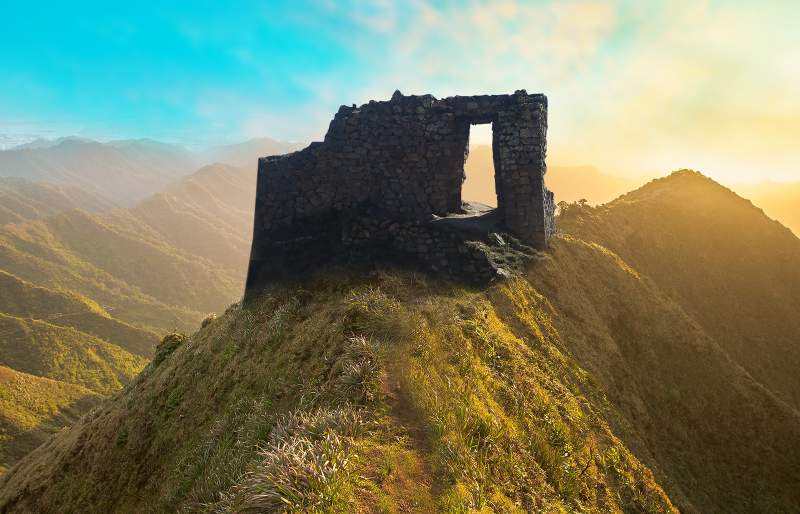
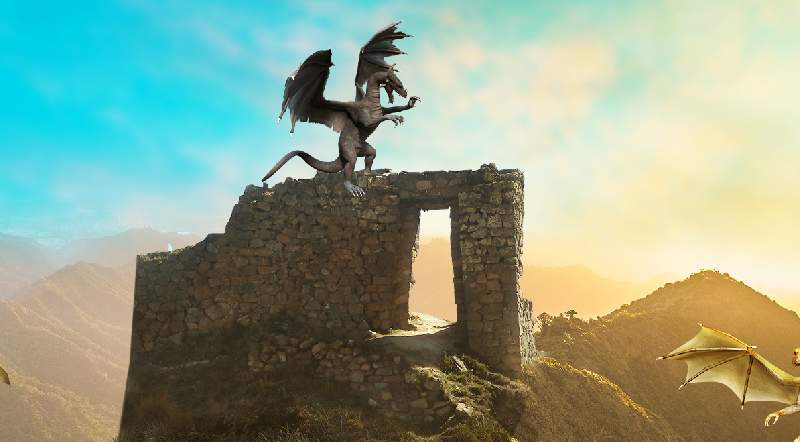
Final Image
Tutorial Details
- Program : Photoshop CS5+
- Estimated Completion Time : 90 minutes
- Difficulty : Intermediate
Resources
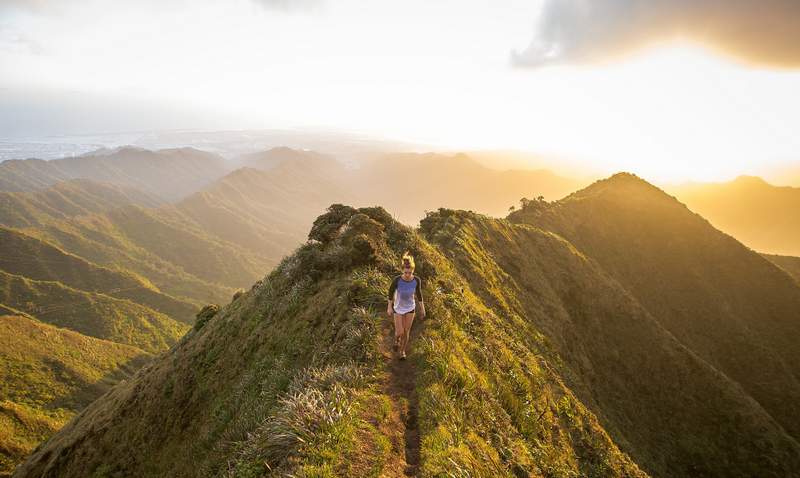
Step 1
Create a new 2000×1193 px document and fill it with white. Open the landscape image and drag this image into the white canvas using the Move Tool (V) .
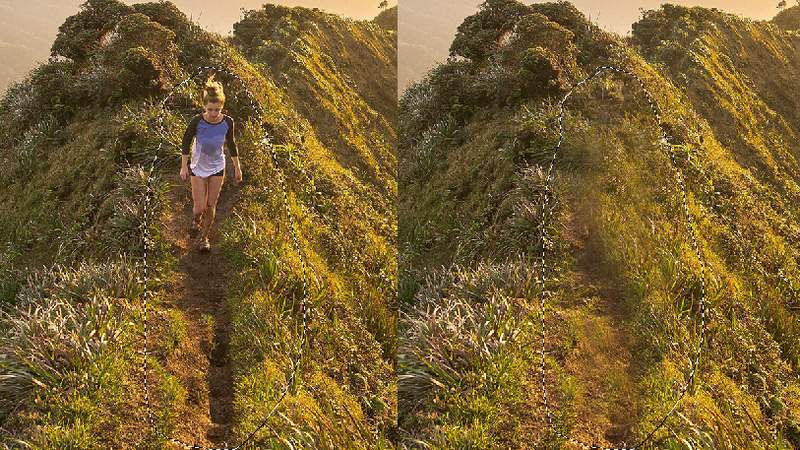
Step 2
We need to remove the woman and her shadow so create a new layer and activate the Clone Tool (S) . Use this tool to clone over the woman and her shadow area.
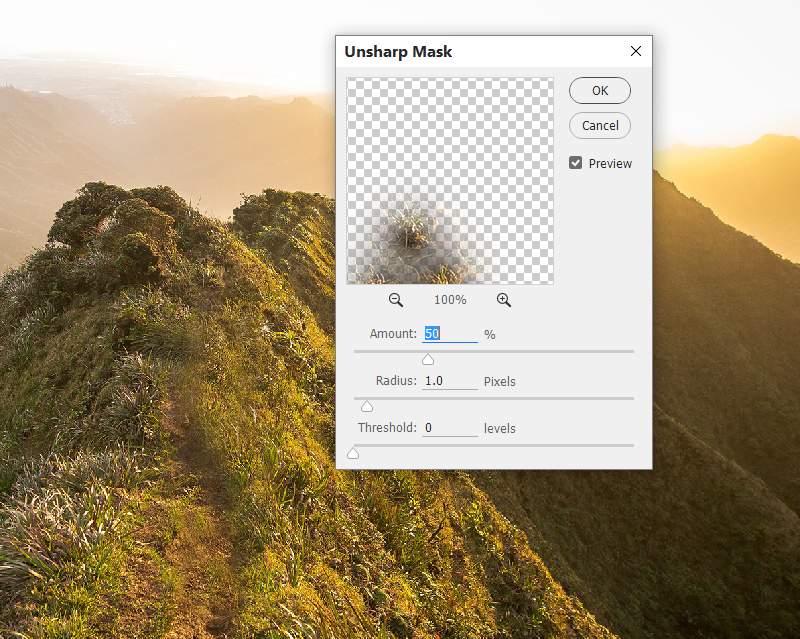
Step 3
The cloned area looks a bit blurred. To fix it, convert the cloning layer to a Smart Object . Go to Filter > Sharpen > Unsharp Mask :
Step 4
Open the sky image and use the Rectangular Marquee Tool (M) to select the sky only and place it onto the upper section of the main canvas.
Click the second icon at the bottom of the Layers panel to add a mask to this layer. Use a soft black brush to remove the hard edges to blend the sky with the existing one.
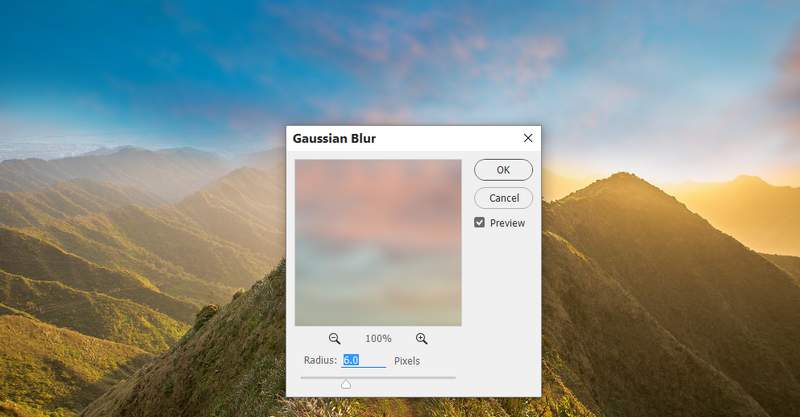
Step 5
Go to Filter > Blur > Gaussian Blur and set the radius to 6 px :
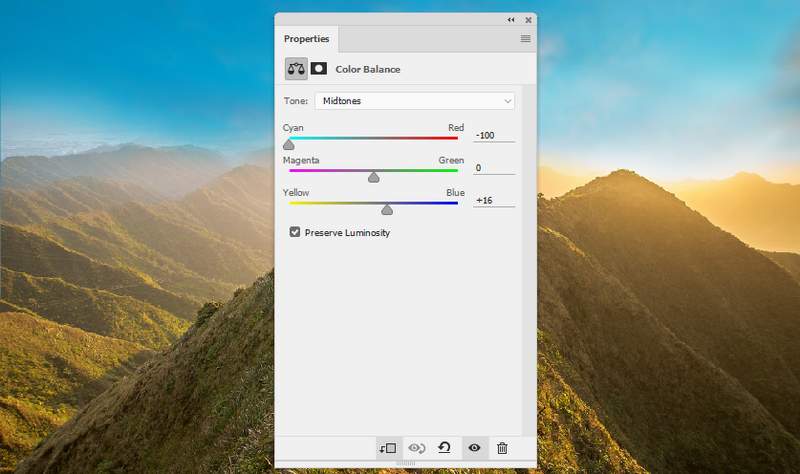
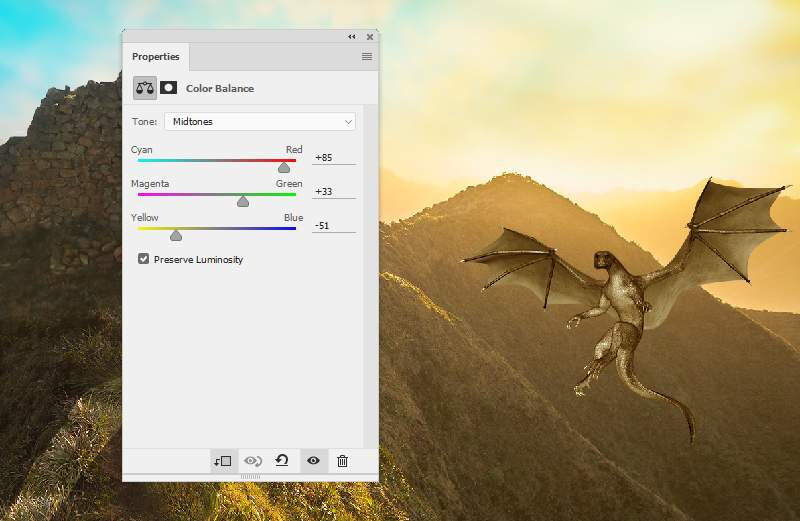
Step 6
Go to Layer > New Adjustment Layer > Color Balance (set as Clipping Mask ) and change the Midtones settings:
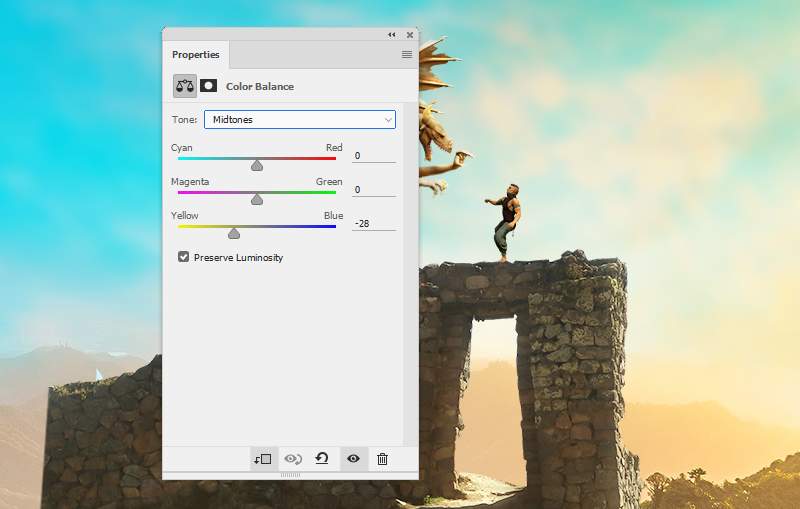
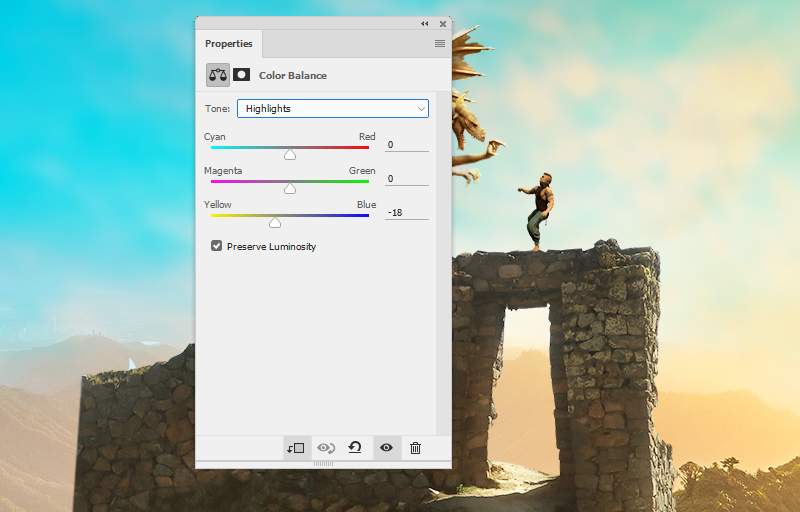
Step 7
Make another Color Balance adjustment layer and later the Shadows and Highlights values. On this layer mask, use a soft black to erase the left side and leave the yellow light effect visible on the right.


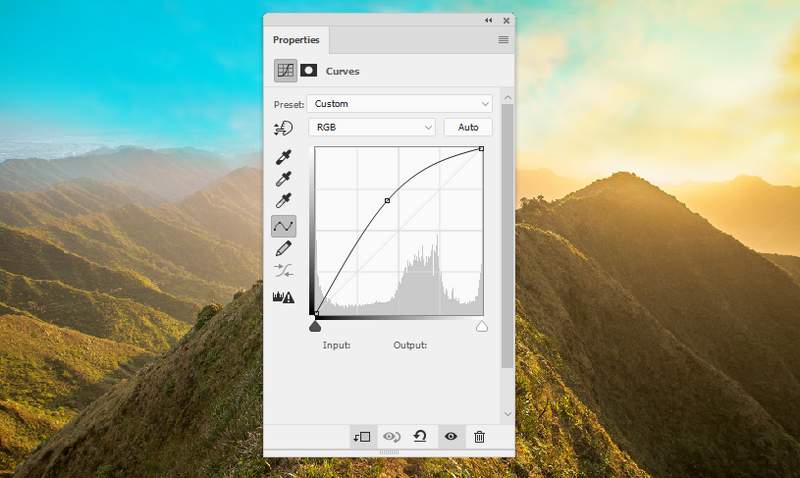
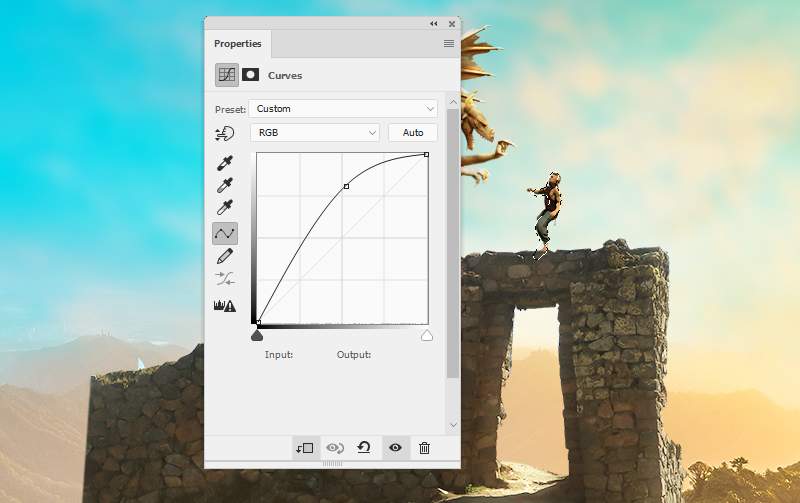
Step 8
Create a Curves adjustment layer to brighten this sky.
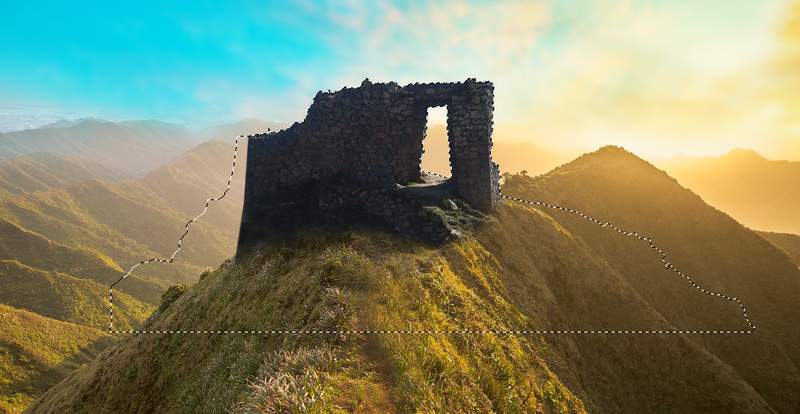
Step 9
Isolate the ruin and place it onto the top of the mountain. Use a layer mask to blend the ruin of the ground.

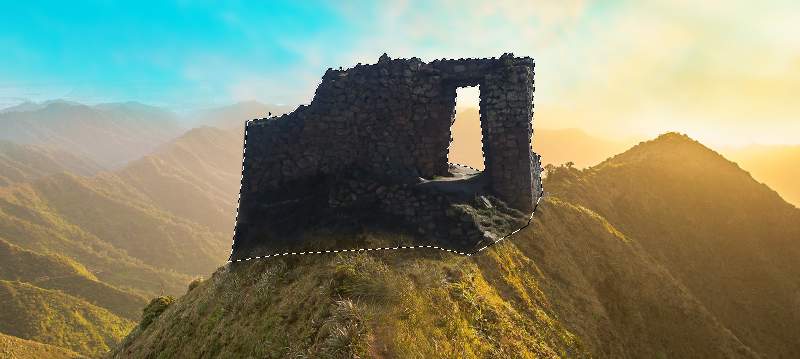
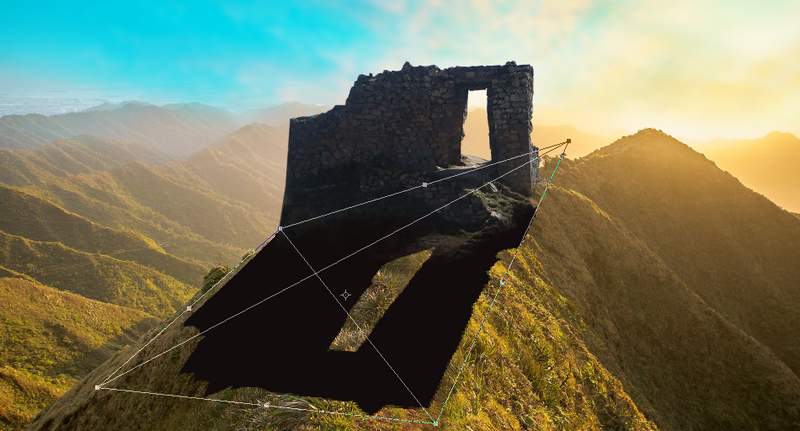
Step 10
To make shadow of the ruin on the ground, create a new layer below the ruin one. Hold the Control key and click the thumbnail of the ruin layer to load its selection.
Press Ctrl+I to invert this selection. Use the Polygonal Lasso Tool (L) to reduce the selection following the form of the visible ruin and press Ctrl+I again.
Step 11
Fill this selection with the color #13100e and flip it vertically ( Edit > Transform > Flip Vertical ) . Move it down and use the Free Transform Tool (Ctrl+T) to distort this shadow to fit the light direction.
Step 12
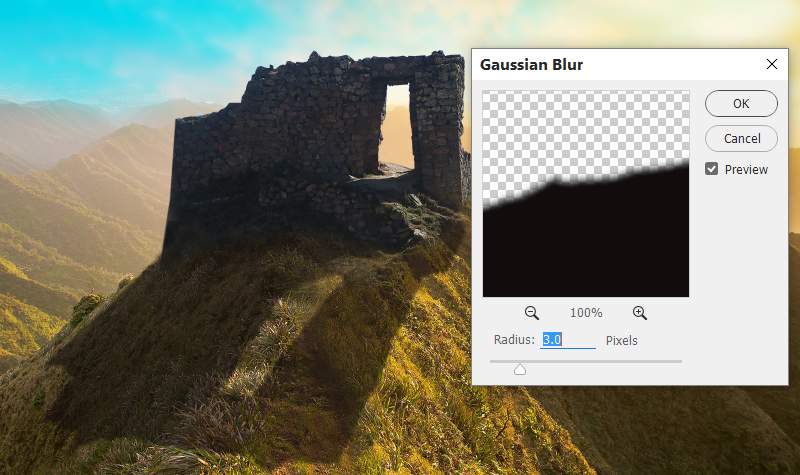
Reduce the opacity of the shadow to 60% and apply a Gaussian Blur of 3 px to this layer.
Add a mask to this layer and use a soft black brush to reduce the opacity on the top and bottom of the shadow.
Step 13
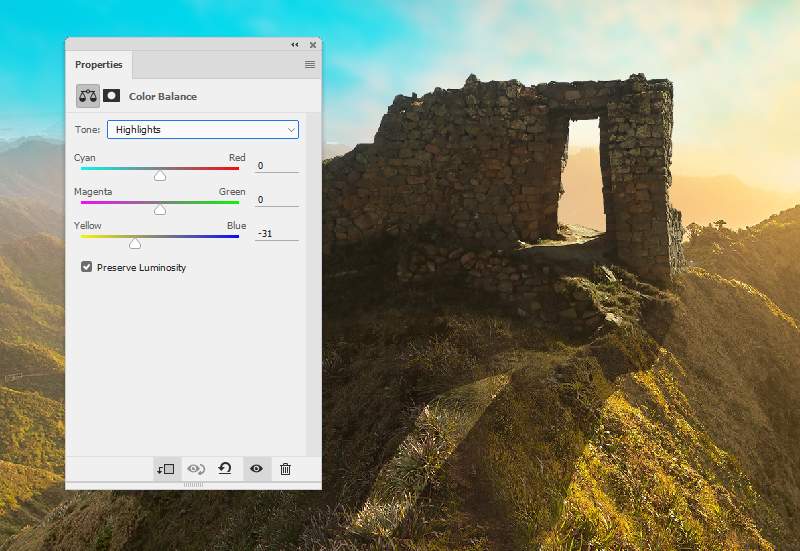
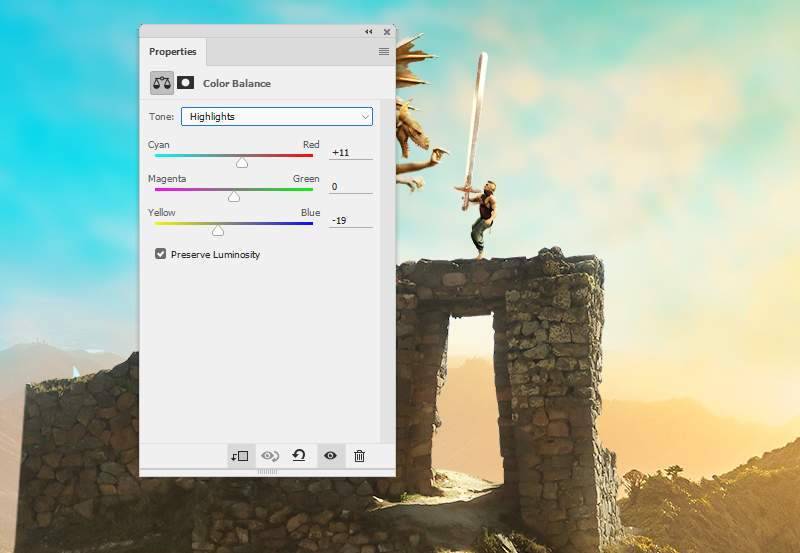
Make a Color Balance adjustment layer above the ruin layer (set as Clipping Mask ) and alter the Midtones and Highlights values.

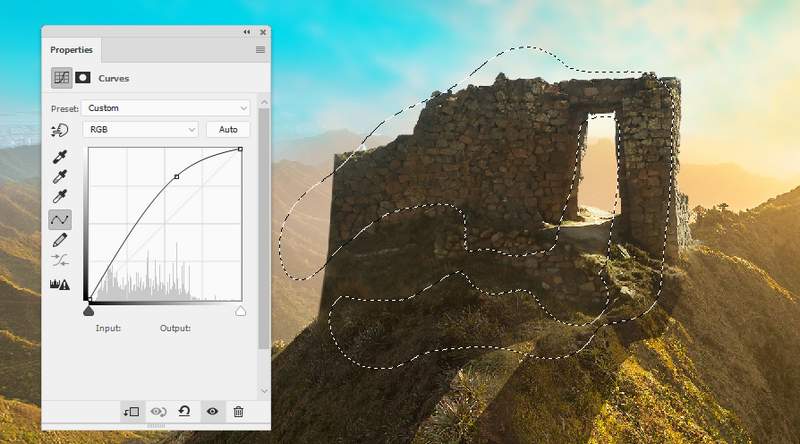
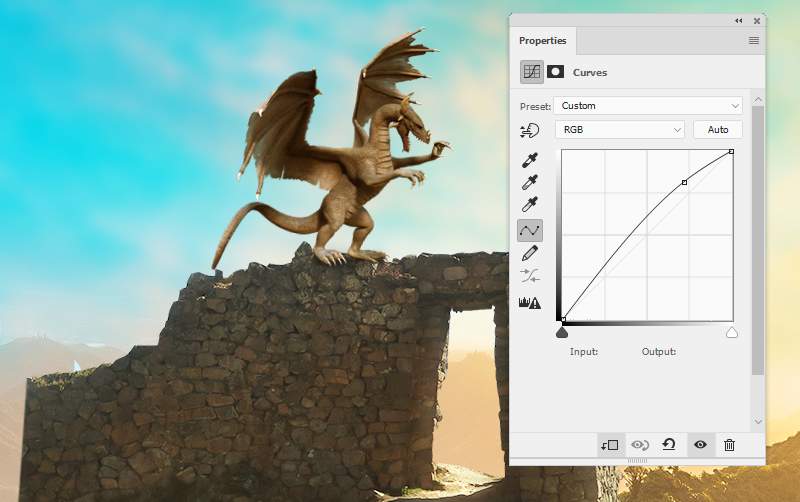
Step 14
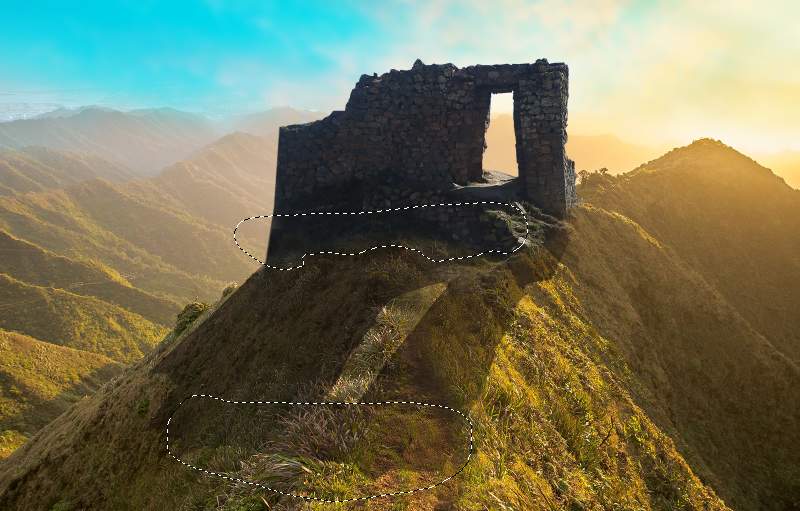
Create a Curves adjustment layer to bring more light to the contour of the ruin. On this layer mask, paint on the hidden/shadow areas of the ruin so they won’t be affected by this adjustment layer.
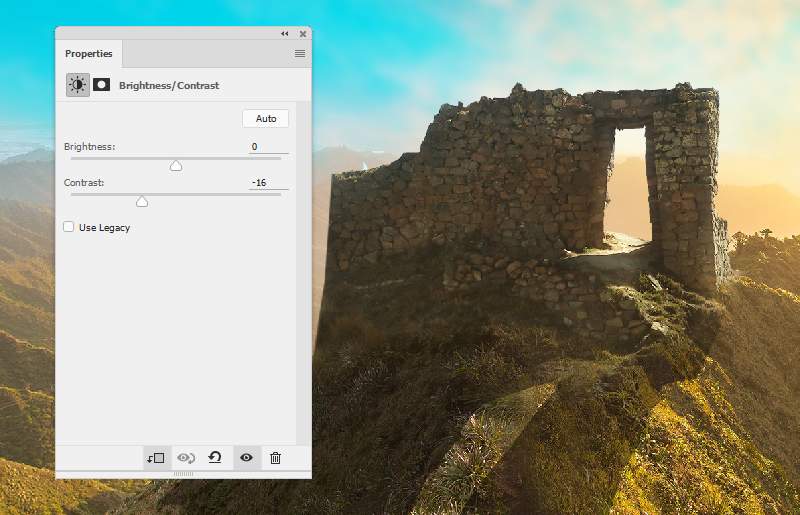
Step 15
Use a Brightness/Contrast adjustment layer to reduce the contrast of the ruin a bit to fit the atmosphere of the scene.
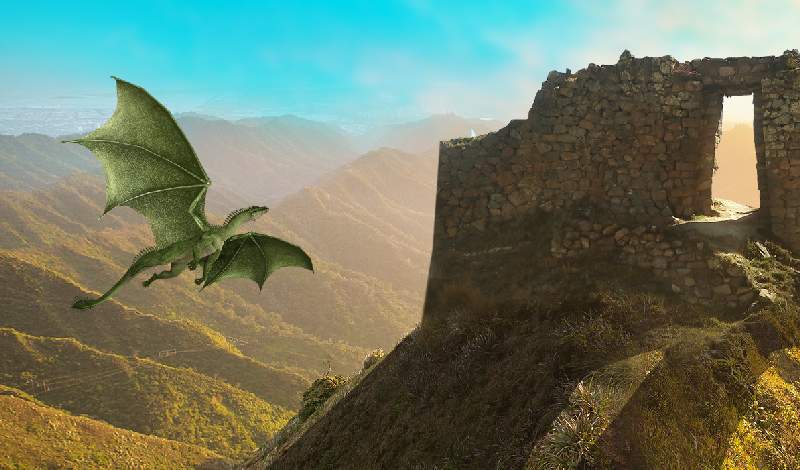
Step 16
Open the dragon 1 image and use the Move Tool to place him to the left side of the canvas.
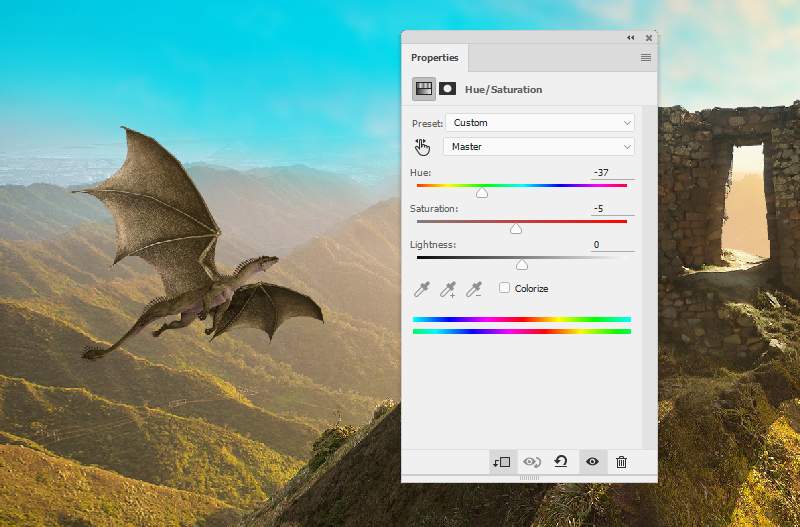
Step 17
Make a Hue/Saturation adjustment layer to change the color of this dragon.
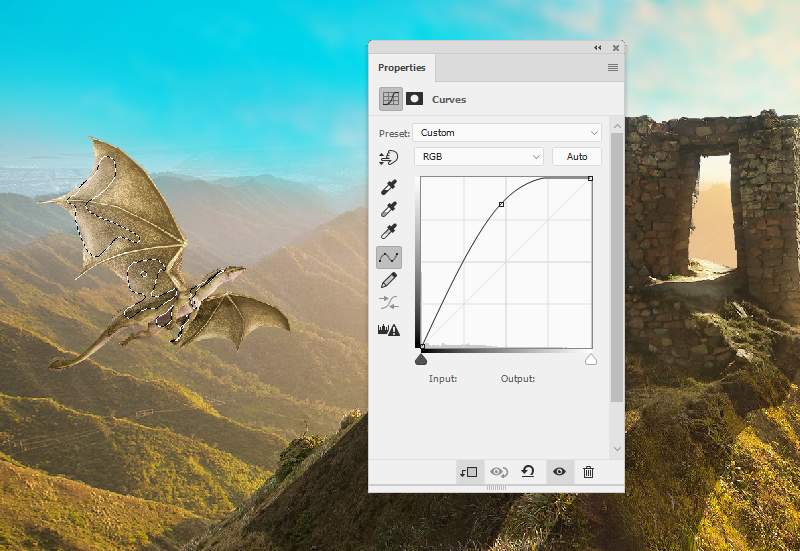
Step 18
Create a Curves adjustment layer to brighten the dragon. On this layer mask, paint on the shadow/hidden areas of the dragon to keep their contrast.
Step 19
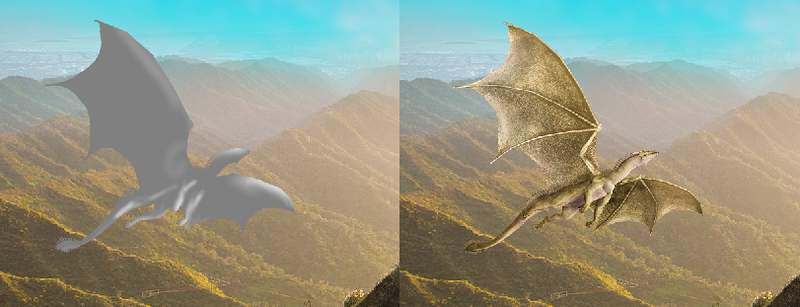
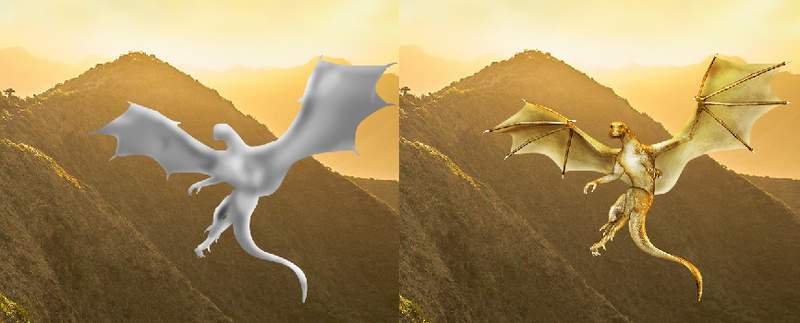
Make a new layer, change the mode to Overlay 100% and fill with 50% gray.
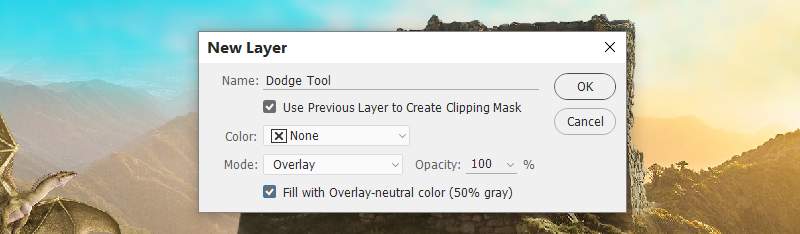
Activate the Dodge Tool (O) with Midtones Range , Exposure about 10% to bring more light to some details of the dragon. You can see how I did it with Normal mode and the result with Overlay mode.
Step 20
Place the dragon 2 in the right side of the canvas.
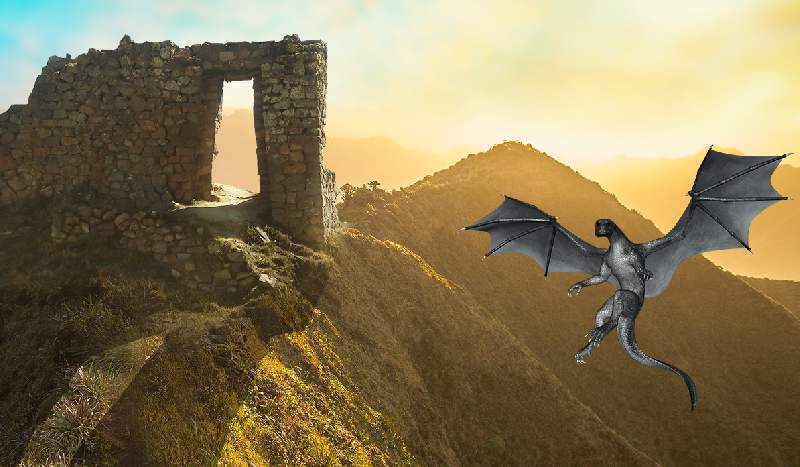
Step 21
Make a Color Balance adjustment layer to change the color of the dragon.
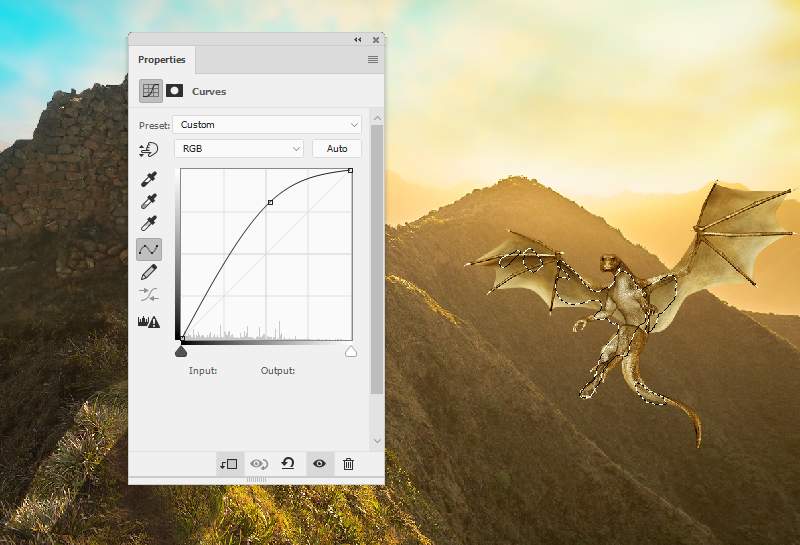
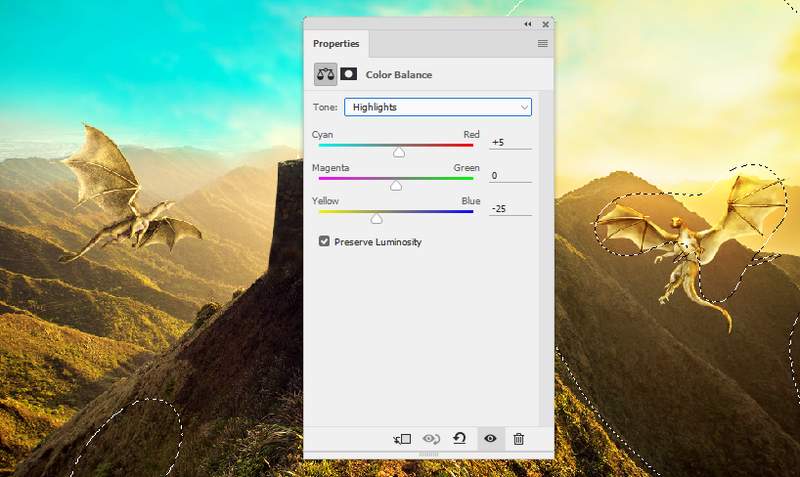
Step 22
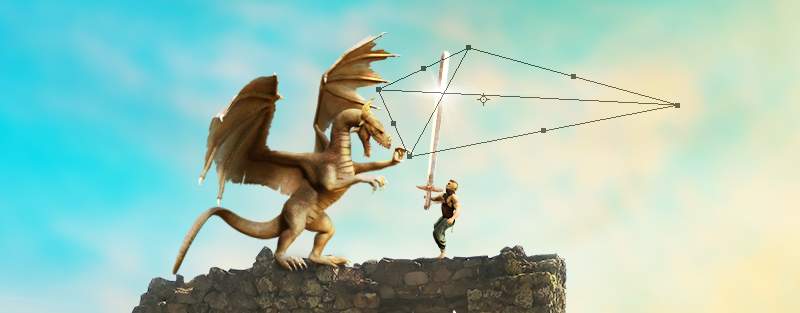
Create a Curves adjustment layer to brighten the dragon, especially the contour. The selected areas show where to paint on the layer mask.
Step 23
Add a new layer, change the mode to Overlay 100% and fill with 50% gray. Use the Dodge and Burn Tool to refine the light/shadow on the dragon.
Step 24
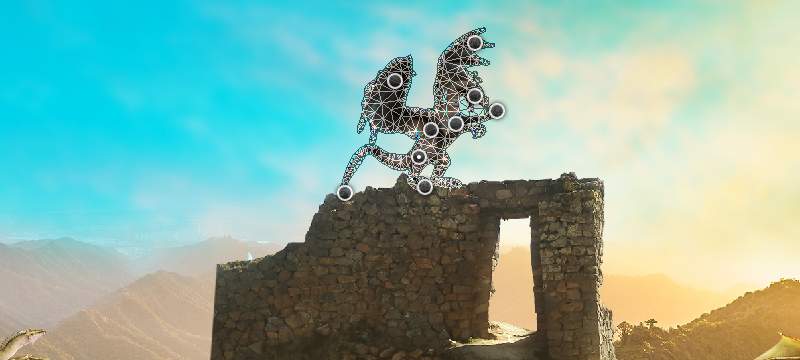
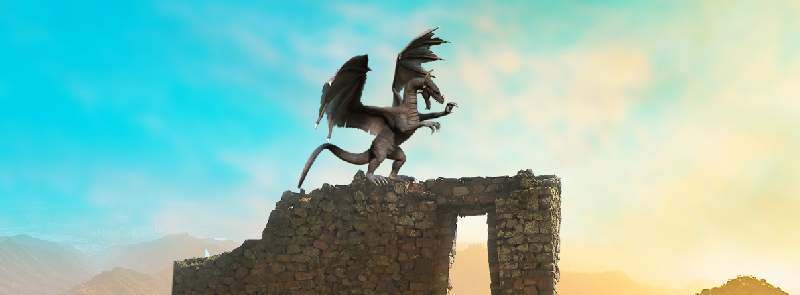
Open the dragon 3 image. Select the dragon only and add him to the top of the ruin.
Go to Edit > Puppet Warp to drag the right leg of the dragon onto the top of the ruin.
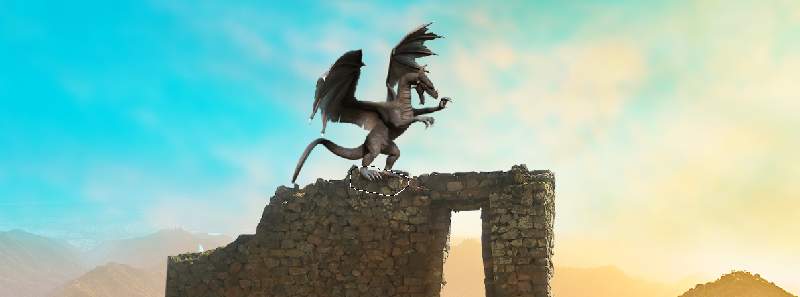
Step 25
Make a new layer below the dragon 3 one. Use a soft brush with the color #13100e , the opacity about 30% to paint shadow for this dragon on the ruin.
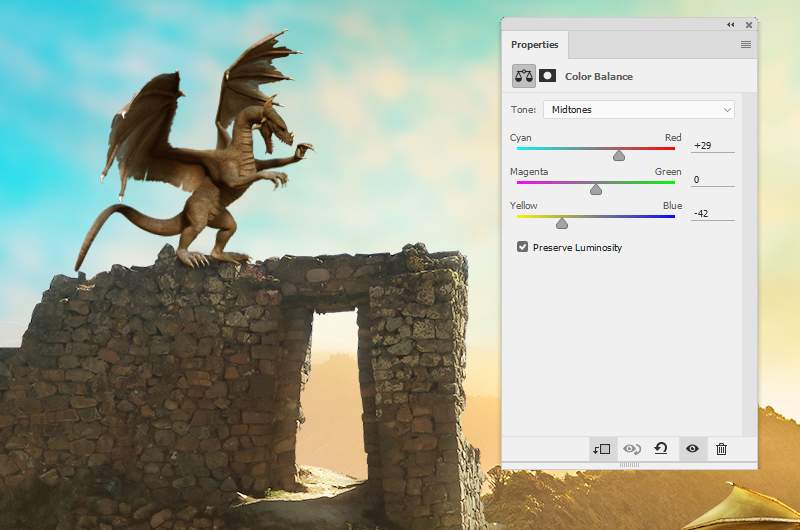
Step 26
Create a Color Balance adjustment layer to alter the color of the dragon.
Step 27
Use a Curves adjustment layer to brighten the dragon.
Step 28
Make a new layer, change the mode to Overlay 100% and fill with 50% gray. Use the Dodge and Burn Tool to enhance to light and shadow of this dragon.

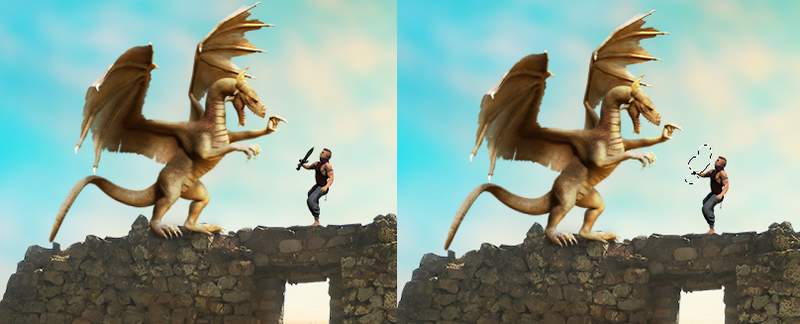
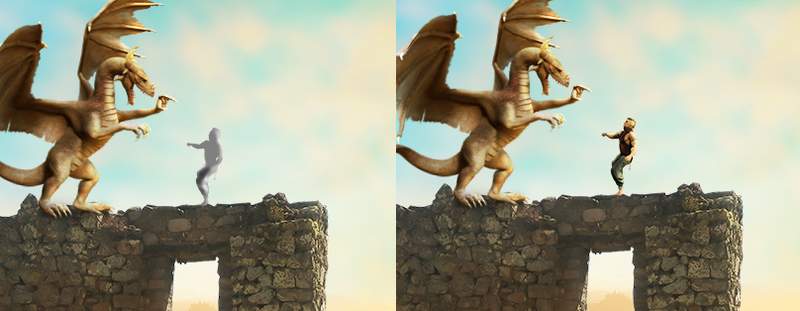
Step 29
Come back to the dragon 3 image. Select the man to add to the front of the ruin 3, onto the top of the ruin. Add a mask to this layer to erase the sword inside his hand.
Step 30
Use a Color Balance adjustment layer to change the color/light of the man.
Step 31
Add a Curves adjustment layer to brighten the man.
Step 32
Create a new layer, use the Dodge and Burn Tool to refine the light/shadow on the man.
Step 33
Open the sword image and select the second one to add to the hand of the man. Use a layer mask to remove the part covering the hand.
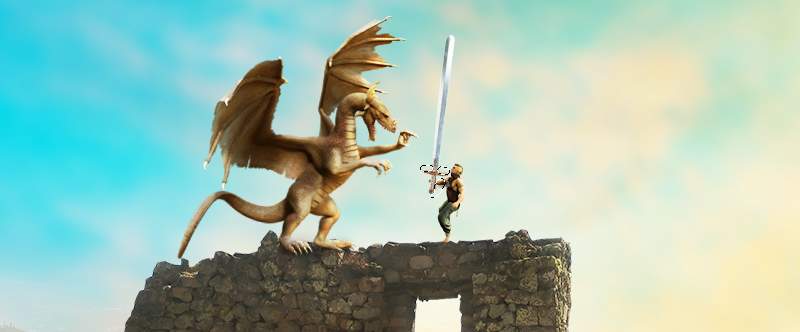
Step 34
Make a Color Balance adjustment layer to alter the sword’s color.
Step 35
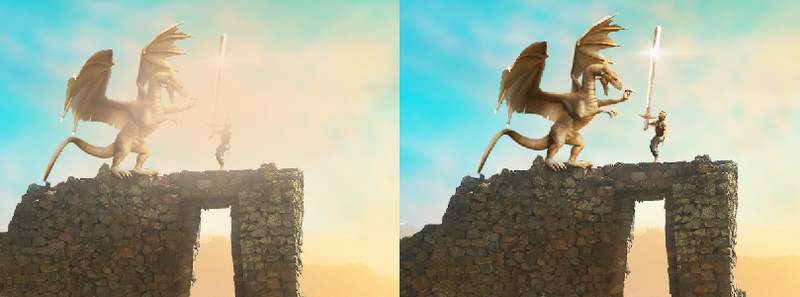
Open the light image and add it to the sword, change its mode to Linear Dodge 100% . Use Ctrl+T to transform the light.
Step 36
Make a new layer, use a soft brush with the color #f9dab8 to paint over the dragon 3 and man. Lower the opacity of this layer to 20% to give this area some misty effect.
Step 37
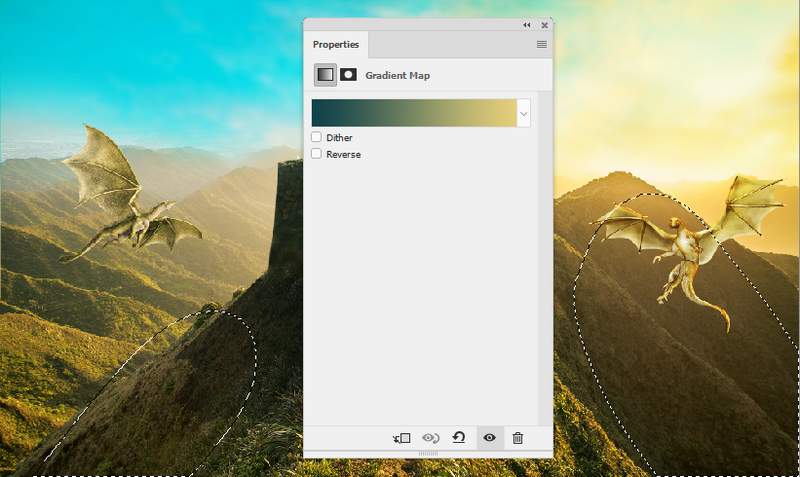
Make a Gradient Map adjustment layer on top of the layers and pick the color #10424b and #e5d07b . Change this layer mode to Soft Light 100% and on this layer mask, paint on the bottom of the both sides to reduce the effect there.
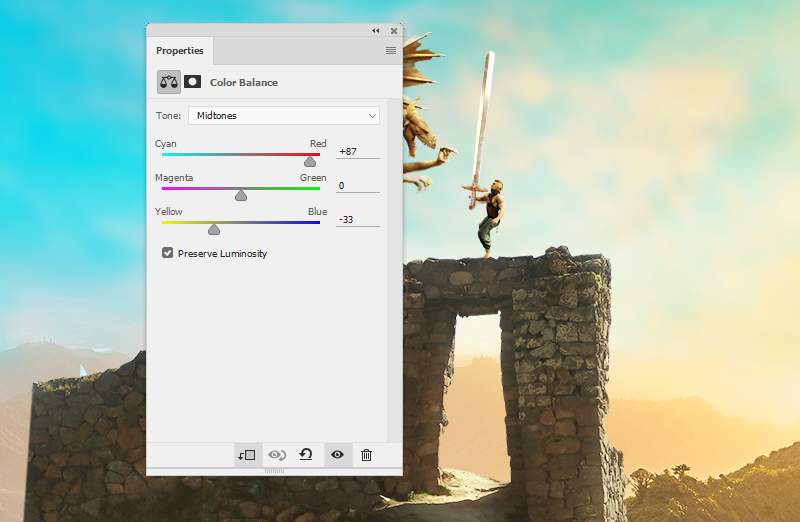
Step 38
Create a Color Balance adjustment layer to change the color of the whole scene. The selected areas show where to paint on the layer mask.


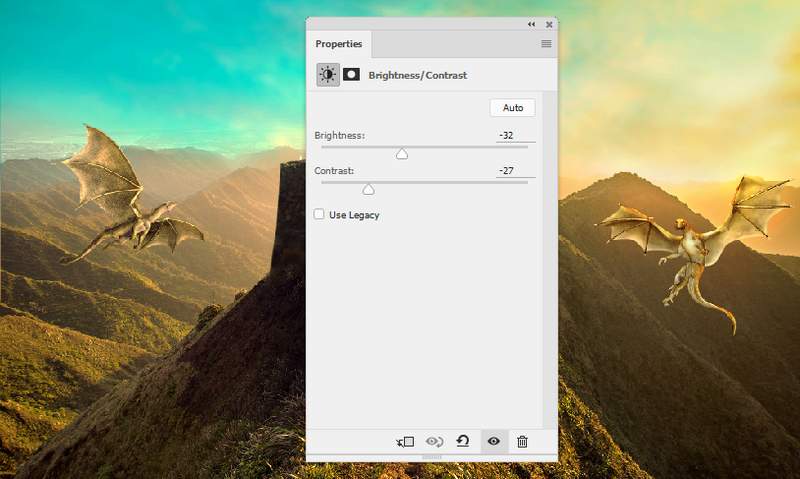
Step 39
Make a Brightness/Contrast adjustment layer to decrease the light/contrast of the scene.
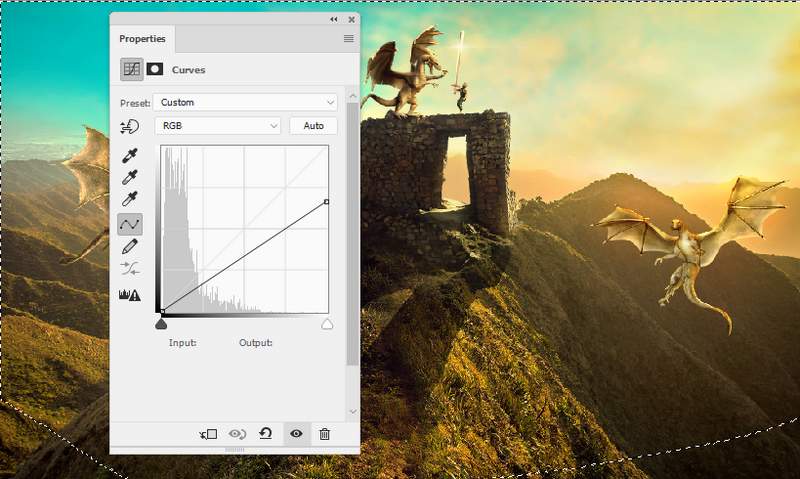
Step 40
Add a Curves adjustment layer to reduce the light on the bottom of the whole scene.
And We’re Done!
I hope that you enjoyed this Photoshop tutorial.