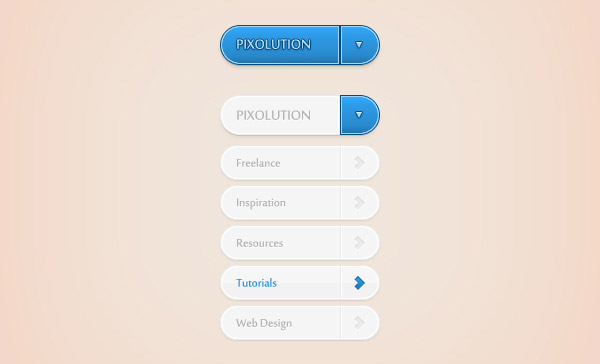
In the following tutorial you will learn how to create a simple drop down menu using Photoshop.
Final Image Preview

Step 1
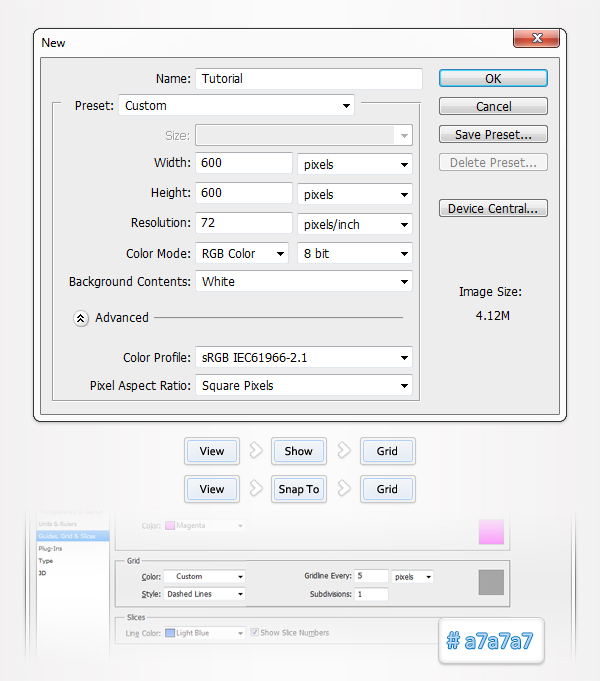
Open Photoshop and hit Control + N to create a new document. Enter all the data shown in the following image and click OK. Enable the Grid (View > Show > Grid) and the Snap to Grid (View > Snap To > Grid). For the moment you need a grid every 5px. Go to Edit > Preferences > Guides, Grid & Slices and focus on the Grid section. Enter 5 in the Gridline Every box and 1 in the Subdivision box. Also, set the color of the grid at #a7a7a7. Once you set all these properties click OK.
Don’t get discouraged by all that grid. It will ease your work later. You should also open the Info panel (Window > Info) for a live preview with the size and position of your shapes.
Step 2
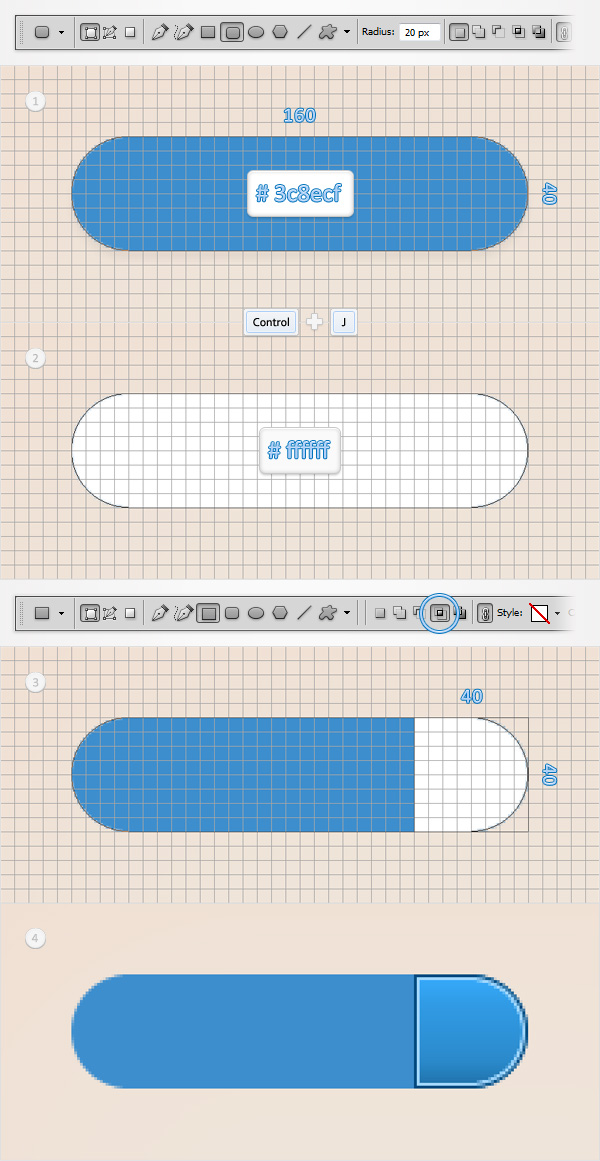
Set the foreground color at #3f8ecf, grab the Rounded Rectangle Tool and set the radius at 20px. Create a 160 by 40px vector path and duplicate it (Control + J). Select this copy and make it white. Switch to the Rectangle Tool, check the Intersect button from the top bar and draw a 40 by 40px vector path as shown in the third image. Move to the Layers panel and double click on this white vector path to open the Layers Style window.
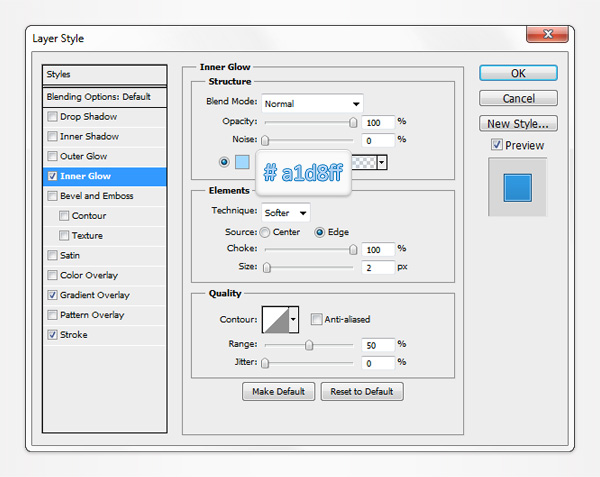
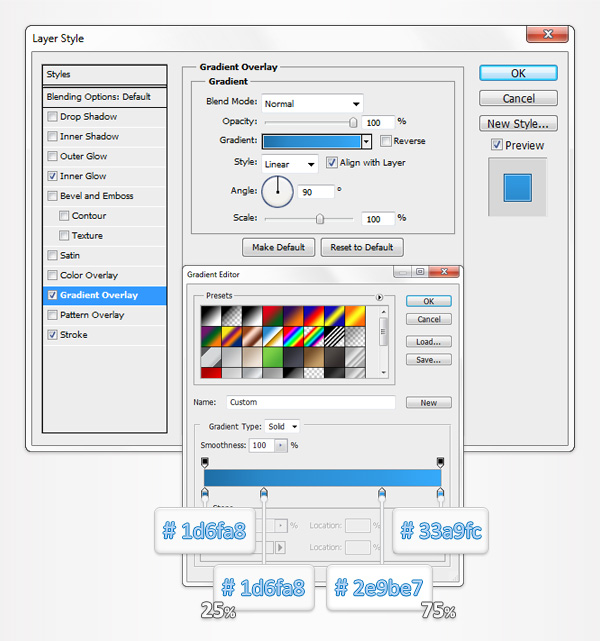
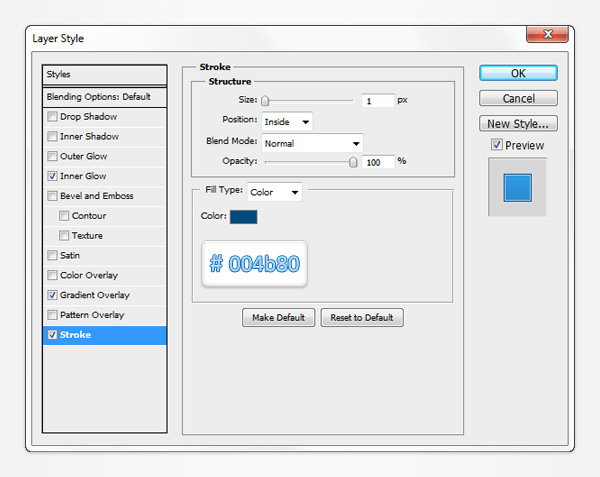
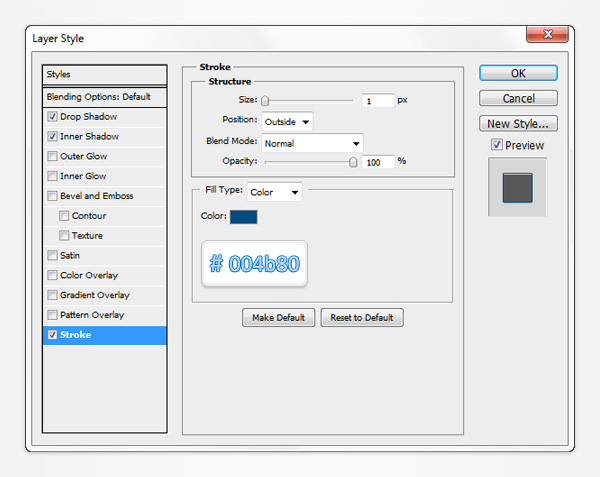
Activate the Inner Glow, the Gradient Overlay and the Stroke then enter the properties shown in the following images.
Step 3
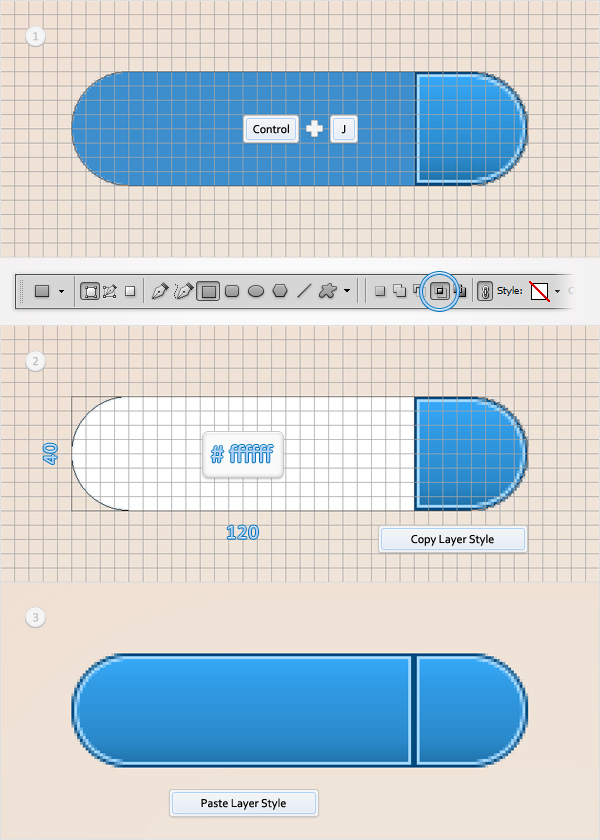
Reselect the blue rounded rectangle made in the previous step and duplicate it (Control + J). Select this copy, make it white and grab the Rectangle Tool. Check the Intersect button from the top bar and draw a 120 by 40px vector path as shown in the second image.
Move to the Layers panel, right click on the white vector path made in the previous step and click on "Copy Layer Style". Return to the white vector path made in the beginning of this step, right click on it then simply click on Paste Layer Style.
Step 4
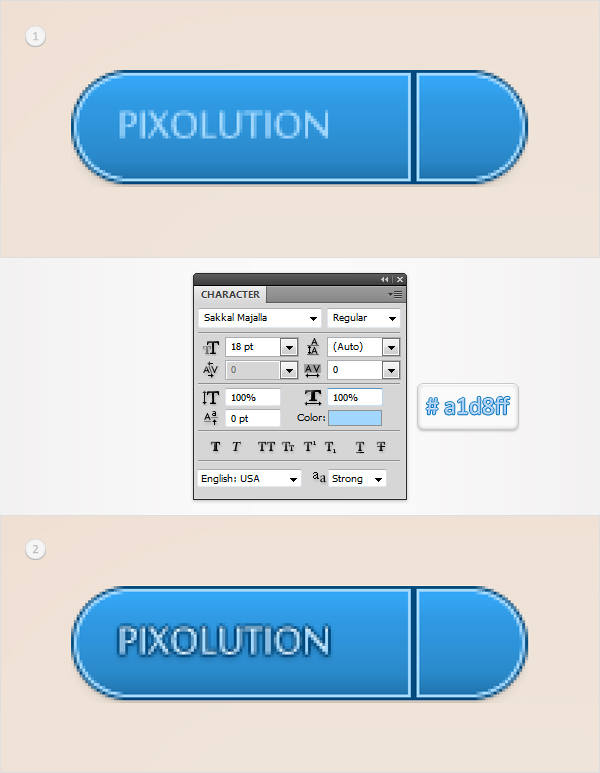
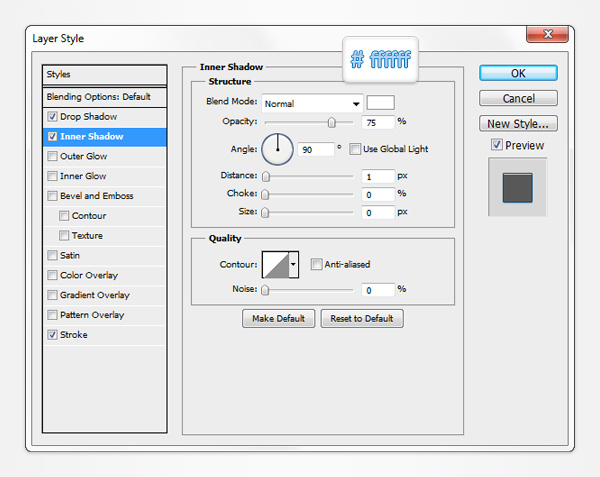
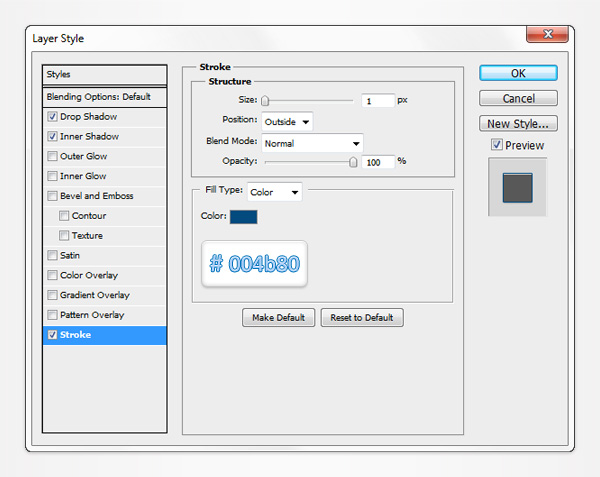
Pick the Type Tool and add your text as shown in the following image. Set its color at #a1d8ff then open the Layers Style window and enter the properties shown in the following images.

Step 5
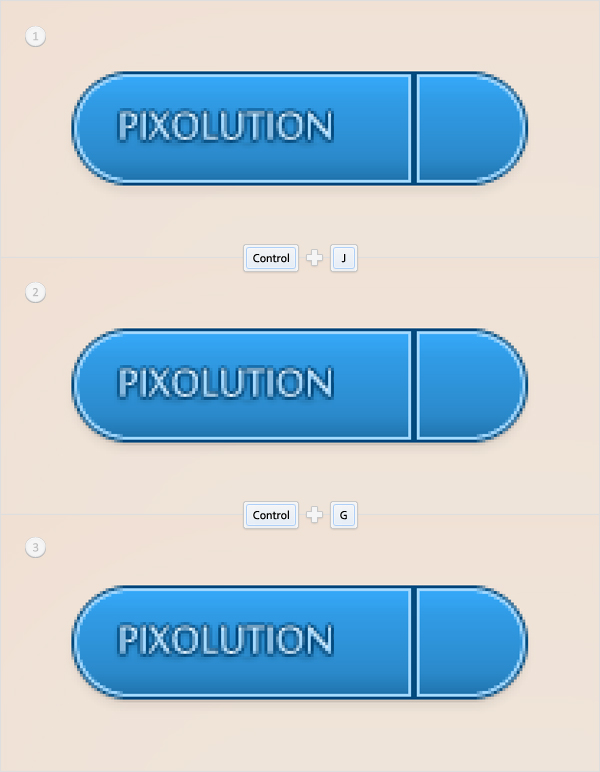
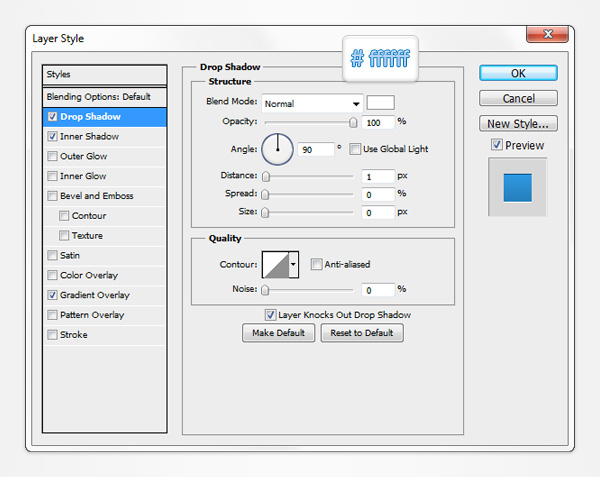
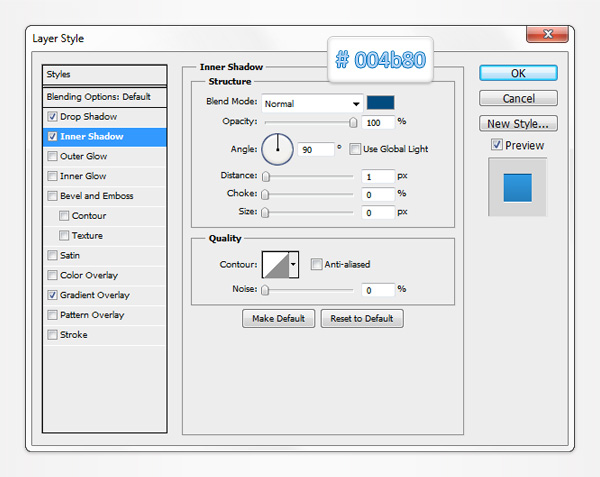
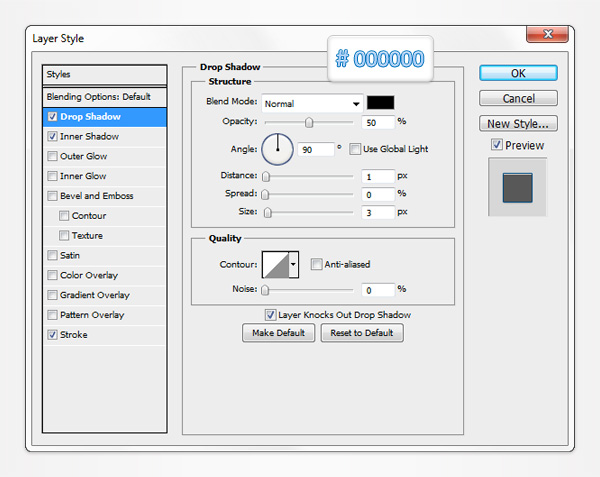
Return to the blue rounded rectangle made in he second step, open the Layer Style window and enter the properties shown below. Duplicate this path (Control + J), select the copy, open the Layer Style window and edit the Drop Shadow properties as shown in the following image. Select all the shapes created so far and group them (Control + G). This will be your closed drop down menu. We’ll add the final touches in the final step.
Step 6
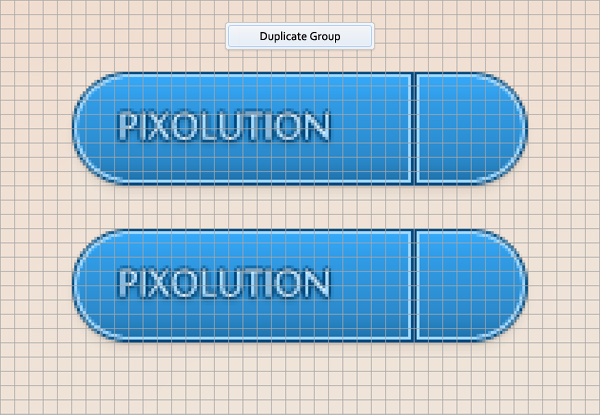
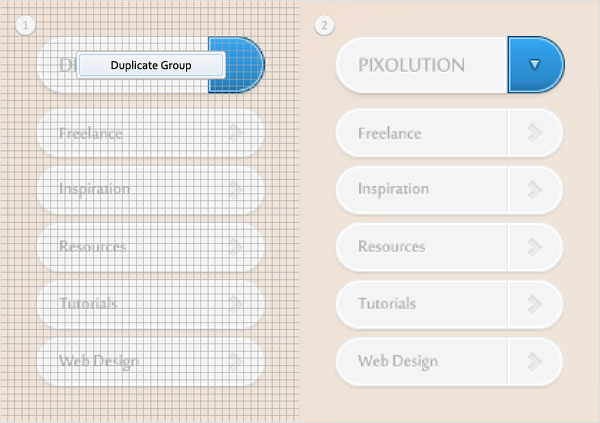
Move to the Layers panel, right click on the group made in the previous step and click on Duplicate Group. Select this newly created group, drag it down and place it as shown in the following image.
Step 7
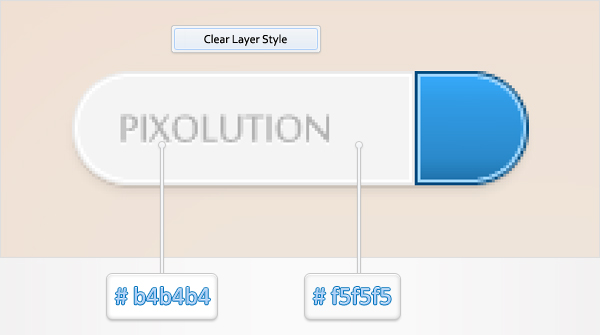
Focus on the new group made in the previous step. First, you need to edit the text. Change its color to #b4b4b4 then right click on it (in the Layers panel) and click on Clear Layer Style. Open the Layer Style window for this grey piece of text and add the discrete Drop Shadow shown in the following image.
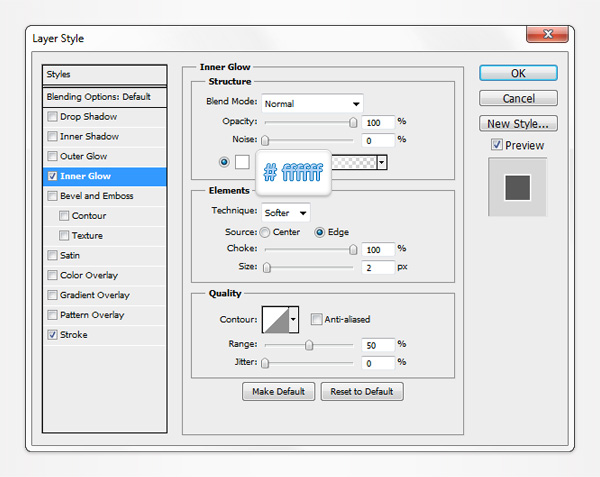
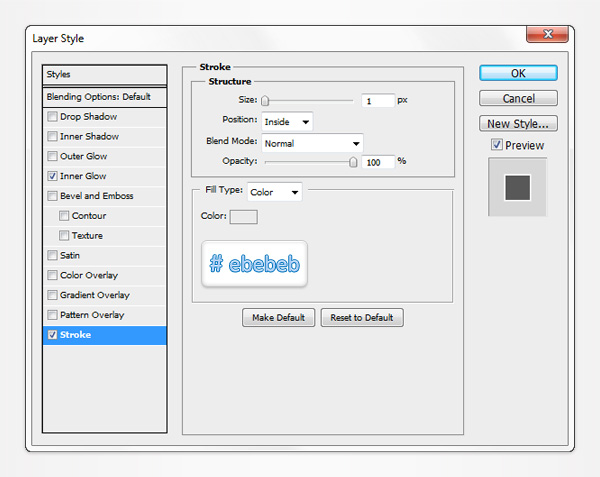
Next, you need to edit the left, white vector path. Select it, replace the white with #f5f5f5, clear the current layer style then open the Layer Style window and enter the properties shown in the following images.

Step 8
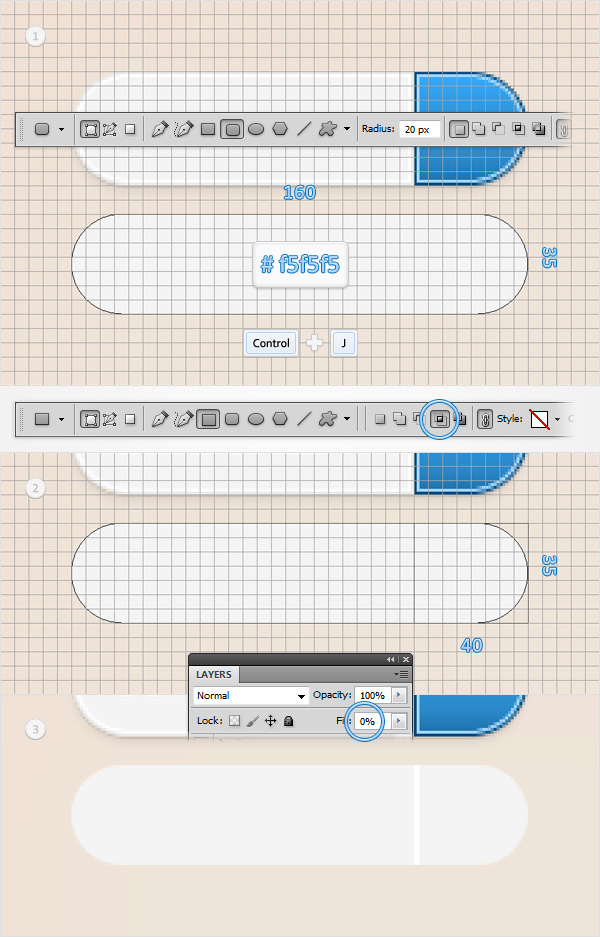
Set the foreground color at #f5f5f5 grab the Rounded Rectangle Tool and set the radius at 20px. Create a 160 by 35px vector path, place it as shown in the first image then duplicate it (Control + J). Select this copy and make it white, switch to the Rectangle Tool, check the Intersect button from the top bar and draw a 40 by 35px vector path as shown in the second image.
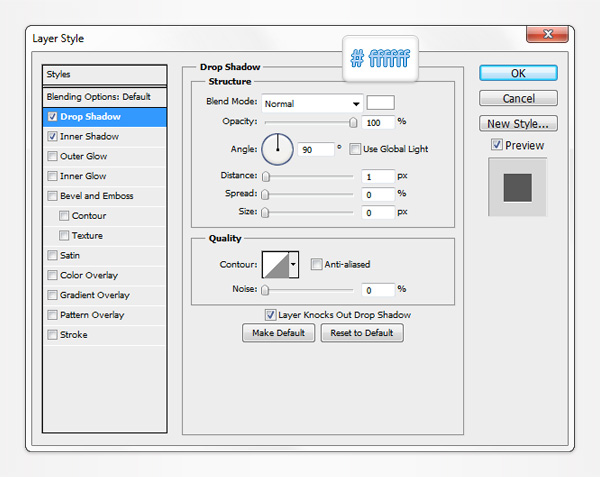
Move to the Layers panel, lower the Fill of this vector path to 0% then open the Layer Style window and enter the properties shown in the following image.
Step 9
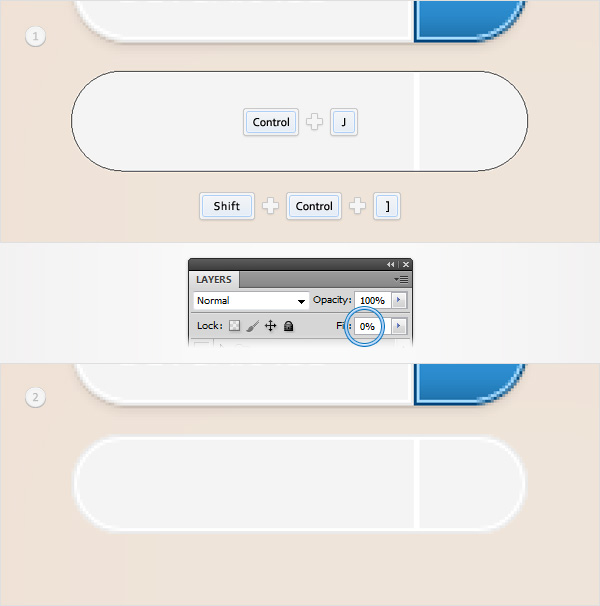
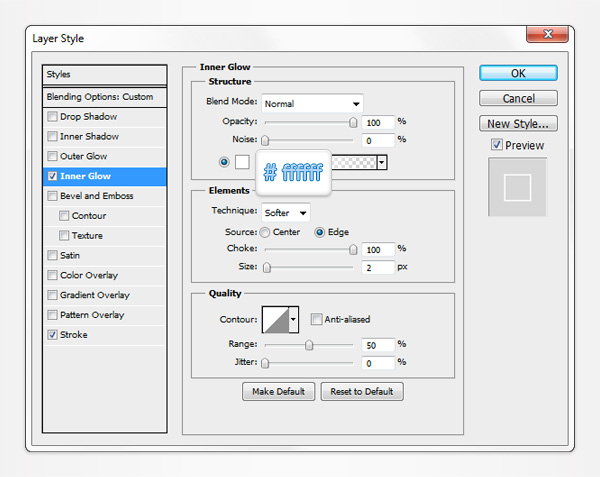
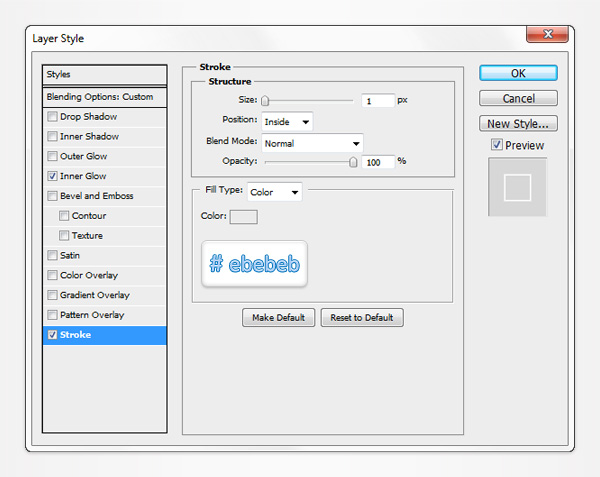
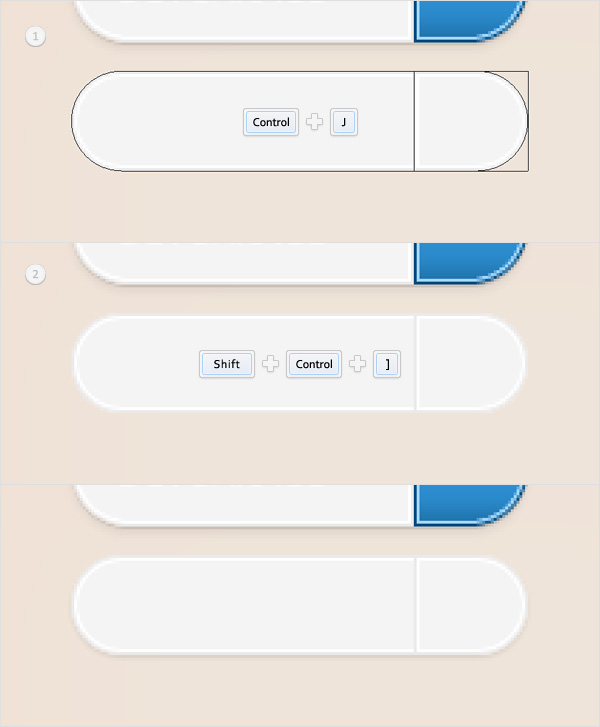
Reselect the rounded rectangle made in the beginning of the previous step and duplicate it (Control + J). Select this copy, bring it to front (Shift + Control + ] ), lower its Fill to 0% then open the Layer Style window and enter the properties shown in the following images.
Step 10
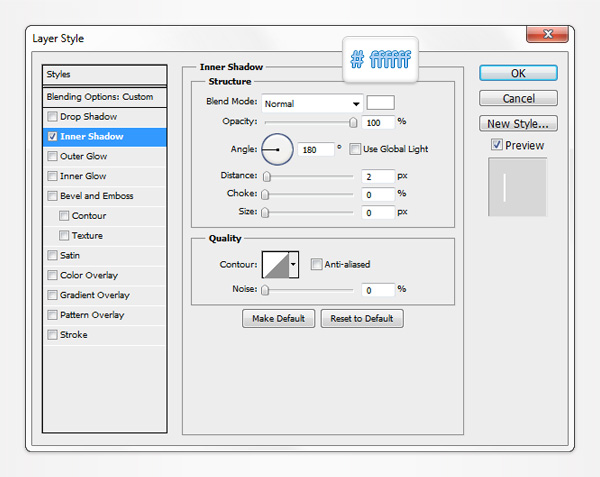
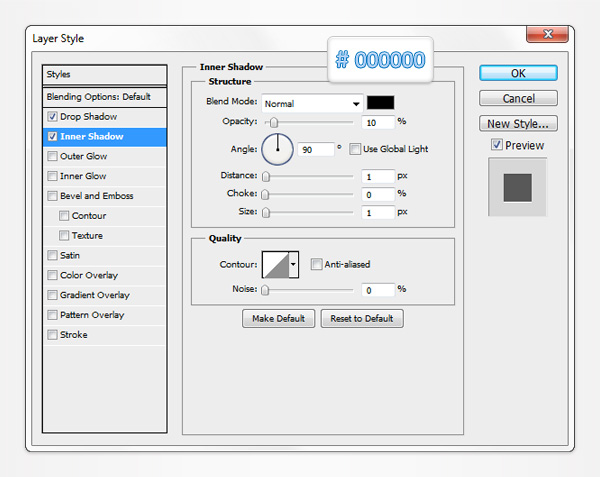
Reselect the second vector path made in the eighth step and duplicate it (Control + J). Select this copy, bring it to front (Shift + Control + ] ) then open the Layer Style window and edit the properties used for the Inner Shadow as shown in the following image.
Step 11
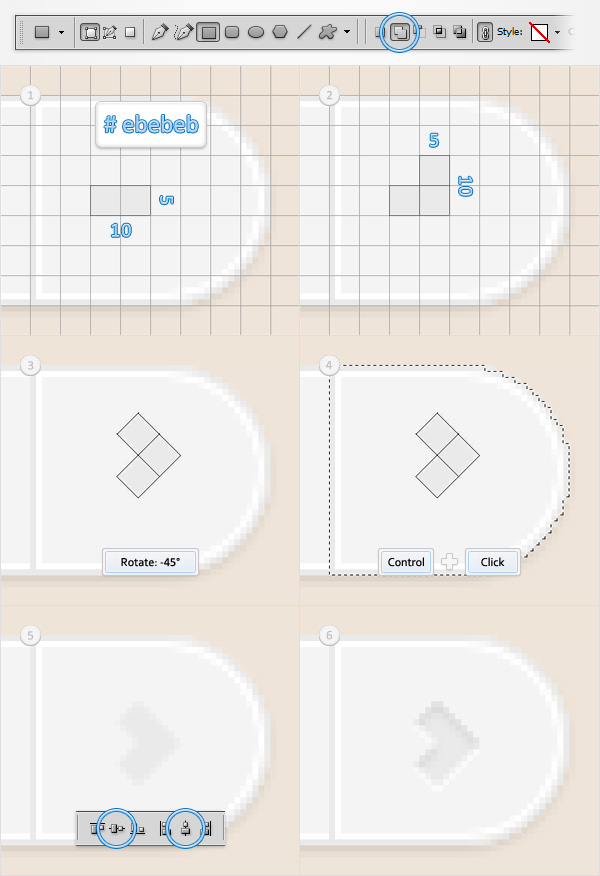
Focus on the right side of the shapes created in the last steps. Set the foreground color at #ebebeb, grab the Rectangle Tool, create a 10 by 5px vector path and place it as shown in the first image. Select this little rectangle and continue with the Rectangle Tool. Check the "Add" button from the top bar and draw a 5 by 10px vector path as shown in the second image. Make sure that this new vector path is still selected and hit Control + T. Rotate it -45 degrees then hit Enter.
Move to the Layers panel, hold Control and click on the vector path made in the previous step. This should load a simple selection around it. Keep it active, grab the Selection Tool, focus on the Layers panel and make sure that yout arrow vector path is still selected.
Move to the top bar and simply click on the "Align vertical centers" and "Align horizontal centers" buttons to center your arrow shown in the fifth image. Open the Layer Style window for this path and enter the properties shown in the following images.
Step 12
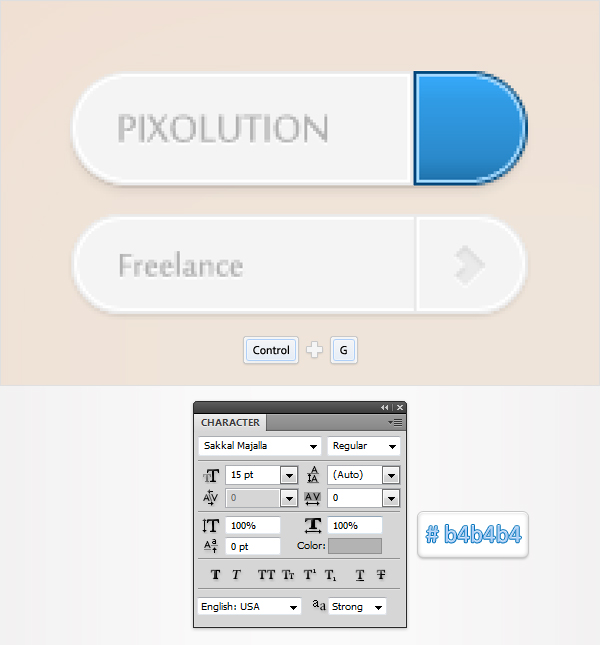
Grab the Type Tool and add a simple, new text as shown in the following image. Set its color at #b4b4b4 then open the Layer Style window and add the discrete Drop Shadow shown in the following image. Select this new piece of text along with all the stuff made in the last four steps and group them (Control + G).
Step 13
Make four copies for the group created in the previous step. Place these new groups as shown in the following image and change the content of the text.
Step 14
Focus on the "Tutorials" sub-menu, open the Layer Style window for the arrow shape and enter the properties shown in the following images.

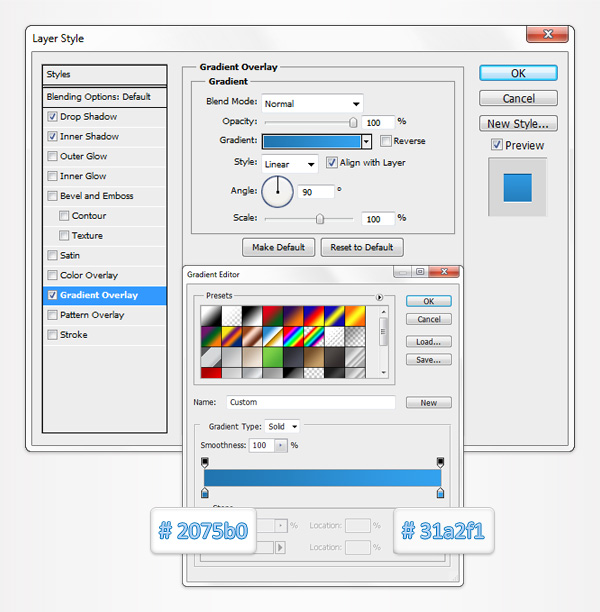
Step 15
Select the "Tutorials" piece of text and change its color to #2c95dd. Also, select the grey rounded rectangle behind the text, open the Layer Style window, activate the Gradient Overlay and enter the properties shown in the following image.

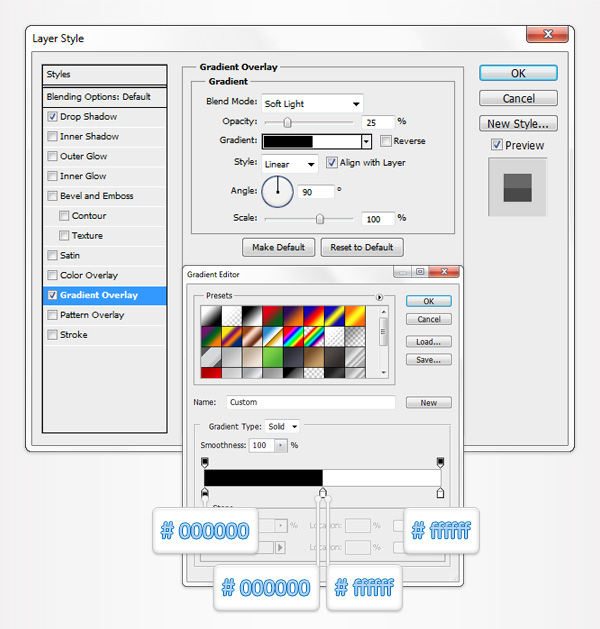
Step 16
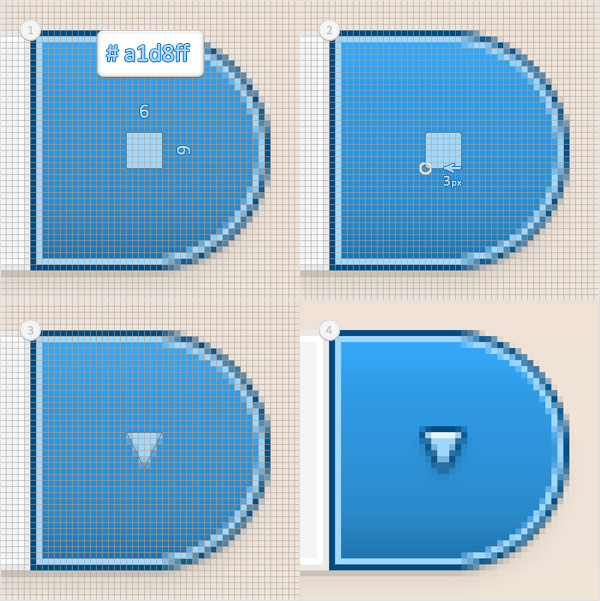
For the final steps you will need a grid every 1px. So, go to Edit > Preferences > Guides, Grid & Slices and enter 1 in the Gridline Every box. Set the foreground color at #a1d8ff, grab the Rectangle Tool, create a 6px square and place it as shown in the first image. Pick the Direct Selection Tool and focus on the bottom side of this new vector path. Select the right anchor point and move it 3px to the left. Switch to the Delete Anchor Point Tool and simply click on the remaining, bottom anchor point to remove it. In the end your square should turn into a triangle.
Open the the Layer Style window for this shape and enter the properties shown in the following images.

Step 17
Finally, duplicate the vector path made in the previous step (Control + J). Select this copy, drag it inside the group made in the fifth step and place it as shown in the following image.
Final Image
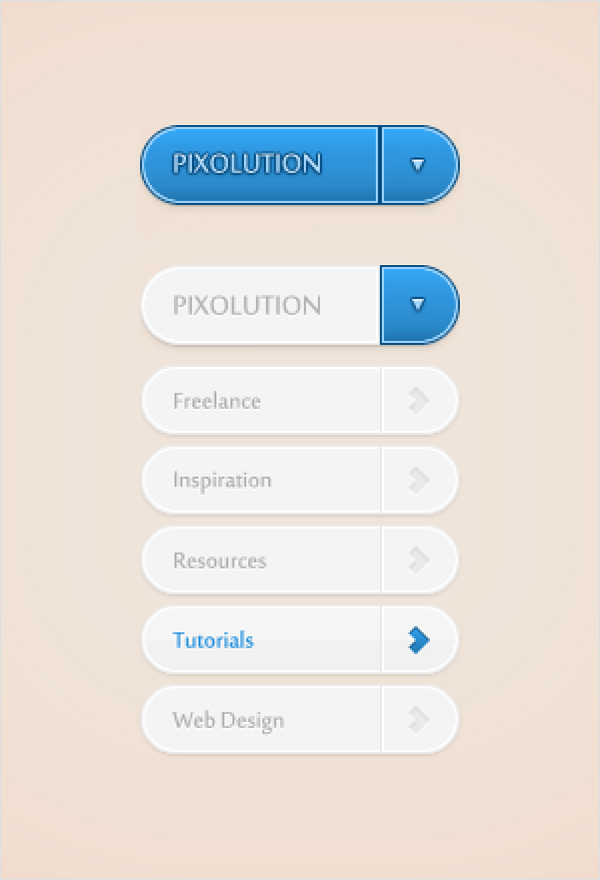
Here is how your final result should look.


