Learn how to create a super creative collage effect, using a range of photo manipulation, blending and compositional techniques in this Adobe Photoshop tutorial.
You’ll learn how to correctly extract your images, layer up various effects to create a sense of depth and detail, and create a cool sketchy hand-drawn effect for your photos.
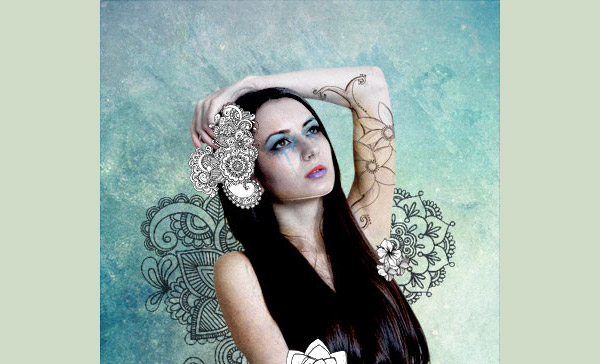
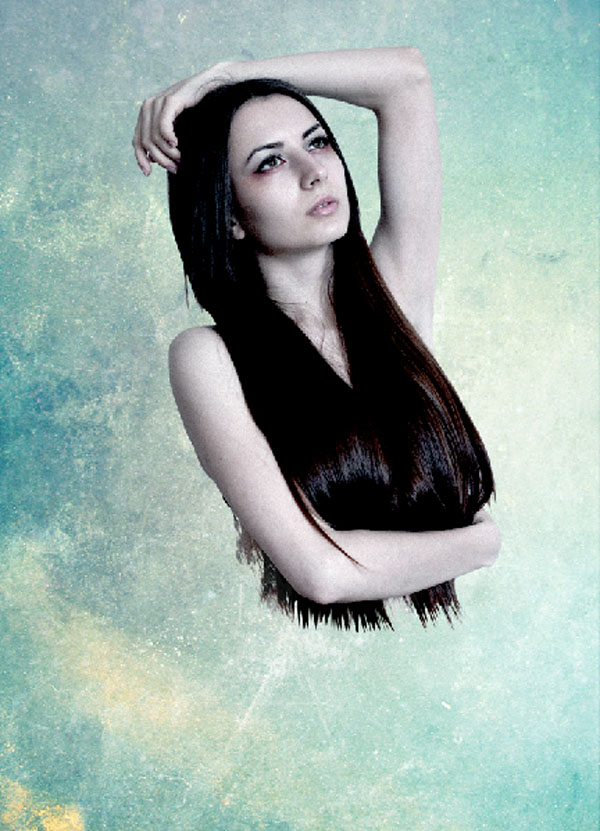
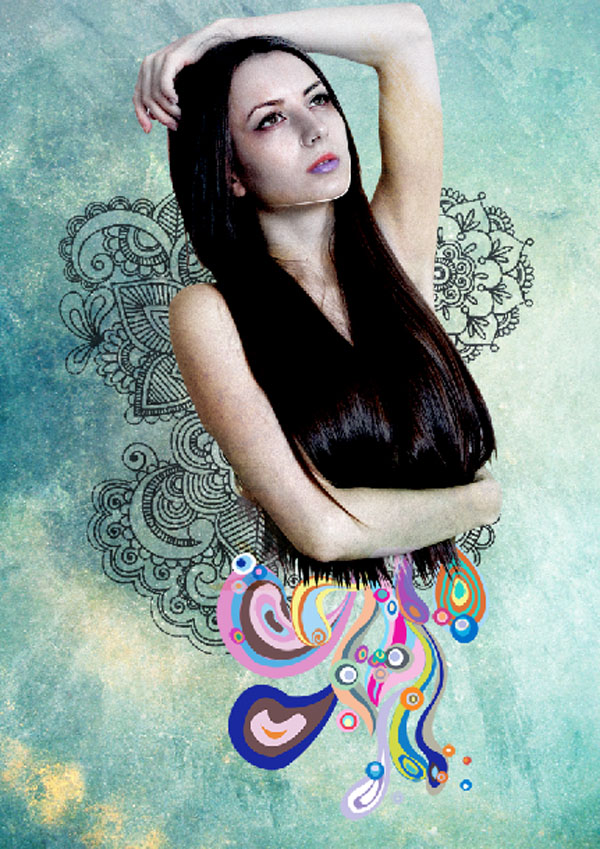
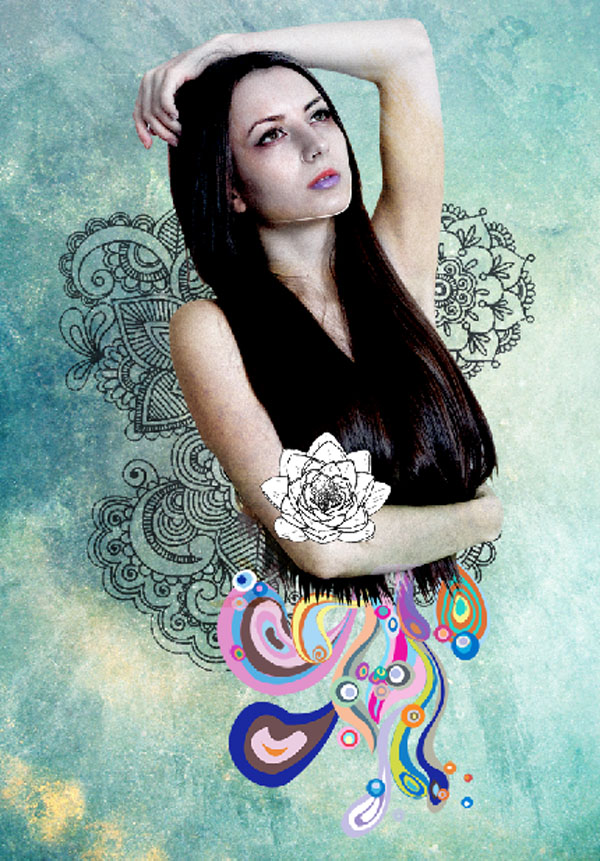
Final Image

Resources
Step 1
Create a new file with a width of 650px and a height of 1040 px at 72 dpi (Dots per Inch). Background Contents should be White.

Step 2
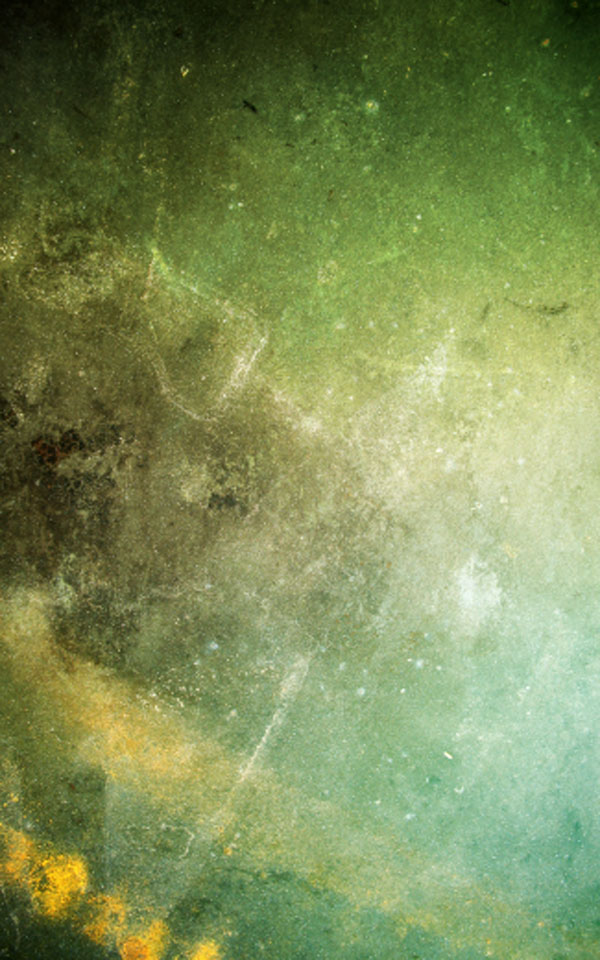
To start off we’ll use various textures to create a subtle distressed background. First, add a group folder called “Texture”, then open “1.jpg” from these colored grunge textures . Place this within the folder, then hit Command/Ctrl + T and resize to cover the canvas. Name the layer “Texture 1”.

The result should be similar to this:
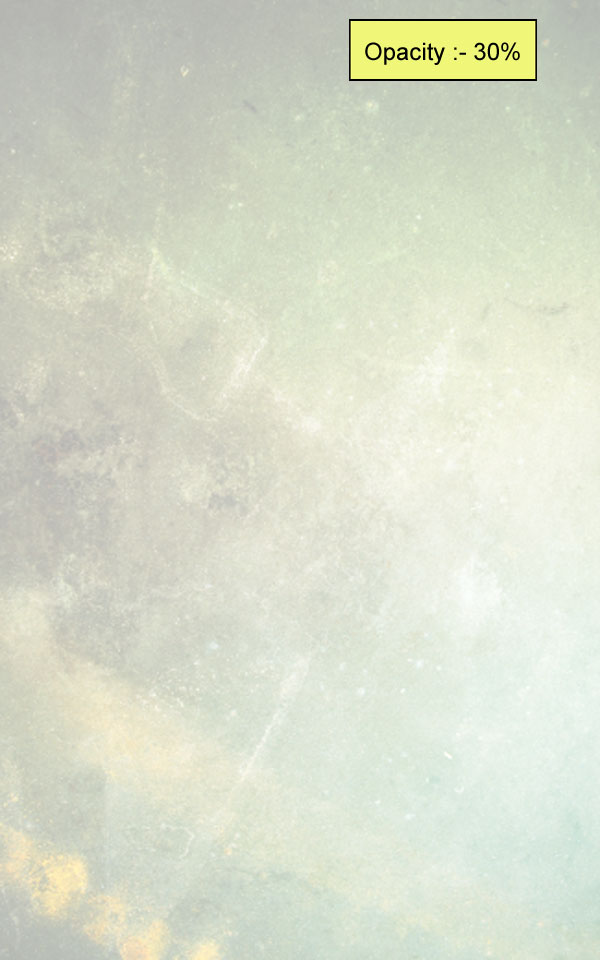
Reduce opacity to “30%”
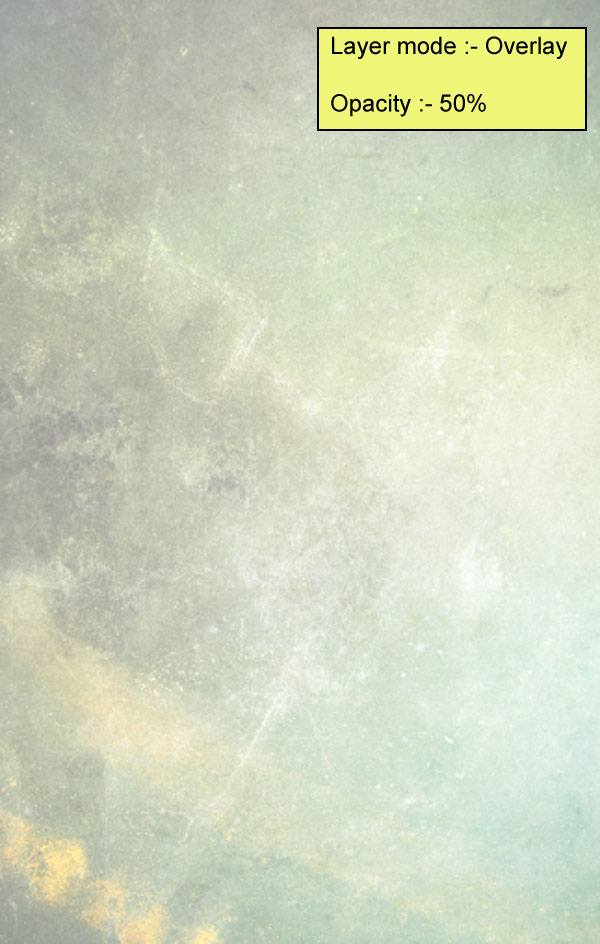
Now add “8.jpg” as a new layer within the same folder, then hit Command/Ctrl + T and resize to cover the canvas and name it “Texture 2”.
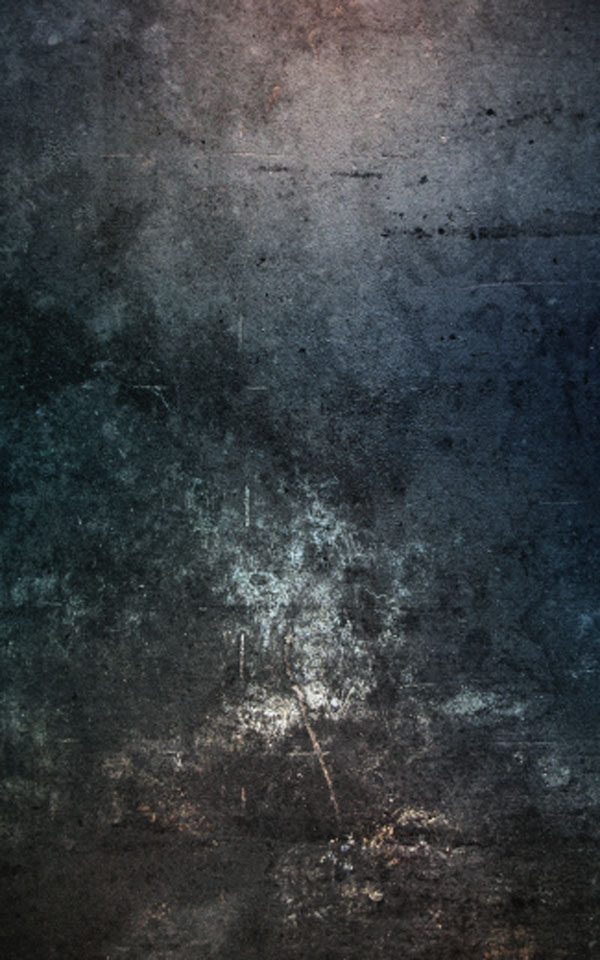
Change the Blend Mode to Overlay and lower its Opacity to 50%.
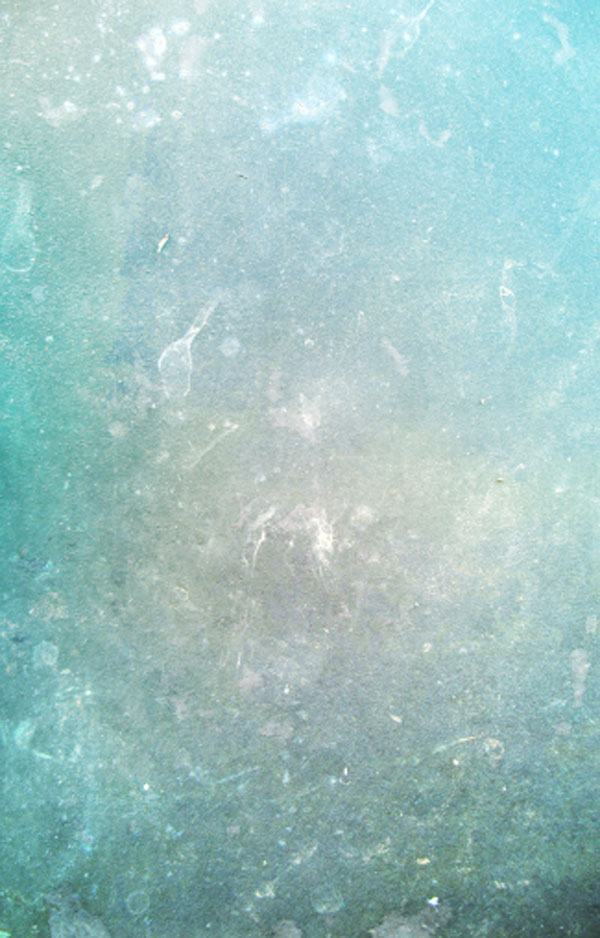
Place “2.jpg” from the “source” folder as a new layer within the same folder. Resize and label it “Texture 3”.
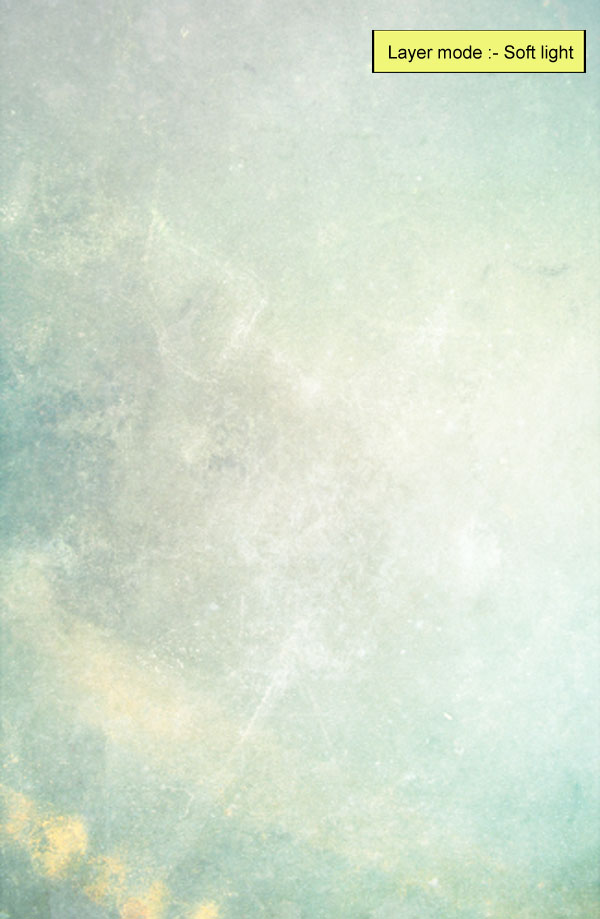
Step 3
Change the layer mode to “soft light” and reduce opacity to “45%”:
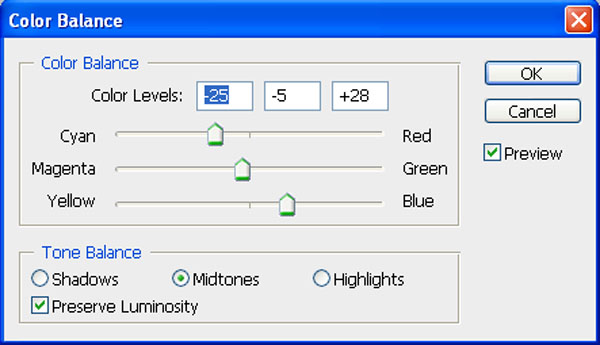
Now Create a new Color balance adjustment layer from the bottom of the layers palette .
When the Color balance box opens, input the following:
Now create a new Levels adjustment layer from the bottom of the layers palette .
When the Levels box opens, input the following: :

The result should be similar to this:

First off, let’s open the girl stock Red 3-Mihaela-VStock in Photoshop. We will be using the girl from this stock image so we will need to transfer it to our main canvas.
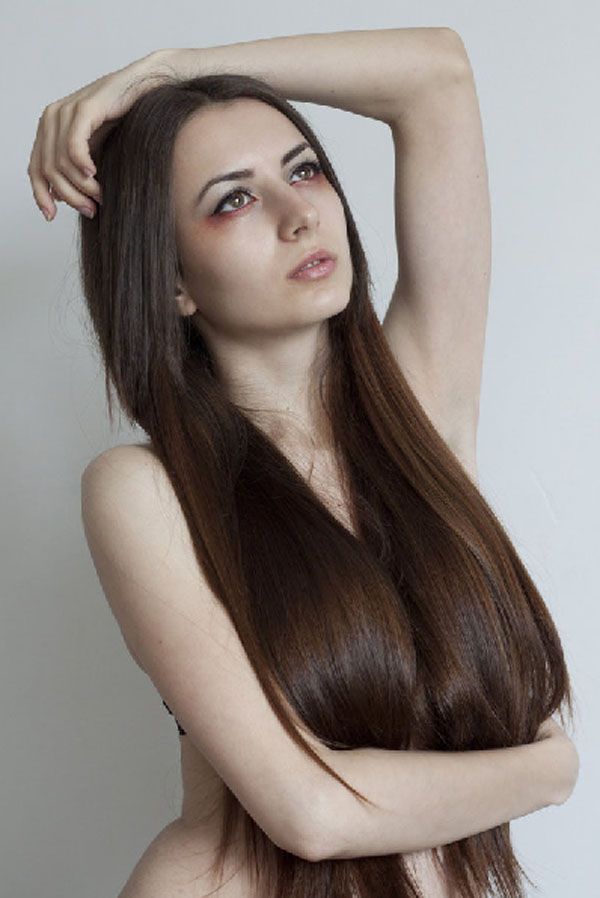
press p to activate pen tool and then make a selection around the girl and then click V to activate the Move Tool. Left-click the image and drag the image to the main canvas
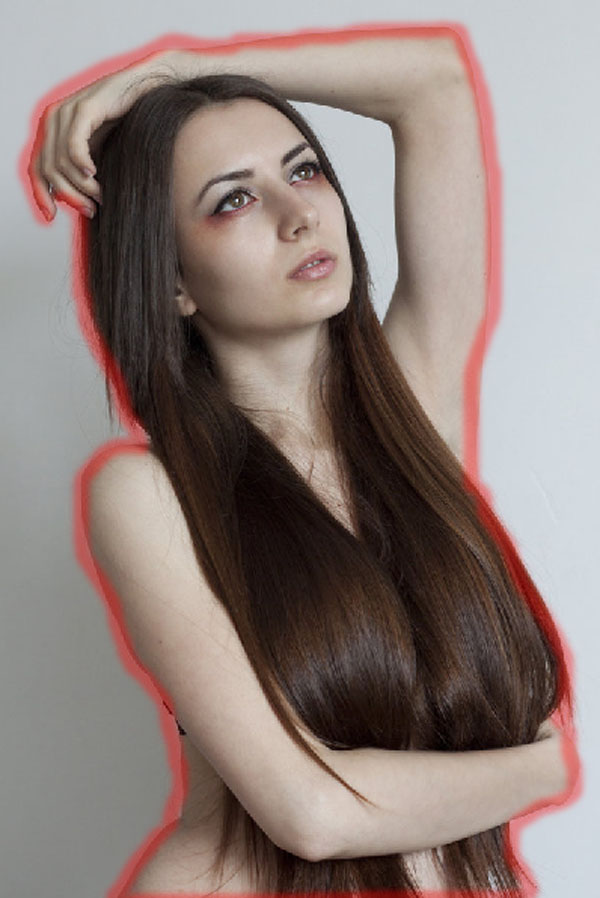
The result should be similar to this: .

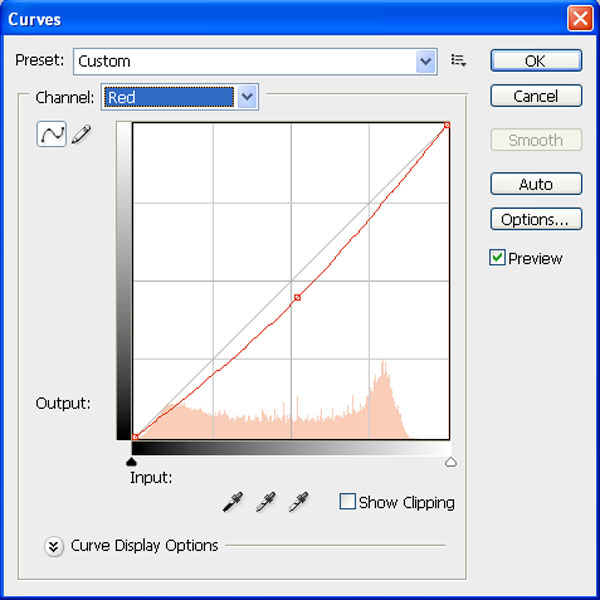
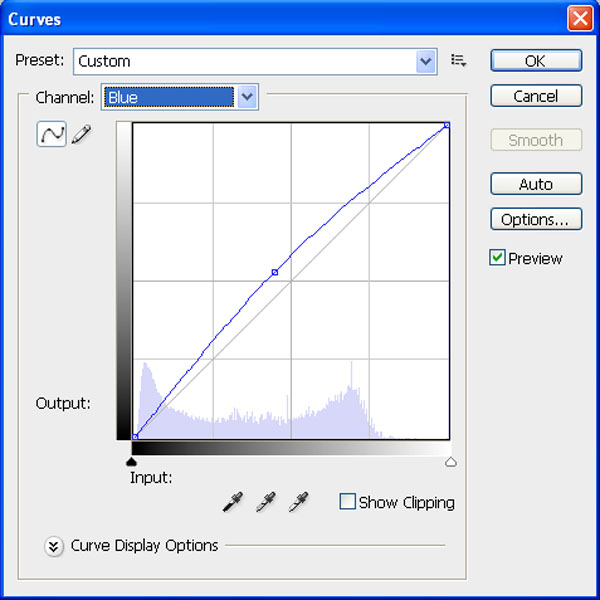
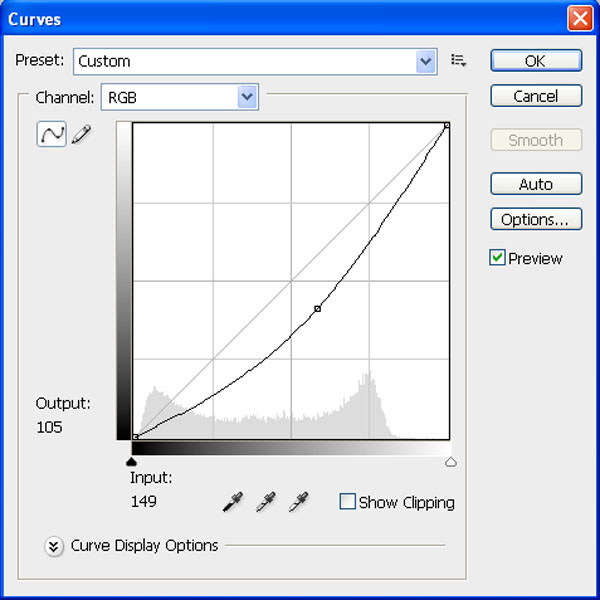
Now create a new Curves adjustment layer from the bottom of the layers palette. Press Alt+left click in between 2 layer’s (girl layer and Curves) to make a mask.
When the Curves box opens, input the following:
Now create a new Curves adjustment layer from the bottom of the layers palette. Press Alt+left click in between 2 layer’s (sky layer and Curves) to make a mask.
When the Curves box opens, input the following:
Step 4
Press Alt+left click in between 2 layer’s (Girl layer and Curves) to make a mask.
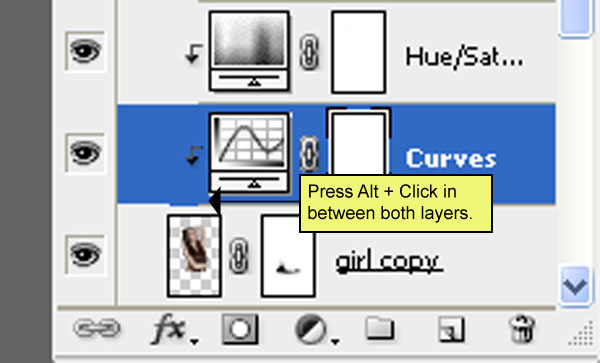
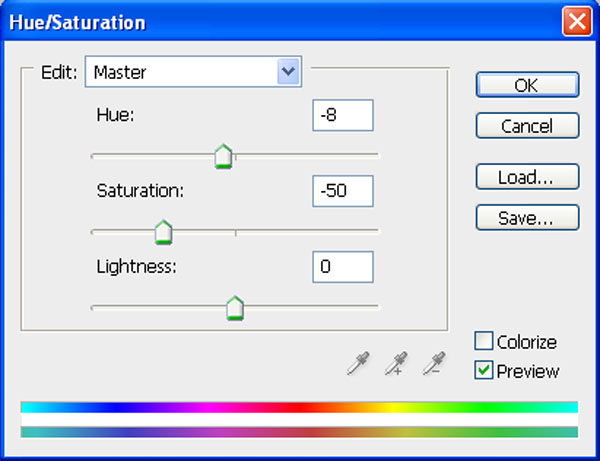
Now create a new Hue/Saturation adjustment layer from the bottom of the layers palette. Press Alt+left click in between 2 layer’s (girl layer and Hue/Saturation) to make a mask.
When the Hue/Saturation box opens, input the following:
Now create a new Curves adjustment layer from the bottom of the layers palette. Press Alt+left click in between 2 layer’s (girl layer and Curves) to make a mask.
When the Curves box opens, input the following:
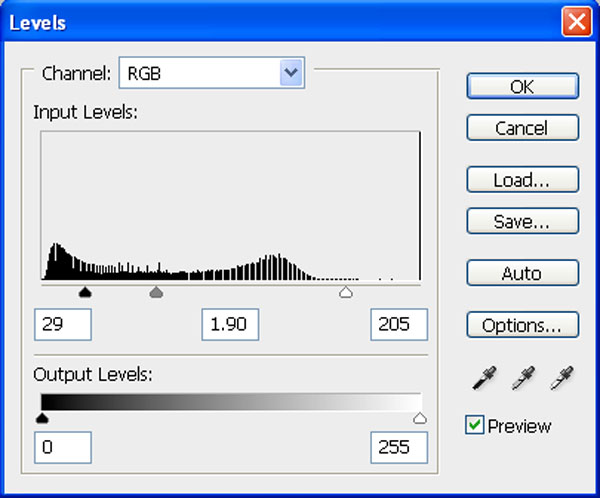
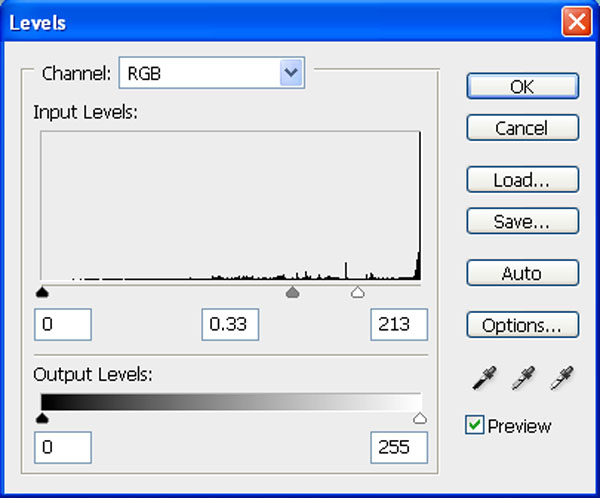
Now create a new Levels adjustment layer from the bottom of the layers palette. Press Alt+left click in between 2 layer’s (girl and Levels) to make a mask.
When the Levels box opens, input the following: :
The result should be similar to this:
s
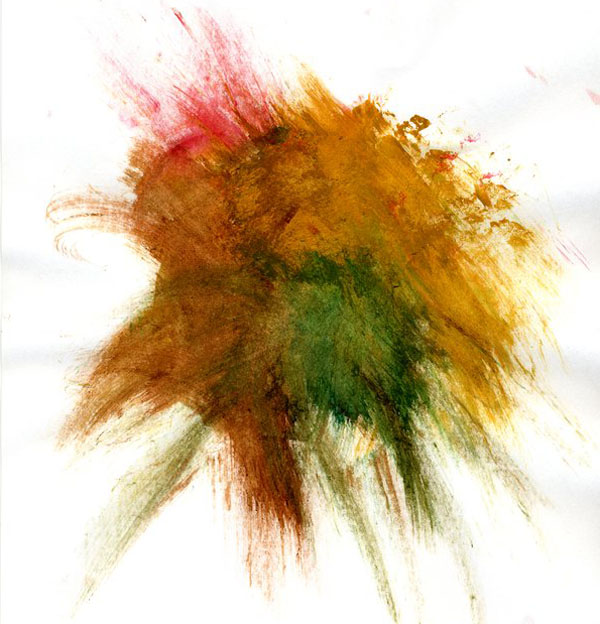
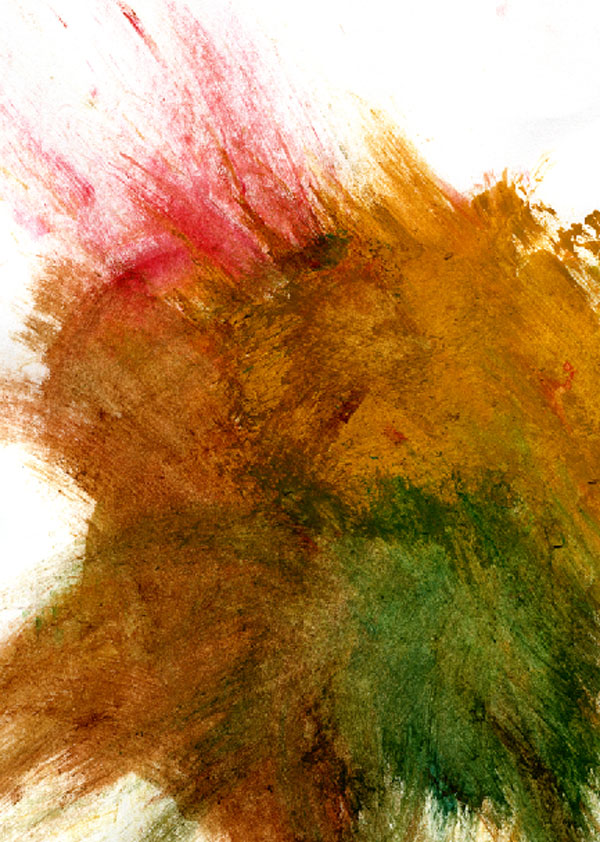
Now,let’s open the WaterColor2 in Photoshop. We will be using the texture from this stock image so we will need to transfer it to our main canvas.
The result should be similar to this:
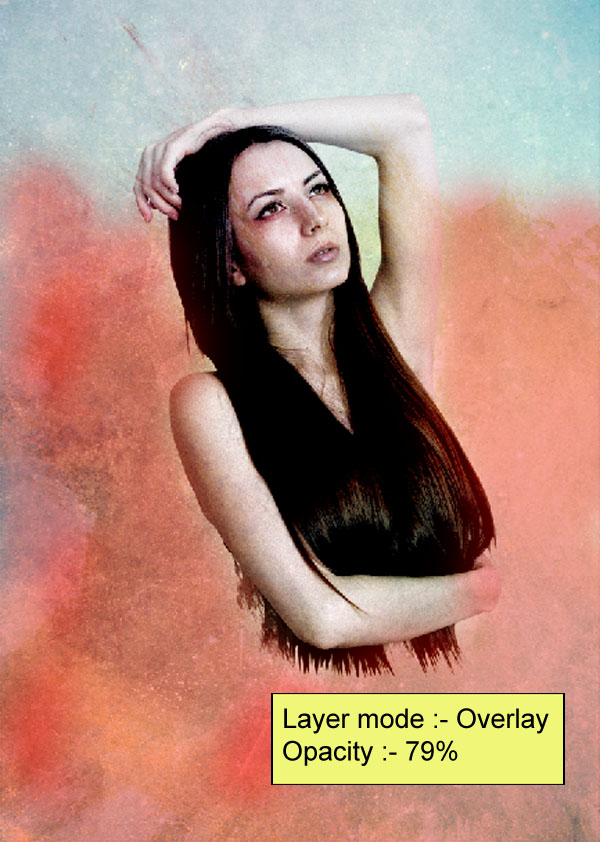
Step 5
Change the layer mode to overlay and reduce opecity to 79%.
Now add vector mask from the bottom of the layers palette .
Now activate the Brush tool (B) with these settings :
Brush size: 400px
Hardness: 0%
Opacity: 40%
Flow: 100%
Color: #000000
Now paint over the highlighted area.
The result should be similar to this:.
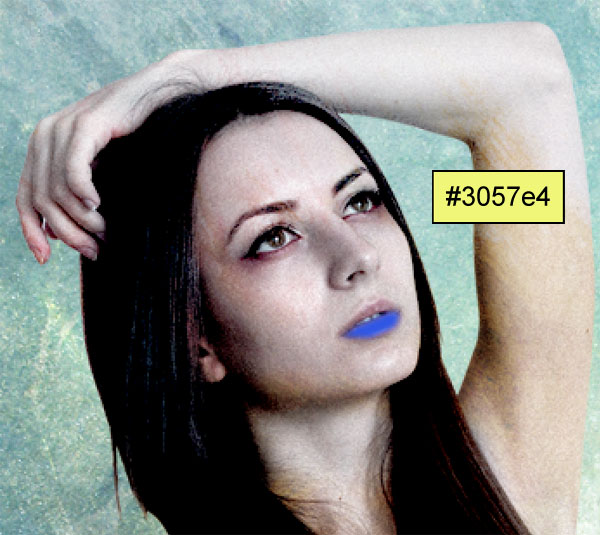
Now activate the Brush tool (B) with these settings :
Brush size: 400px
Hardness: 0%
Opacity: 40%
Flow: 100%
Color: #3057e4
Now paint over the highlighted area.:
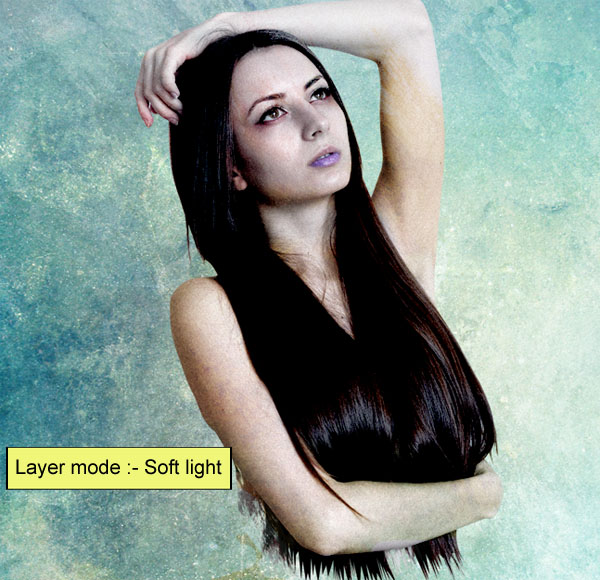
Now, change the layer mode to soft light
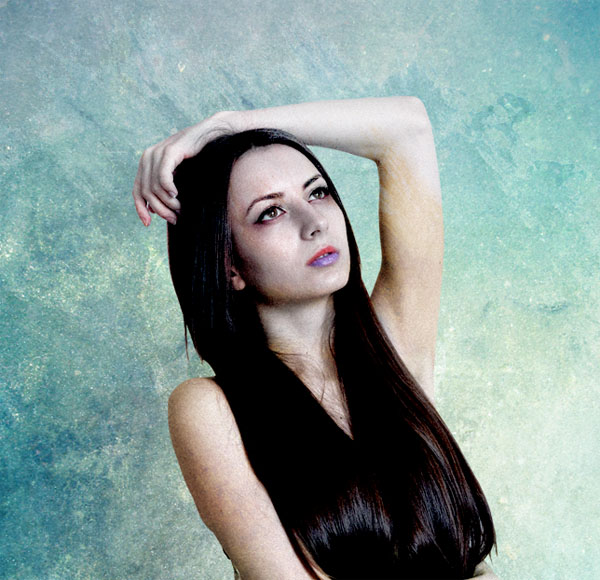
Repeat the same process using #dc2d30 as foreground color :
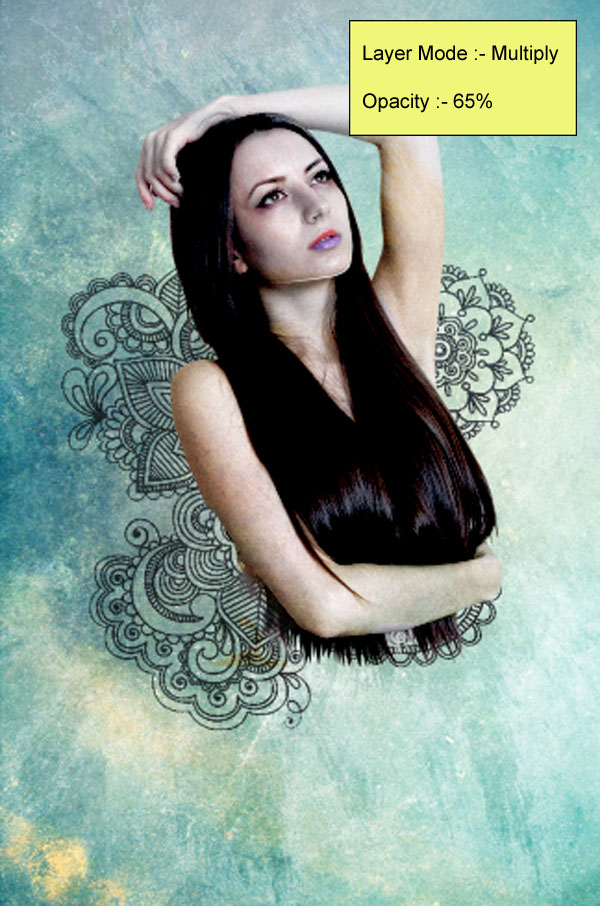
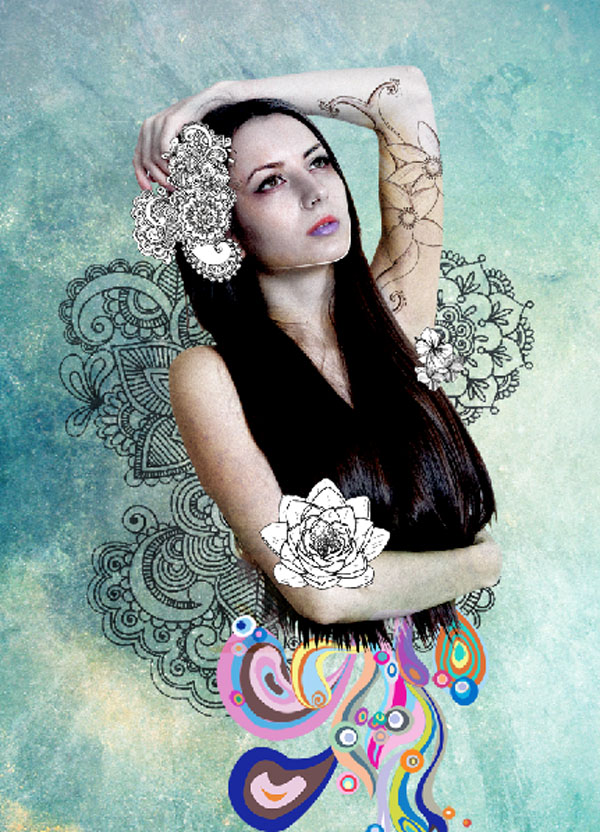
Now, let’s open the Drawing Flower Pattern in Photoshop. We will be using the vectors from this stock image so we will need to transfer it to our main canvas.
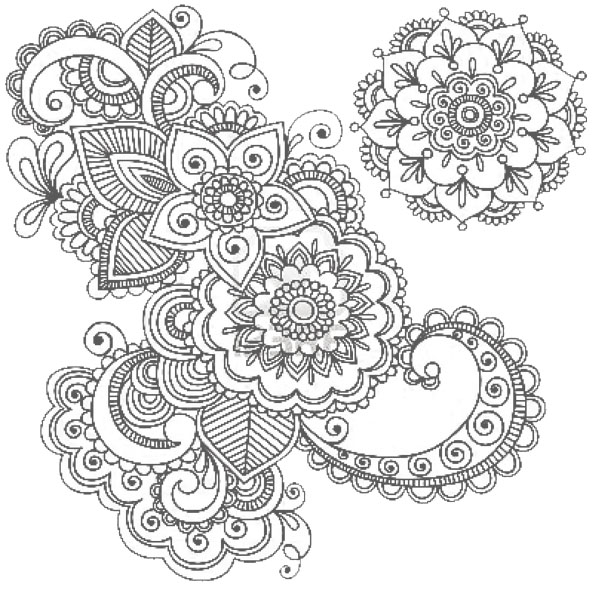
change the layer mode to multiply and reduce opacity to 65%.
Step 6
Now,let’s make a new layer and name it “Shape 1” activate Pen tool and draw a shape. See as below :
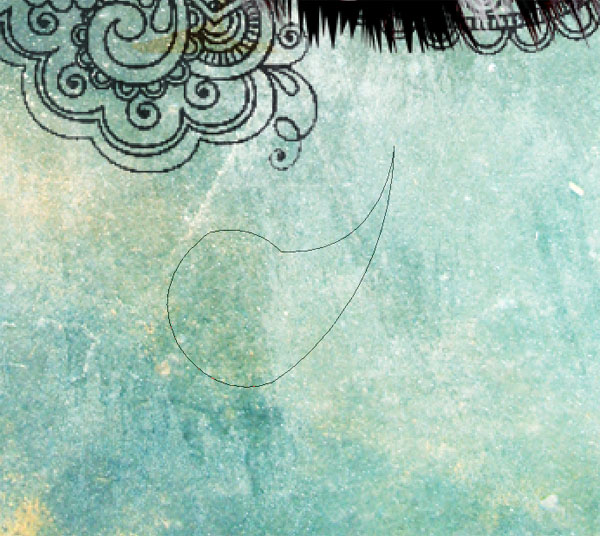
Now fill it with #1a29a0 color .
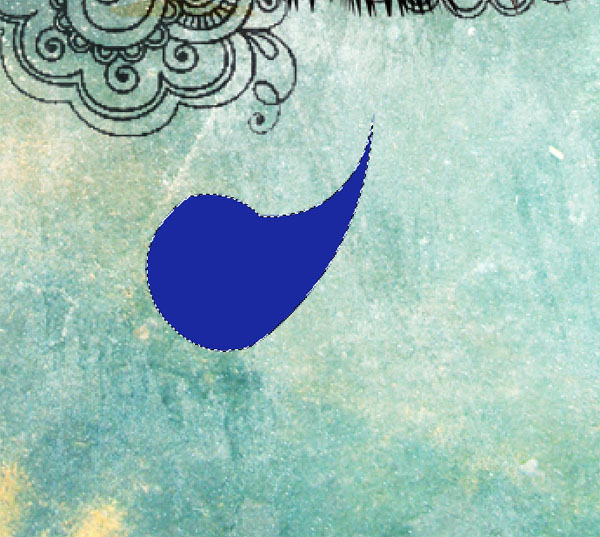
Repeat the same process and add more shapes .

The result should be similar to this:
Now, let’s open the Flower 1 in Photoshop. We will be using the vectors from this stock image so we will need to transfer it to our main canvas and name it “Flower 1”.
The result should be similar to this:
Step 7
Now create a new Levels adjustment layer from the bottom of the layers palette. Press Alt+left click in between 2 layer’s (flower1 and Levels) to make a mask.
When the Levels box opens, input the following:
The result should be similar to this:
Now add more flowers to our canvas.
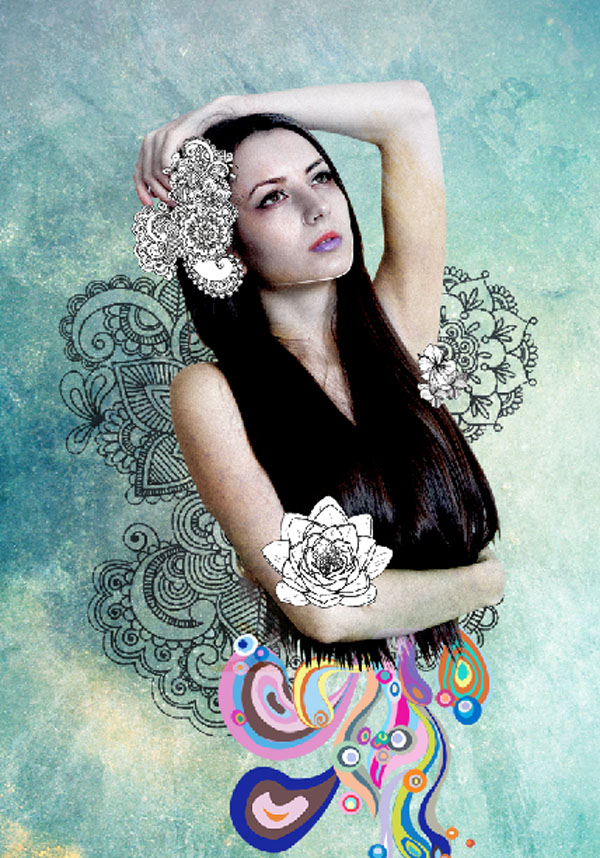
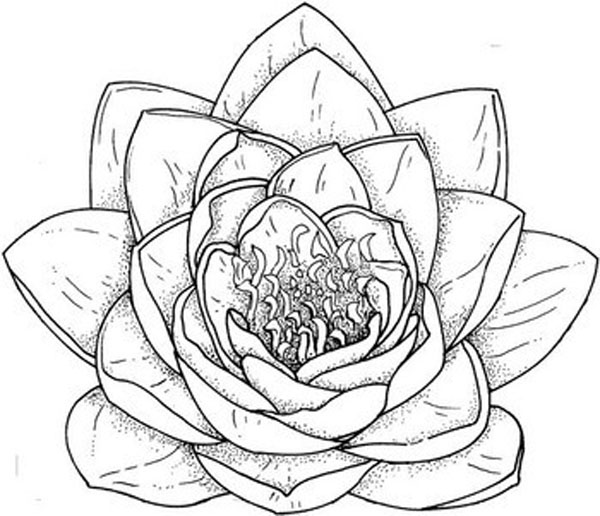
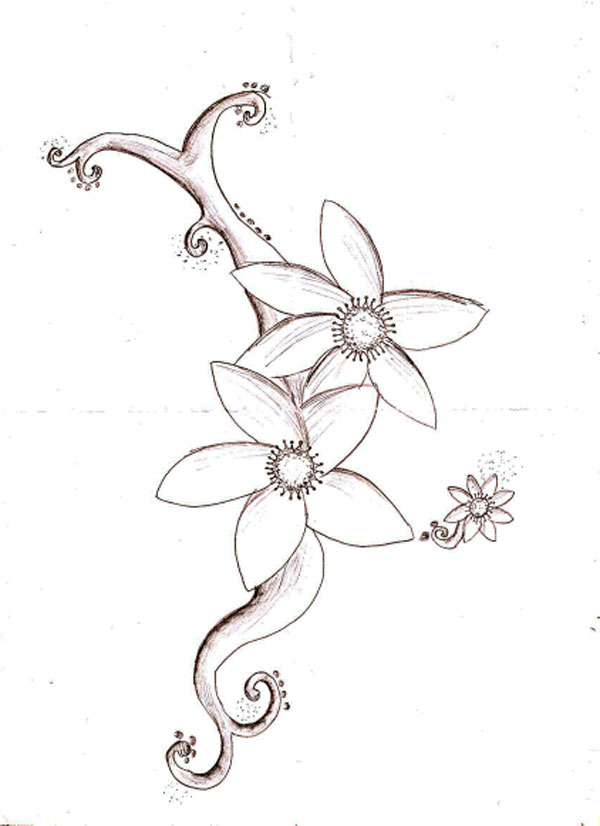
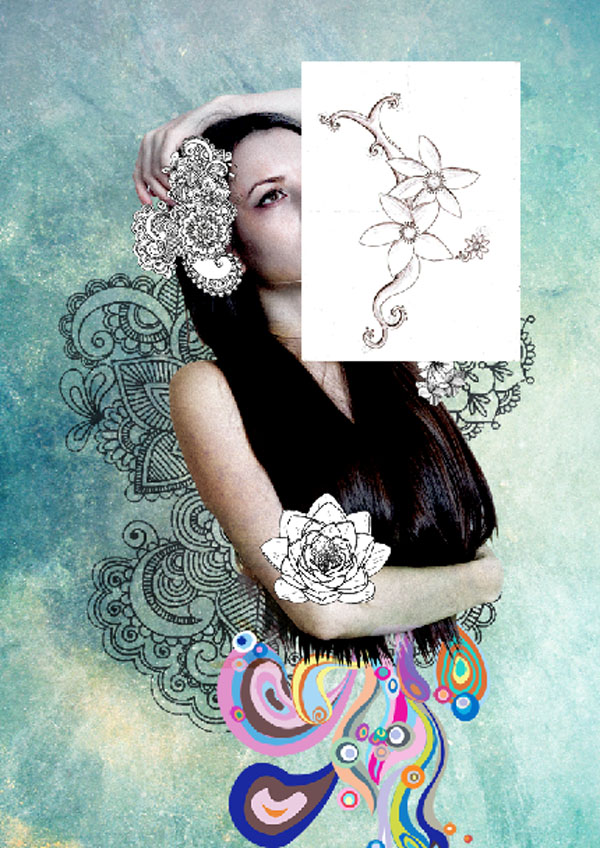
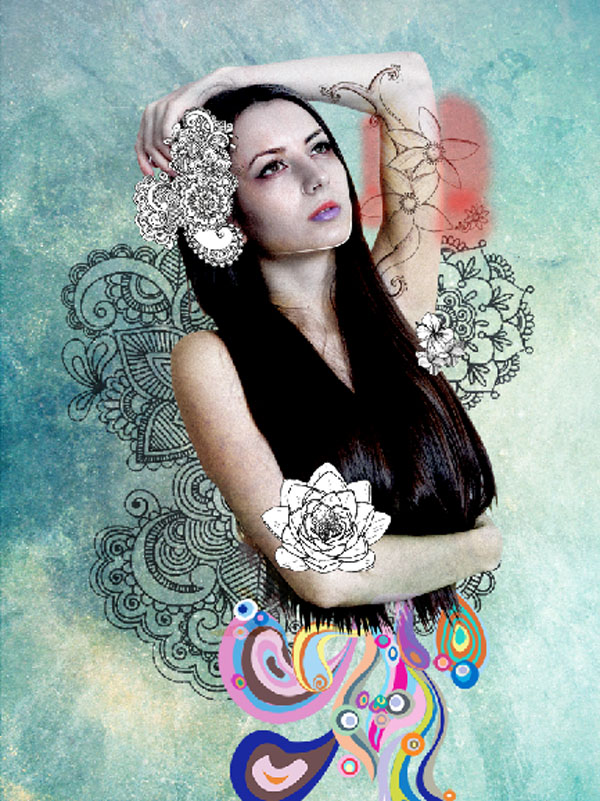
Now, let’s open the Flower 7 in Photoshop. We will be using the vectors from this stock image so we will need to transfer it to our main canvas and name it “Tattoo”.
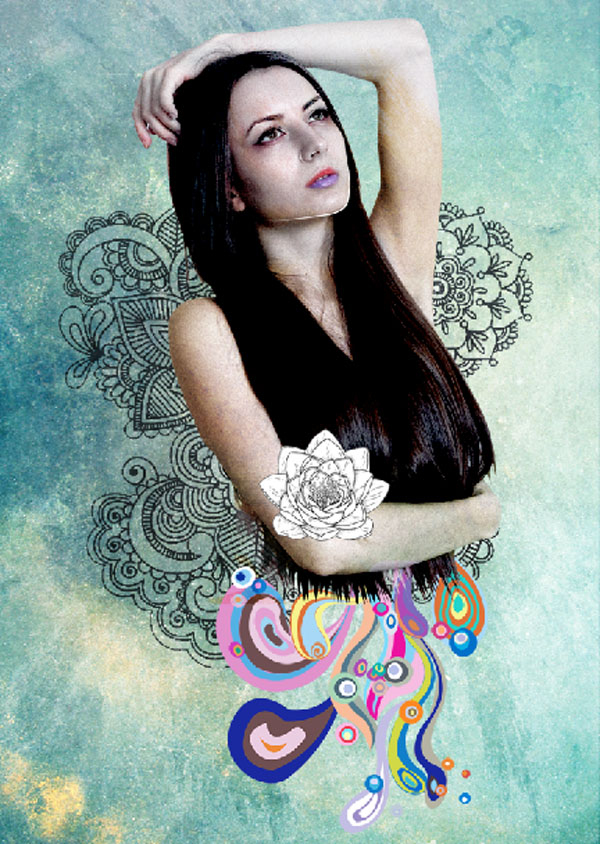
Next, activate the Transform tool (Ctrl/Cmd +T), then while the “Tattoo” layer is selected resize it as shown below:
Step 8
now change the layer mode to multiply
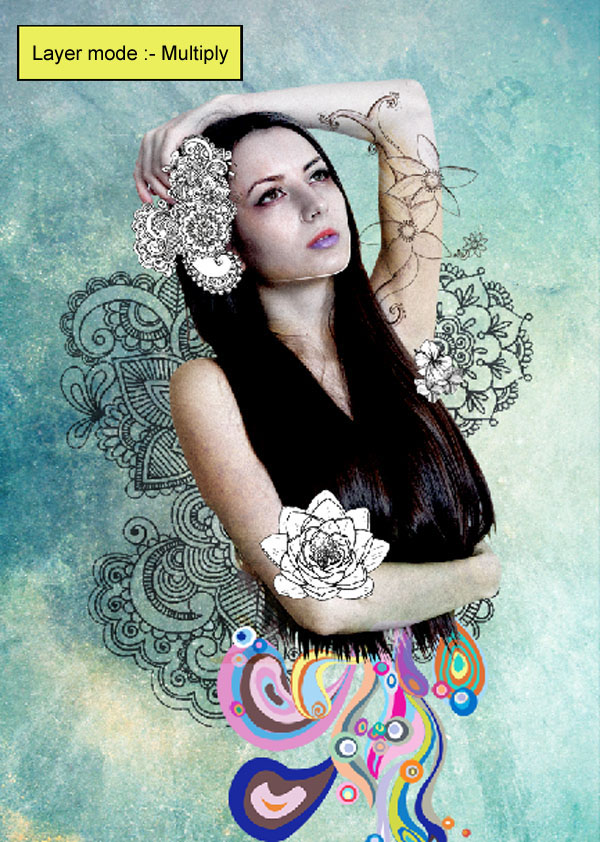
Now add a vector mask from the bottom of layers palette .
Now activate the Brush tool (B) with these settings :
Brush size: 400px
Hardness: 0%
Opacity: 40%
Flow: 100%
Color: #000000
Now paint over the highlighted area.
The result should be similar to this:
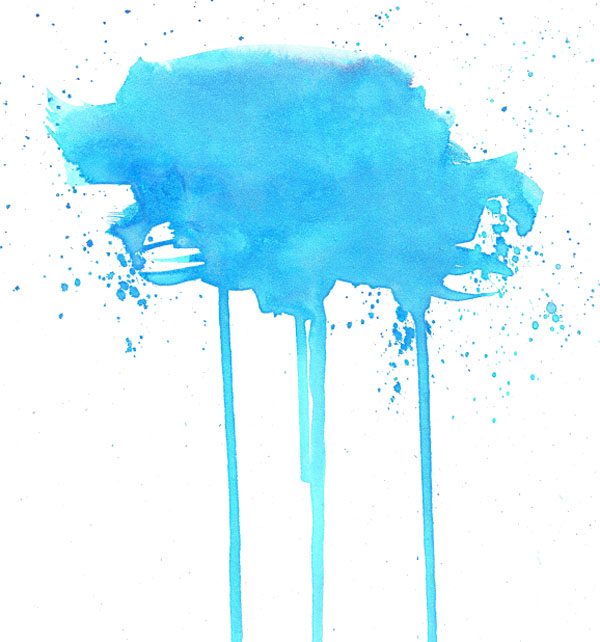
Now, let’s open the Blue blotch in Photoshop. We will be using the texture from this stock image so we will need to transfer it to our main canvas.
Next, activate the Transform tool (Ctrl/Cmd +T), then while the “Snail” layer is selected resize it as shown below:

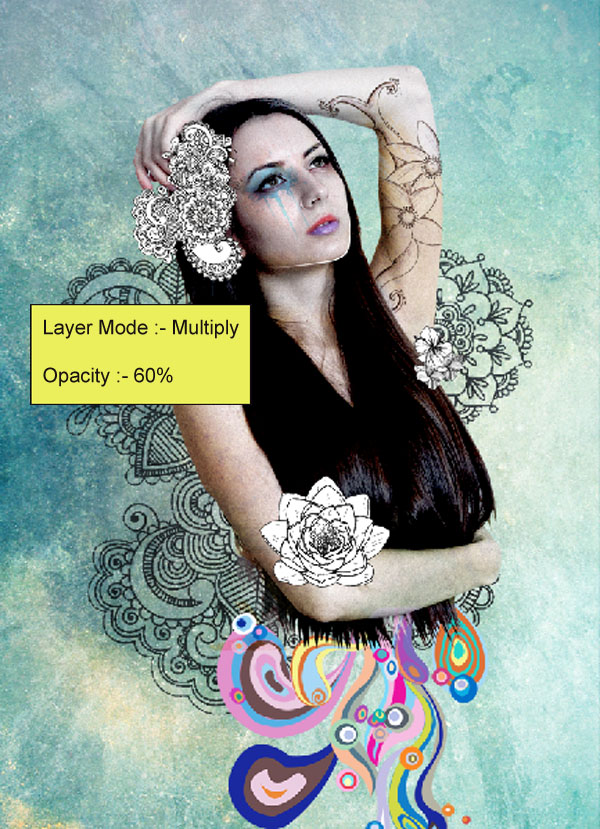
now change the layer mode to multiply and reduce opacity to 60%
Repeat the same process and add the same effect to the second eye .
And We’re Done!