This is simply but very useful tutorial about how to create text effect like using cabs.
Alright, you can start by first creating a new document, as usual; I used a document size of 1000×500 pixels. Then fill it with linear gradient using colors of #ffc255 and #d26845.

Ok, now apply Filter > Artistic > Sponge to this layer:

Now we have a texture like this:
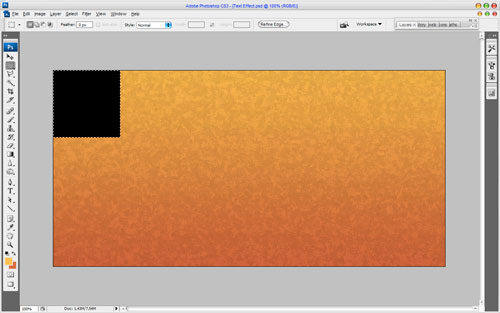
Ok, the next step what we need to do is to add taxi pattern to our canvas. Start with creating a new layer, then get out the Rectangular Marque Tool and make a square selection as on picture below and fill it with black color.
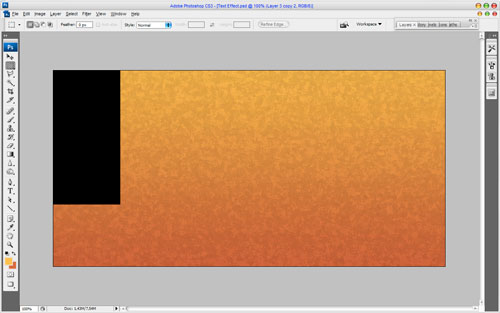
Remove the selection with Ctrl+D, then duplicate layer with Ctrl+J and move it a little bit down:
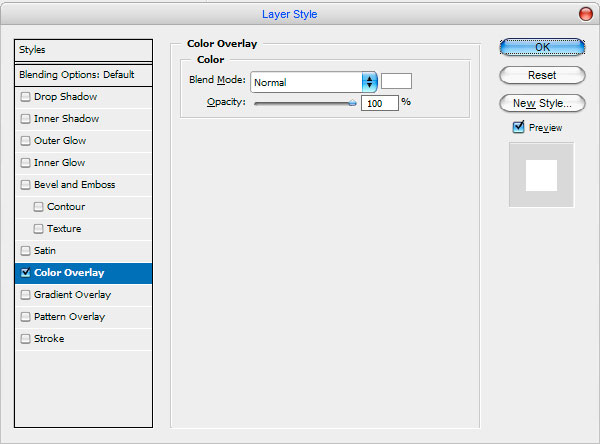
Apply Color Overlay layer style to this layer:
See the result:
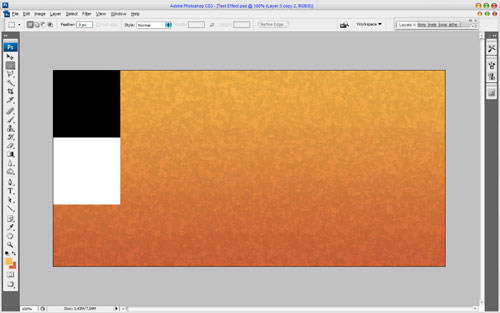
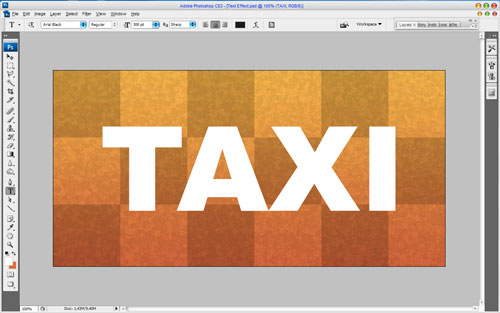
Make the same things a couple of times to get taxi pattern.
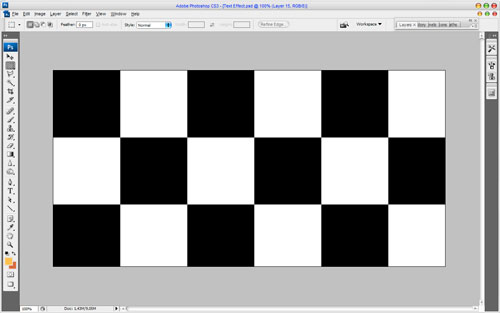
Now mess with the layer mode & opacity/fill. I tried Color Burn with an opacity of 17%.
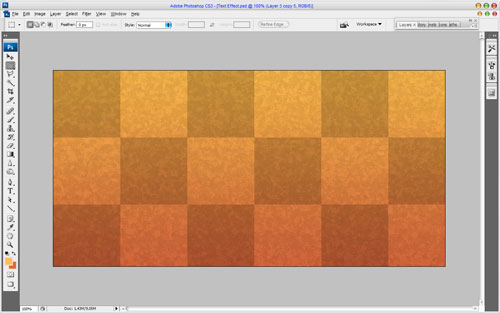
This is the easy part; all you have to do is write out your desired text on the canvas. Get out the Horizontal Type Tool and write out your text, for example ‘TAXI’ in whatever color you want, for example, white.
In the above image I’ve used a font called Arial Black (300 pt, Sharp), which is commercial free. Ok, now let’s start with creating taxi text effect. First of all we need to add some pattern to Photoshop patterns palette to use it for creating text effect later. Create a new document with size of 16×16 pixels and draw a square dots by using Pencil Tool as on picture below.

Now use Edit > Define Pattern to save this picture as pattern.
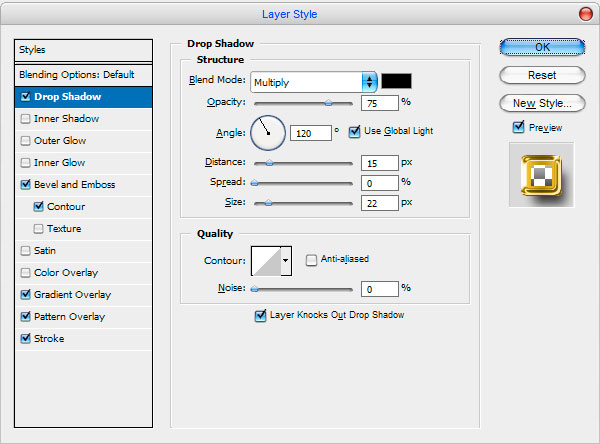
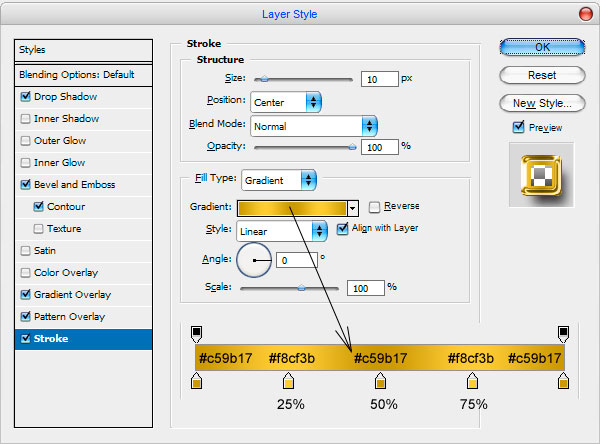
Go back to our main canvas and apply Drop Shadow, Bevel and Emboss, Contour, Gradient Overlay, Pattern Overlay and Stroke layer styles to this text layer:
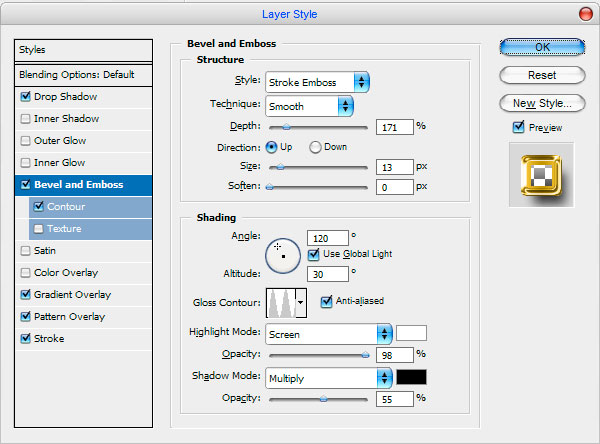
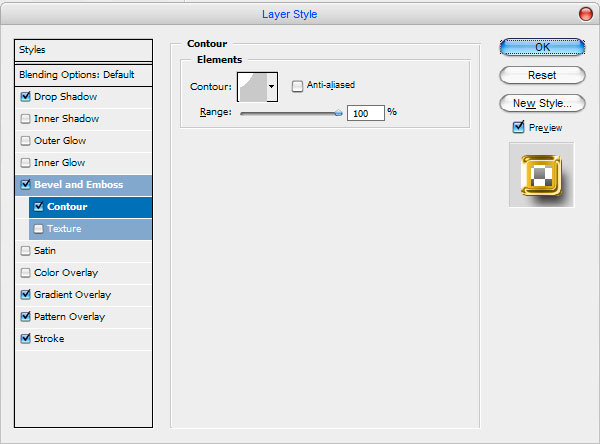
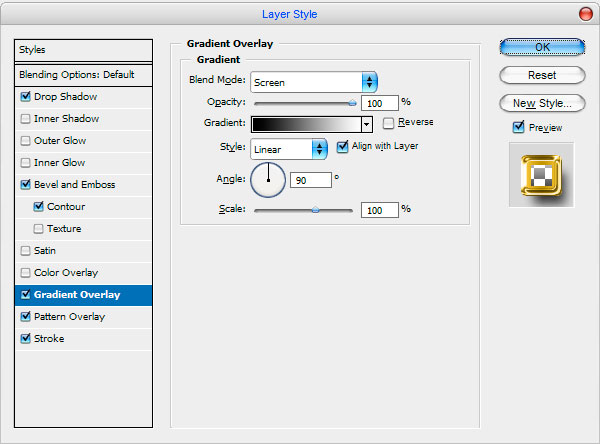
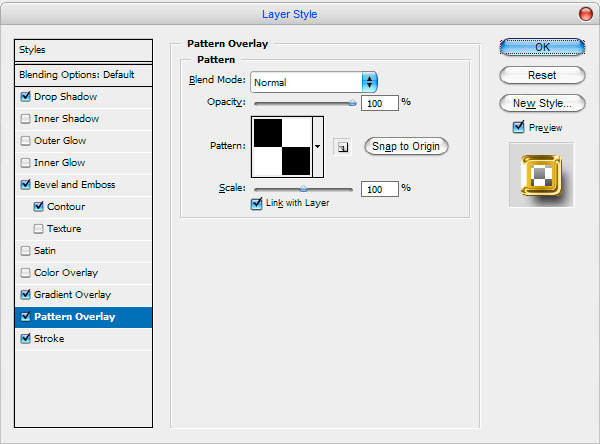
Now we have elegant taxi text effect don’t you think?
That is it for now! Thanks for reading the tutorial, everyone!


