In the following tutorial you will learn how to create a simple price table using Photoshop.
Final Image Preview
As always, this is the final image that we’ll be creating:

Resources
Step 1
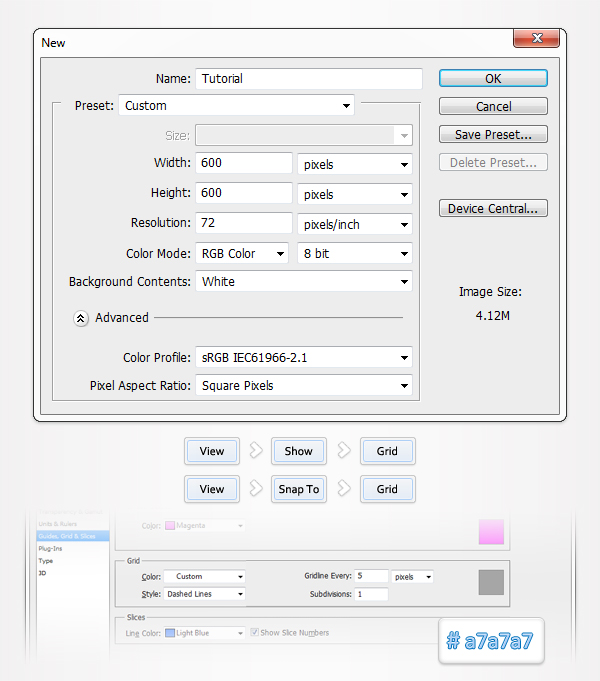
Open Photoshop and hit Control + N to create a new document. Enter all the data shown in the following image and click OK.
Enable the Grid (View > Show > Grid) and the Snap to Grid (View > Snap To > Grid). For the moment you need a grid every 5px. Go to Edit > Preferences > Guides, Grid & Slices and focus on the Grid section. Enter 5 in the Gridline Every box and 1 in the Subdivision box. Also, set the color of the grid to #a7a7a7.
Once you set all these properties click OK. Don’t get discouraged by all that grid. It will ease your work.
You should also open the Info panel (Window > Info) for a live preview of the size and position of your shapes.
Step 2
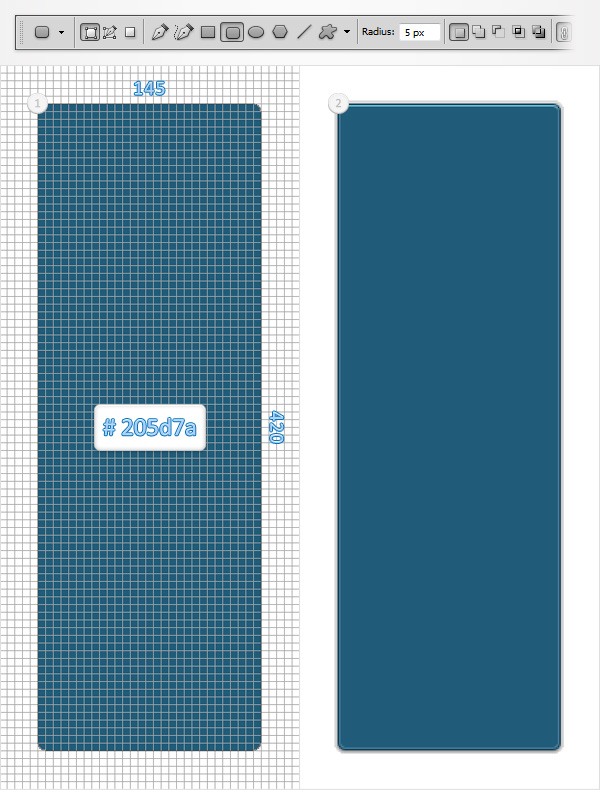
Set the foreground color to #205d7a, grab the Rounded Rectangle Tool, set the radius to 5px and draw a 145 by 420px vector shape.
Move to the Layers panel and double click on this rounded rectangle to open the Layer Style window.
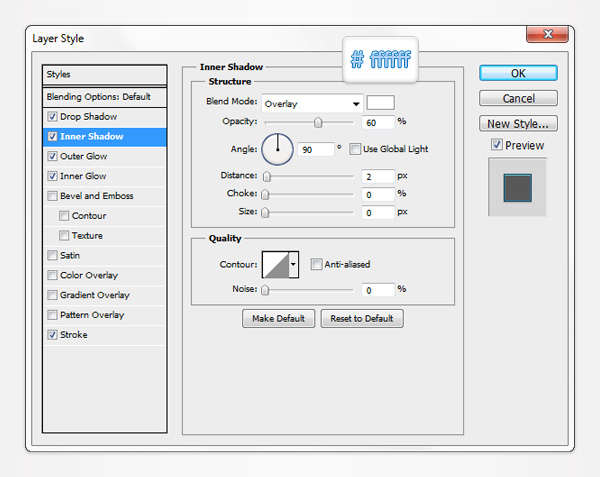
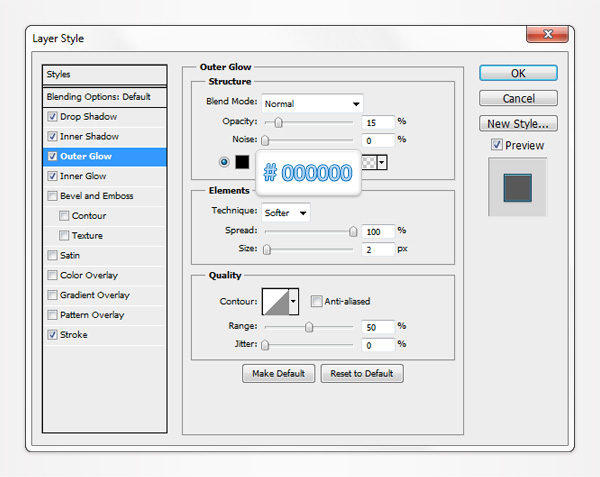
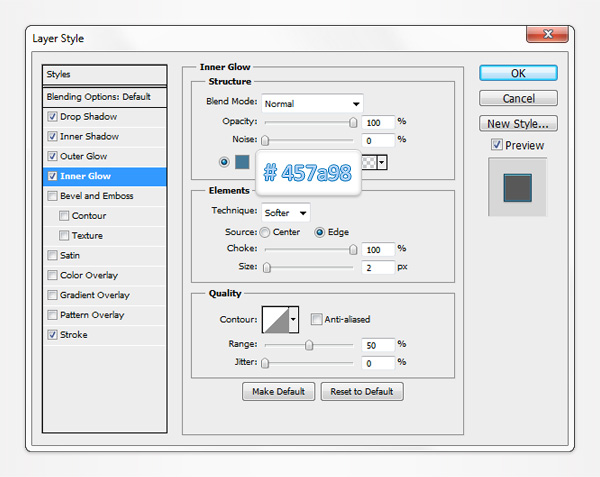
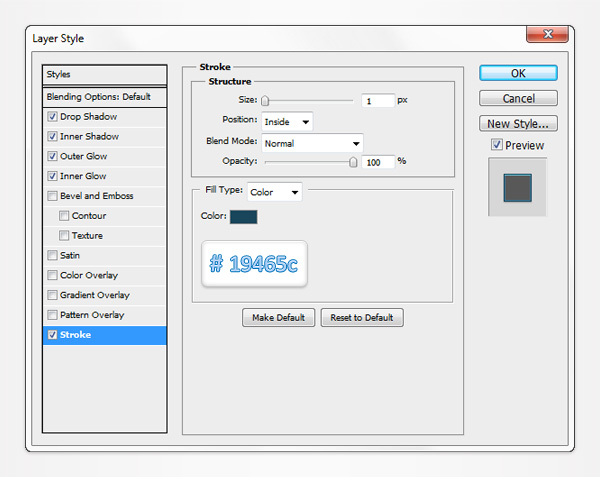
Activate the Drop Shadow, the Inner Shadow, the Outer Glow, the Inner Glow and the Stroke then enter the properties shown in the following images.
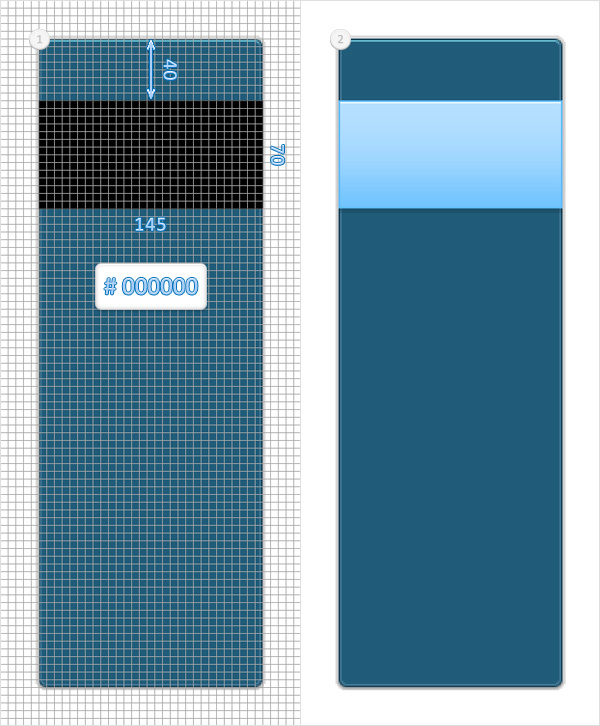
In the end, it should look like the second image. You can disable the Grid (View > Show > Grid or Control + ” ) for a few moments if you want to have a better look at your shape.

Step 3
Set the foreground color to black, grab the Rectangle Tool, create a 145 by 70px shape and place it as shown in the first image.
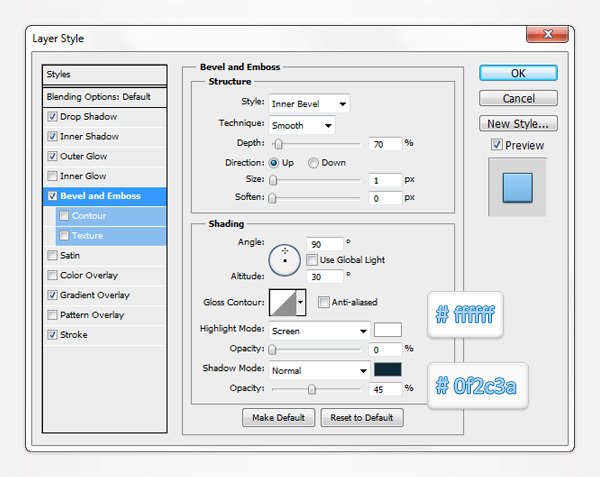
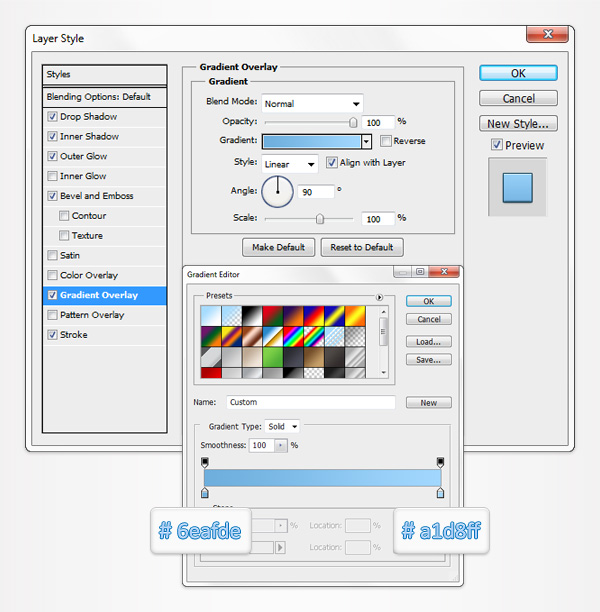
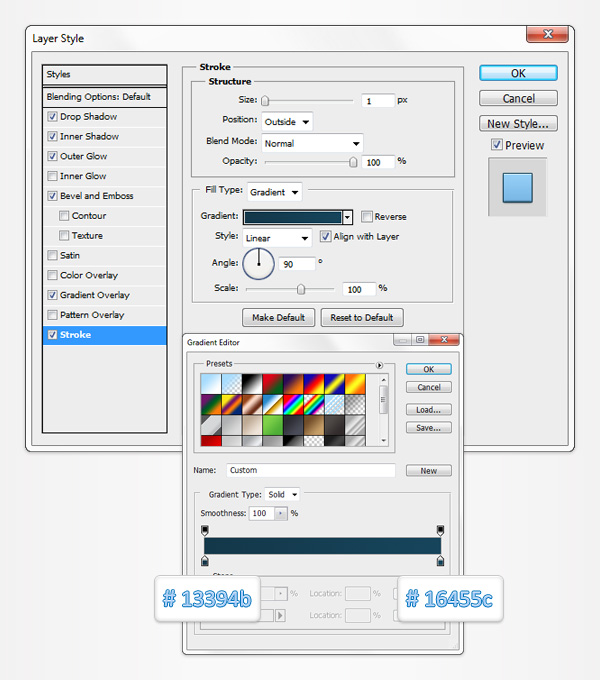
Move to the Layers panel, open the Layers Style window for this new shape and enter the properties shown in the following images.


Step 4
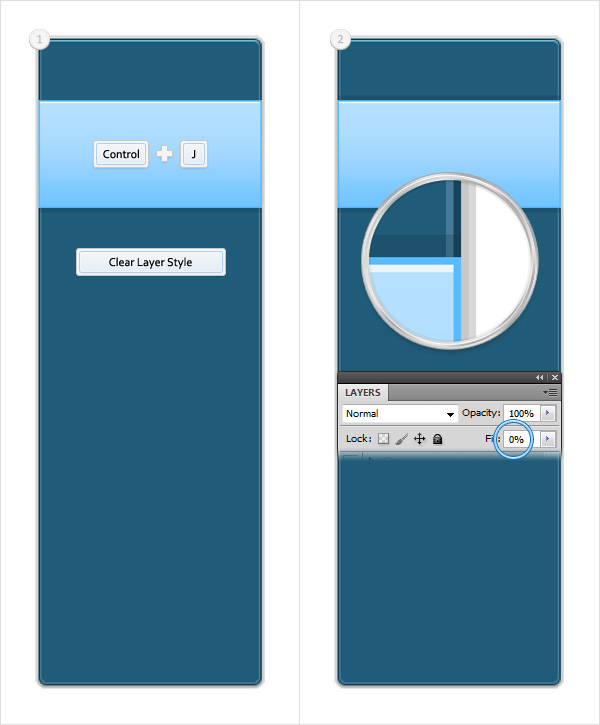
Reselect the vector path made in the previous step and duplicate it (Control + J).
Focus on the Layers panel, right click on this copy and click on Clear Layer Style.
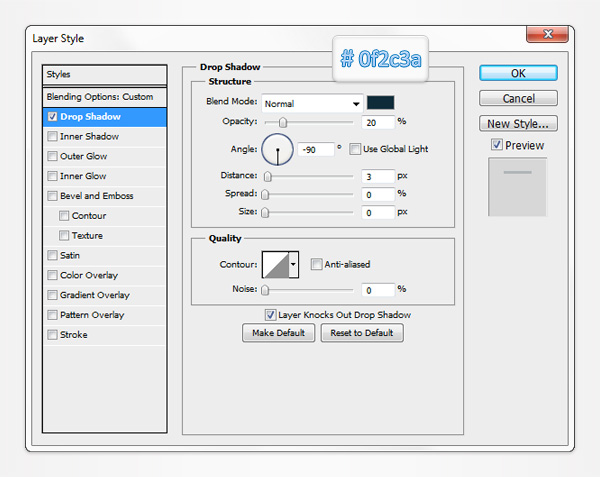
Select this copy, lower its Fill to 0% then open the Layer Style window and enter the properties shown in the following image.
Step 5
For this step you need a grid every 1px. Simply go to Edit > Preferences > Guides, Grid & Slices and enter 1 in the Gridline Every box.
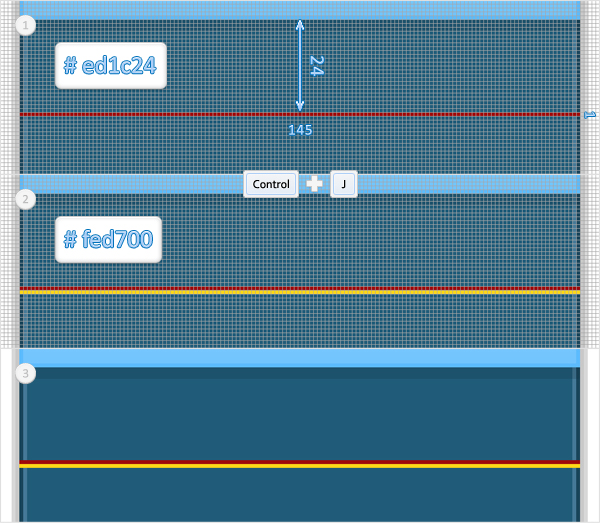
Set the foreground color to #ed1c24 and grab the Rectangle Tool. Create a 145 by 1px shape, place it as shown in the first image then duplicate it (Control + J).
Select this copy, move it 1px down and replace the dark red with #fed700.
Step 6
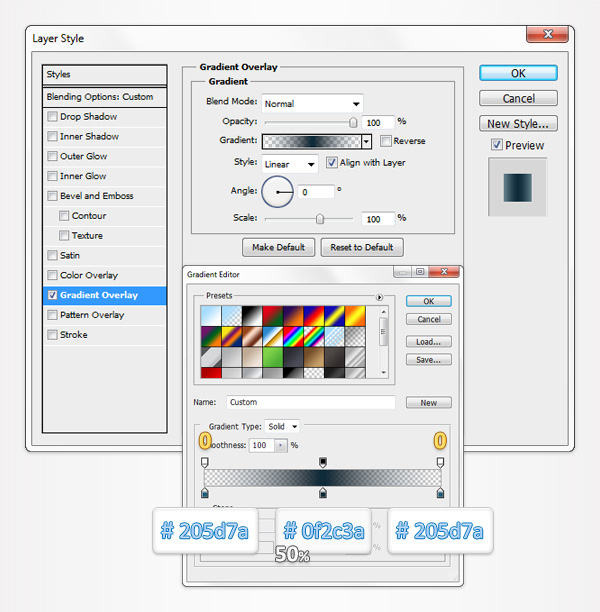
Reselect the red vector path made in the previous step, lower its Fill to 0% then open the Layer Style window and enter the properties shown in the following image.
Step 7
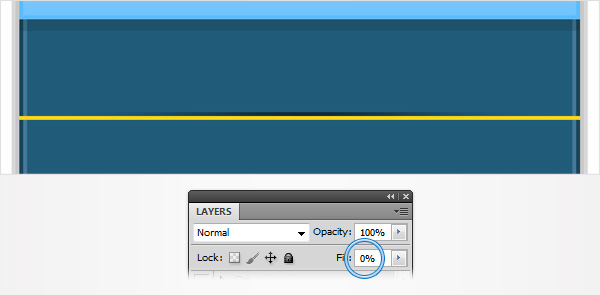
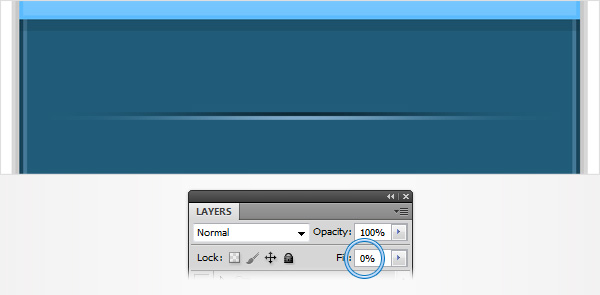
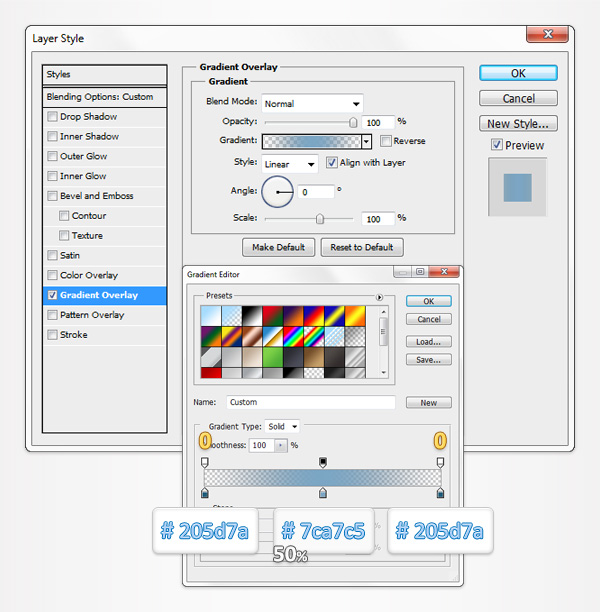
Reselect the yellow vector path made in the fifth step, lower its Fill to 0% then open the Layer Style window and enter the properties shown in the following image.
Step 8
Return to “gridline every 5px”. So, go to Edit > Preferences > Guides, Grid & Slices and enter 5 in the Gridline Every box.
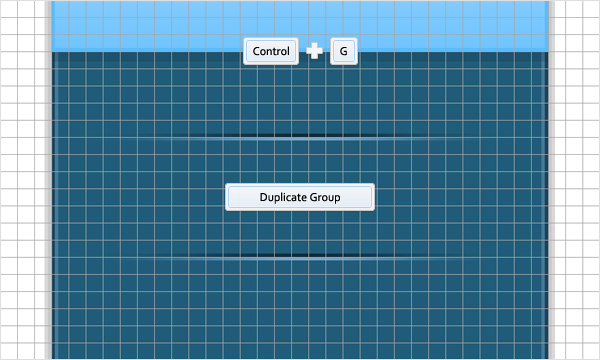
Reselect the two, thin rectangles edited in the last two steps and group them (Control + G).
Move to the Layers panel, right click on this new group then click on Duplicate Group.
Select this group copy and drag it down as shown in the following image.
Step 9
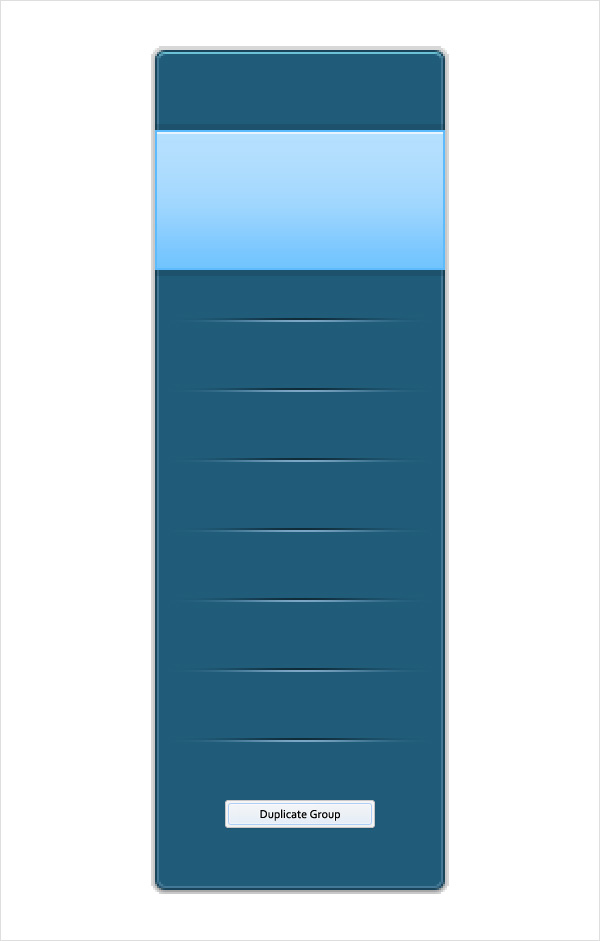
Keep focusing on the group made in the previous step, make five new copies and place them as shown in the following image.
Step 10
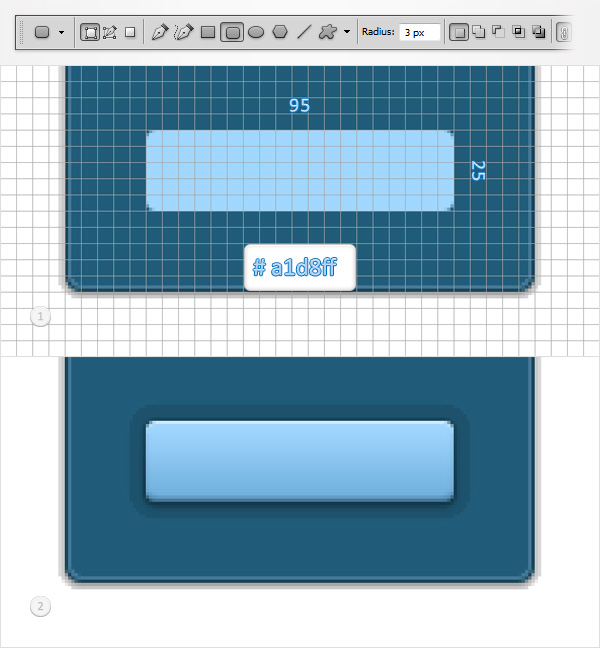
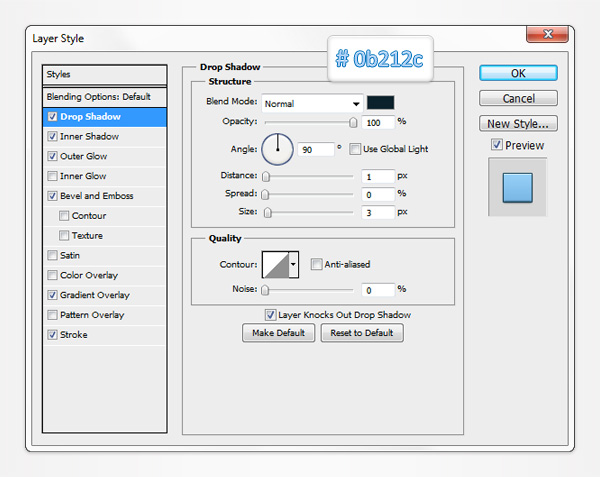
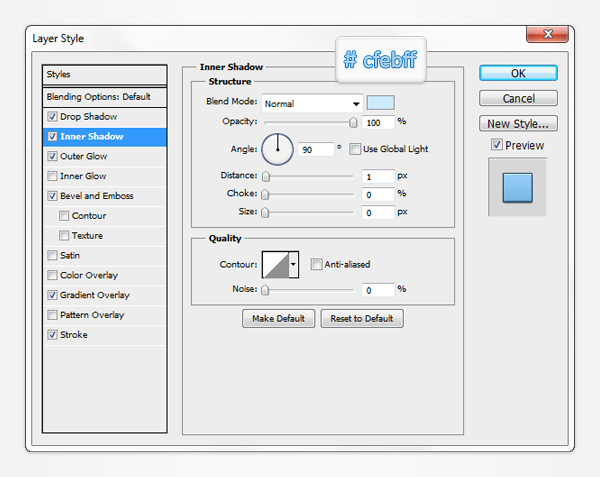
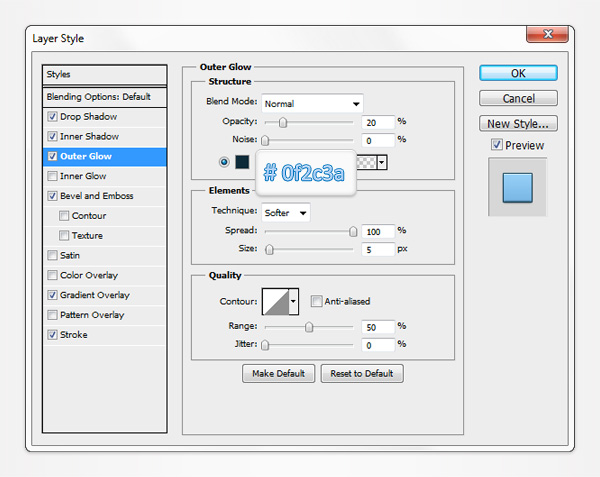
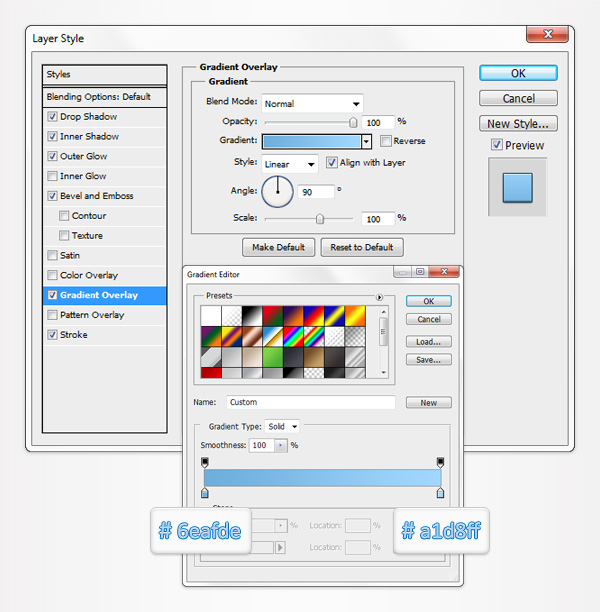
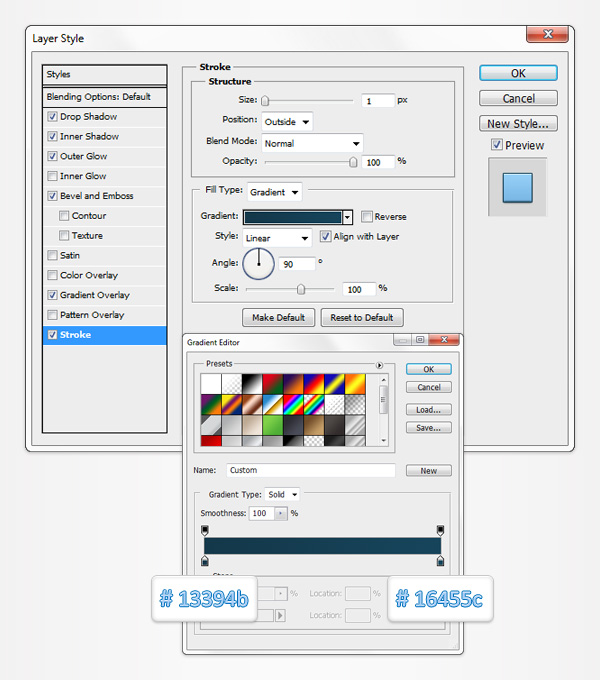
Set the foreground color to #a1d8ff, grab the Rounded Rectangle Tool, set the radius to 3px, create a 95 by 25px vector path and place it as shown in the first image.
Move to the Layers panel, open the Layers panel for this new rounded rectangle and enter the properties shown in the following images.

Step 11
Disable the Grid (View > Show > Grid).
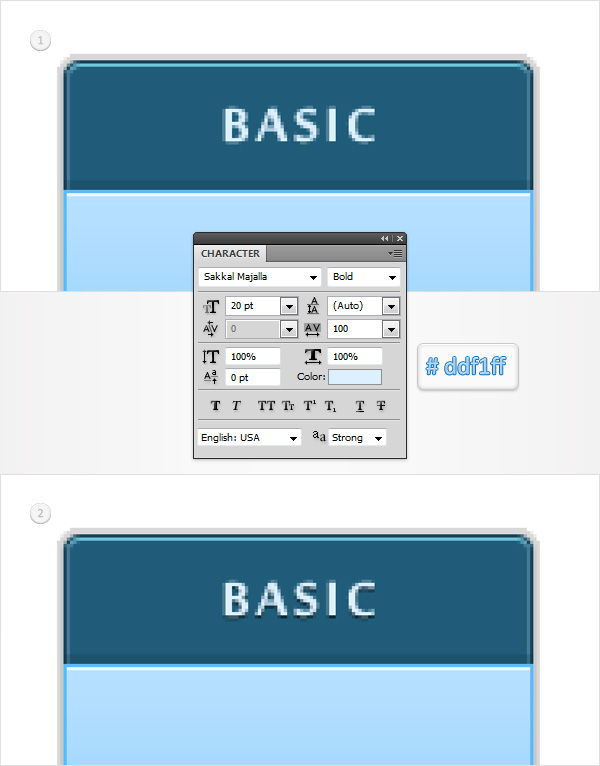
Open the Character panel (Window > Character), pick the Type Tool(T), set the color to #ddf1ff and add the “BASIC” piece of text as shown in the following image.
Use the Sakkal Majalla font with the style set at Bold and the size set at 20pt. Move to the Layers panel, open the Layer Style window for this little piece of text and enter the properties shown in the following image.

Step 12
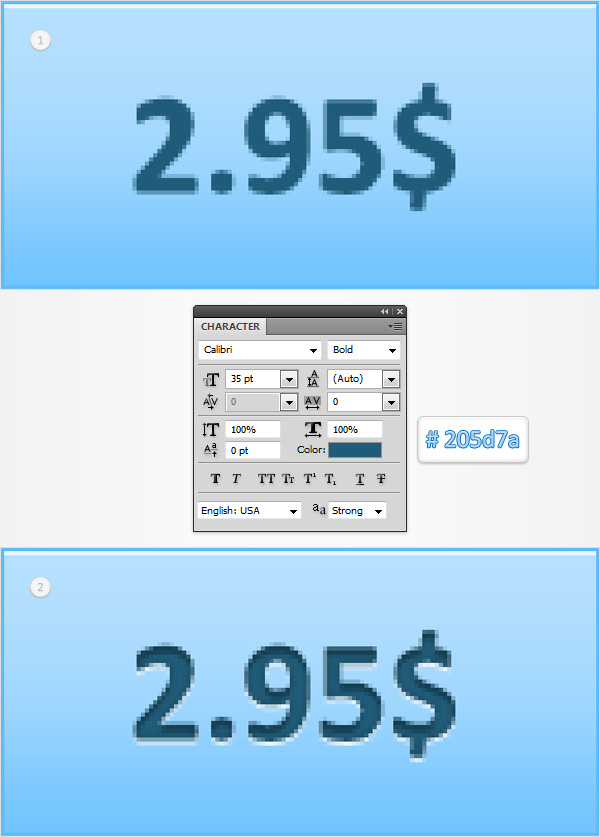
Pick the Type Tool(T), set the color to #205d7a and add a simple price as shown in the following image.
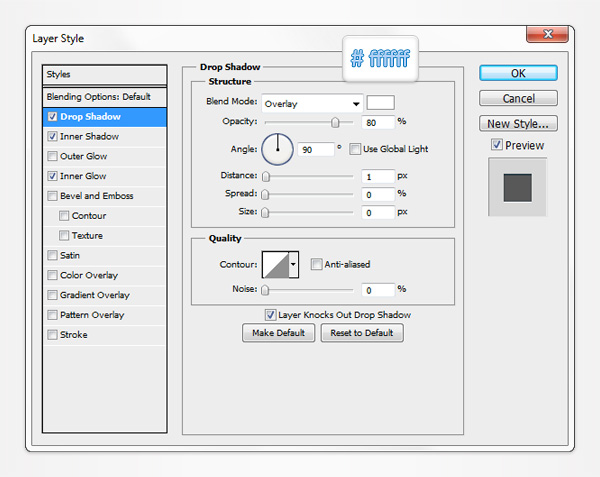
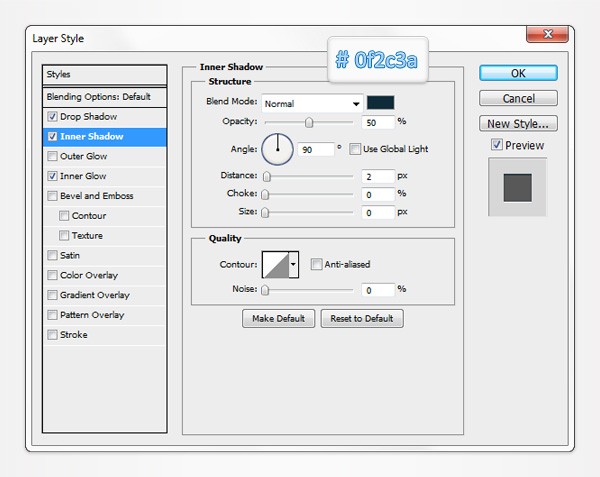
Use the Calibri font with the style set at Bold and the size set at 35pt. Move to the Layers panel, open the Layer Style window for this new piece of text and enter the properties shown in the following images.

Step 13
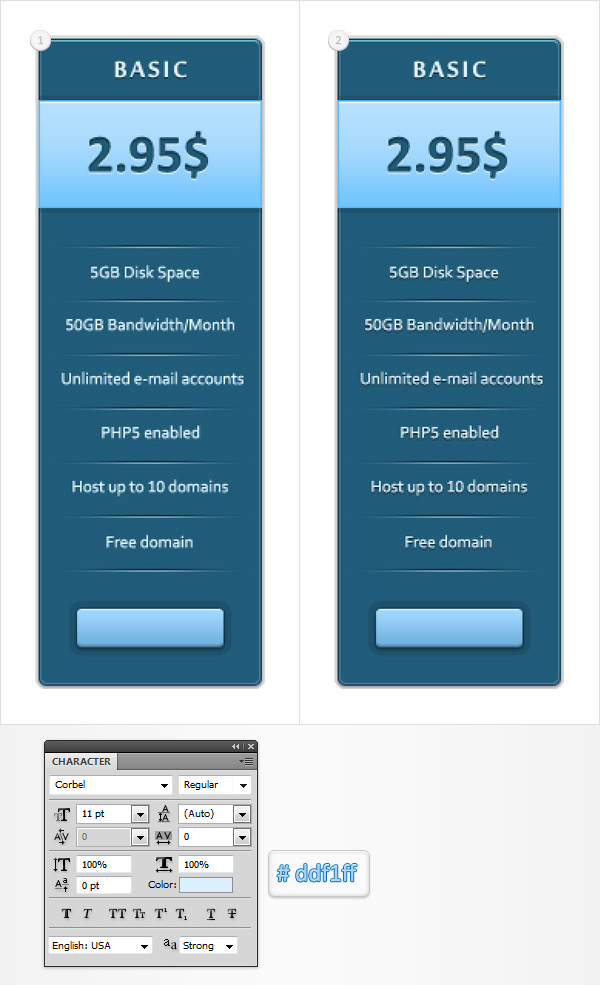
Pick the Type Tool(T), set the color to #ddf1ff and add some new text as shown in the first image.
Use the Corbel font with the style set at Regular and the size set at 11pt.
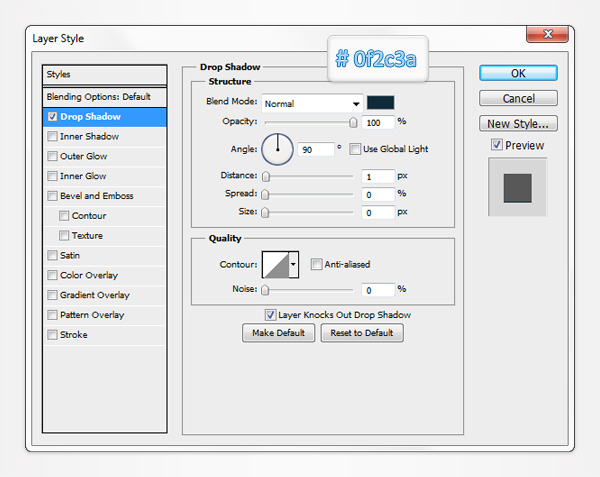
Move to the Layers panel, open the Layer Style window for this new pieces of text and enter the properties shown in the following image.
Step 14
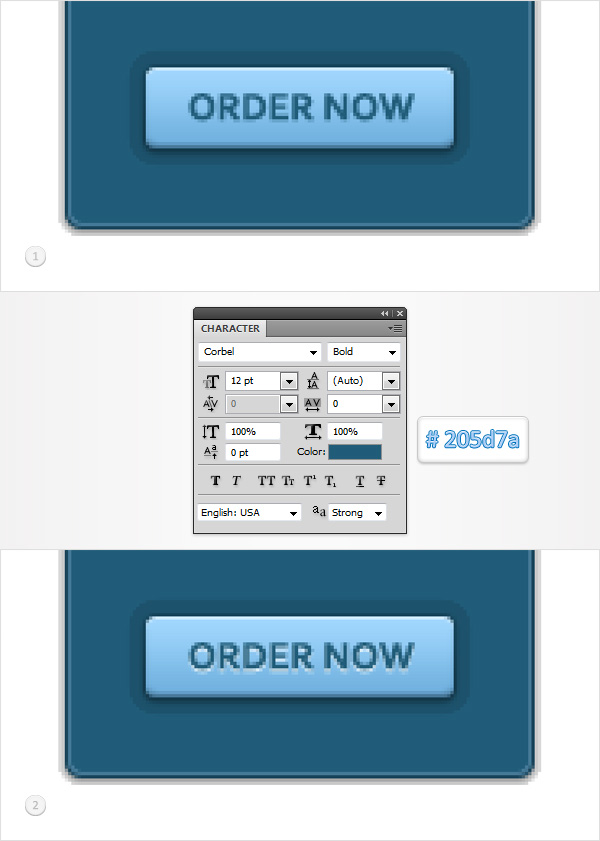
Pick the Type Tool(T), set the color to #205d7a and add the “ORDER NOW” piece of text as shown in the first image.
Use the Corbel font with the style set at Bold and the size set at 12pt.
Move to the Layers panel, open the Layer Style window for this new piece of text and enter the properties shown in the following image.

Step 15
Reselect the vector shapes and the pieces of text created so far and group them (Control + G).
Make two copies of this group and move them to the right as shown below.
Focus on these new groups and simply edit the text as shown in the following image.

Step 16
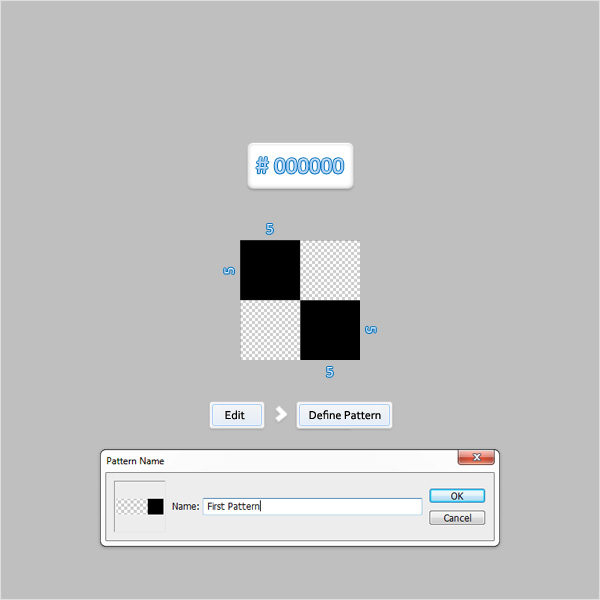
Hit Control + N to create a new document. Enter 10 in the width and height boxes then click OK.
Move to the Layers panel and remove the default “Background” layer.
Enable the Grid (View > Show > Grid) and set the foreground color at black.
Grab the Rectangle Tool and set the foreground color to black.
Create two, 5px squares and place them as shown in the following image.
Next, you need to turn this tiny document into a pattern.
Simply go to Edit > Define Pattern, pick a name for your pattern and click OK.
Close this document (you don’t need to save it) and return to the first document.
Step 17
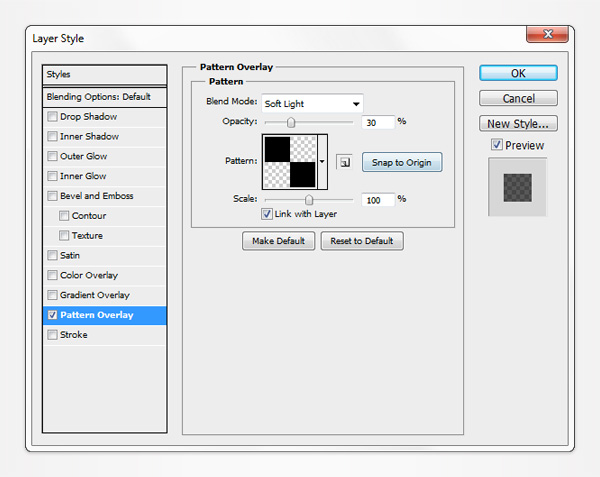
Pick the Rectangle Tool and set the foreground color to #282828. Create a 600 by 600px shape, send it to back (Shift + Control + [ ) then open the Layer Style window and enter the properties shown in the following image.
Use the pattern made in the previous step.

Final Image
Here is how your final result should look.
