In this Photoshop tutorial we’ll be making a cool, glossy star logo, using the default Photoshop shapes, some layer styles, and simple effects. You can see what I made using this tutorial in the below image.

1.
Start by making a new document in Photoshop, say around 450 x 450 pixels, use the default Resolution. I added a nice gradient into the background. (#71a001 to #8cbf13)

2.
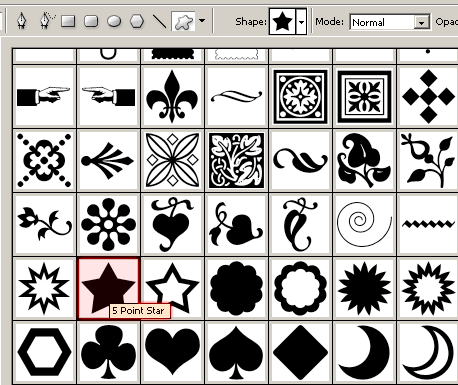
Next, find and get out the Custom Shape Tool, ![]() make sure you use these settings. Go into the shapes tab at the top and find the five-point star shape.
make sure you use these settings. Go into the shapes tab at the top and find the five-point star shape.

Note: If the star or none of those shapes are shown, click the little arrow in the right corner of the shapes box and select “All.” Before you make the shape set your foreground color to a very pale green color. (#edff7a)
Drag your shape onto the canvas, preferably in the middle area. (note: hold shift to make the star perfect)

To give your star some nice effect now, right-click the layer shown in the layer’s pallete, go into the Blending Options and apply these few layer styles:

Looking pretty cool now, right? 🙂
3.
Create a new layer, then drag another star shape onto the canvas, much smaller like the one shown in the below image.

Hold ctrl on your keyboard and click the layer thumbnail for the small star. (this is to make a selection around it)
Go back to the first star layer and press delete, then delete the smaller star layer. This is what we want:

To finish off, create two more star shapes on your canvas and apply the same layer styles as before, IÂ also added a kind of shiny effect in the background.

Well, that’s all for this short Photoshop tutorial! I hope you enjoyed it.
