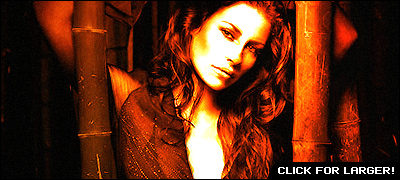
Basically, in this tutorial I’m going to be showing you how to create a photo effect like the one in the below image, it’s pretty much all accomplished by using Filters, as are most photo effects, right? Photo manipulation on the other hand uses many tools of the trade, most commonly “airbrushing”, as everyone calls it. But we’re just going to be making a nice, hot, fiery kind of photo effect in this tutorial!
1. Selecting a Stock Photo, etc.
Firstly, start by finding a stock photo that you can add the effect to. A few good resources to find free stock photos are:
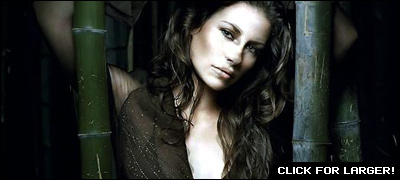
Or, you can of course, go to to Google Images and look up your favorite female actress. In this case I’ve used a stock photo of Evangeline Lilly from the TV series, LOST! 🙂
2. Ripple Filter Effect
Now open up your stock photo in Photoshop, you can either keep it at it’s current size of resize it down a little bit, I resized it a little bit for the sake of this tutorial. After you’ve opened the photo, you might want to brighten it up a little or sharpen it, I didn’t though. I started by duplicating the original layer then applying Filter > Distort > Ripple to the duplicate layer. After this, lower the opacity for your duplicate layer to 40-50% and change the layer mode to either Darken or Multiply, I used Multiply.
This just gave it a little effect, if you want to make it seem more like smoke or something, maybe try Filter > Distort > Wave.
3. Colorizing
Now it’s time to add some fire color. Start by creating a new layer.
Now in your new layer, using the Radial Gradient Tool, drag a red gradient over the whole document. The two reds I used were #f82714 and #8c0900.
Now, change the layer mode for this gradient layer to Color and lower the opacity to about 30-50%.
Now another gradient – create another layer and fill it with a bright orange radial gradient.
The colors I used for this gradient were #febb0f and #fe5400.
After making your gradient, change the layer mode to something like Overlay and lower the opacity if it needs it, in this case I didn’t lower the opacity.
4. Additional Effects
To finish this off, duplicate the original layer, or merge all your layers together, then apply some different filters, change the layer modes, etc. You need to be creative here. I duplicated the original layer, moved it above all the others then applied Filter > Brush Strokes > Crosshatch and messed around with the layer mode/opacity.
Also try Filter > Render > Lighting Effects as well as Filter > Noise > Add Noise.
You can see my result image below:
Mess around with all the different filter effects and layer modes, you might also want to try some grunge brushing.
5. In finishing
Thanks for visiting PhotoshopStar, your source for great quality, free Photoshop tutorials!

