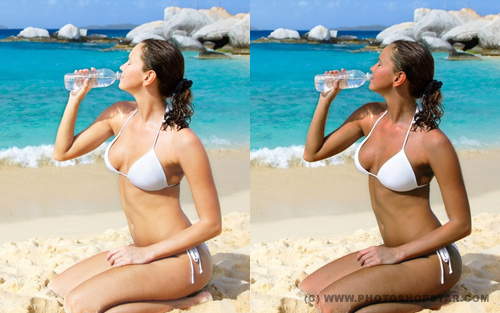
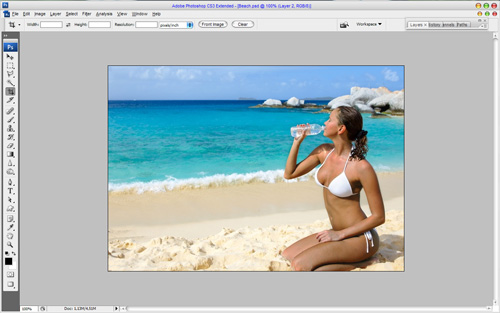
I’m just going to be making a nice, hot tanned skin photo effect in this tutorial! If you are interesting, join me!
So, let’s start! If you don’t have appropriate photo you can use mine or find another one thru Google Images. Also you can use your own photos if you think that you are not tanned on the photo or do not have time to go to the sea or ocean or just want to be swarthy. Open up the photo at first.

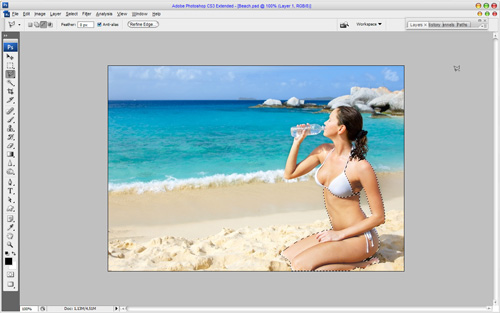
The girl on the picture above looks untanned. I know how to help her to make ‘quick tan.’ Select the Polygonal Lasso Tool and start with skin selection.
Pay your attention that we selected just some part of the skin. We need to cut away part of swimsuits from selected area. Hold the Alt button (the minus sign should be appear near lasso tool pictogram) and start to cat away swimsuit from the selected area.
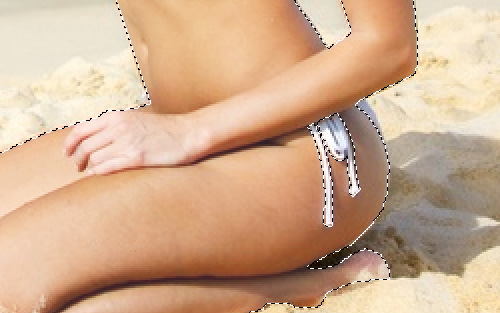
Ok, after that we need to add selection the other parts of girl’s body. In this way hold the Shift button (the plus sign should be appear near lasso tool pictogram) and select as more areas as you need.
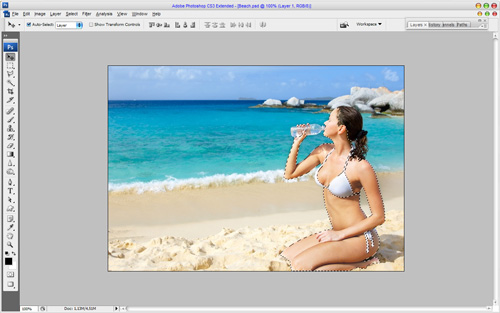
Press Ctrl+J to duplicate selected part of image to the new layer. And now begin to change color for this layer, turning a girl in a light tan. For this effect apply Image > Adjustments > Layers and set up following presets for each channel:
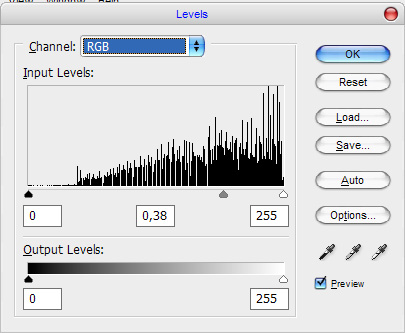
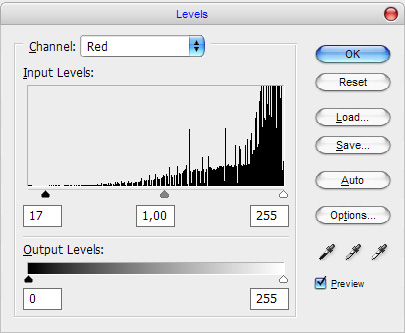
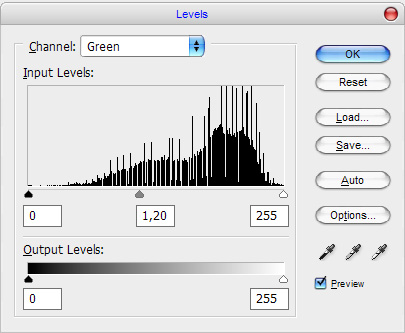
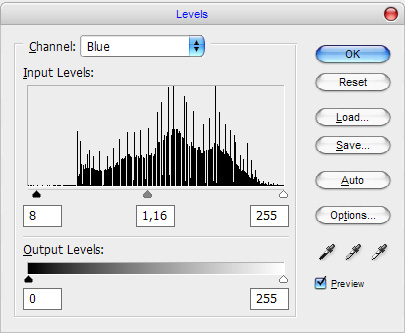
Now, we have something like this:
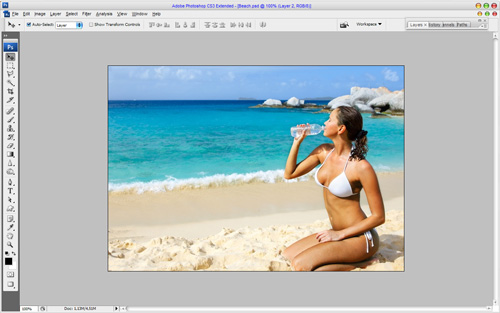
Ok, I think, It will be better to remove contrast a little bit and change brightness with Image > Adjustments > Brightness/Contrast.
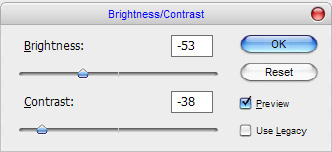
Here is result:
Ok, we are done! The girl looks better as before. You can see the difference on the picture below. Of course we can make this effect in other ways in Photoshop, but this one is simple and useful as for me.
If you want to receive updates from PhotoshopStar, please consider subscribing our RSS feed. You can also follow us on Twitter.
If you prefer, you can also subscribe to our monthly Newsletter.

