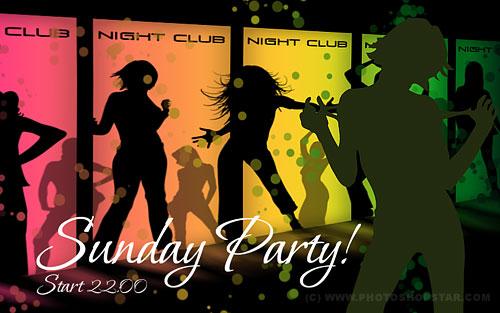
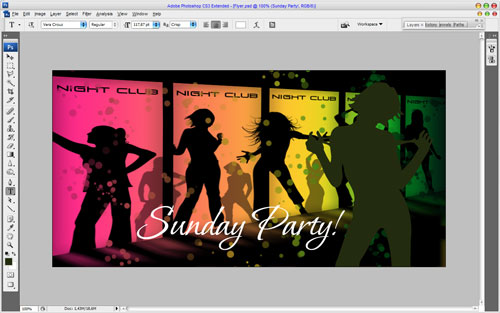
In this tutorial I’m going to show you how to design professional pseudo vector flyer using just Photoshop tools.
Create a new document with size of 1000×500 pixels and 72dpi of resolution. Fill this canvas with black color.
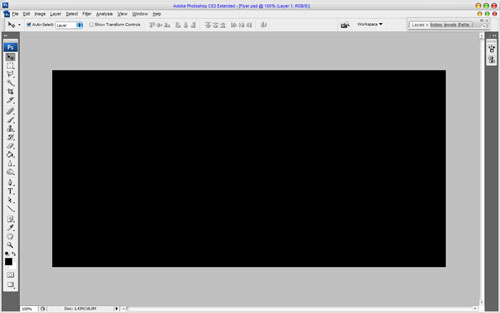
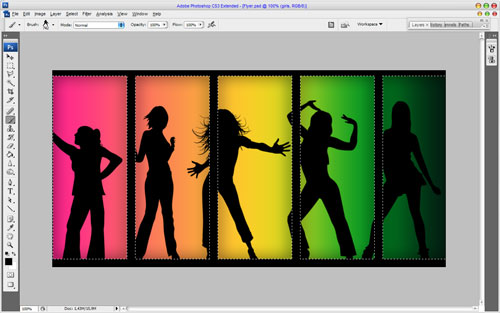
After that start with creating background decorations. Create a new layer and make rectangular selection with Rectangular Marquee Tool, then fill this selection with white color.
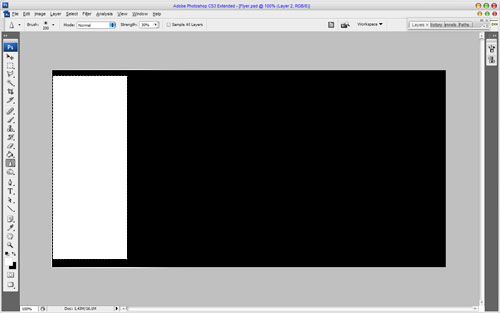
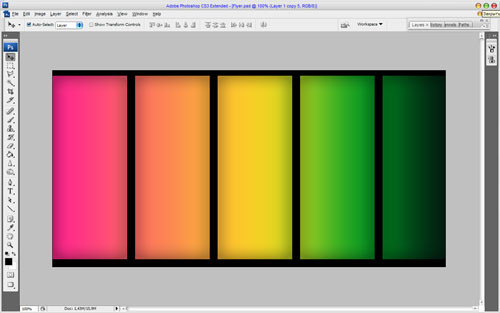
Remove selection with Ctrl+D and duplicate current layer with Ctrl+J a few times. Arrange other shapes as was shown on my picture below.
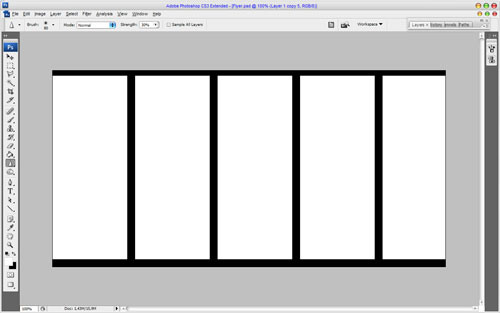
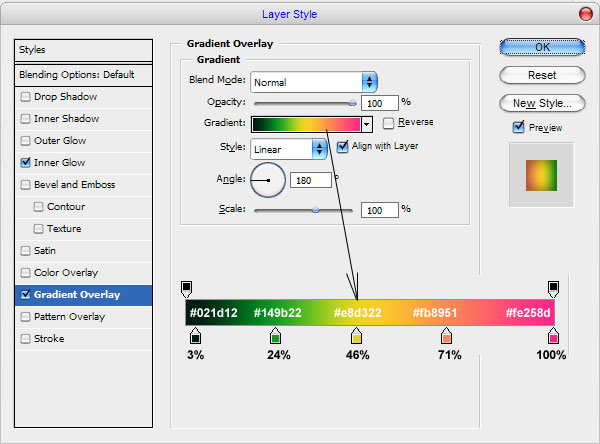
Merge all white shapes in one layer and apply Inner Glow and Gradient Overlay layer styles to the new layer.

The result should be next:
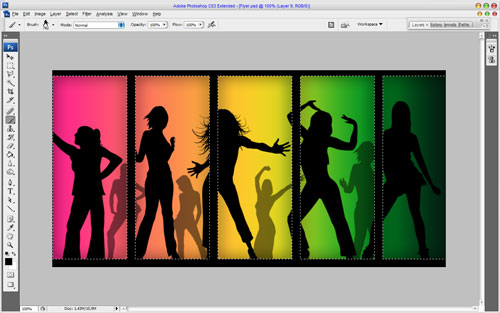
Ok, move to the next step. Now I would like to add some dancing girls’ silhouettes. In this way you may need these brushes. Make current layer selection with Select > Load Selection, after that create a new layer and add a few different prints of silhouettes with Brush Tool.
Create a new one layer above and make a few prints more a little bit smaller sizes. Set layer opacity to 50% up for this layer.
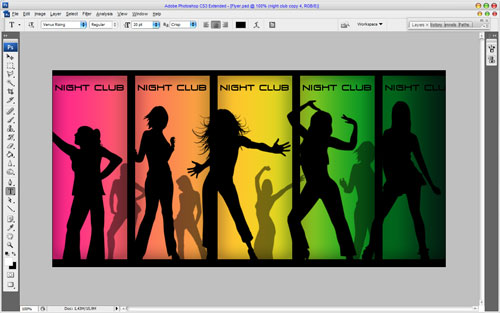
Remove selection with Ctrl+D. Then get out the Horizontal Type Tool and add some text with black color.

In the above image I’ve used a font called Venus Rising, which you can download from here. Copy this text layer a few times also and arrange copies like on my picture below.
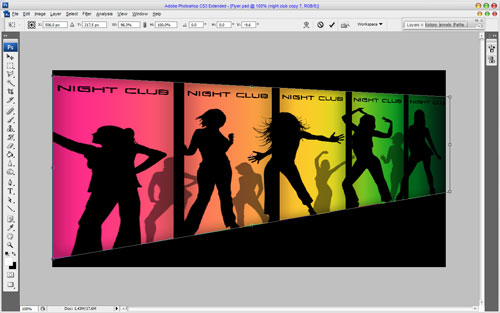
Merge all layers together excepting background and apply Edit > Transform > Distort to transform the picture.
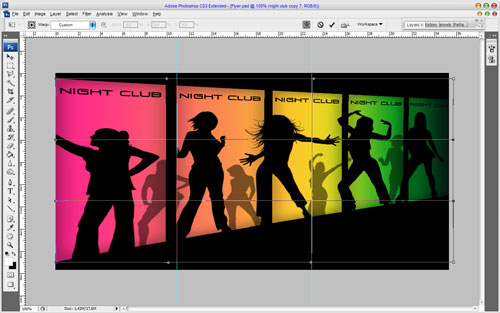
Then apply Edit > Transform > Warp, it will be better to add a couple of guide lines to adjust the transformation accurately.
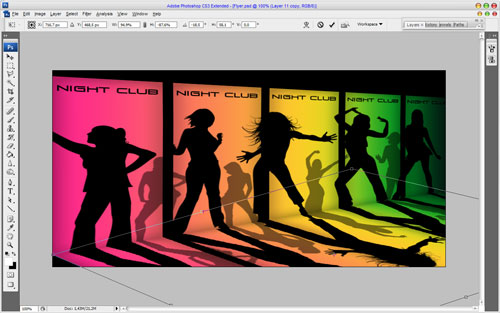
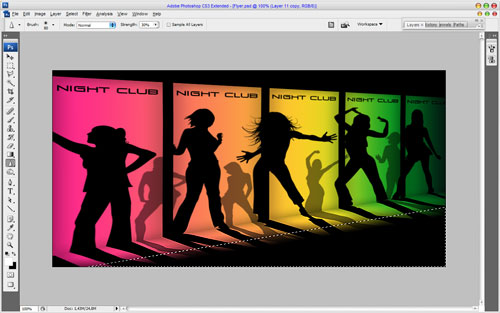
We got an interesting perspective. Move to the next difficult step. We need to reflect glow from this picture on the floor. Duplicate current layer with Ctrl+J, then flip vertical copied layer with Edit > Transform > Flip Vertical and omit the image down a bit. Don’t press ‘Enter’ or ‘Apply’ button until u use two more transformations. Use Edit > Transform > Skew and Edit > Transform > Distort to get the reflection like on my picture below. After that press ‘Enter’ or ‘Apply’ button. Be attentively, because it is difficult step. It may be complicated for beginners in Photoshop.
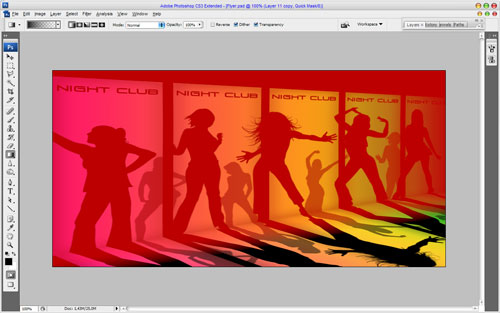
Then apply Quick Mask Mode with gradient as below:
Then go back to Standard Mode. Now we have some selected area. Press Delete to clear image into the area.
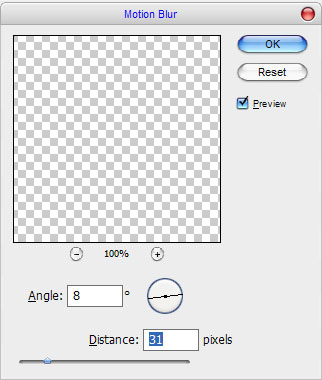
After that remove selection with Ctrl+D. Now, apply Filter > Blur > Motion Blur with next parameters:
Reduce opacity to 50% for current layer to get the next result.
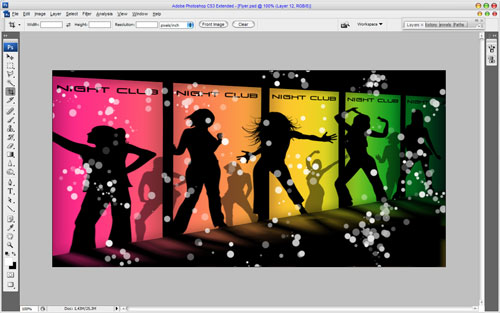
Ok, we are done with background. Move to the next step. I would like to add a glow from the stroboscope. Select the Brush Tool and a hard round brush about 19 pixels. Then click the button ‘Toggle the Brushes palette’ on the Options Bar to open brush presets window or by choosing Window > Brushes. Here we can see a couple of presets. Now, set up the following presets for current brush:
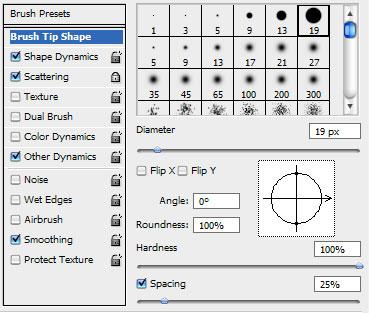
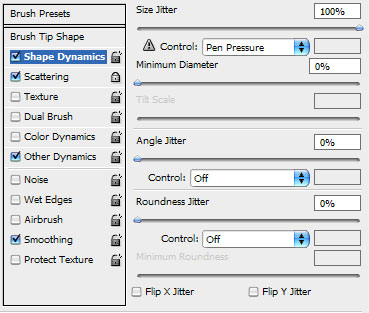
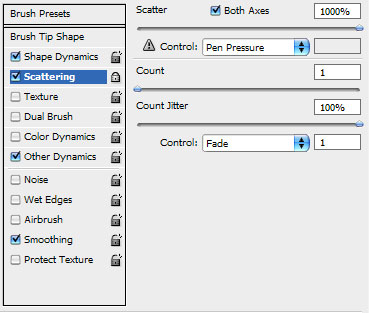
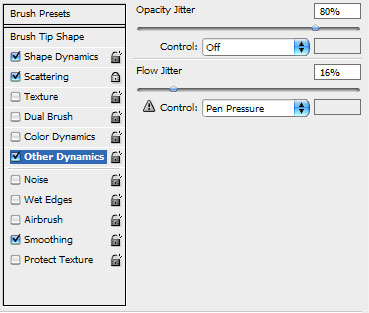
Create a new layer and make a few strokes with white color.
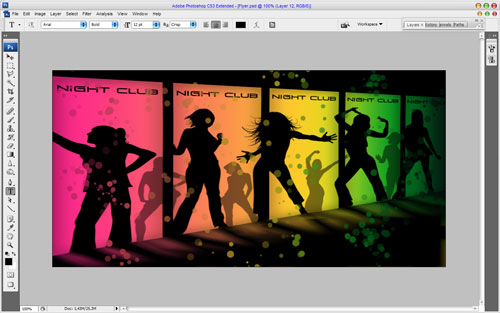
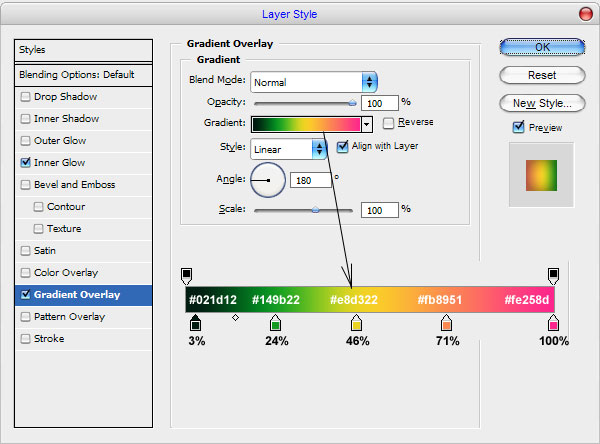
Then apply Inner Glow and Gradient Overlay layer styles to this layer.
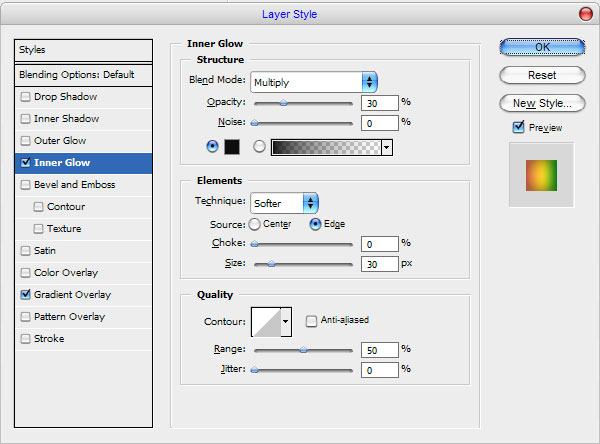
See the result below:
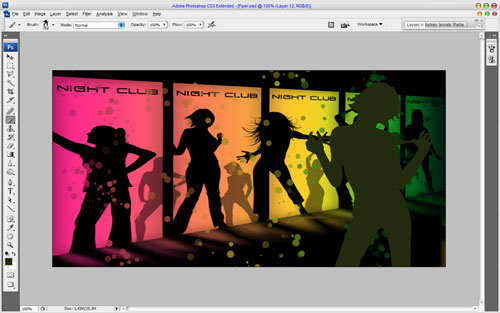
After that I would like to add one bigger silhouette of the girl. Get out the Brush Tool again and make the print using one of brushes with color of #232b0e on the new layer.
And the last one thing that we need to add is advertising text. Use the Horizontal Type Tool and write out some text which you can see on the picture below.
In the above image I’ve used a font called Vera Crouz, which you can download from here. Add one more text line to finish off the tutorial.
We are done for this tutorial! I hope you get the result that you expected. Do not be afraid to experiment and you will get excellent results!

