
Photoshop layer styles are very versatile in nature. They are also a great time saver and offer a lot of flexibility during editing and reuse. Popular layer styles like glass, chrome and gold are very much in demand in every day Photoshop work. In this tutorial we will explore an easy, but realistic Gold Text Effect in Photoshop.
Once you are done, you can use this style in your other projects also by simply copying and pasting. So, let’s get started!
Final Image
As always, this is the final image that we’ll be creating:

Tutorial Details
- Program: Adobe Photoshop CS5
- Estimated Completion Time: 40 minutes
- Difficulty: Beginner-Intermediate
Step 1
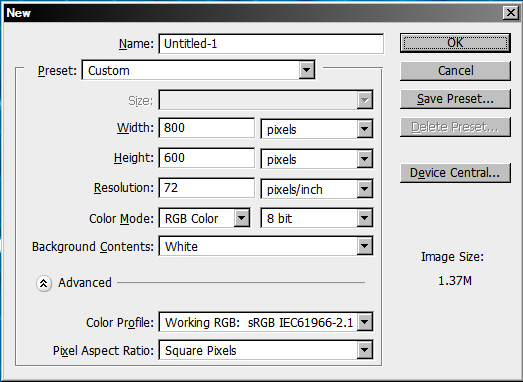
Open a new file (File > New) in Adobe Photoshop with the following settings. Save the file as “Gold Text Effect.psd”. During work remember to frequently use File > Save (Ctrl + S) to save and update the file.
Step 2
Type the text “Gold” or anything you like with a large bold serif font. Here Adobe Caslon 205 pt bold font has been used.

Step 3
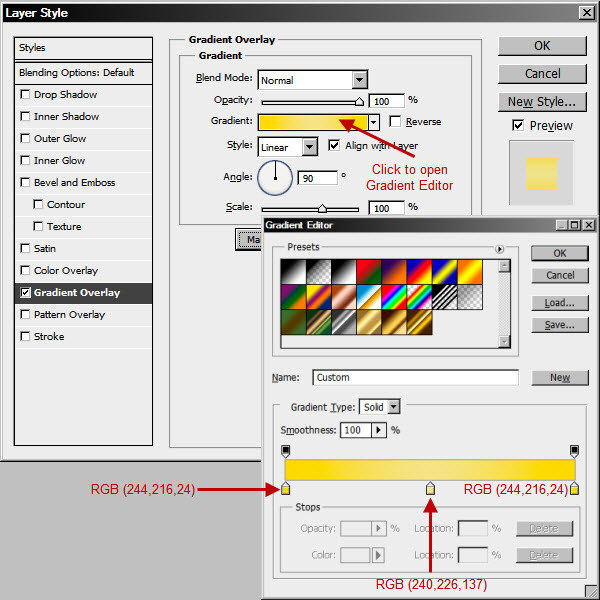
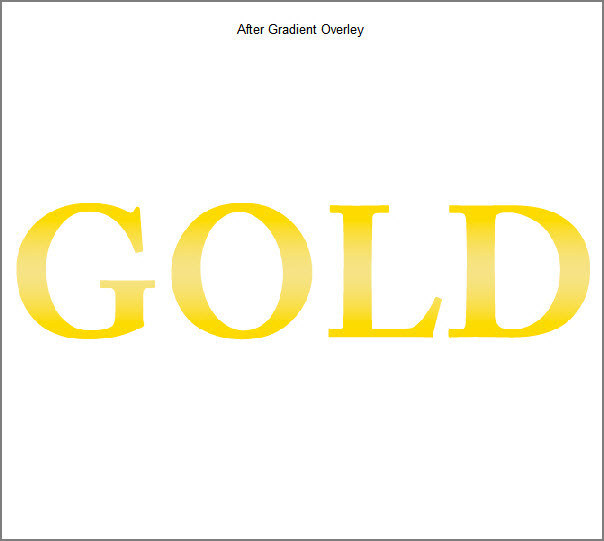
Start building the Gold text Layer style. First Gradient Overlay for basic colors.
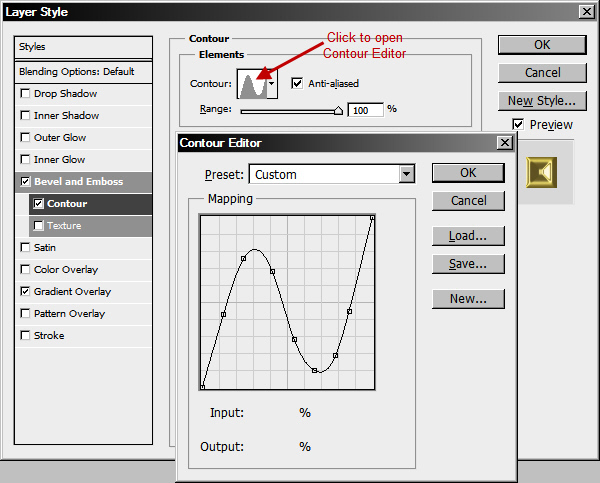
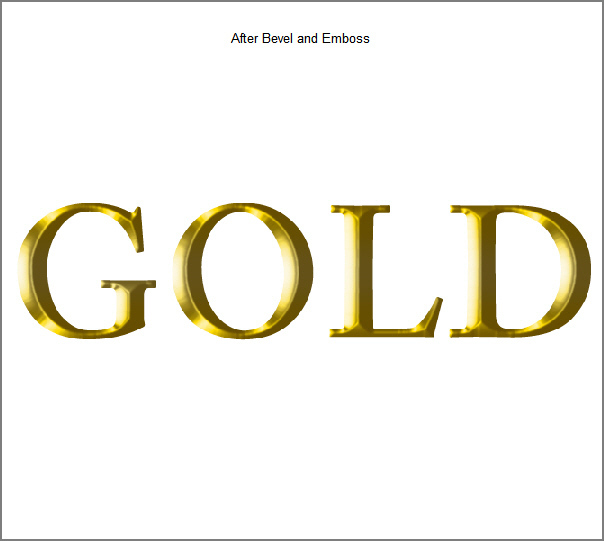
Step 4
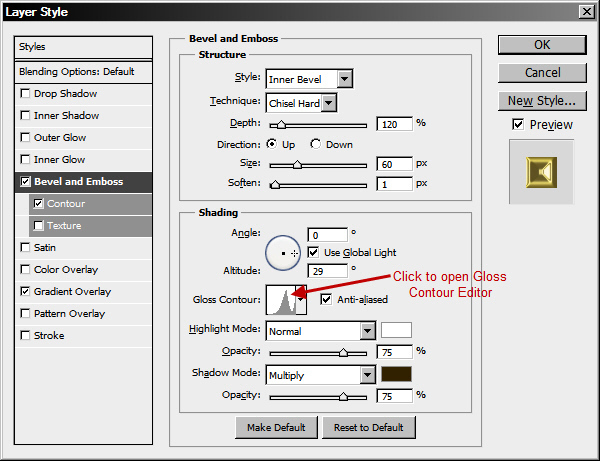
Then Bevel and Emboss for the 3d look.

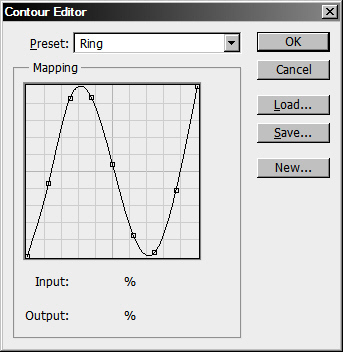
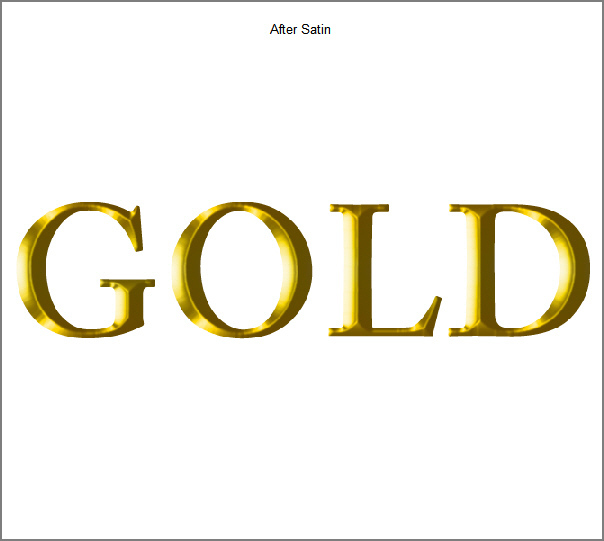
Step 5
Now we use Satin for surface shade variation.

Step 6
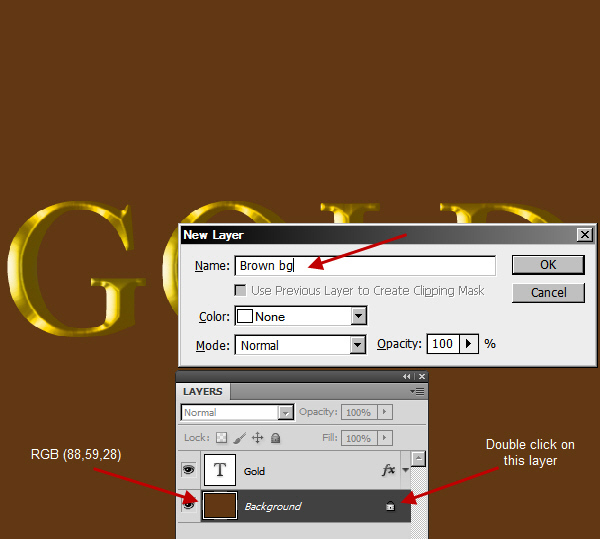
Our gold style is complete. Let’s create the background. Fill the “Background” layer with a brown color (RGB 88, 59, 28). Then Double click this layer and in the following New Layer window dialogue box type “Brown bg” in the name field. Click ok to accept and close this dialogue box.
Step 7
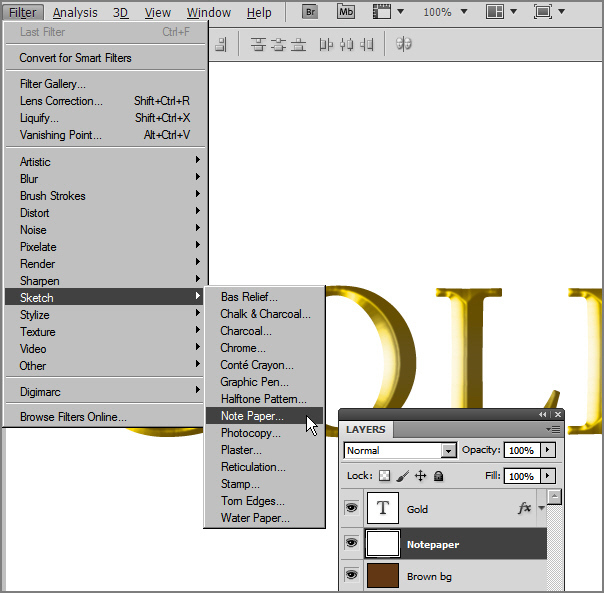
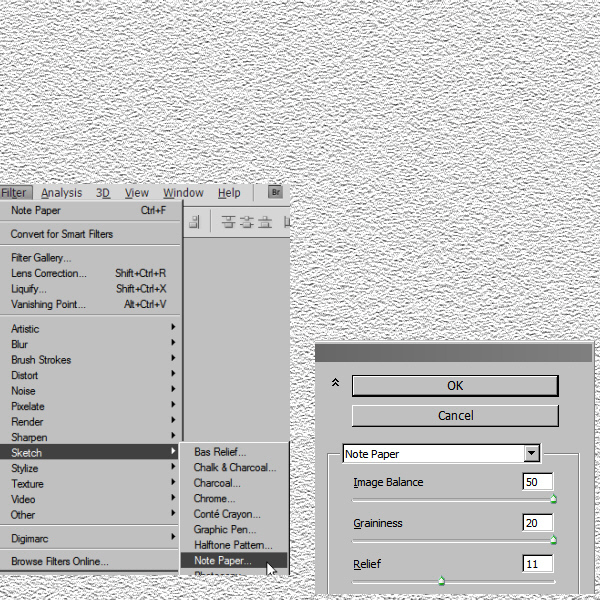
Create a new layer on top of “Brown bg” with the name “Notepaper”. Then fill it with white color. Apply Filter > Sketch > Note Paper. This will add a paper texture to the white color of the layer.
Step 8
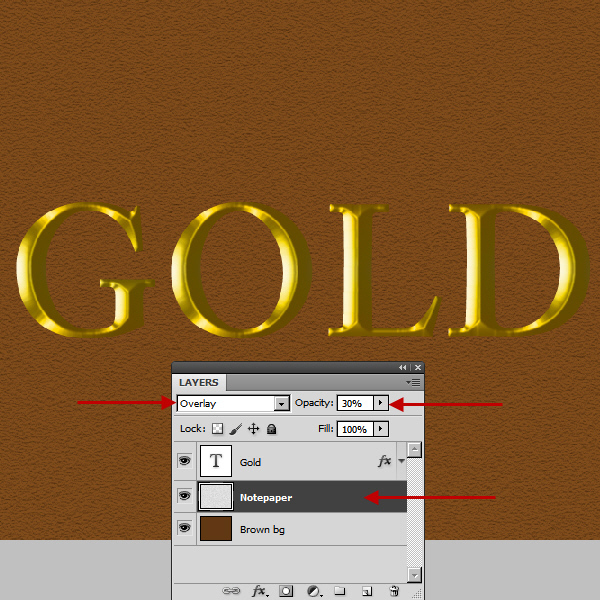
Change the blend mode of “Notepaper” layer to Overlay and Opacity 30%. The paper texture will blend with brown color of the layer (“Brown bg”) below it.
Step 9
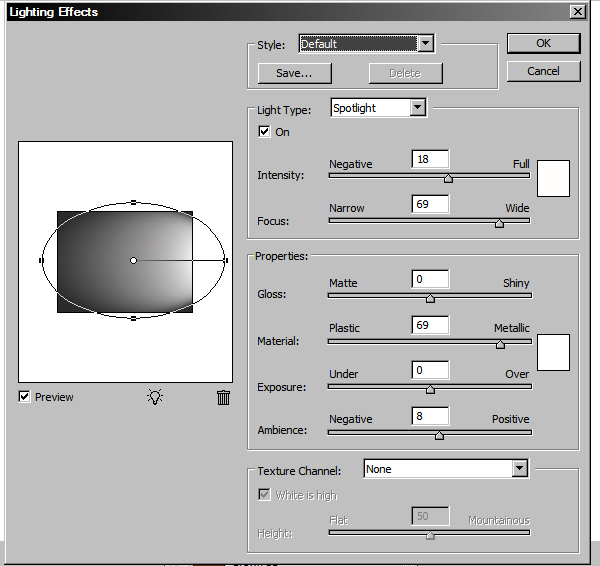
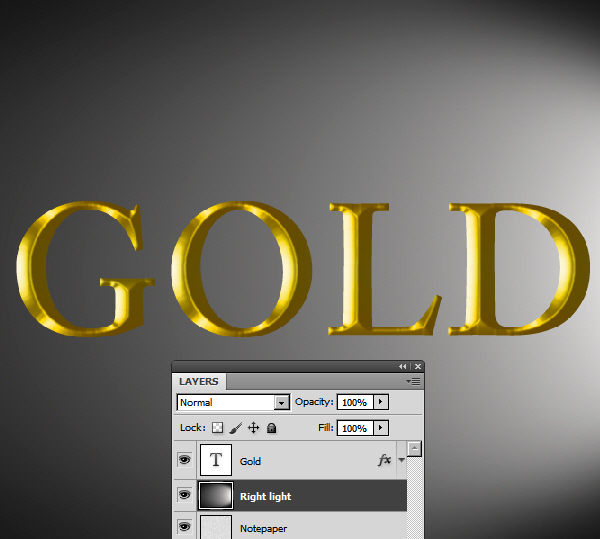
Create a new white color layer with the name “Right light” on top of “Notepad”. Apply Filter > Render > Lighting Effect with the following settings.
Step 10
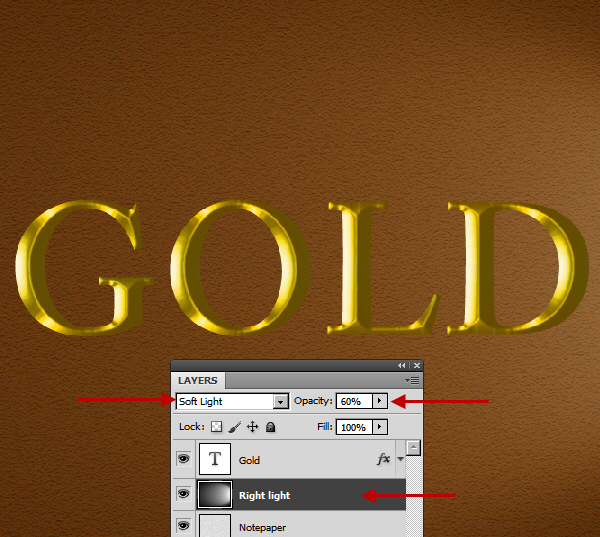
Change the Blend mode of this layer (“Right light”) to Soft light and opacity 60%. This layer will work as the light source from right side.
Step 11
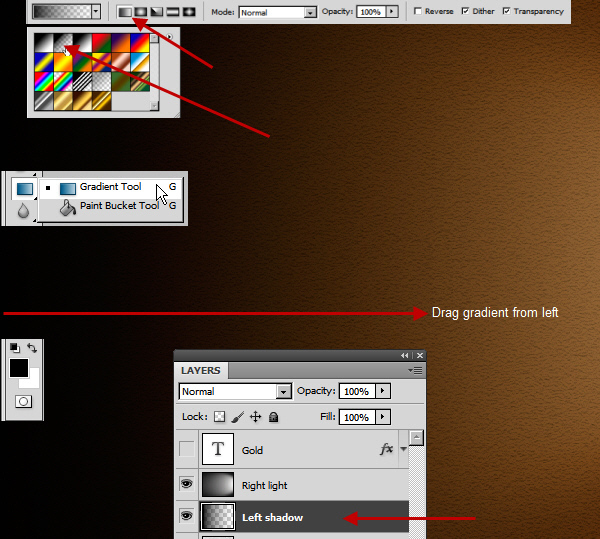
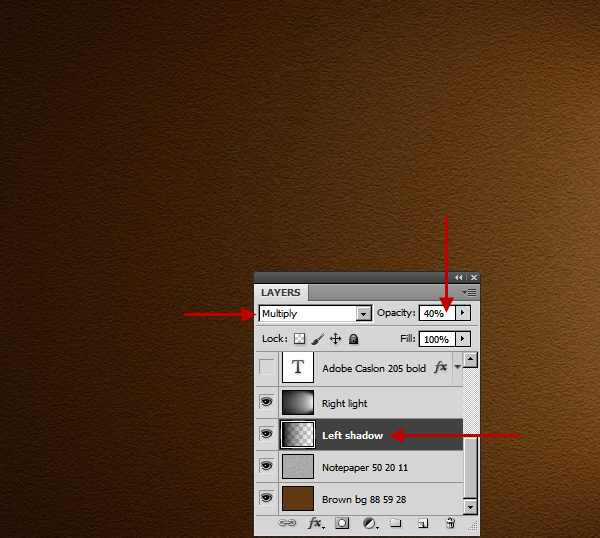
Press “D” key to make the current foreground background colors black and white. Then below “Right light” create a new layer with the name “Left shadow”.
Select the Gradient Tool. In the Options bar (Below Menu Bar) click the gradient drop down list and select the Foreground to Transparent (First row, second from left) gradient. From the right side of the gradient Drop down list select Linear (First from left) from Gradient Types. Click and drag with the Gradient Tool to create a transparent linear gradient from the left to right edge on this layer. We’ll use this as a shadow for the left.
Step 12
Change the Blend Mode of “Left shadow” layer to Multiply and Opacity 40%.
Step 13
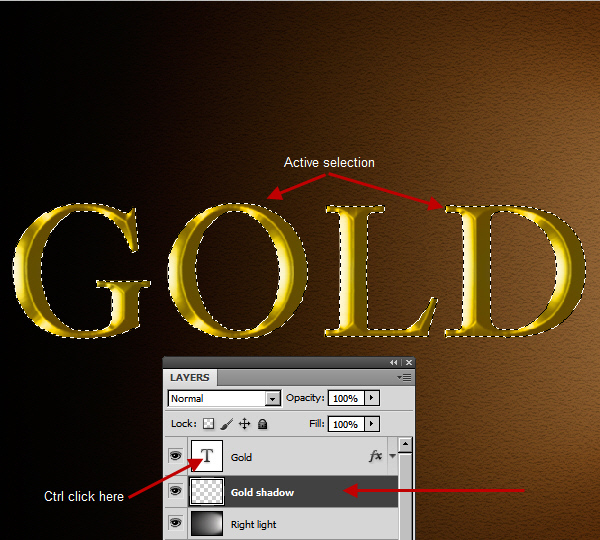
Create a new layer on top of “Right light” and below “Gold” layer. Name it “Gold shadow”. Then Ctrl-click on “Gold” text layer to load the text as a selection.
Step 14
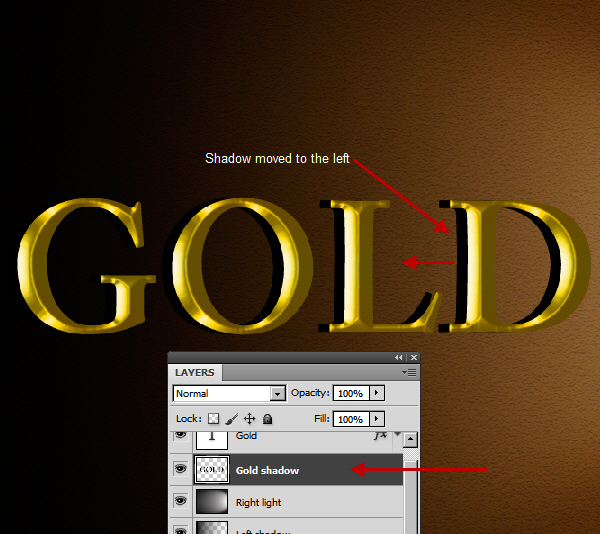
Fill the selection with black and move the layer to the left by using the left arrow key from the keyboard.
Step 15
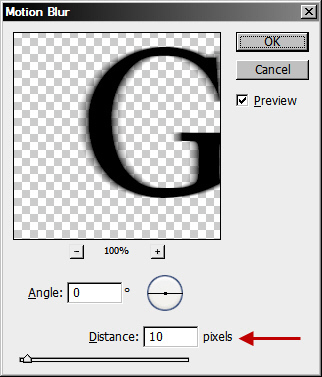
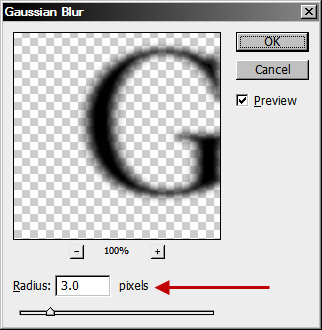
Select Multiply as the blend mode of this layer. Then Filter > Blur > Motion Blur with the value 10 pixels. Then Filter > Blur > Gaussian Blur with the value 3 pixels. This will create a realistic shadow which is affected by the light from the right side.

Step 16
Ctrl-click on “Gold” layer again to load the text as a selection. Click on the Create new fill or adjustment layer button below the Layers panel.
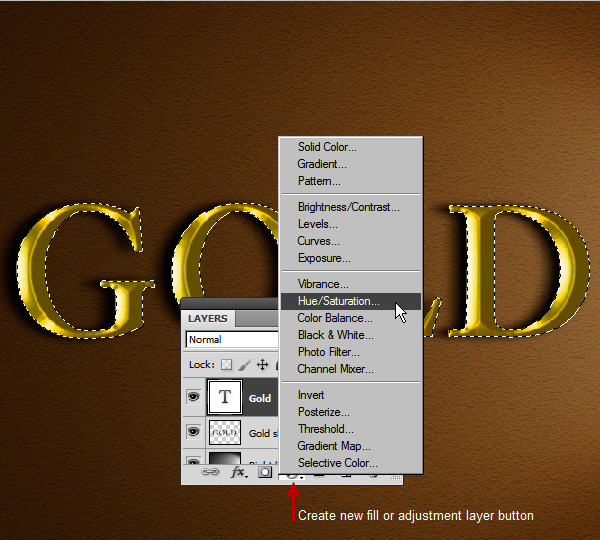
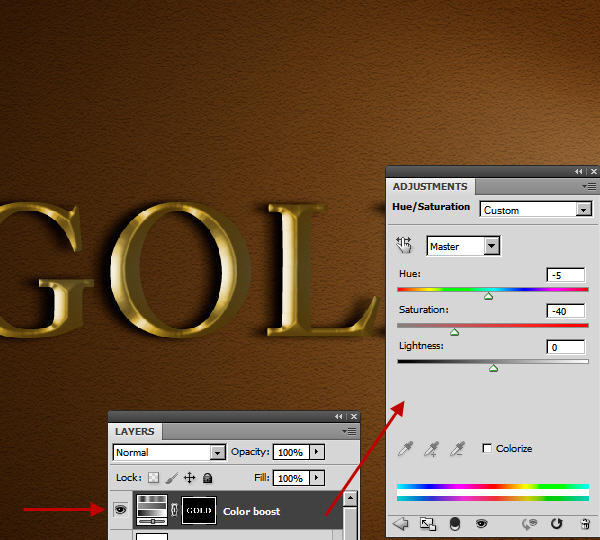
Step 17
Create a Hue/Saturation adjustment layer with the name “Color boost”. The “Gold” text selection will become a mask of this new Adjustment Layer. For the Hue/Saturation settings see the screenshot below.
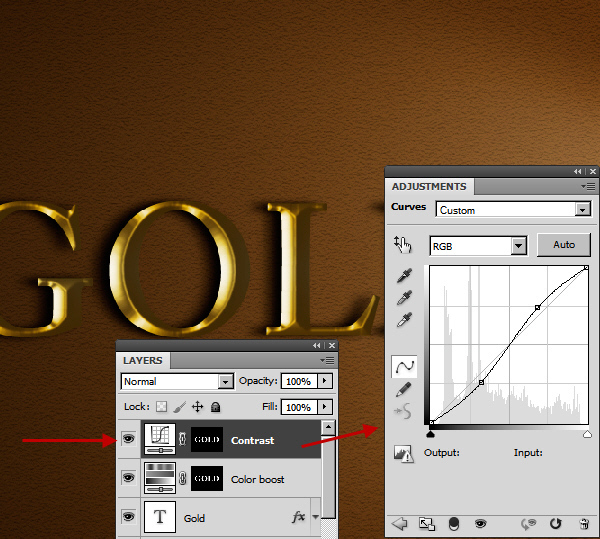
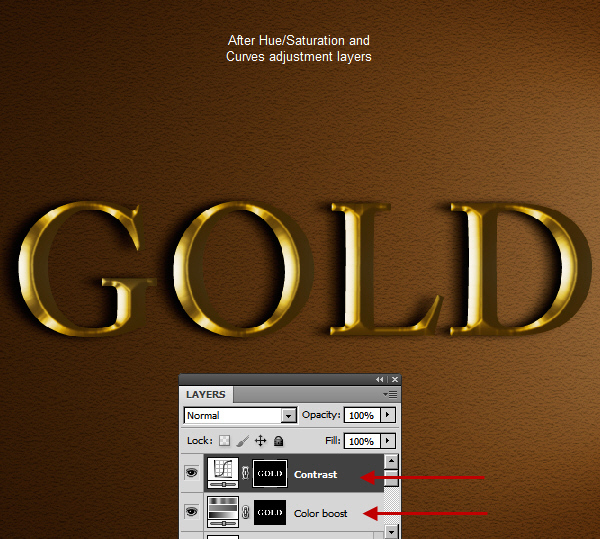
Step 18
Create another new Curves adjustment layer with the name “Contrast” on top of the “Color boost” layer. Use the following screenshot for the Curves adjustment layer settings.
Step 19
Next create a new layer on top of the “Contrast” by Alt clicking the Add New Layer button below the Layers Panel. The New Layer dialogue box will open.
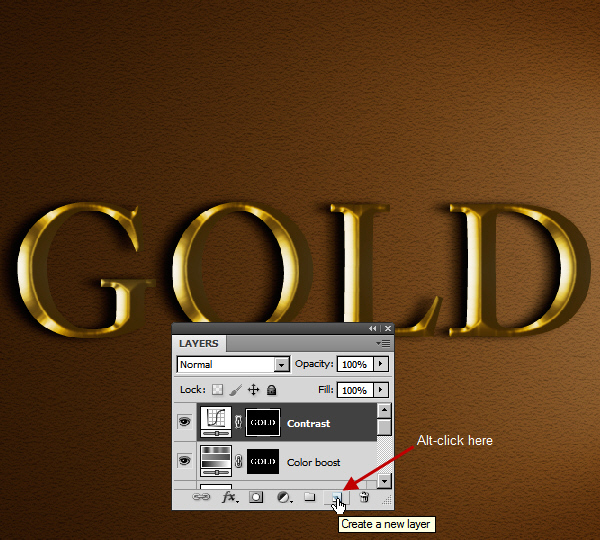
Step 20
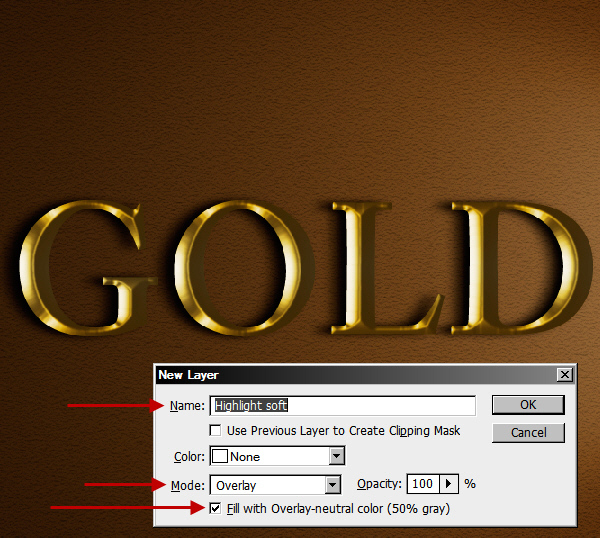
In the Mode field select Overlay and below that check “Fill with Overlay-neutral color (50% gray)” check box to fill the layer with 50% gray color. Name the layer “Highlight soft”.
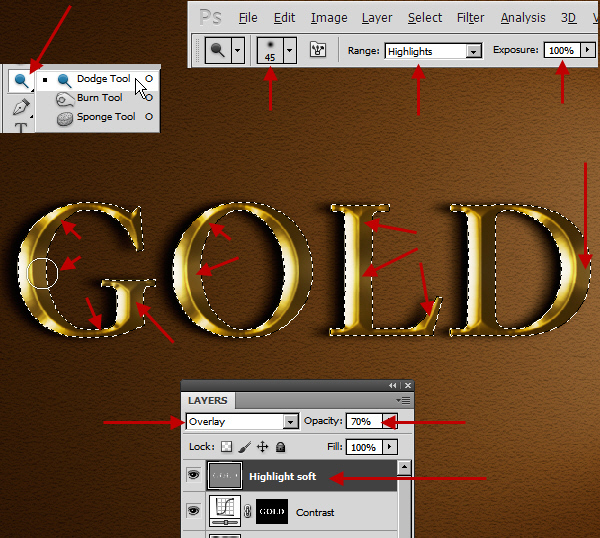
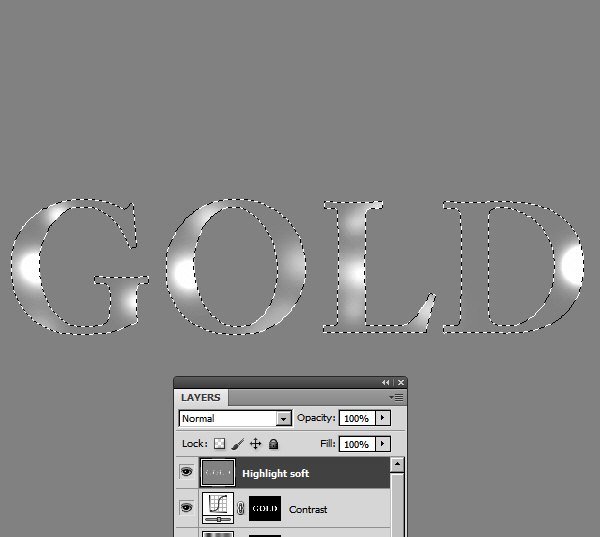
Step 21
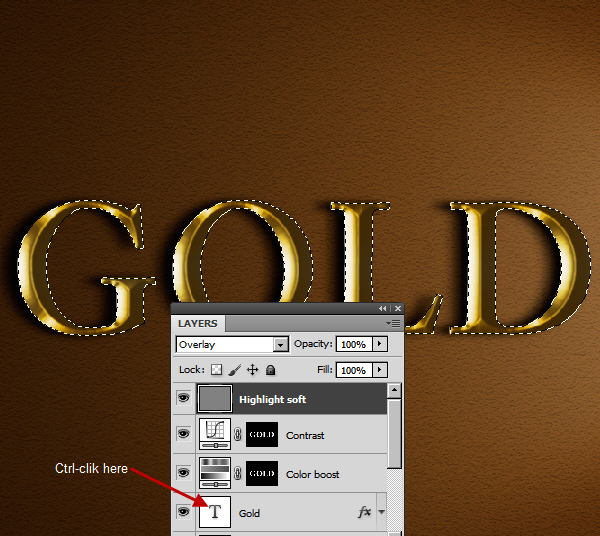
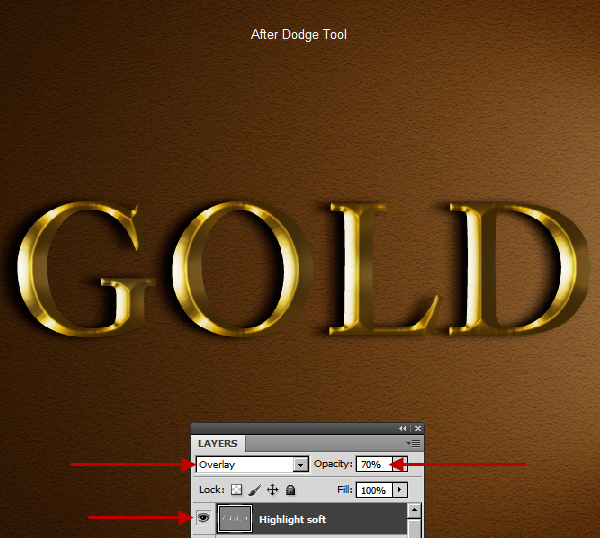
Ctrl-click on the “Gold” layer to select it. Take the Dodge Tool and make sure that in the Options Bar range is Highlight and Exposure is 100%. Click on the light areas to create bright highlight spots. Don’t overdo this, as we will do this on another layer. Notice that the active selection prevents any paint from going within or inside the gold text. After painting, use Select > Deselect (Ctrl + D) to deselect. Then change the layer opacity to 70%.
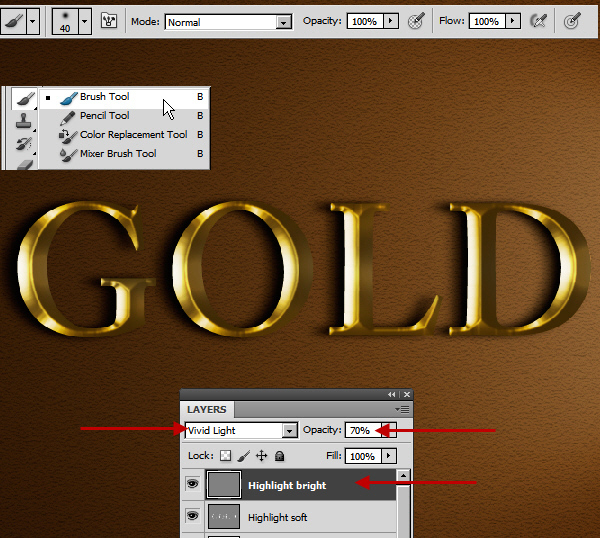
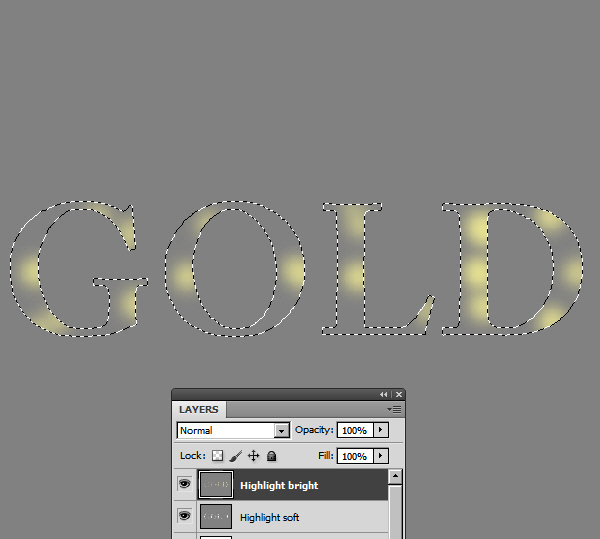
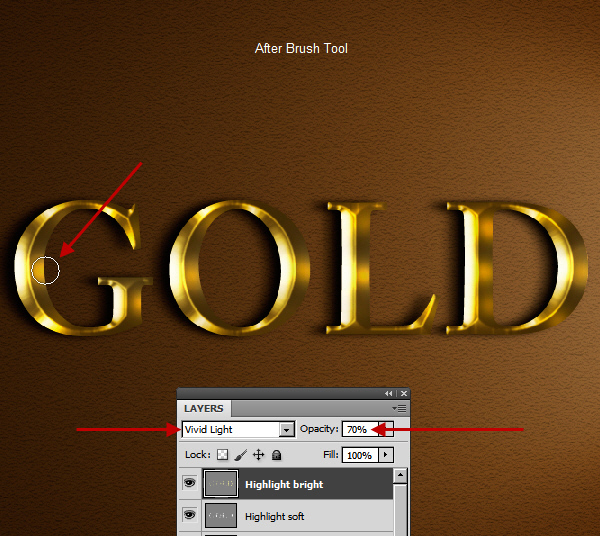
Step 22
Follow the same procedure to create another 50% gray layer with the name “Highlight bright”. Change the Blend mode to Vivid Light this time, but with the same 70% opacity as previously. Vivid Light will create a much stronger effect. We are creating the small bright spots within the highlight areas now. But the bright spots should display some color also. Select a soft round brush and press the Alt key. The brush will temporarily change into the Eyedropper Tool. Select a light yellow color from the highlight areas of the “Gold” text. Reduce the brush size to a little smaller than the “Highlight soft” layer. Now click to create highlight spots right on top of the spots created earlier in the “Highlight soft” layer. Use the screenshot below as a reference.
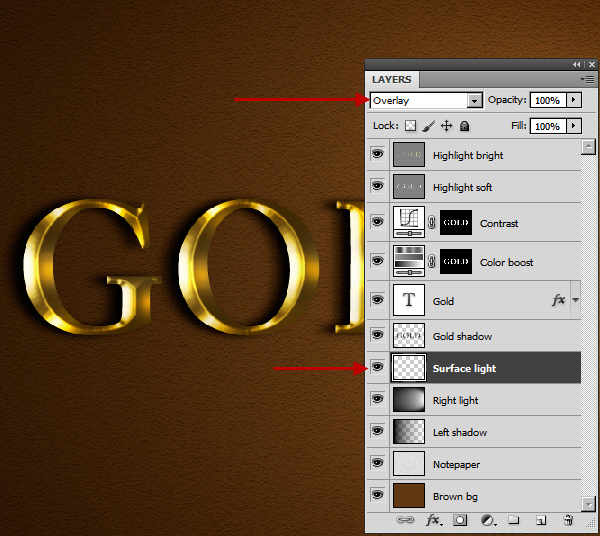
Step 23
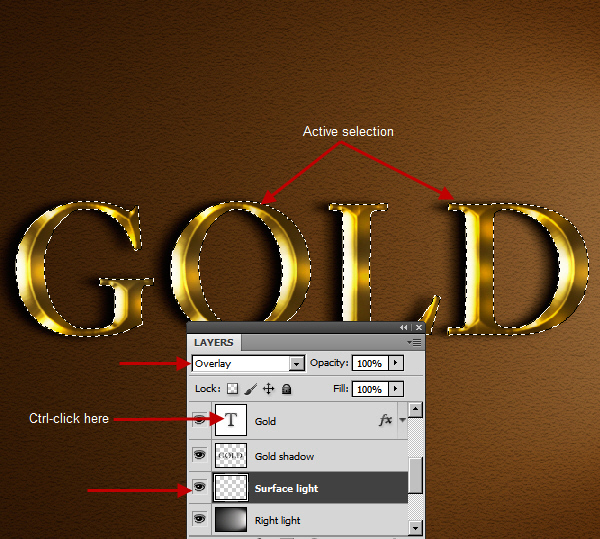
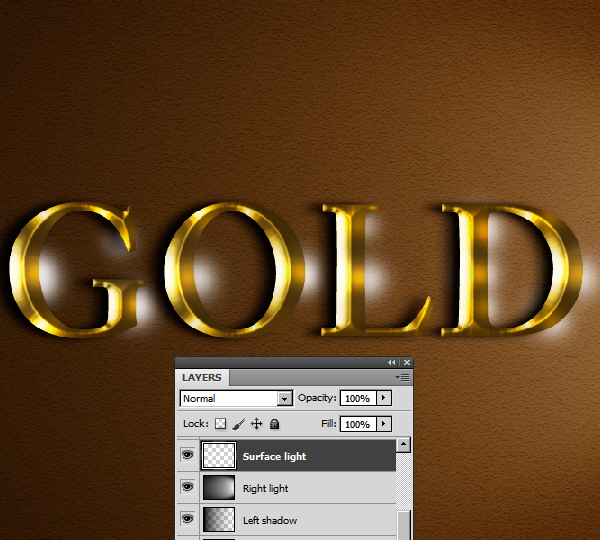
The gold we are creating here is shiny in nature. So there must be some reflected lights bouncing of the shiny surface of the gold. To show the reflected lights we need to create some bright spots on the floor (“Brown bg”) matching the top highlight spots. So create a new layer on top of “Right light” layer with the name “Surface light”. Then change the layer blend mode to Overlay.
Step 24
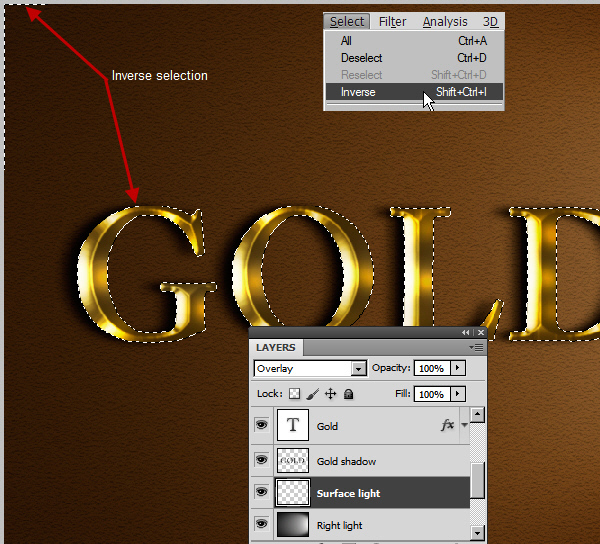
Load the selection of the gold text by Ctrl-clicking on the “Gold” layer. Then go to Menu > Select > Inverse to inverse the selection. This will select the area outside the gold text. Now using the same light yellow color from “Highlight bright” layer and a soft round brush paint the bright color spots in the “Surface light” layer. Match the position of the spots with the position of the “Highlight soft” and “Highlight bright” layers. Deselect when you are done.
Step 25
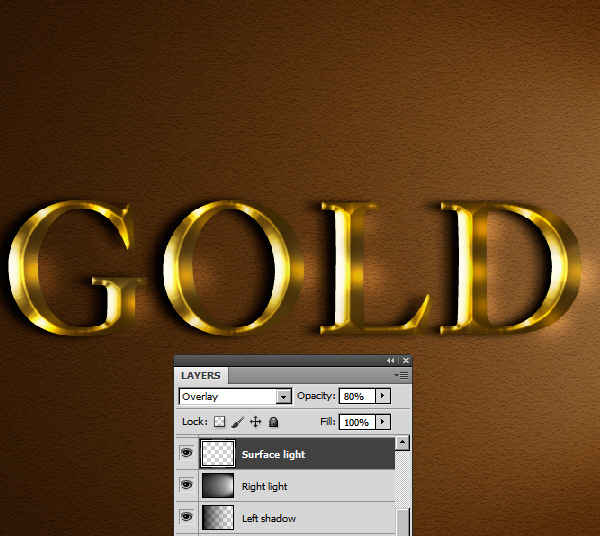
Change the blend mode of this layer to Overlay and opacity to 80%. The bright spots will blend with the surface below.
Step 26
Next we will add some Lens Flares on top of the bright highlight spots. We will use Filter > Render > Lens Flare for this. But if we apply Lens Flare directly on top of the “Highlight bright” layer, then later it will be impossible to edit. So for a flexible workflow, we will create a new layer with the name “Lens flares” on top of “Highlight bright” layer and fill with black. But we don’t want this black color to be visible. Also we need a very bright Lens flare effect. To achieve all of these we will use Linear Dodge (Add) blend mode for this layer. So change the blend mode of “Lens flares” layer to Linear Dodge (Add).

Step 27
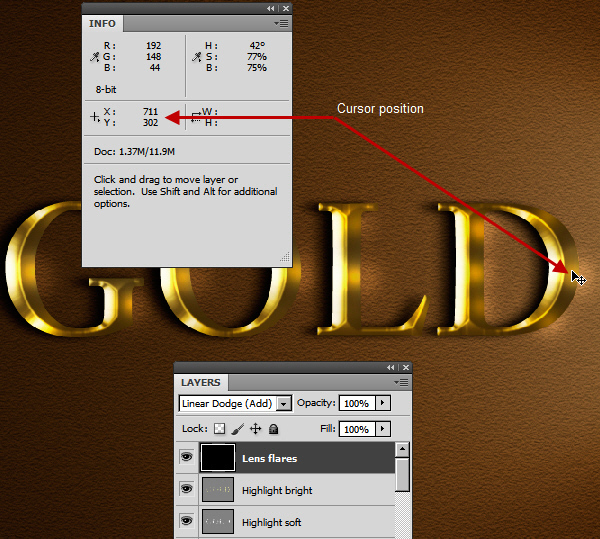
Now we need to find the exact position of the lens flares. Open the Info Panel from Window > Info. Then click on the plus (+) sign besides X and Y and select pixels. The plus sign is actually a small button. Keep this window open.
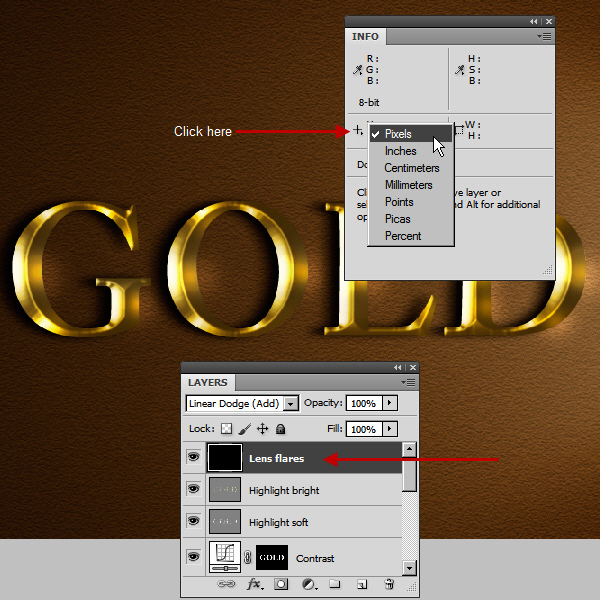
Now position your cursor on top of a bright spot and check the exact x and y coordinates of your cursor position in the X and Y area of the Info panel. Write down this information on paper or in a text file.
Open Filter > Render > Lens Flare. But there is no typing field for x and y coordinates! Press the Alt key and click within the Lens Flare preview window. A small “Precise Flare Center” dialogue box will open now. Type the previous x and y information in the “Set flare center” fields and click ok to close.
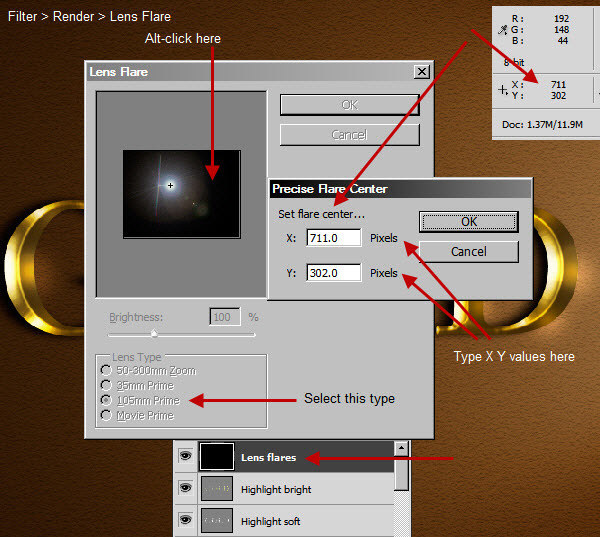
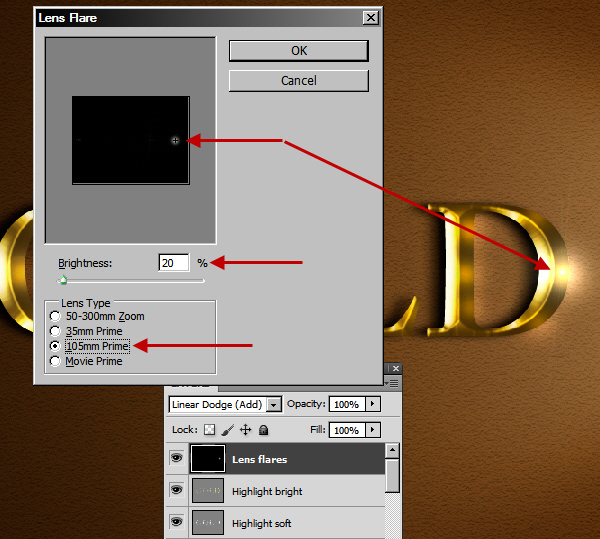
Back in the main “Lens Flare” window select 105 mm Prime as the Lens Type and click ok to accept. The Lens Flare is positioned on the exact spot.
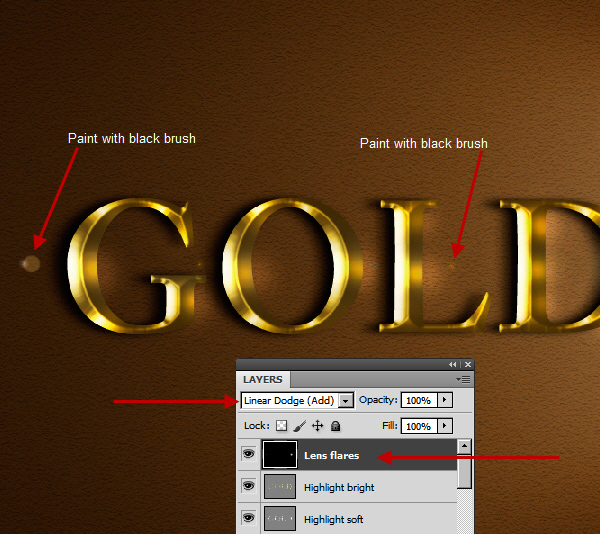
The problem with the Lens Flare filter is it creates some extra light artifacts (i.e rings, spots etc.) with the main flare. Take a soft Brush with black color and paint over these areas to hide them.
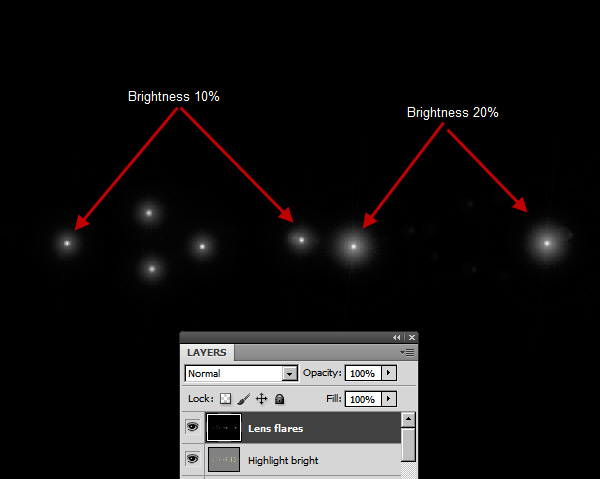
Step 28
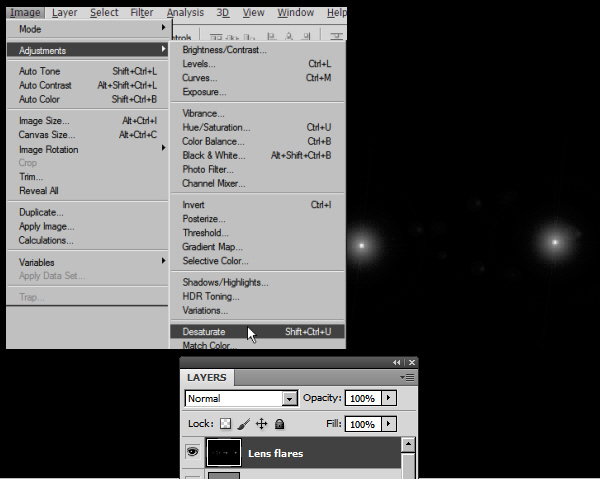
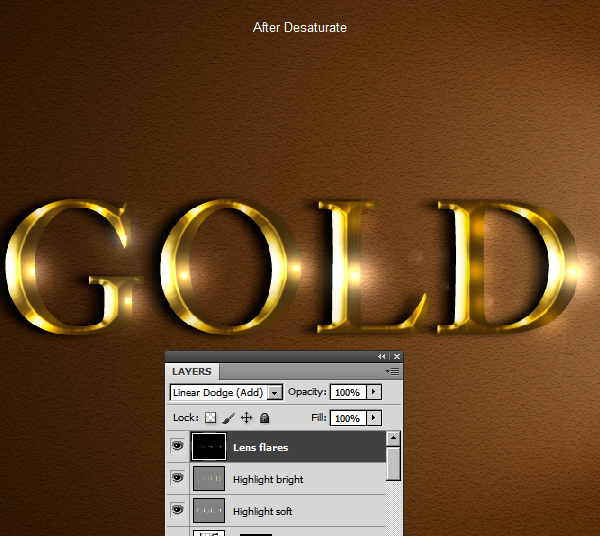
Follow the same technique to create a few more flares. Then go to Image > Adjustment > Desaturate. This will remove the color cast which comes with the Lens Flare filter. Check the screenshot below for the position of the flares.
Step 29
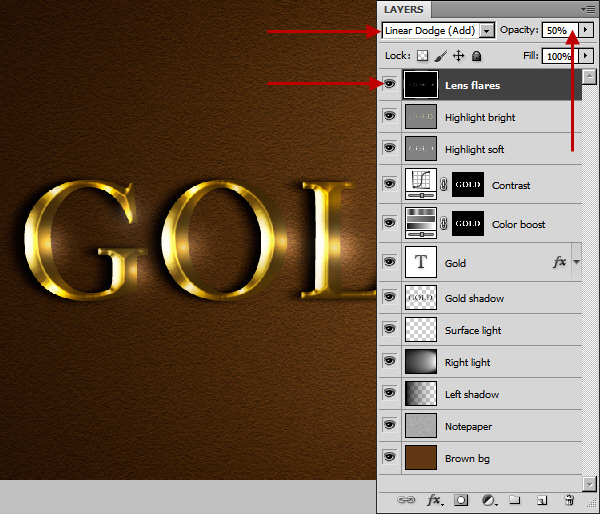
Finally, change the Opacity of “Lens flares” layer to 50%.
And We’re Done!
Congratulations, the Realistic Gold Text Effect is now complete. Below is the final result.