In this Photoshop tutorial, I’ll show you how to create a fantasy scene featuring a flying girl with giant butterflies.
You’ll learn how to combine several stock images using adjustment layers, masking, and brushes. You will also learn how to enhance colors, create depth of field and more.
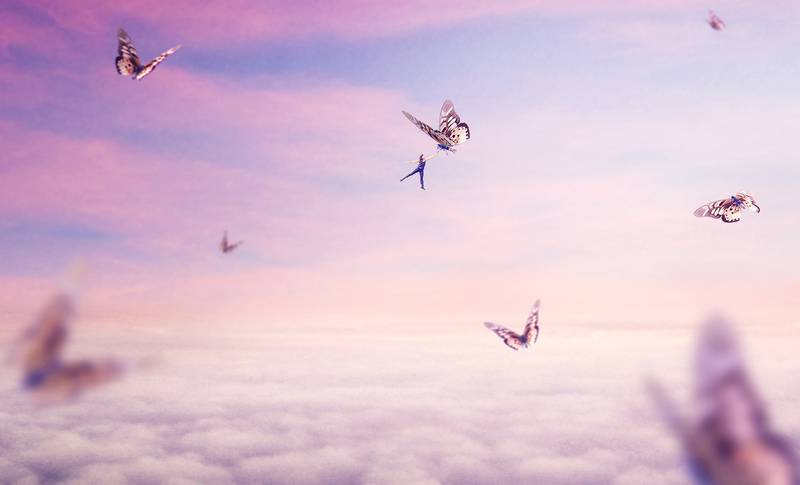
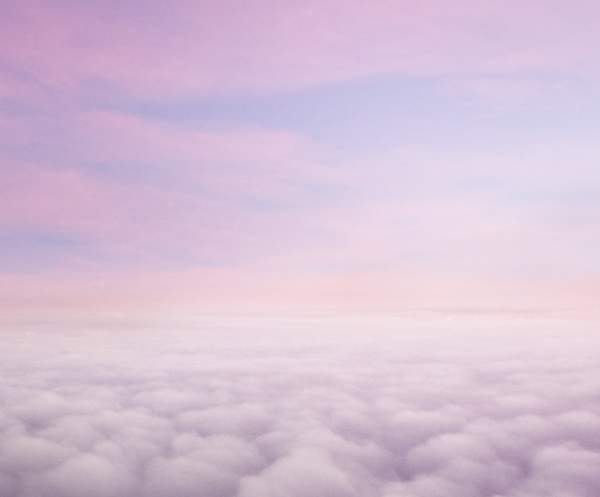
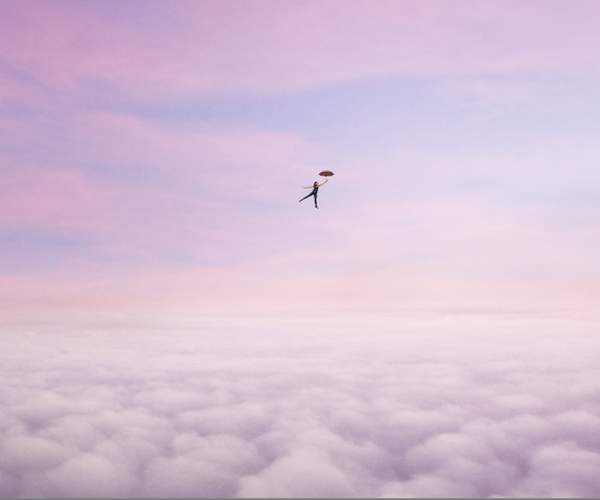
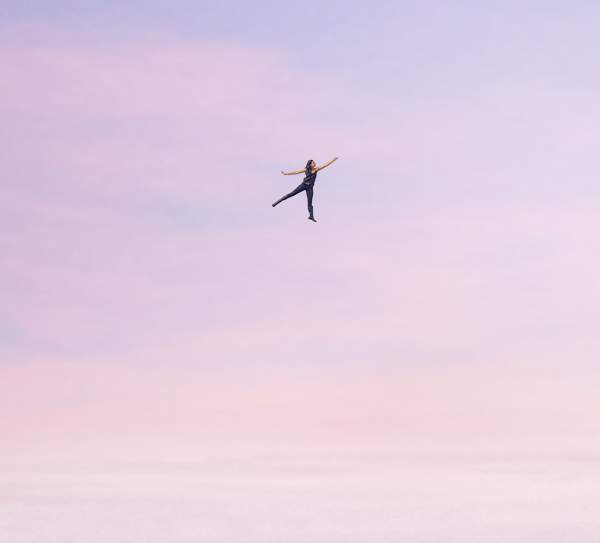
Final Image
Tutorial Details
- Program : Photoshop CS3+
- Estimated Completion Time : 90 minutes
- Difficulty : Intermediate
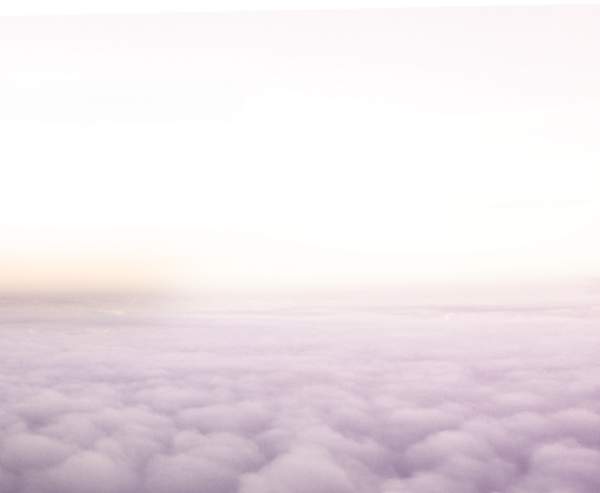
Resources
Step 1
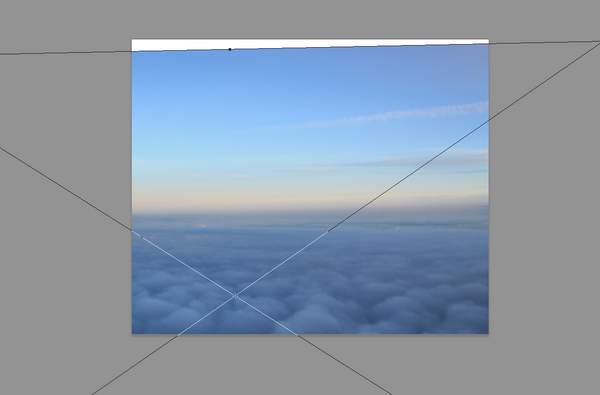
Create a new 1400×1156 px document in Photoshop and fill it with white. Open the clouds image and drag this image into the white canvas using the Move Tool (V). Use the Free Transform Tool (Ctrl+T) to rotate it to the left a bit to make the horizon more in proportion.
Step 2
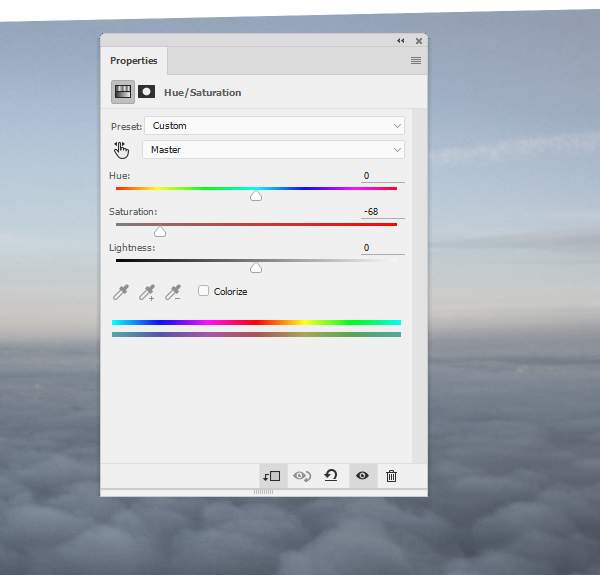
Go to Layer > New Adjustment Layer > Hue Saturation and set it as Clipping Mask. Bring the Saturation value to -68:
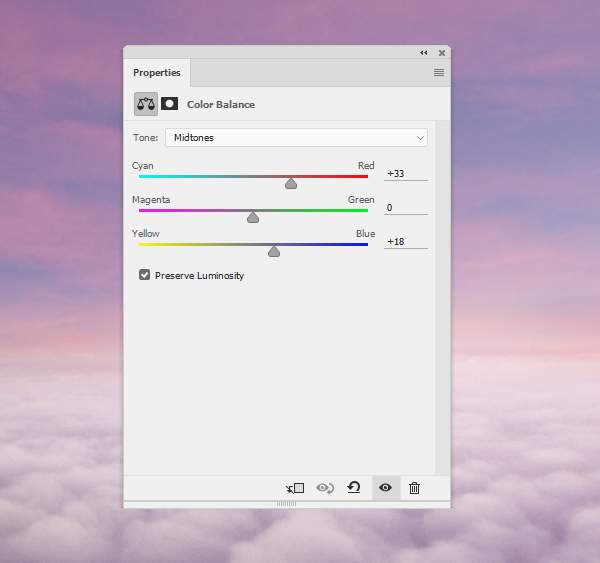
Step 3
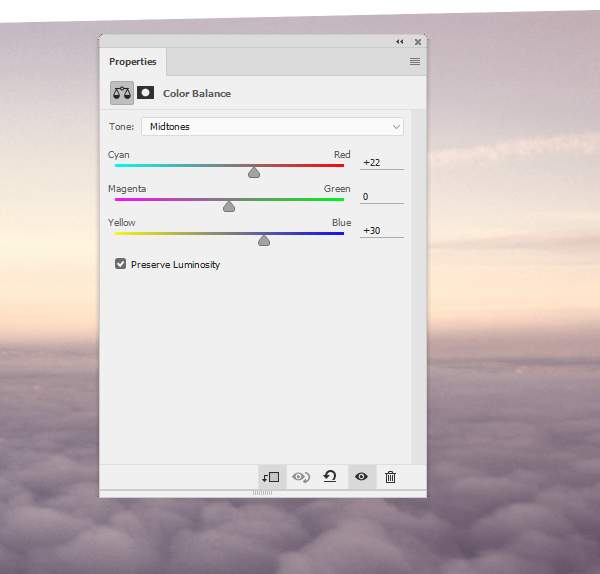
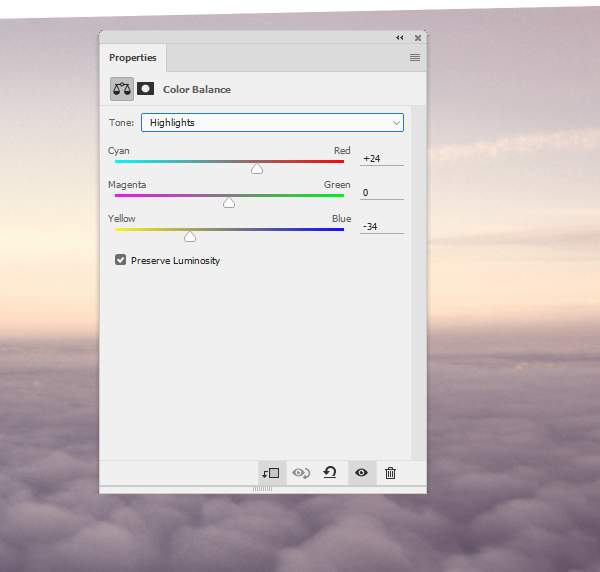
Use a Color Balance adjustment layer and change the Midtones and Highlights settings:
Step 4
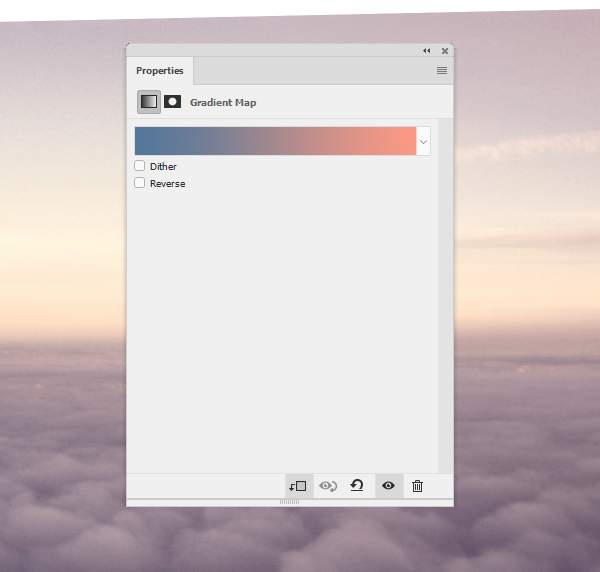
Make a Gradient Map adjustment layer and pick the colors #53789b and #fb9a84. Alter this layer mode to Soft Light 20%. It’s to bring more warm pink to the clouds.
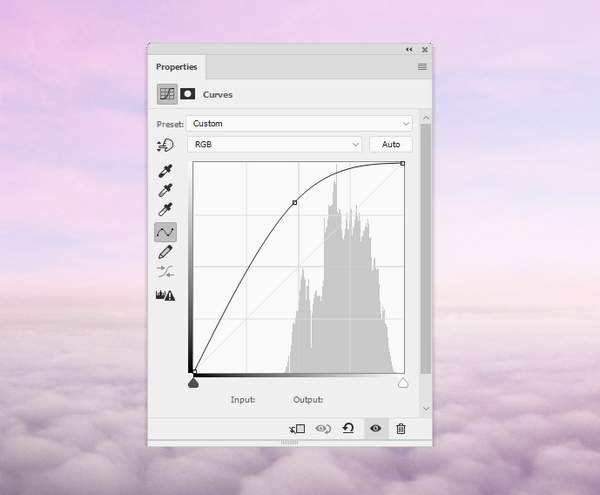
Step 5
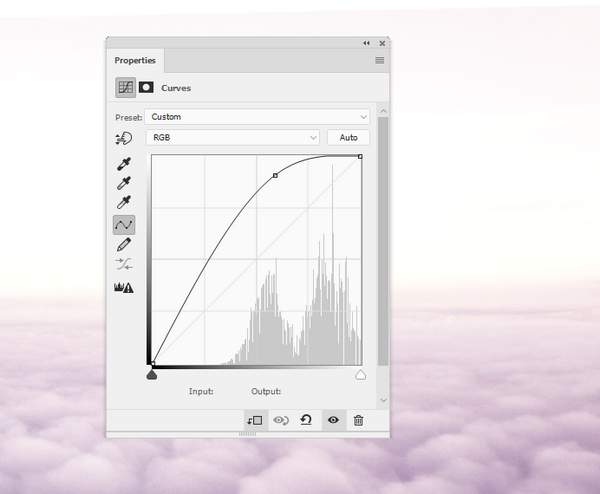
The clouds look too dark and dull so use a Curves adjustment layer to brighten them. On this layer mask, use a soft black brush with a low opacity (about 20-30%) to paint on the left horizon and the left foreground. We aim to make the main light source come from the right horizon.

Step 6
Open the sky image. Use the Rectangular Marquee Tool (M) to select the sky area only and place it in the upper half of the canvas.
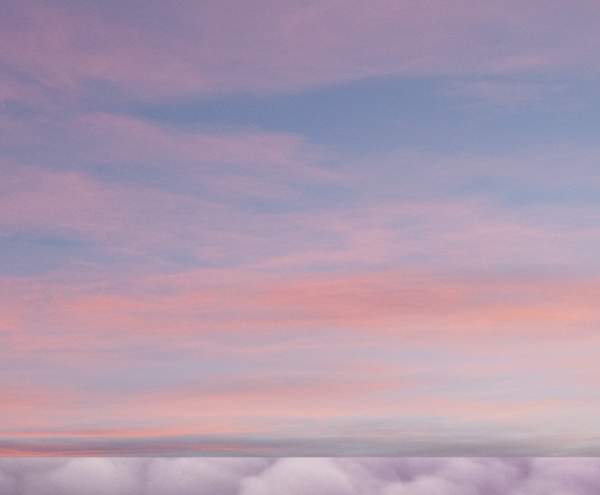
Click the second icon at the bottom of the Layers panel to add a mask to this layer. Use a soft black brush to erase the hard edges and blend it with the existing sky and horizon.
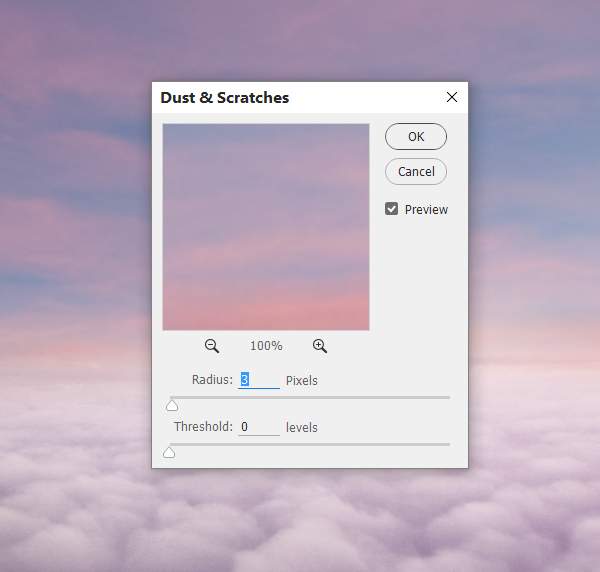
Step 7
Go to Filter > Noise > Dust & Scratches to soften the sky a little:
Step 8
Add a Color Balance adjustment layer to match the sky’s color with the clouds:
Step 9
Use a Curves adjustment layer to brighten the sky. On this layer mask, use a soft black brush to reduce the lightness in the sky and fit the light in the horizon.

Step 10
Isolate the model from the background and add her to the middle section of the canvas.
Use a layer mask with a hard black brush to remove the umbrella:
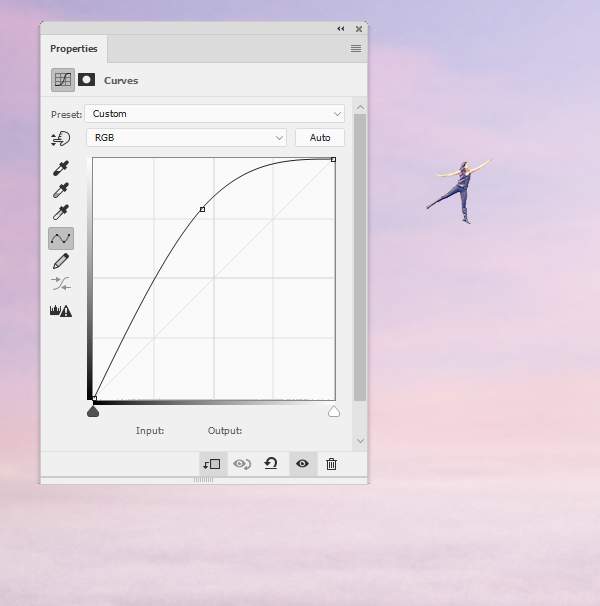
Step 11
Make a Curves adjustment layer to make the model brighter:
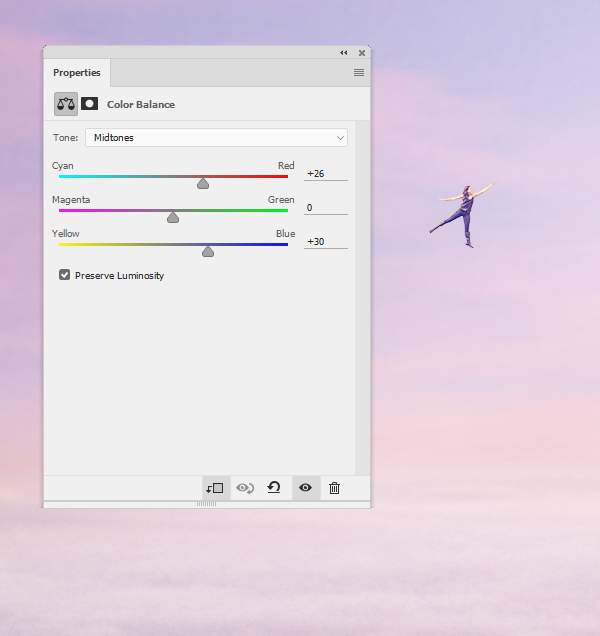
Step 12
Create a Color Balance adjustment layer to make the model’s color more vibrant:
Step 13
Open the butterflies image. As it has a transparent background so just use the Move Tool to place different buttterflies over the canvas. Set one perched on the spreading arm of the model and some very big ones near the foreground.
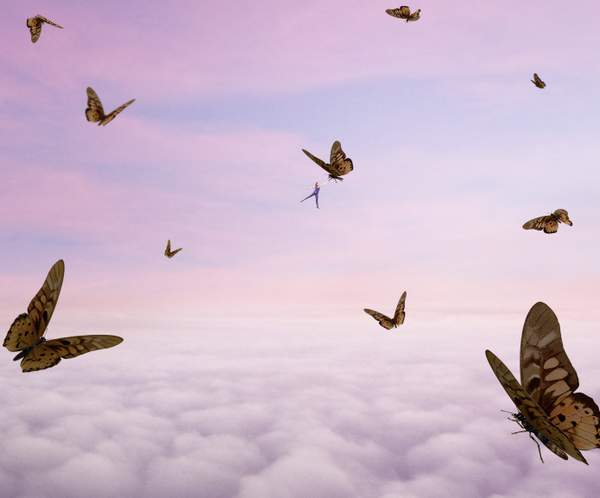
Step 14
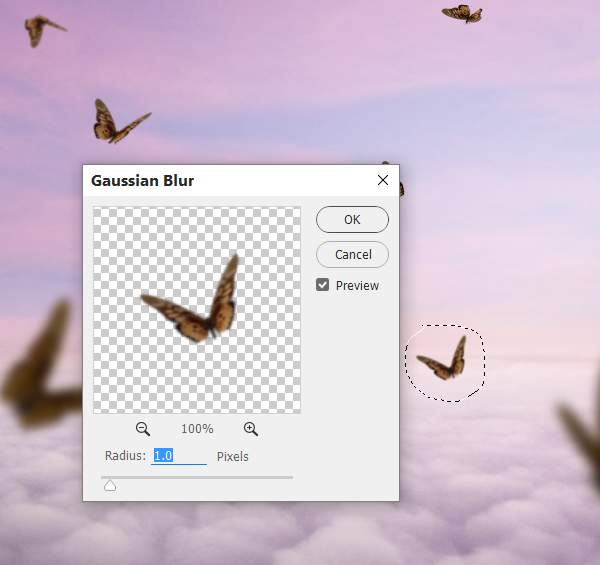
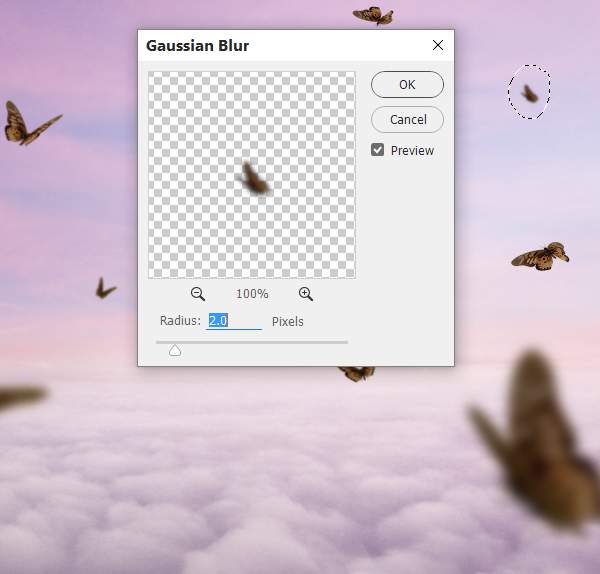
Apply the Gaussian Blur filter to some of the butterflies. I’ve set the radius to 10 and 12 px to the biggest ones in the foreground.
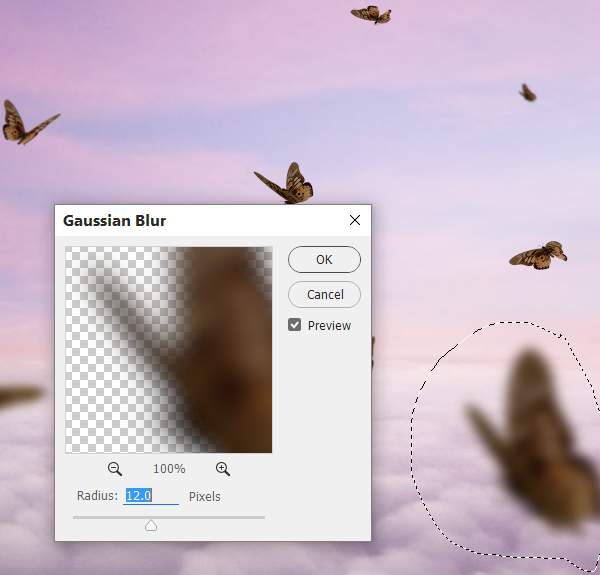
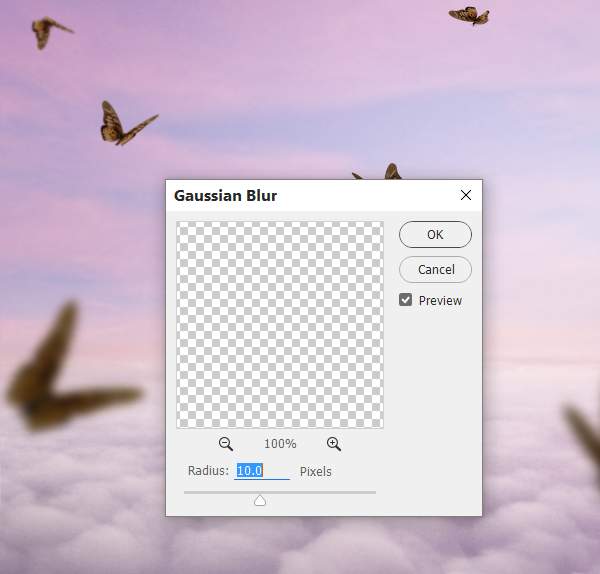
To the others, I’ve set the radius to 1 or 2 px to vary the depth of field. Feel free to blur the butterlies you want as long as you feel good.
Step 15
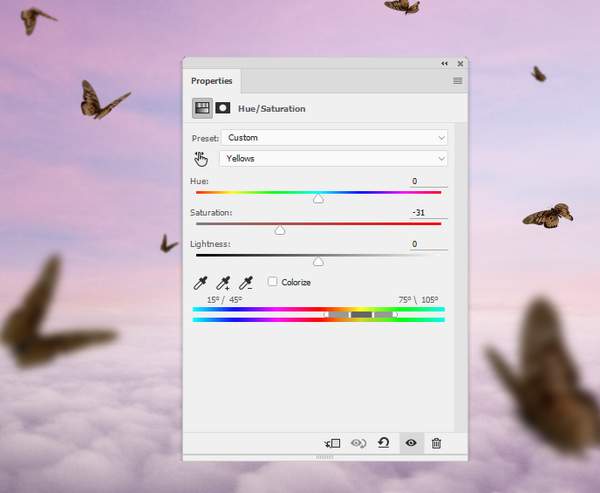
Select all the butterfly layers and hit Ctrl+G to make a group for them. Change this group mode to Normal 100% and use a Hue/Saturation adjustment layer to desaturate the butterflies:
Step 16
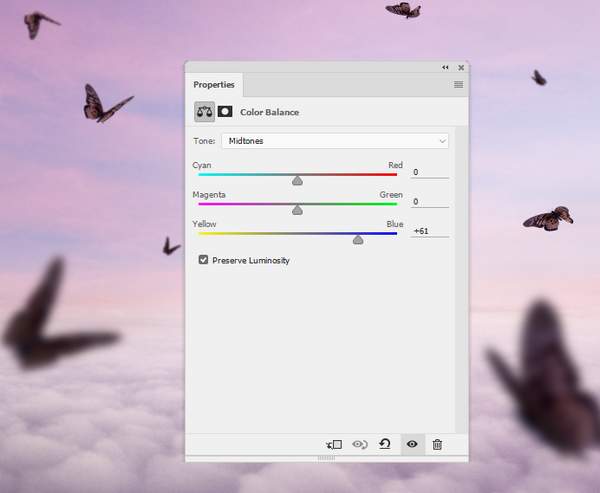
Add a Color Balance adjustment layer and alter the Midtones settings:
Step 17
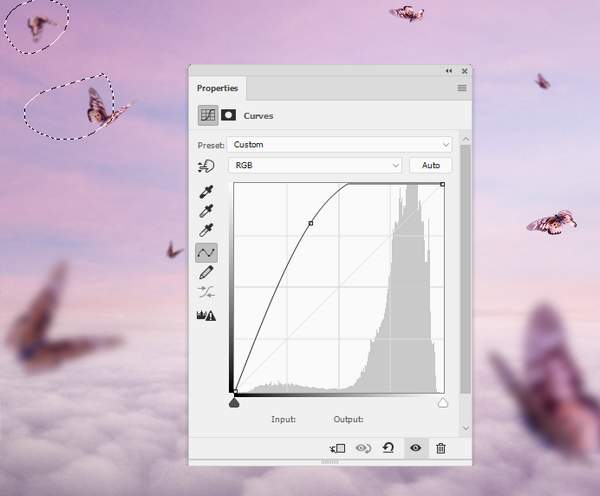
Make a Curves adjustment layer to brighten the butterflies. Paint on the ones on the top left to reduce light there.
Step 18
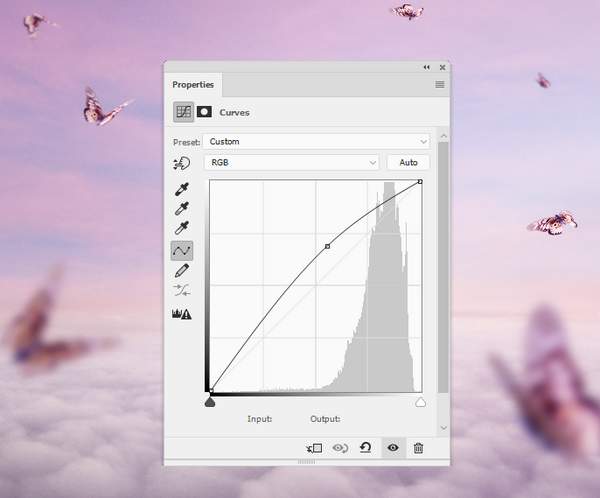
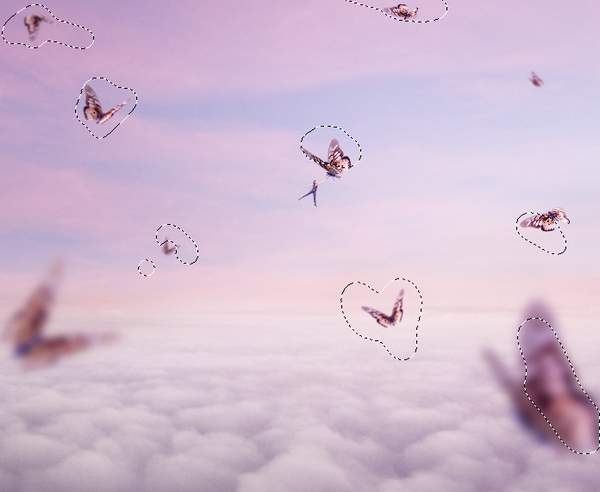
Use another Curves adjustment layer to make some butterflies nearer the right horizon brighter. The selected parts show where to paint on the layer mask.
Step 19
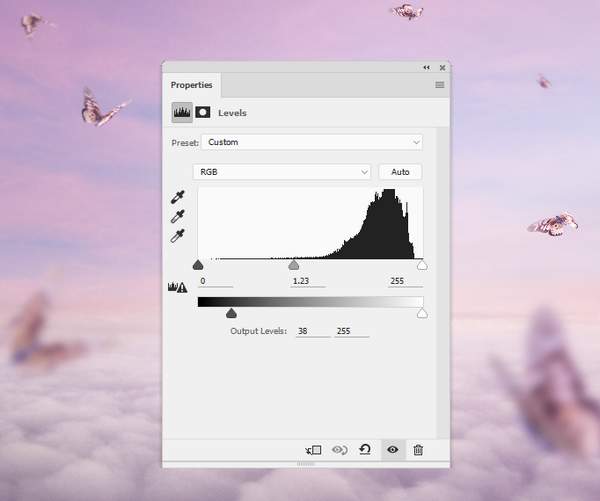
Add a Levels adjustment layer to increase the light a bit for all of the butterflies.
Step 20
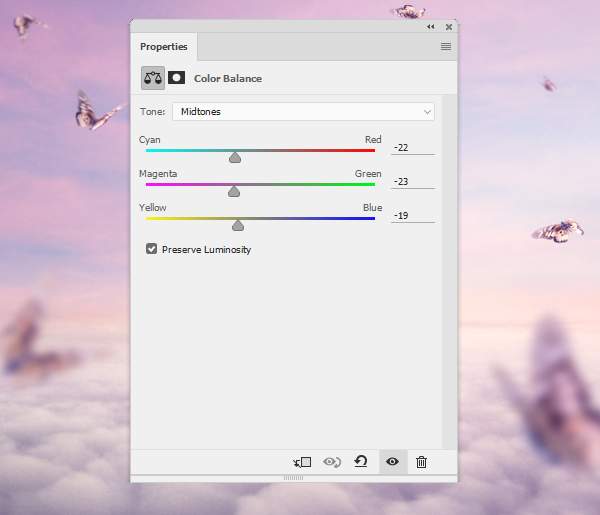
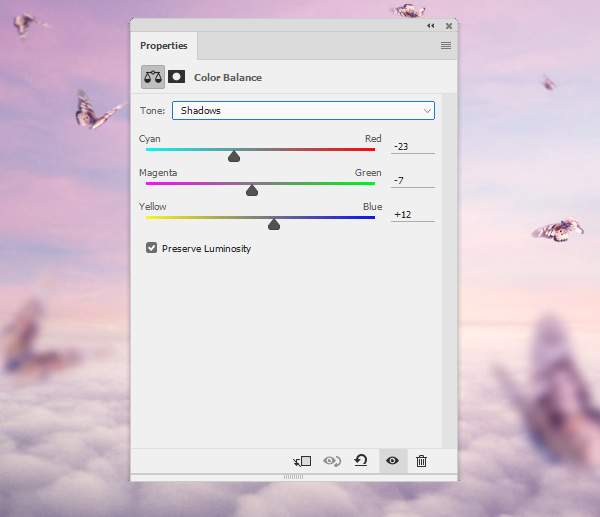
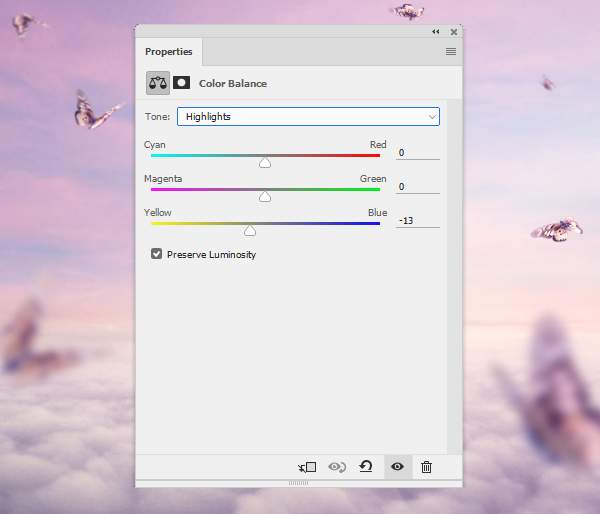
Make a Color Balance adjustment layer on top of the layers and alter all of the settings:
Step 21
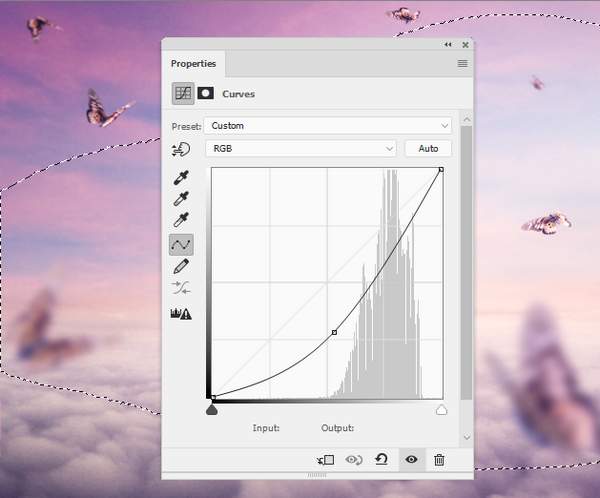
Create a Curves adjustment layer to darken the left edges and foreground a bit. Paint on the rest to keep its lightness as well as create a nice contrast for the scene.
Step 22
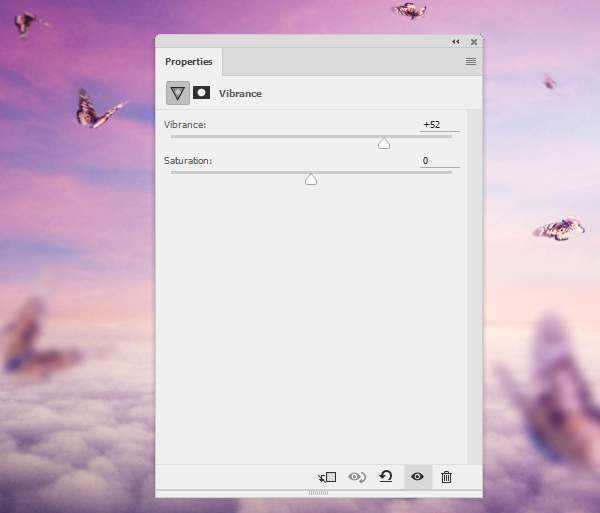
Use a Vibrance adjustment layer to enhance the final effect.
And We’re Done!
I hope that you enjoyed this tutorial.
