
In this Photoshop tutorial we will add our own watermark sign to an existing photo.
We will use the Type Tool and a blending mode to achieve pleasing effects.
Final Image
As always, this is the final image that we’ll be creating:

Tutorial Details
- Program: Adobe Photoshop CS3
- Estimated Completion Time: 40 minutes
- Difficulty: Beginner-Intermediate
Resources
Step 1
Let’s start by creating our pattern in Photoshop. Create a new document 649×504 pixels (Ctrl +N).

Step 2
Select the Type Tool (T) and choose whatever font you feel like (for this tutorial I am using Calibri Bold).
Type your desired text (like your company, your name or your website, etc).

Step 3
Let’s add the copyright sign. Click with the type tool again to create a new text somewhere in the document. Hold the alt key and type 0169. You should see the copyright sign appearing. If for some reason you don’t manage to create the copyright sign simply search for it on Google and copy/paste it in your text. I also added the current year – 2015. You can also group the two text layers together by holding the Ctrl key and clicking on each layer in the layer palette.

Step 4
Select the text group in the layers palette and press Ctrl + T to open the Free Transform Tool.
Rotate the text at a 25 degree angle (you can hold the Ctrl key while rotating to rotate the text in fixed increments).

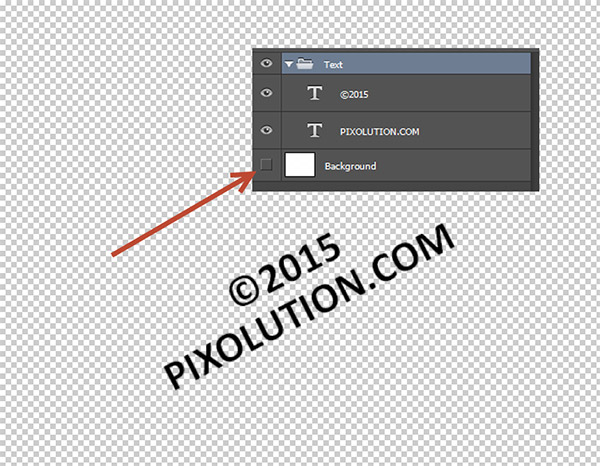
Step 5
Turn off the background layer (in the layers palette you can see some eyeballs next to the layer thumbnails. Simply click on those eyeballs to toggle the visibility of the layers on and off).
Step 6
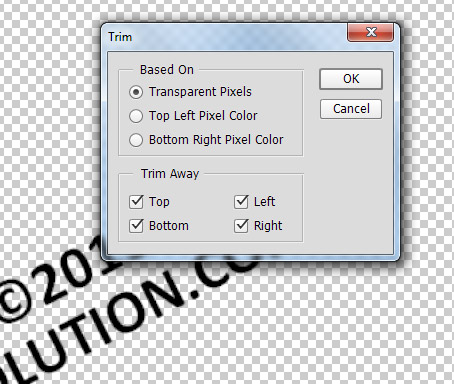
Let’s trim the document so we have only the text and no more additional white space around it. We could use the Crop tool to manually do this but thankfully Photoshop already has a command that does that for us. Simply go to Image > Trim and use the settings shown below. Press Ok.
Step 7
Now that the image is trimmed let’s define our pattern. In order to do this go to Edit > Define Pattern. Give a suitable name to your pattern (I named mine “watermark”) and press Ok.

Step 8
Open the image on which you desire to apply the watermark – in my case I opened the image “Landscape”.

Step 9
Create a new layer by pressing Ctrl + Shift + Alt +N. Press Shift + F5 to open the fill window. From the Contents drop down menu choose Pattern. From the Custom Pattern drop down menu choose the pattern we created in the previous steps.

Step 10
As you can see we have a watermark applied but it is quite intrusive and prevents us from properly viewing the image. In order to correct that we will use one of the Photoshop’s most useful tools: Blending modes. Simply change the blending mode of the pattern layer to Soft Light and lower the Opacity to 30%. Now you should see your watermark beautifully blending with the image.

And We’re Done!