In this Photoshop tutorial we will create a painting from a photo and than we’ll give it a cigarette break. We’ll use both simple and advanced techniques.
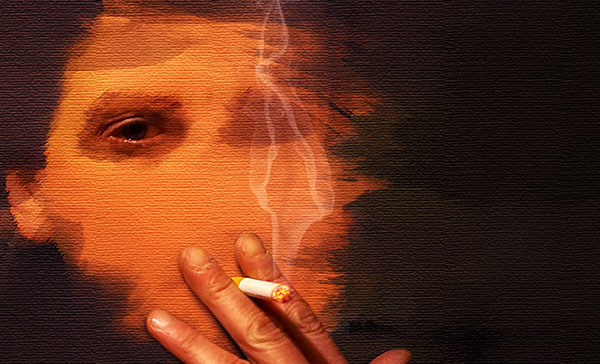
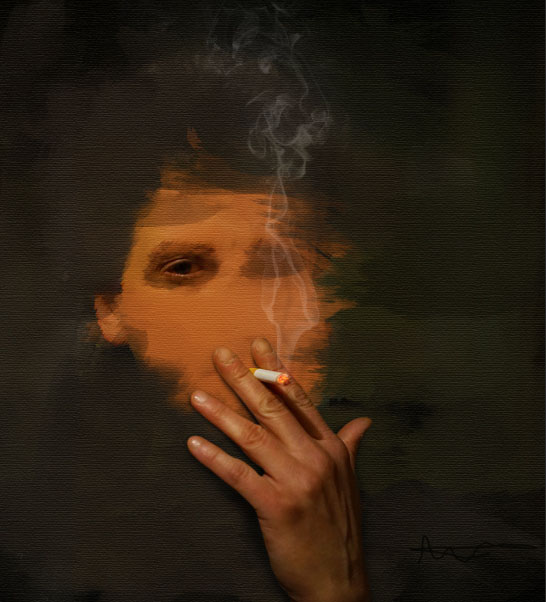
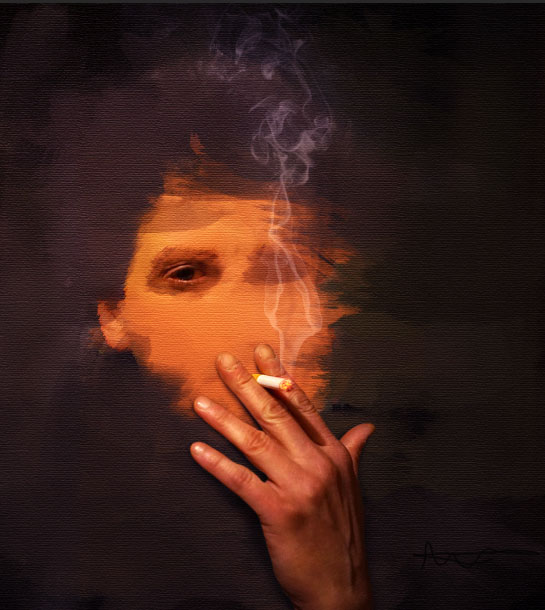
Final Image
As always, this is the final image that we’ll be creating:

Tutorial Details
- Program: Adobe Photoshop CS3
- Estimated Completion Time: 30 minutes
- Difficulty: Beginner-Intermediate
Resources
Step 1
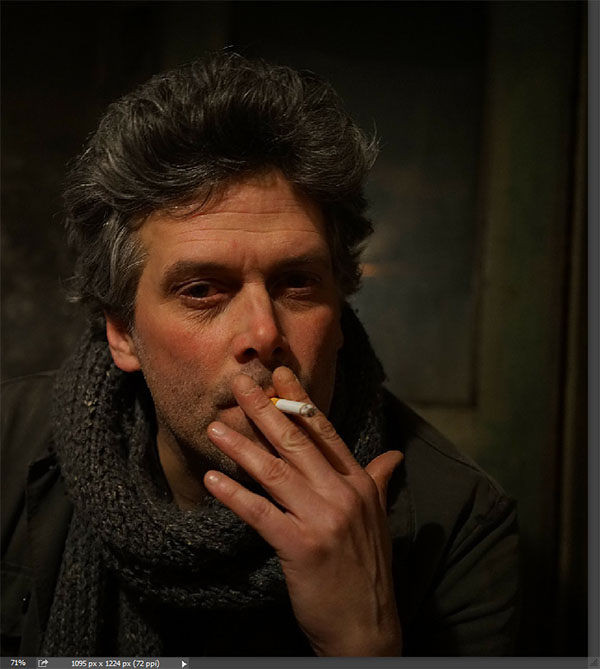
Open the image “Smoking”.
Step 2
Apply a Dry Brush filter by going to Filter > Filter Gallery and choosing Dry Brush. Use the settings shown below.

Step 3
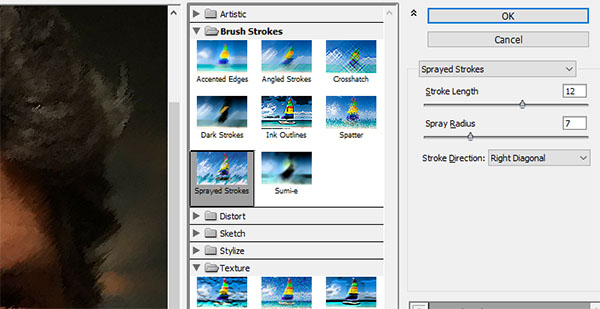
Create a new layer from all visible layers (Ctrl + Shift + Alt + E) and apply a Sprayed Stroke effect (Filter > Filter Gallery).
Step 4
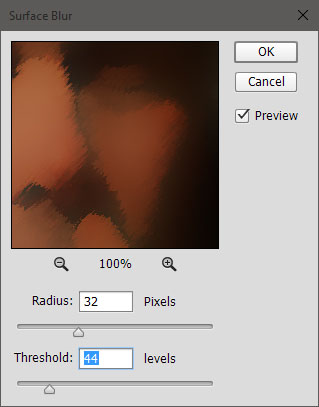
Create a new layer from all visible layers and this time apply a Surface Blur (Blur > Surface Blur) with the settings shown below.
Step 5
Import the “Dry Brushes” by double clicking the downloaded .abr file. Create a new layer (Ctrl + Shift + Alt + N) and choose a brush you like (from the previously imported brushes).
Set the opacity to 100% and sample a color from an area around the hair. Paint with that color in the area from where you sampled the color – feel free to change the brush settings (F5) – mainly the Shape Dynamics. Add a size jitter, an angle jitter or/and a roundness jitter.
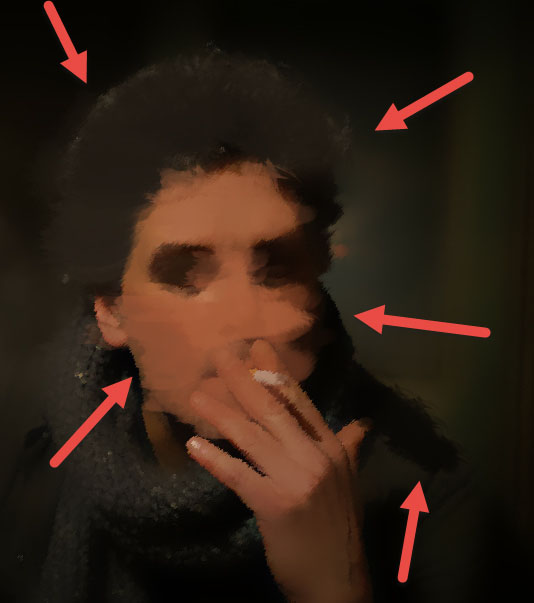
You can see in the photo below that I painted the hair, the shoulder and the face.
Step 6
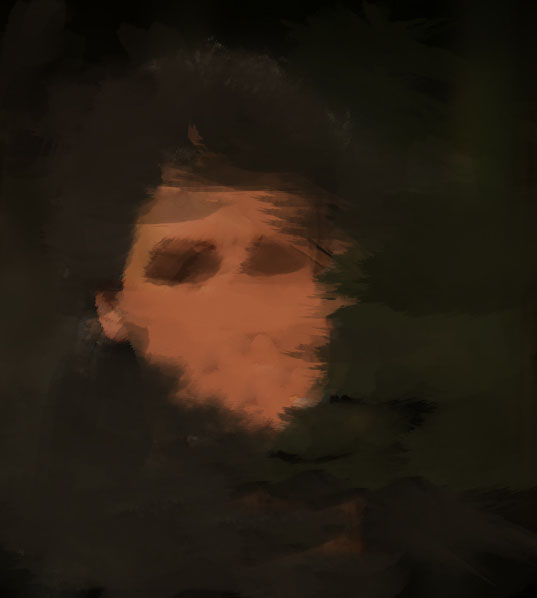
Create a new layer and repeat the process described in step 5 but this time focus on the background. You can even use the chalk brush tool but make sure to sample from multiple points to create a variety of colors.
Step 7
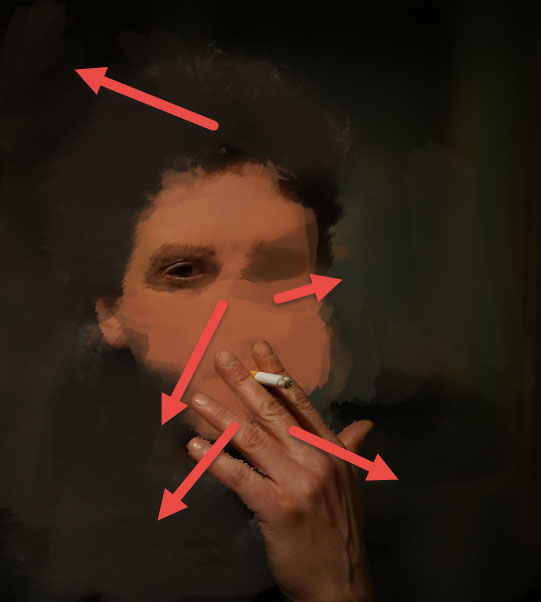
Create some more new layers and play around with the dry brushes and various colors and opacities. You can see my result below.
Step 8
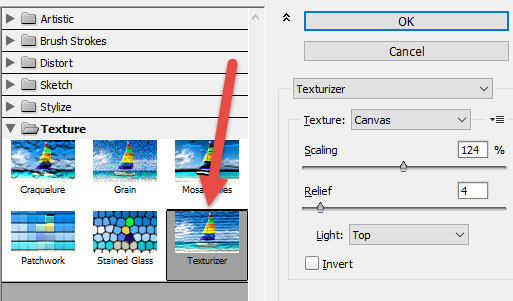
Create a new layer from all the visible layers and apply a canvas texture by going to Filter > Filter Gallery, choosing the Texturizer effect and selecting Canvas on the type of texture (pic below).
Now it almost looks like a real painting – however, we’re still missing a very important element.
Step 9
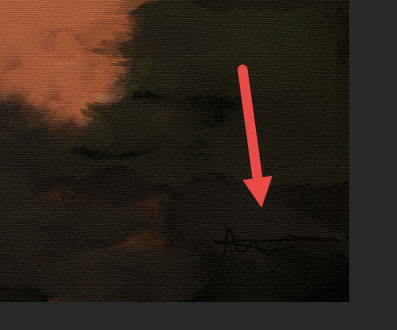
And that element is a signature. Create a new layer and with standard round soft brush at 100% opacity sign your name (or scrabble something resembling a signature) in the bottom right corner of the image.
Step 10
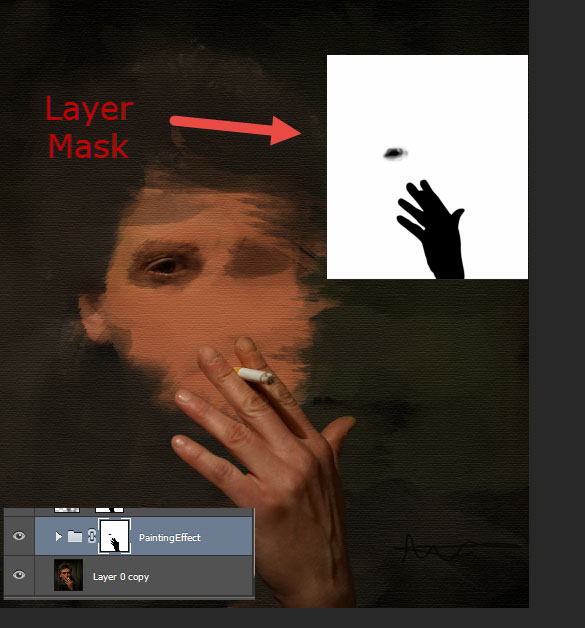
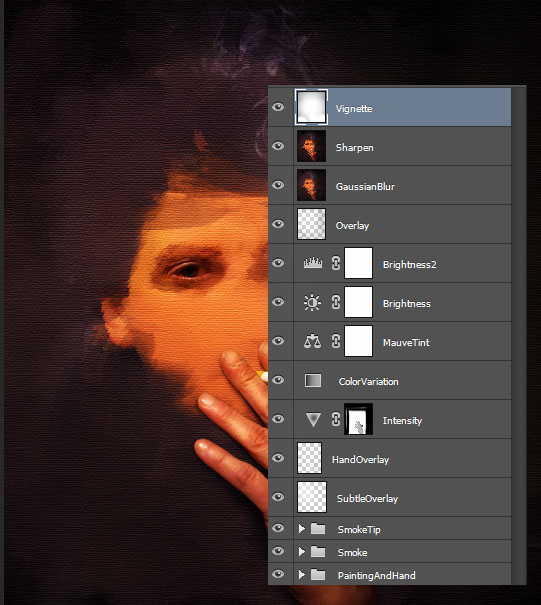
Let’s separate the hand and the cigarette from the painting. It’s a very easy process – first select all the layers we created until now (except the original layer) by holding Ctrl and clicking on each layer and press Ctrl + G to group them.
Add a layer mask to this group by going to Layer > New Layer Mask > Reveal All. In a layer mask black reveals and white conceals.
Click on the layer mask to make it active and with a round soft brush paint with black at 100% opacity in the middle of the eye and 50% opacity around it. By doing this we will hide all the layers in the group (where the painting is) thus letting the original layer show through.
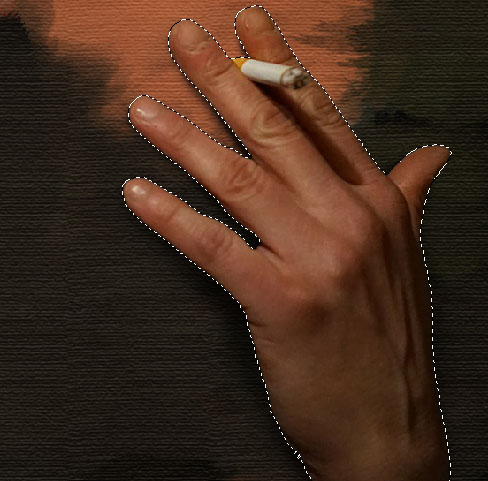
The hand is a bit trickier but not hard. Select the Pen Tool and create a shape around the hand and the cigarette. Once you’re done press Ctrl + Enter to transform it into a selection.
Press D to set default colors and click on the layer mask to make it active. Press Ctrl + Backspace to fill the selection with black and there you have it.
Step 11
The hand looks fake because there’s no shadow underneath. Create a new layer and Ctrl + Click on the group’s layer mask you painted in the previous step. This will make an inverse selection of the hand – and by this I mean that everything but the hand and the eye are selected.
Now paint gently with the round soft brush over the hand to create the shadow. Because the hand is not selected (everything but the hand is selected) we will not paint over the hand.
Step 12
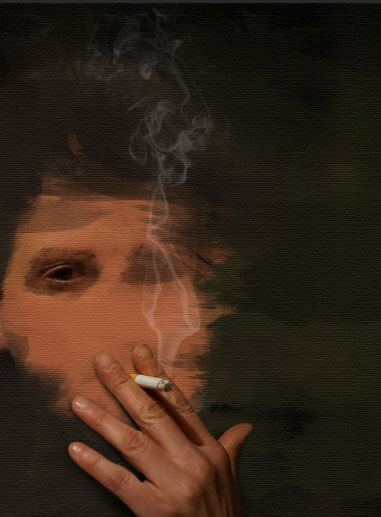
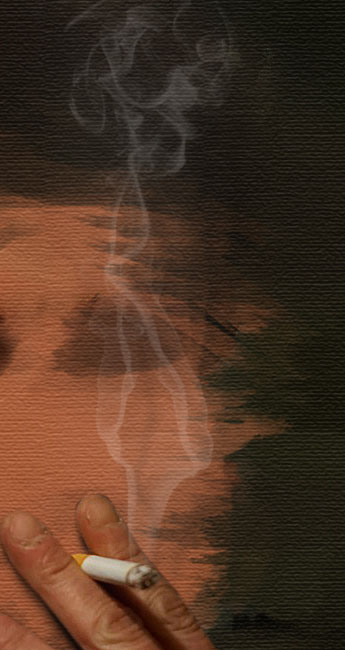
Let’s add some smoke to the cigarette. Import the “Smoke Brush” and on a new layer create some white smoke coming out from the cigarette (if you don’t get it right first time you can use the Free Transform – T – to reposition the smoke).
Step 13
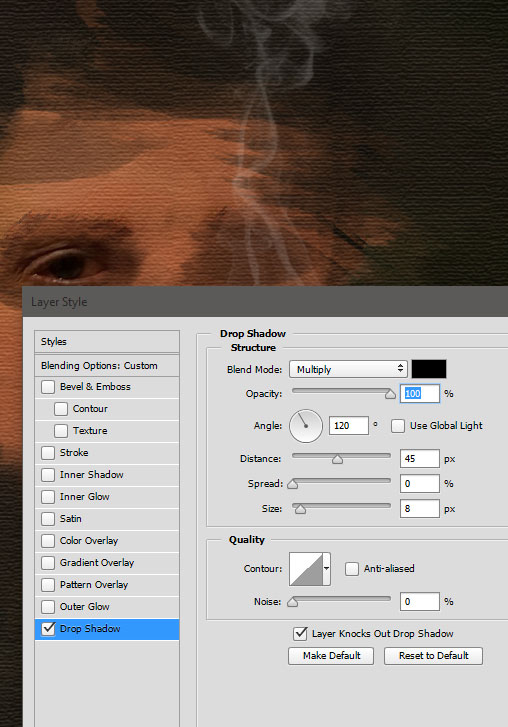
The smoke looks fake. You know why? Because even smoke has shadow.
Duplicate the smoke layer by pressing Ctrl + J, set the Fill to 0% and double click it to open the Blending Options panel. Add a Drop Shadow effect using the settings shown below.
Step 14
To make the smoke blend better with the overall scene let’s add some very subtle haze to it. Create a new layer and with the round soft brush at 3% Opacity and a large size (100-200px) paint over the smoke to make it hazy. The effect is very subtle and you may not see it in the photo below but you’ll surely see it in your Photoshop document.
Step 15
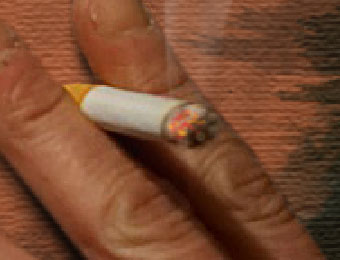
Let’s add some glow to that cigarette tip and make it look like it’s burning. Create a new layer and with the chalk brush at 20% opacity paint with an orange red over the tip of the cigarette. You can see my result below.
Step 16
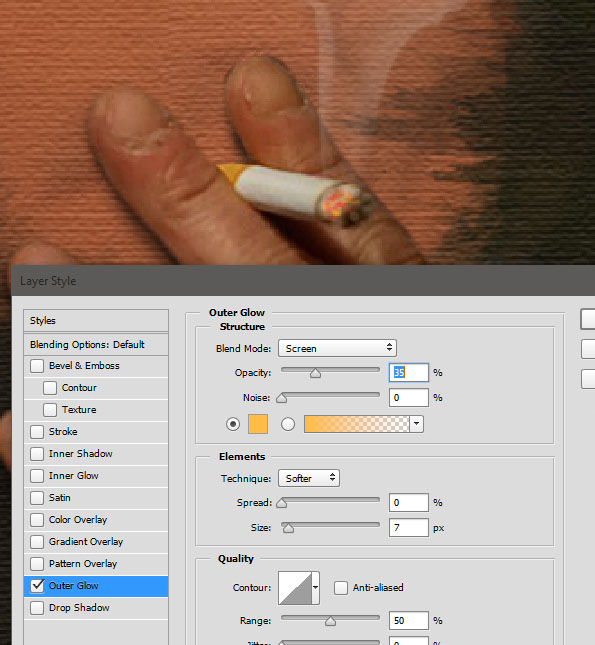
Double click the previously created layer and add an Outer Glow effect as shown below.
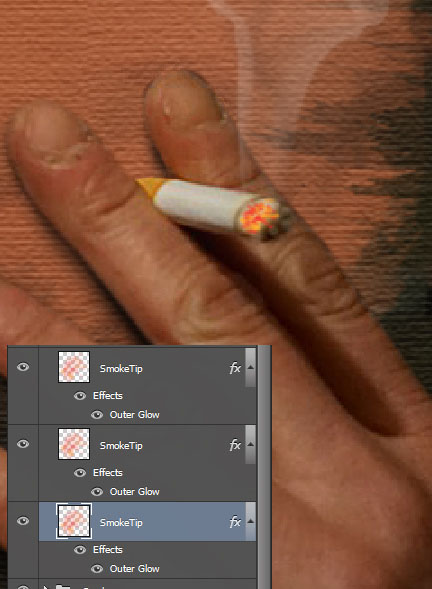
Step 17
Duplicate this layer twice (press Ctrl + J twice) to increase the glow effect.
Step 18
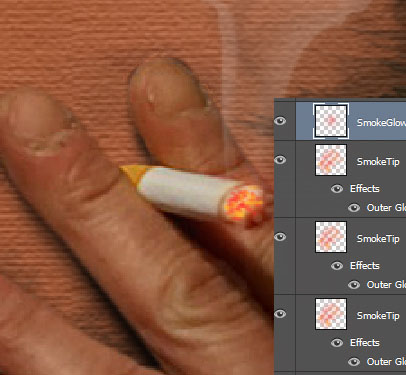
Let’s boost the glow effect even further. Create a new layer and set the blending mode to Color Dodge. With the same red-orange you used in the previous steps to paint the burning tip of the cigarette and a round soft brush to paint over the said tip again.
Step 19
We’re done with the composition – let’s add some final touches that will make our scene really stand out. Create a couple of new layers and set them to Overlay blending mode.
Paint with the round soft brush with white (20% Opacity) over the highlights of the hand on one layer and add some big highlights in the upper left corner.
Step 20
Add a Vibrance/Saturation Hue Adjustment Layer (Layer > New Adjustment Layer > Vibrance/Saturation) and boost the Vibrance slider to +100..
In the layer mask paint with 100% black on the edges (in order to reveal the saturation effect only on the hand and the face).
Step 21
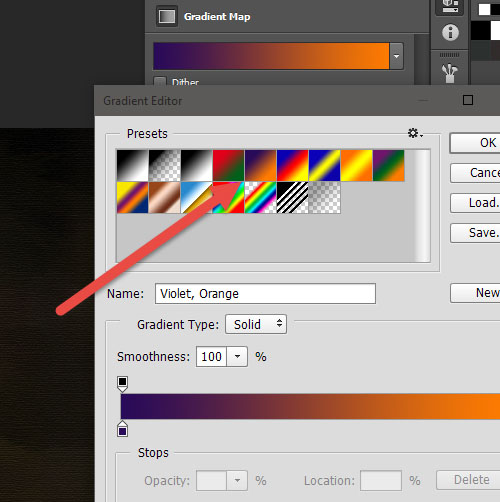
Add some color variation to the scene by creating a Gradient Map Adjustment Layer (Layer > New Adjustment Layer > Gradient Map) with the settings shown below. Change the blending mode to Soft Light.
Step 22
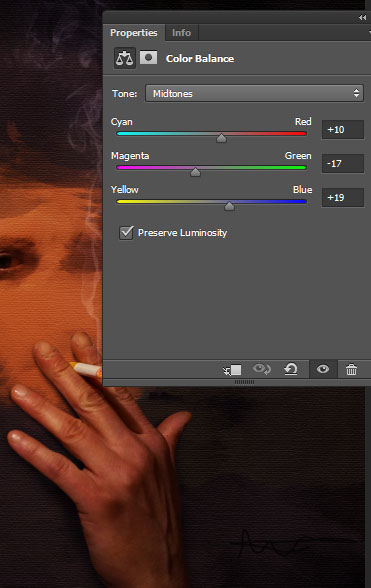
Add a Color Balance Adjustment Layer (Layer > New Adjustment Layer > Color Balance) and use the settings shown below to increase the overall warmth.
Step 23
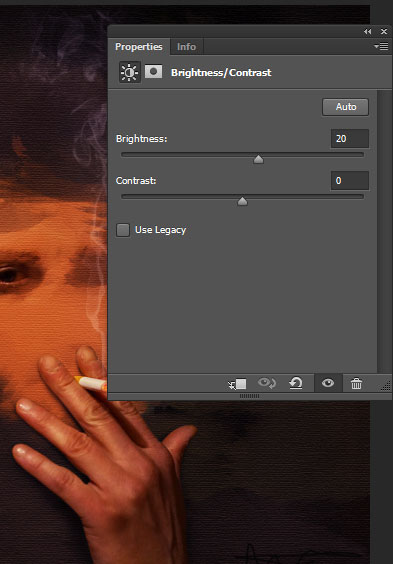
Add a Brightness/Contrast Adjustment Layer (Layer > New Adjustment Layer > Brightness Contrast) and increase the brightness slider to 20.
Step 24
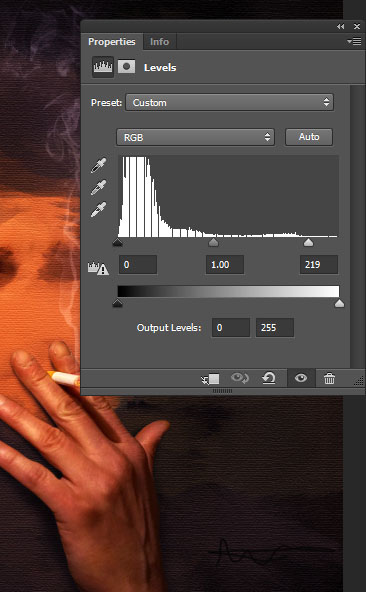
In order to increase the contrast create a Levels Adjustment Layer (Layer > New Adjustment Layer > Levels) and use the settings shown below.
Step 25
Now let’s adjust the overall light in the scene. Create a new layer and set it to Overlay. With the round soft brush tool paint at 20% Opacity with black on the edges and with white in the middle (especially over the face).
Step 26
Create a new layer from all the visible layers and change the blending mode to Soft Light.
Lower the Fill to 25% and add a 50px Gaussian Blur (Blur > Gaussian Blur).
This will bring up more warm tones and increase the overall contrast.
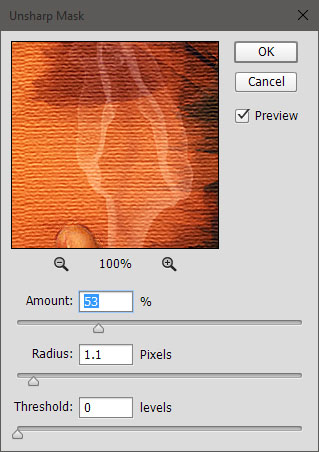
Step 27
Create a new layer from all the visible layers and this time add an Unsharp Mask effect (Filter > Sharpen > Unsharp Maks) with the settings shown below to sharpen the image.
Step 28
Finally let’s add a Vignette. Create a new layer and set the blending mode to Multiply. With the round soft brush at 20% Opacity paint with black on the edges of our scene. And we’re done.
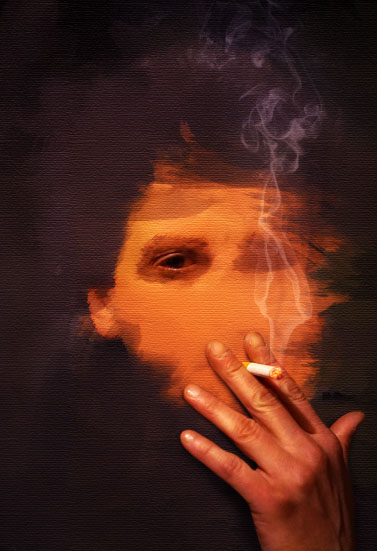
And We’re Done!