In this Photoshop tutorial we will create a crazy disco effect using some textures, blending modes and a touch of creativity. Let’s begin!
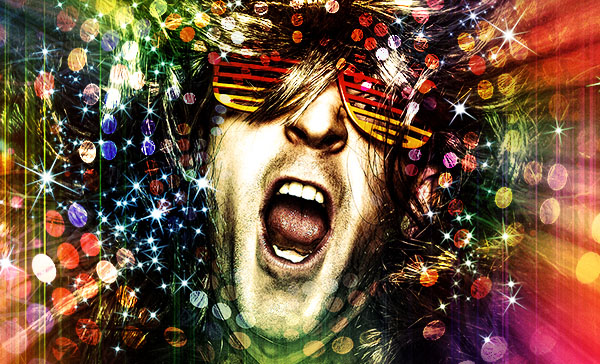
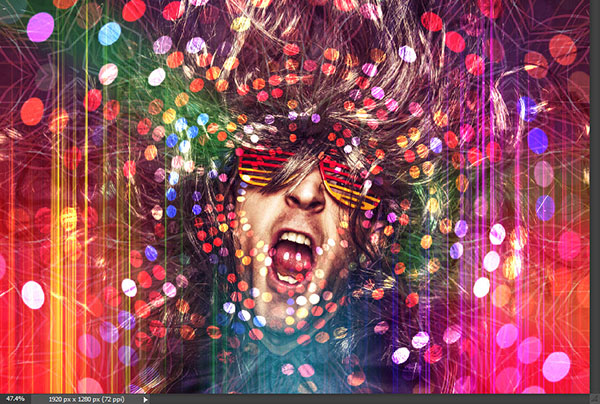
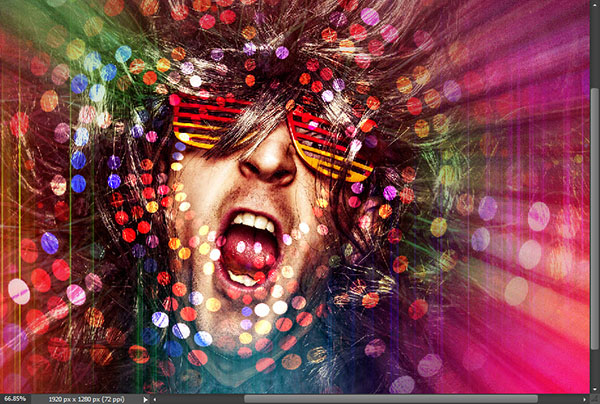
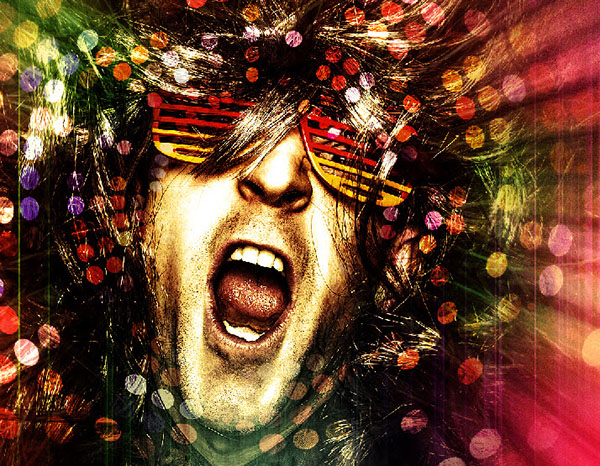
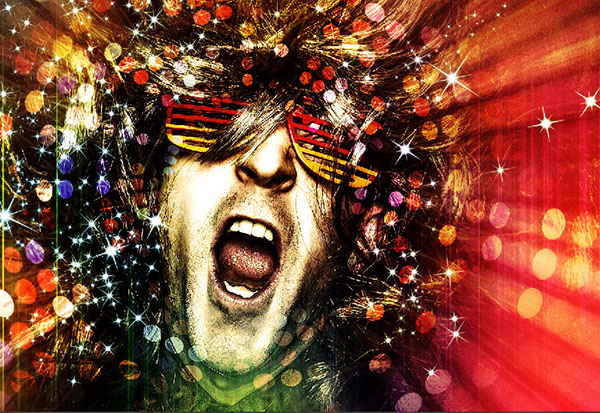
Final Image
As always, this is the final image that we’ll be creating:
Tutorial Details
- Program: Adobe Photoshop CS3
- Estimated Completion Time: 30 minutes
- Difficulty: Beginner-Intermediate
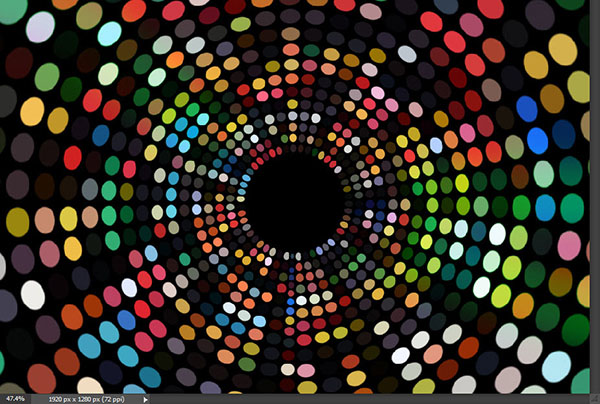
Resources
Step 1
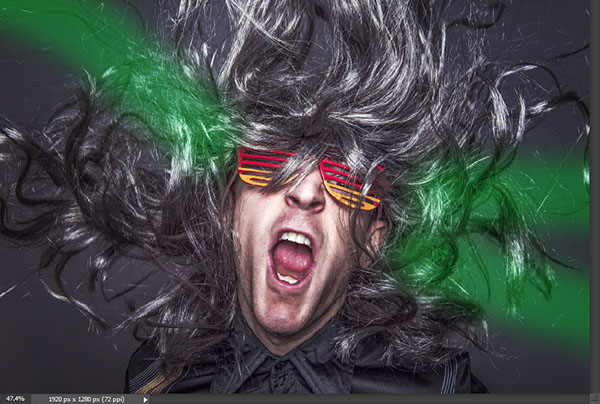
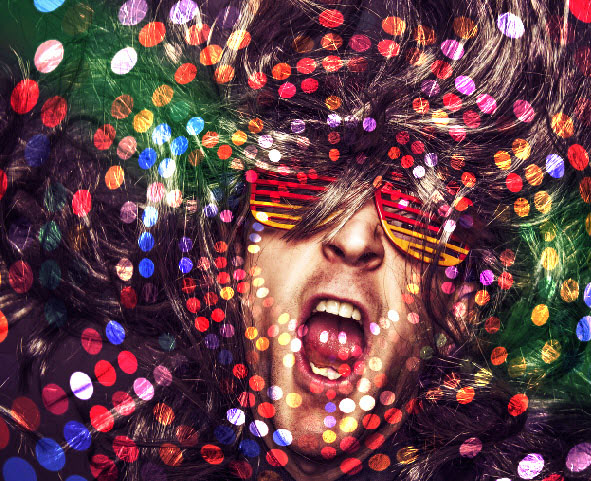
Open the file “Crazy Face”. We will transform this image into a crazy disco effect.
Step 2
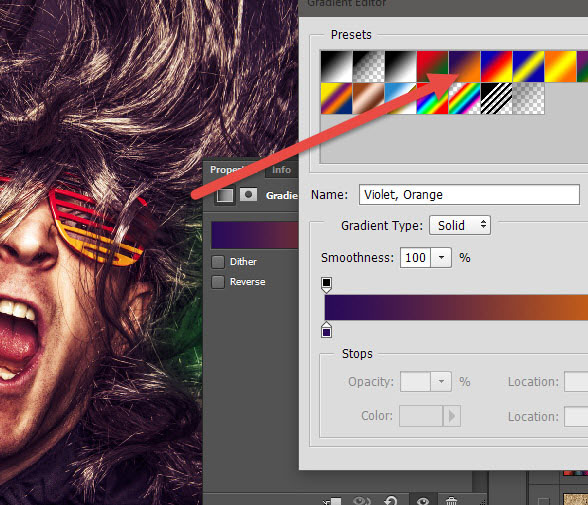
Create a new Gradient Map Adjustment Layer and use the settings show below to change the colors in our image and make it pop a bit. You can create all kinds of adjustment layers by simply going to Layer > New Adjustment Layer > … and choosing one of the many adjustment layers.
Step 3
Let’s add some special effects. Open the file “Disco Lights” and select all by pressing Ctrl + A. Go back to our image and paste with Ctrl + V.
Use the Free Transform Tool (Ctrl + T) to position and resize the lights as shown below. In order to keep the proportions while resizing hold the Shift key when dragging the corner handles.
Step 4
Now let’s blend the disco light nicely with our image. There are multiple ways of doing this but my favorite way is using blending modes. Change the blending mode of the disco light layer to Color Dodge and you should have something like the image below.
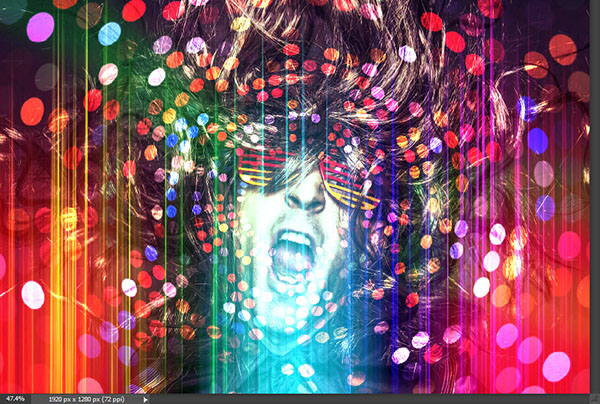
Step 5
Open the file “Light Leak” and copy/paste it into our scene (Ctrl + A, Ctrl + C to copy and Ctrl + V to paste in our document). Resize it as shown below and change the blending mode to Linear Dodge. As you can see the effect is looking good but it is quite strong in the center. We’ll correct that in the next step.
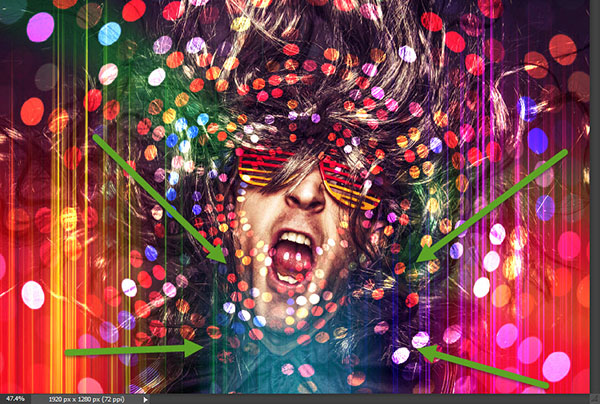
Step 6
Add a layer mask to the Light Leak layer by going to Layer > Layer Mask > Reveal all. Select the brush tool and choose the round soft brush from presets. Change the foreground color to black and click on the layer mask to make it active. Now simply paint over the area indicated below (the lower center section of the image) to hide the area where the light leak effect is too strong.
In a layer mask white reveals and black conceals so by painting with black over an area we will hide it. Just make sure that you make the layer mask active (click on the white thumbnail next to the layer thumbnail in the layer palette) before painting – you don’t want to paint directly on the image.
Step 7
Open the “Abstract Effect” image. Copy/paste this image in our document and change the blending mode to Screen. Lower the Fill to 41% and use a layer mask to hide the area around the face.
This step will add some more detail to our scene and make it more interesting.
Step 8
Now let’s improve some of the highlights of the face. Create a new layer (Ctrl + Shift + Alt + N) and change the blending mode to Overlay. With the standard round soft brush paint with white (30% Opacity) over the highlighted areas of the face. If the effect is too strong lower the opacity of the layer.
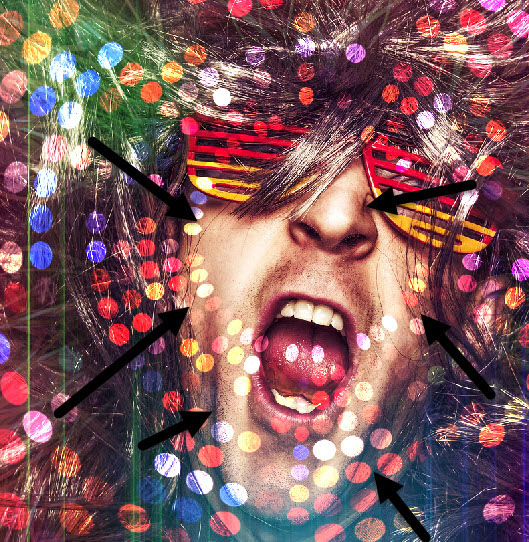
Step 9
Create a new layer and import the glam brushes by downloading and double clicking the .abr file. Select Morning Dawn from the brush presets (F5) and lower the opacity of the brush to 30%.
Change the blending mode to Color Dodge and sample a color from the scene (hold the Alt key and click once over a color you like in order to sample it). Paint with the glam brush around the scene and change the color 2 or 3 times.
Step 10
Let’s unify and boost the colors with the help of a texture. Open the file “Texture” and copy/paste it into our scene. Change the blending mode to Color Burn and lower the Fill to 21%. Your scene should look like the image below:
Step 11
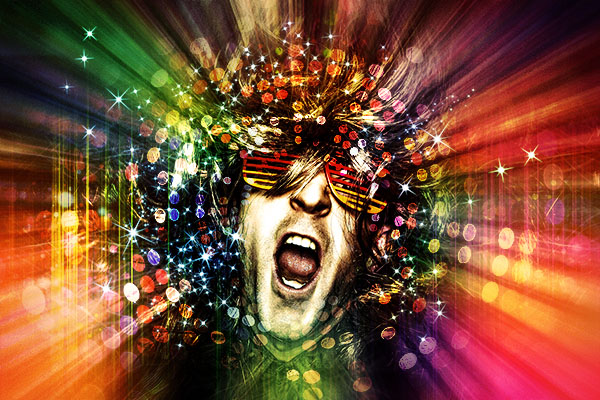
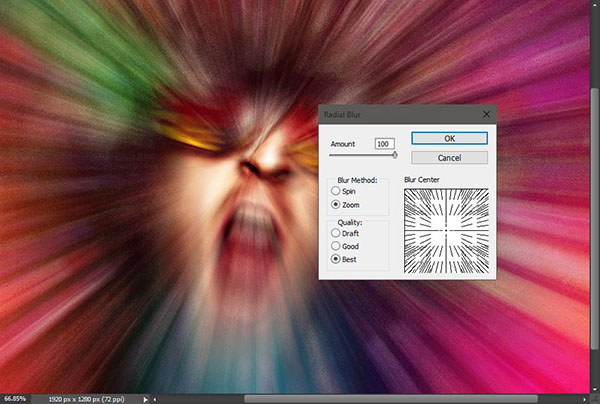
Now let’s create the main effect of our scene – the zoom effect. Create a new layer from all the visible layers by pressing Ctrl + Shift + Alt + E and apply a Radial Blur (Filter > Blur > Radial Blur) with the settings shown below.
Step 12
Add a layer mask to the zoom effect layer and with a round soft brush at 100% Opacity paint with black over the face (make sure you are painting in the layer mask) to hide the effect in that area.
Step 13
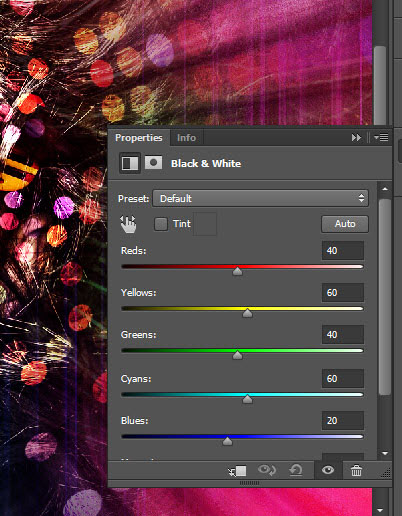
Create a Black&White Adjustment Layer and change the blending mode to Soft Light. Drag the sliders as shown below. This will darken and increase the contrast lightly.
Step 14
Create a new Curves Adjustment Layer and drag the bottom right slider arrow towards the left to increase the light.

Step 15
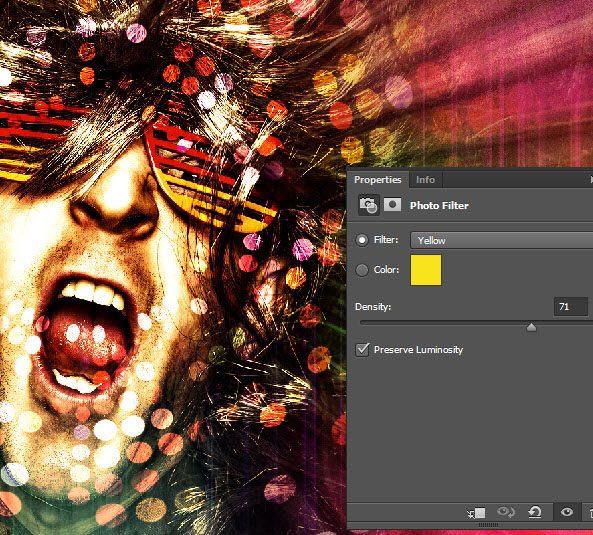
Create a Photo Filter Adjustment Layer and use the settings shown below to really warm up the image and bring out the colors.
Step 16
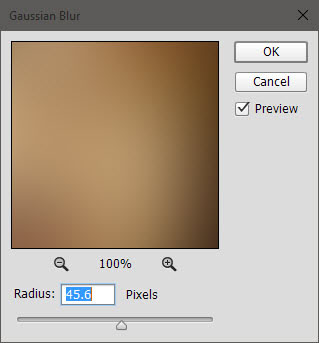
Create a new layer from all the visible layers with Ctrl + Shift + Alt + E and apply a 45.6px Gaussian Blur (Filter > Blur > Gaussian Blur). Change the blending mode to Soft Light to achieve a somewhat dreamy effect and gently increase the contrast.
Step 17
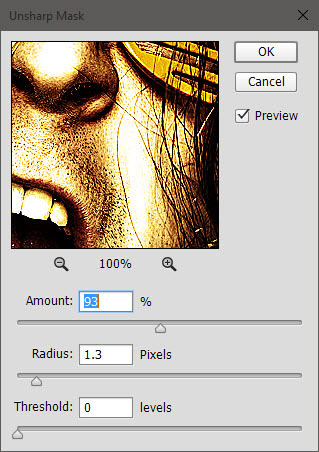
Now let’s sharpen the image. Apply an Unsharp Mask effect by going to Filter > Sharpen > Unsharp Mask with the settings shown below.
Step 18
Now add a layer mask to the sharpen filter and paint with 100% black over the edges of the scene thus showing the sharpen effect only in the center of the scene.
Step 19
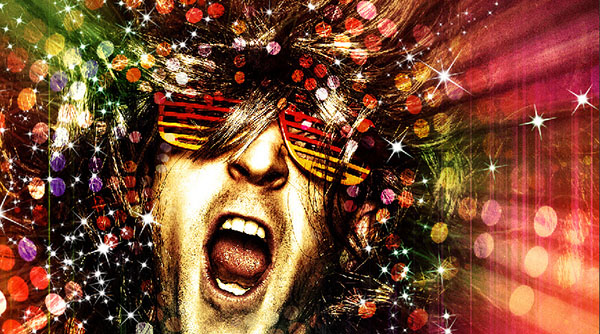
From the glam brush you imported select the Spark brush preset (F5). Paint some white stars on a new layer around the face.
Step 20
Create a new layer and change the blending mode to Overlay. Lower the fill to 76% and sample a color of your choosing (alt-click on a color with the brush tool selected). Paint as you see fit (let the artist in you be free) over large areas of the scene. Sample different colors and try to achieve an effect that pleases you.
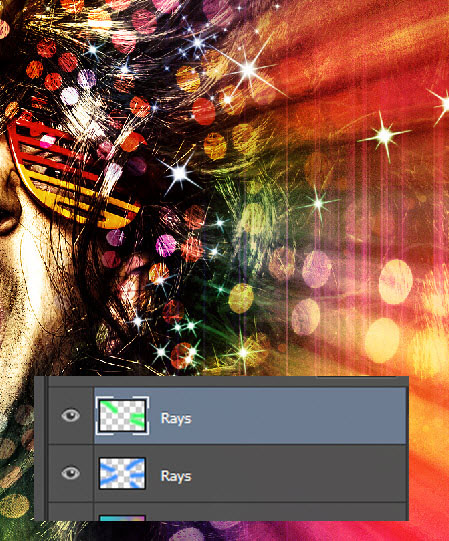
Step 21
Create a new layer and change the blending mode to Soft Light. Sample a lively green color from our scene and try to create some rays emerging from the face (with a round soft brush). I used two layers with different colors but you can use as many as you like.
And We’re Done!