Learn in this Photoshop tutorial how to create comic strip effect from any photo you want.
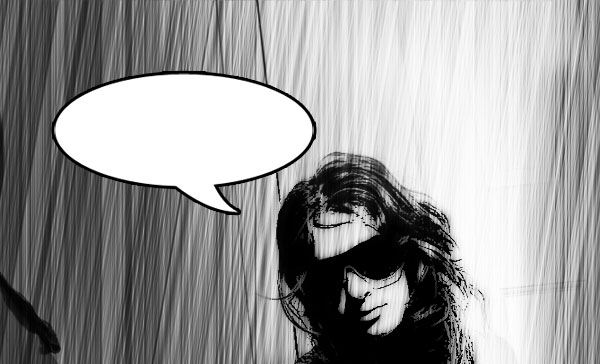
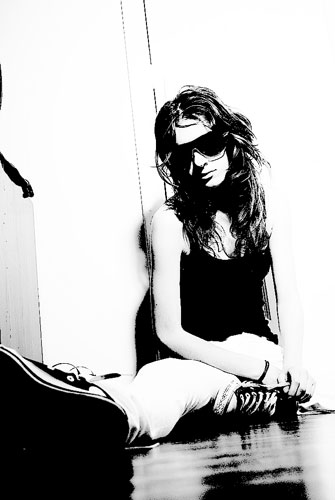
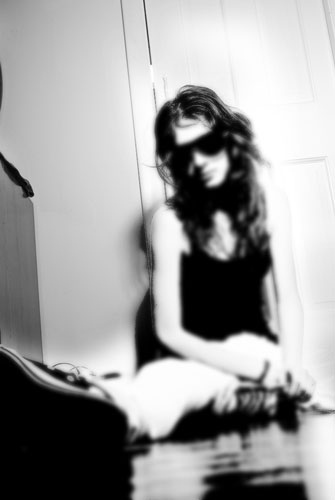
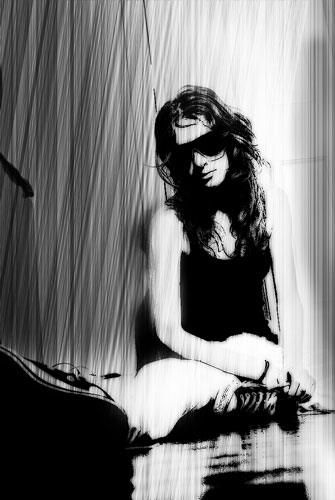
Final Image

Resources
Step 1
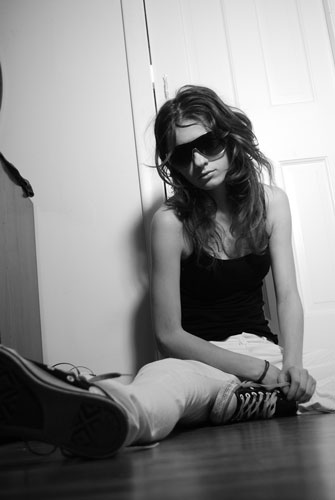
Start by opening photo in Photoshop. Resize image to 669px width and 1000px height by going to Image > Image Size.

Step 2
The picture should be black & white. Go to Image > Adjustments > Desaturate to convert color picture to monochrome.
Step 3
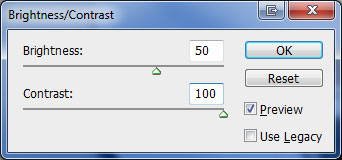
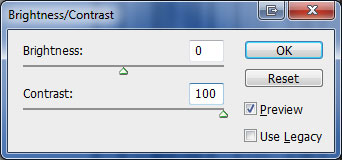
Duplicate layer (Ctrl+J) and apply Image > Adjustments > Brightness/Contrast with following settings to duplicated layer:
Step 4
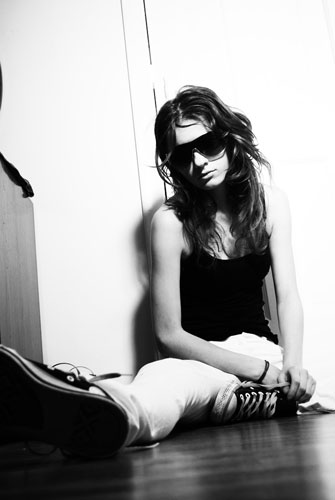
Apply Filter > Sharpen > Sharpen More.

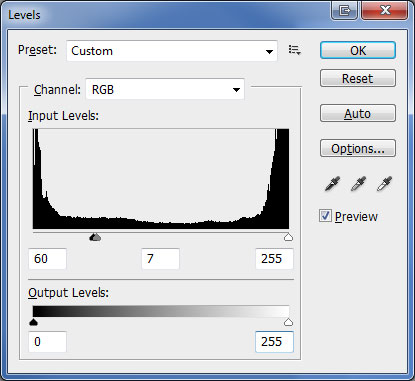
Step 5
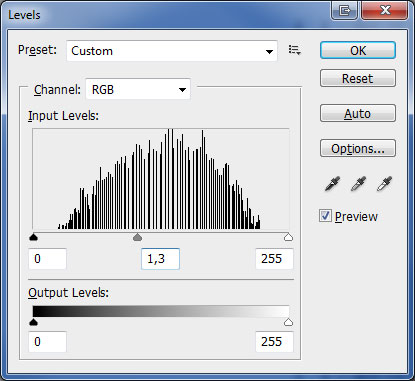
Apply Image > Adjustments > Levels with following settings:
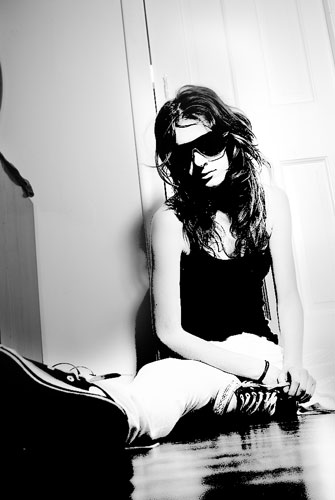
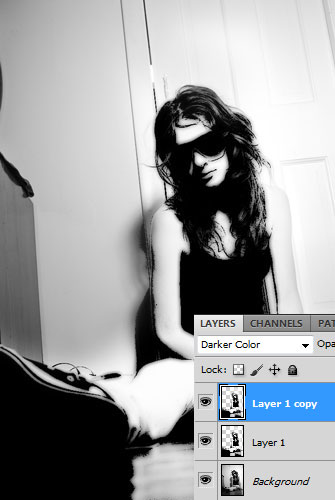
Step 6
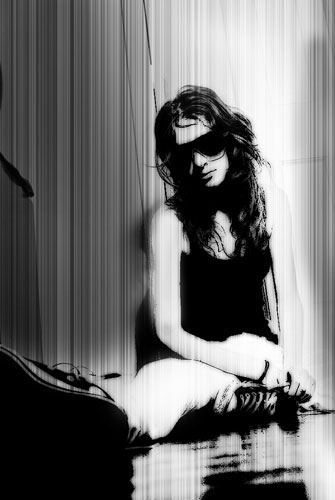
Right now we have 2 layers: black and white photo and upper layer where we apllied all those effects. Choose the Eraser Tool and soft-edged brush with 200 px in diameter and remove carefully the white color around the girl on the upper layer. In the end you will have something similar to my image below.
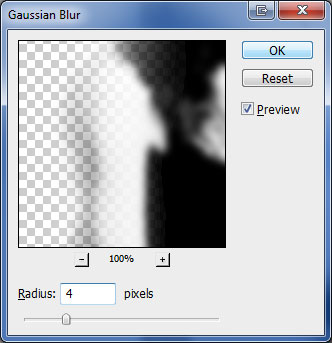
Step 7
Now we need to add contrast. Copy the upper layer with effects (Ctrl+J) and blur copied layer by using Filter > Blur > Gaussian Blur with next settings:
Step 8
Assign Darker Color blending mode to this layer.
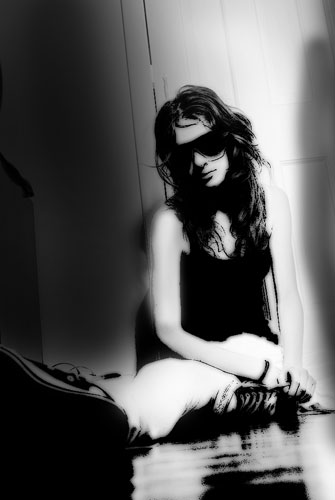
Step 9
The image of the girl should look more bright, so let’s darken the area around her. For this purpose we’ll create a new layer, choose the Brush Tool and soft-edged brush with 400 px in diameter with foregound color #000000 and begin to darken the area around the girl.
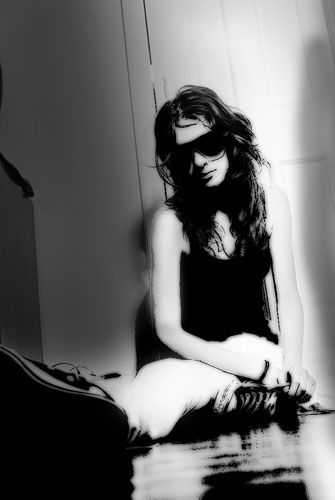
Step 10
Change layer opacity to 76%.
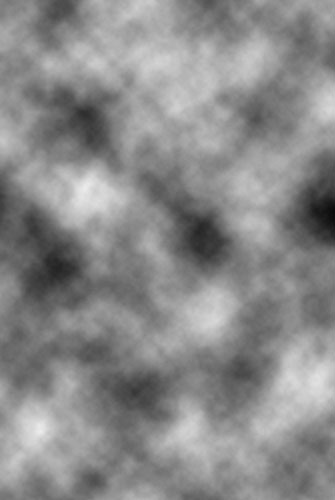
Step 11
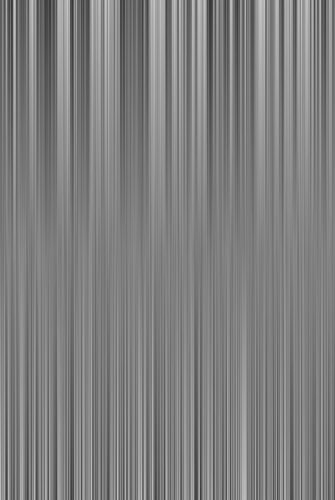
Create a new layer on top. Apply Filter > Render > Clouds to it.
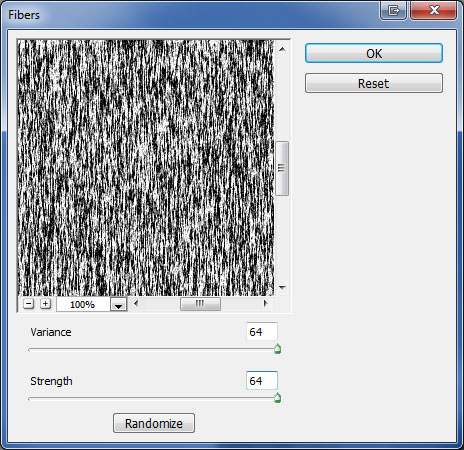
Then apply Filter > Render > Fibers with the settings, that are shown in the screenshot below:
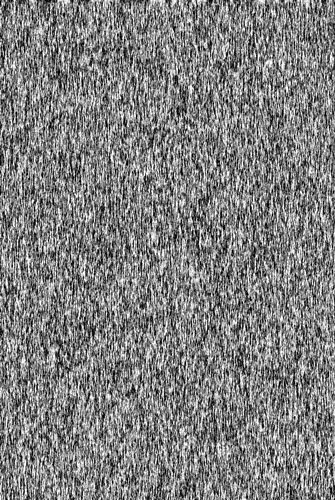
We get this result:
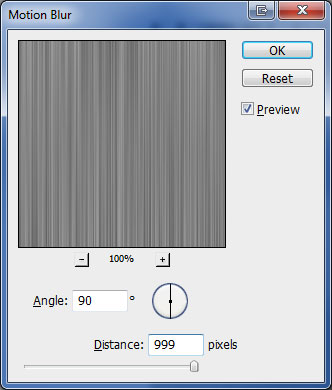
Step 12
We apply now Filter > Blur > Motion Blur with the following settings:
To increase the effect, keep applying filter hitting Ctrl+F until you get the result as in the image below:

Step 13
Apply Image > Adjustments > Brightness/Contrast:

Step 14
After that apply Image > Adjustments > Levels to lighten the image.

Step 15
Finally, assign Overlay blending mode to this layer.
Step 16
Duplicate layer (Ctrl+J) and go to Edit > Transform > Distort and do like i have on screenshot below.
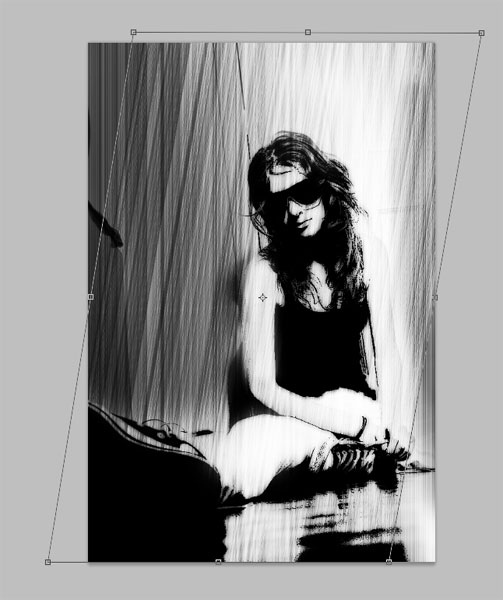
Step 17
Duplicate layer (Ctrl+J) with the inclined strokes and move to the right to fill empty space.

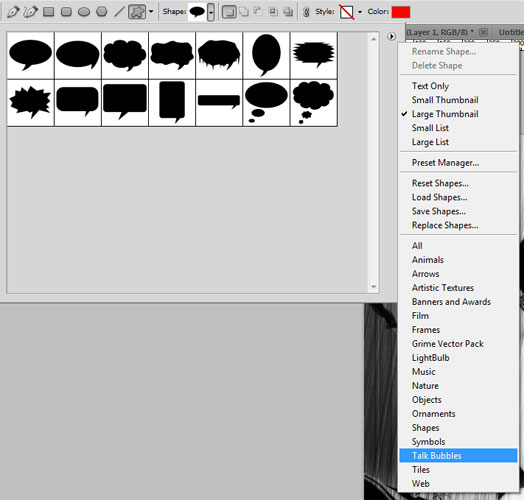
Step 18
Select Custom Shape Tool and one of the standard shapes (Talk1 from Talk Bubbles) and draw a shape with white color (#ffffff).

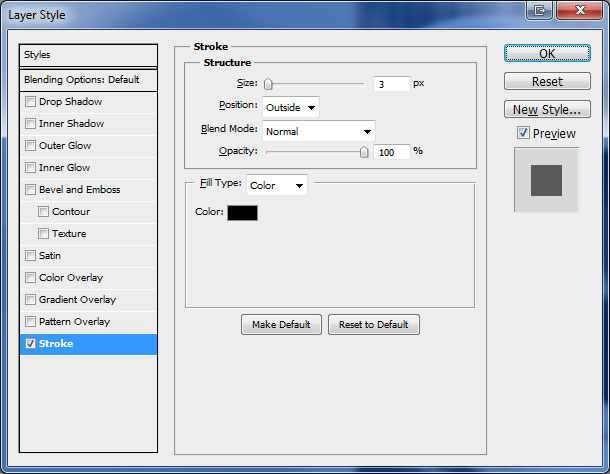
Step 19
Go to Edit > Transform > Flip Horizontal to correctly position talk bubble. After that, apply Stroke layer style to this layer.
And We’re Done!
Try with different photos to gain the best possible effect. Good luck!